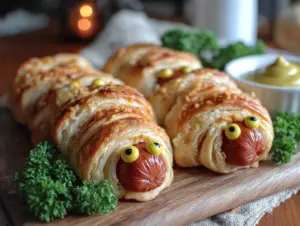
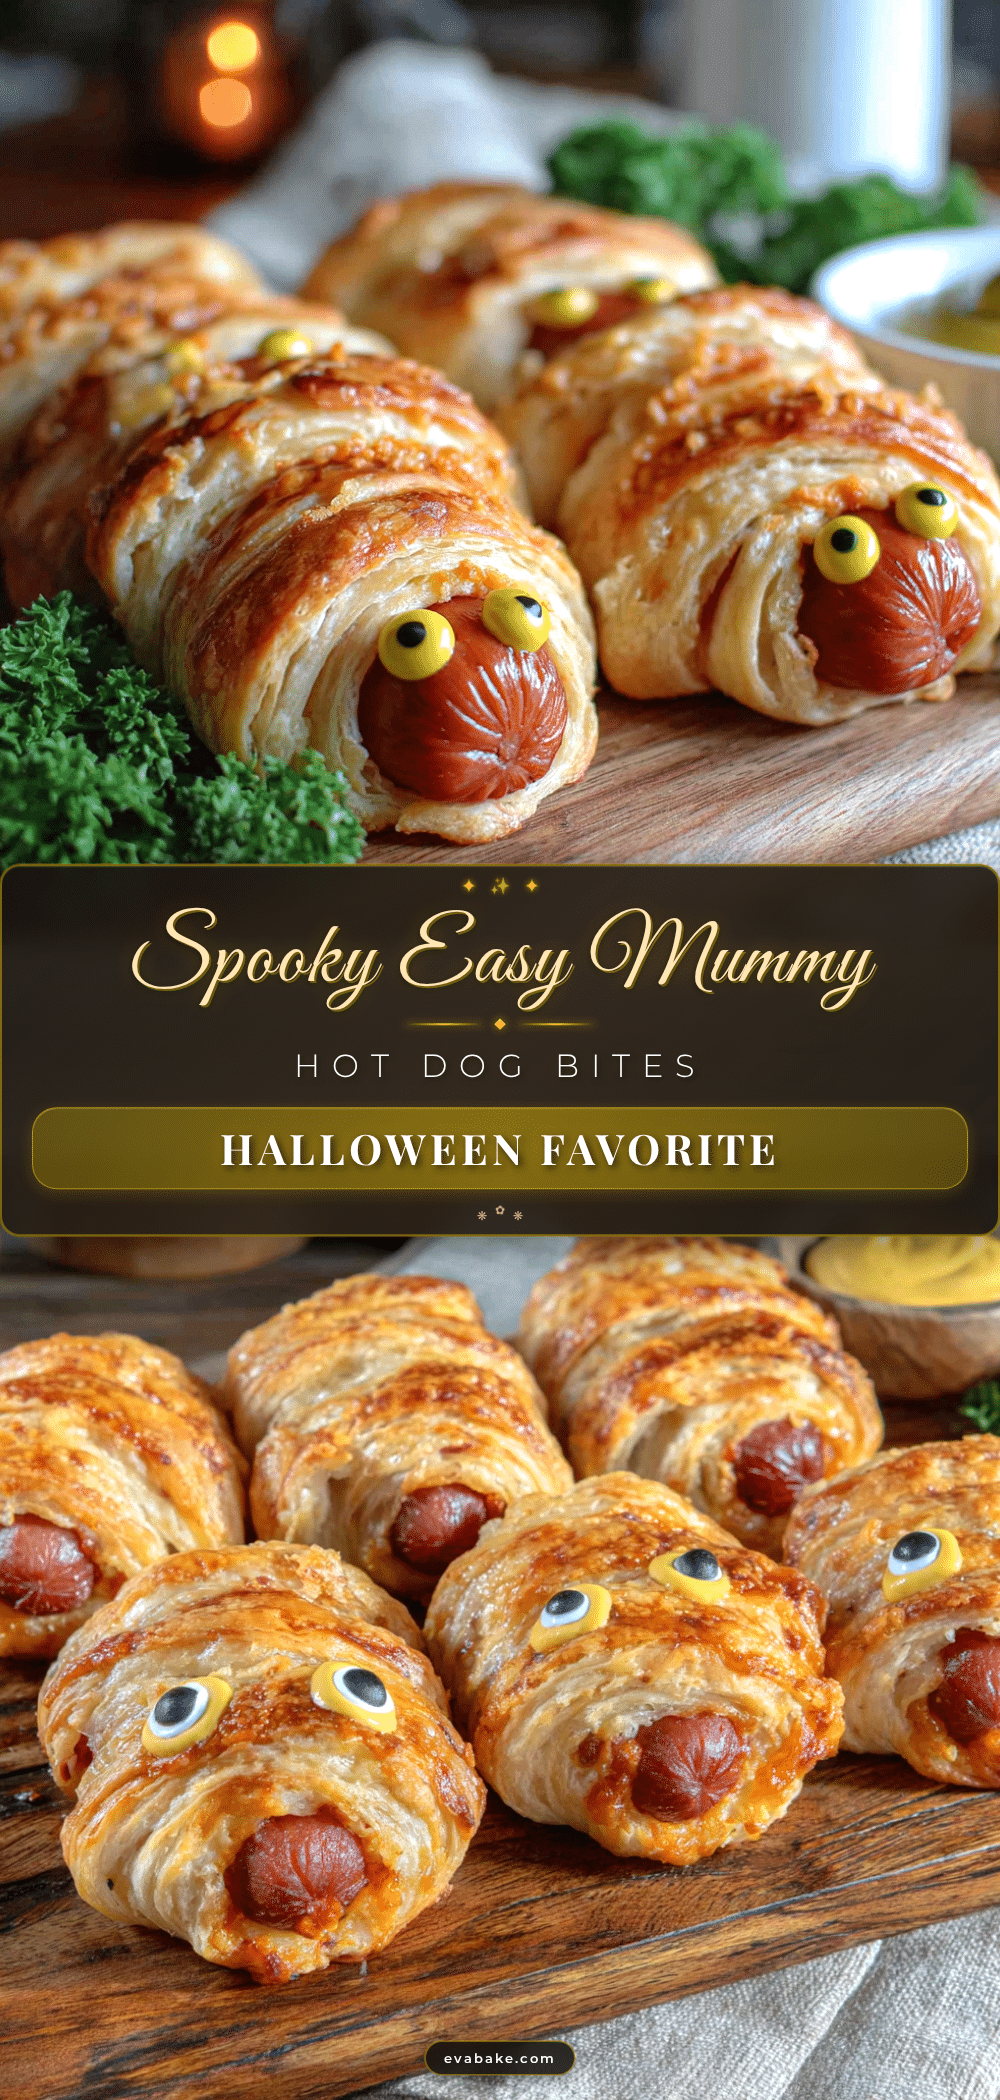
My seven-year-old nephew took one bite, stopped mid-chew, and just pointed at the plate with wide eyes. He didn’t say a word for a solid five seconds—which, if you know him, might as well be an eternity. Then he grabbed a second one before I could even ask if he liked it. That’s when I knew these Easy Mummy Hot Dog Crescent Rolls with Mustard Eyes were going to be a permanent fixture at our Halloween gatherings. I’d been testing a few different spooky snacks for the big costume party we host every year, and honestly, I almost skipped this one. I mean, how different could a hot dog wrapped in dough really be?
Turns out, pretty different. There’s something about the way the crescent dough crisps up in the oven, catching those little golden edges while the hot dog stays juicy inside. And the mustard eyes? That was pure last-minute desperation—I’d run out of candy eyes and figured, why not. My nephew called them “angry mummies” and I haven’t made them any other way since. The whole thing takes maybe twenty minutes from start to finish, which feels almost illegal for something that gets this much reaction.
These aren’t fancy. They’re not complicated. But they’re the kind of thing that makes people smile without trying too hard. And isn’t that what Halloween snacking should be about?
Why You’ll Love This Recipe
Let me tell you why these little guys have become my most-requested Halloween recipe. I’ve tested them at three different parties now, and they disappear faster than anything else on the table. Here’s what makes them special:
- Ready in 20 Minutes : From fridge to table in under a half hour. You can make these while the kids are still wrestling into their costumes.
- Five Ingredients Max : Crescent rolls, hot dogs, mustard, and maybe some cream cheese for dipping. That’s it. No special trips to the store.
- Perfect for Halloween Parties : They look spooky without being scary. Even the littlest goblins will eat these.
- Kid-Friendly to Make : My niece helped wrap the dough strips around the hot dogs. She called it “mummy bandaging practice.”
- Surprisingly Satisfying : The combination of flaky, buttery dough with salty hot dog and that little tang of mustard is way better than it has any right to be.
What makes these different from every other mummy dog recipe out there? It’s the mustard eyes. I know, I know—it sounds weird. But that tiny pop of sharp, yellow brightness cuts through all the richness and makes each bite feel complete. Plus, they actually look like angry little mummies coming after you. I’ve seen grown adults giggle at these things.
This is the kind of recipe that makes you feel like a Halloween hero without breaking a sweat. Perfect for when you want to impress but also want to actually enjoy the party.
What Ingredients You Will Need
This recipe uses simple, everyday ingredients that you probably already have in your kitchen. I love that about it—no hunting down specialty items or making last-minute store runs.
- 1 can (8 oz) refrigerated crescent roll dough — I prefer Pillsbury original, but any brand works. The key is getting the kind that comes in the perforated triangle sheets, not the seamless ones.
- 8 hot dogs — Go with your favorite brand. I’ve used beef, turkey, and even those little cocktail sausages for mini versions. All-beef hot dogs give the best flavor, honestly.
- Yellow mustard — This is non-negotiable for the eyes. The bright yellow color pops against the golden dough, and that tangy flavor is perfect. French’s is my go-to, but store brands work fine too.
- Optional: Cream cheese or ketchup for dipping — Not required, but highly recommended. A little bowl of cream cheese thinned with milk makes a great “mummy dip.”
- Non-stick cooking spray or parchment paper — For lining your baking sheet. I’ve forgotten this before, and let me tell you, scraping mummy parts off a bare pan is not fun.
A quick note on crescent rolls: I’ve tried using puff pastry and homemade dough for these, and honestly? The canned stuff works best. It’s soft enough to wrap easily, puffs up just right, and gets that perfect golden color that makes the mummies look like they’ve been lurking in a tomb. Plus, the perforated triangles are already portioned—you just cut each one into strips and you’re good to go.
For the hot dogs, look for ones that aren’t too thick. The standard size works perfectly. If you use jumbo hot dogs, the dough strips won’t wrap around enough times to look like mummy bandages. Trust me on this one—I learned the hard way.
Equipment Needed
You don’t need much for this recipe, which is part of why I make it so often. Here’s what you’ll want to have on hand:
- Baking sheet — A standard half-sheet pan works great. Line it with parchment paper for easy cleanup.
- Sharp knife or pizza cutter — For cutting the crescent dough into strips. A pizza cutter makes this step ridiculously fast.
- Small bowl — For the mustard. You’ll be using a toothpick to dot the eyes, so having a little mustard pool is helpful.
- Toothpicks — These are perfect for applying the mustard eyes. You could use a squeeze bottle, but toothpicks give you more control and make the dots look more consistent.
- Pastry brush (optional) — If you want to brush the dough with egg wash for extra golden color. I don’t usually bother, but it does make them prettier.
If you don’t have a pizza cutter, a sharp knife works just fine. I’ve even used kitchen shears in a pinch—they actually work surprisingly well for cutting dough strips. Just make sure whatever you use is sharp enough to cut cleanly without dragging the dough.
Preparation Method
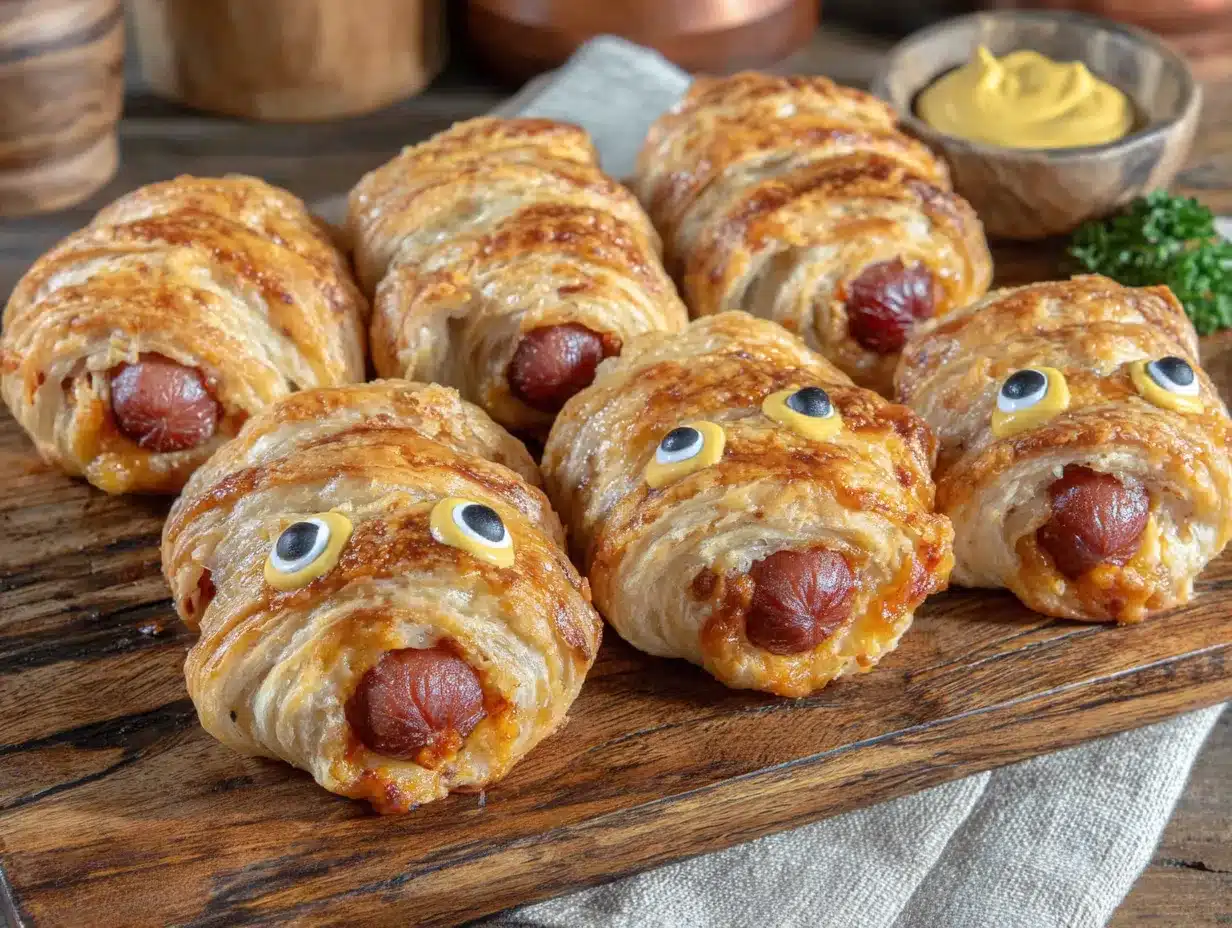
Alright, let’s make some mummies. I promise this is easier than it looks.
- Preheat your oven to 375°F (190°C). Line a baking sheet with parchment paper or give it a light spray of non-stick cooking spray. I prefer parchment because cleanup is basically zero.
- Open the can of crescent rolls. Pop that tube open—you know the sound. Unroll the dough and separate it along the perforated lines into 8 triangles. Lay them flat on your work surface.
- Cut each triangle into strips. Using a sharp knife or pizza cutter, cut each triangle lengthwise into 3 long strips. You’ll end up with 24 strips total. They don’t need to be perfectly even—mummies are supposed to look a little messy anyway.
- Wrap the hot dogs. Take one hot dog and start wrapping a dough strip around it, stretching the dough slightly as you go. Leave a small gap at the top (about a half inch) where the mummy’s “face” will be. Don’t wrap too tightly—the dough needs room to puff up. Use 2-3 strips per hot dog, overlapping them slightly so it looks like bandages.
- Place on baking sheet. Arrange the wrapped hot dogs on your prepared baking sheet, leaving about an inch of space between each one. They won’t spread much, so you can fit all 8 on a standard sheet pan.
- Bake for 12-15 minutes. Pop them in the oven and bake until the dough is golden brown and puffed. The hot dogs will be heated through. Keep an eye on them after the 12-minute mark—ovens vary, and you don’t want burnt mummies.
- Let them cool slightly. Remove from the oven and let them rest on the baking sheet for about 2-3 minutes. They’ll be really hot right out of the oven, and the dough needs a minute to set.
- Add the mustard eyes. While they’re still warm (but not scorching hot), dip a toothpick into the yellow mustard and dot two small eyes onto the exposed hot dog at the top of each mummy. Don’t worry about making them perfect—slightly uneven eyes make the mummies look more characterful.
- Serve warm. Arrange them on a platter and watch them disappear. If you’re making the cream cheese dip, serve it on the side.
A few things I’ve learned from making these more times than I care to count: First, don’t overwork the dough. It gets sticky and tough if you handle it too much. Second, if the dough strips feel too long, you can trim them—but honestly, the extra wrapping just makes the mummies look more authentic. And third, if you’re making these ahead of time for a party, underbake them by about a minute, then reheat for 30 seconds in the microwave before serving. They’ll taste freshly made.
One time I got distracted and left them in the oven for 17 minutes. The dough was a little darker than I’d like, but the mummies looked even more “undead” with that extra toasting. So if you accidentally overbake them, just call it a happy accident.
Cooking Tips & Techniques
After making these for three Halloweens straight, I’ve picked up a few tricks that make the process smoother and the results better.
Don’t stretch the dough too thin. I know it’s tempting to pull it as thin as possible to get more wraps, but the dough needs some thickness to puff up properly. If you stretch it too much, you’ll end up with flat, sad bandages instead of fluffy, golden ones. Keep the strips about a quarter-inch thick.
Use room temperature crescent dough. Cold dough cracks when you try to wrap it. Let the tube sit on the counter for about 10 minutes before opening it. This makes the dough more pliable and less likely to tear. I learned this after my first batch fell apart mid-wrap—frustrating doesn’t begin to cover it.
Space out the mustard application. If you add the mustard eyes before baking, the heat will make them run and look blurry. Always add them after baking, while the mummies are still warm but not hot. The warmth helps the mustard stick without it sliding off.
Make mini versions for appetizers. Cut the hot dogs into thirds and use smaller dough strips. Bake for about 10 minutes instead of 12-15. These are perfect for parties where you want people to graze rather than sit down with a full mummy dog.
Double the batch if you’re feeding a crowd. These go fast. I made 16 for a party of 10 adults and 6 kids, and they were gone in 20 minutes. If you’re serving these as the main snack, plan on 2-3 per person.
One mistake I still make sometimes: wrapping the dough too tightly around the hot dog. The dough expands as it bakes, and if it’s wrapped too snug, it can squeeze the hot dog and make it bulge out the bottom. Leave a little breathing room between the dough and the hot dog—about the thickness of a pencil.
Variations & Adaptations
These mummy dogs are surprisingly versatile. Here are some ways I’ve changed them up over the years:
Spicy Mummies : Swap the regular hot dogs for spicy jalapeño or chorizo-style hot dogs. Add a tiny dot of sriracha next to the mustard eyes for a “bloodshot” look. My brother-in-law requests these every year now.
Cheesy Mummies : Before wrapping, cut a slit lengthwise down each hot dog and stuff it with a thin strip of cheddar or mozzarella cheese. The cheese melts out slightly during baking, which looks like mummy ooze. It’s a little messy but absolutely delicious.
Veggie Mummies : Use vegetarian hot dogs or even pre-cooked sausages. I’ve tried this with plant-based dogs and they work fine—just make sure to check the cooking time since some veggie dogs heat up faster than meat ones.
Breakfast Mummies : Swap the hot dogs for breakfast sausage links. Serve with maple syrup for dipping instead of mustard. I made these for a Halloween morning breakfast and my kids thought they’d died and gone to heaven.
Gluten-Free Option : Use gluten-free crescent dough or puff pastry. The texture is slightly different, but the visual effect is the same. Just watch the baking time—gluten-free doughs often brown faster.
If you’re feeling extra creative, try adding little “bandage” details by drizzling a tiny bit of ketchup or hot sauce across the dough after baking. It looks like the mummies have been through a battle. My nephew calls these “warrior mummies” and they’re his favorite variation.
Serving & Storage Suggestions
These are best served warm, right after the mustard eyes go on. The contrast between the hot, flaky dough and the cool, tangy mustard is part of the magic. Arrange them on a platter with a small bowl of cream cheese dip or extra mustard in the center. If you’re going for full Halloween vibes, serve them on a black platter or a tray lined with fake spiderwebs.
For dipping, I’ve found that cream cheese thinned with a splash of milk (plus a pinch of garlic powder) is the perfect companion. It’s creamy and mild, which balances the saltiness of the hot dogs. Ketchup works too, but honestly, the mustard eyes already bring enough tang.
Storage: Leftover mummy dogs (if you have any!) can be stored in an airtight container in the refrigerator for up to 3 days. The dough will soften a bit, but they’re still tasty. To reheat, pop them in the oven at 350°F for about 5 minutes, or microwave for 20-30 seconds. The microwave is faster but the dough won’t be as crispy.
Freezing: You can freeze these before baking. Assemble the mummy dogs on a baking sheet and freeze until solid, then transfer to a freezer bag. When you’re ready to bake, add 2-3 minutes to the baking time. I’ve done this for Halloween parties and it works like a charm—just don’t add the mustard eyes until after they’re baked.
If you’re looking for other Halloween treats to serve alongside these, try my Witch’s Finger Cookies with Almond Nails for a sweet-and-spooky combo. Or go all out with a Halloween Party Charcuterie Board that has something for everyone.
Nutritional Information & Benefits
Let’s be real—these are not health food. They’re Halloween fun food, and that’s okay. But here’s the breakdown if you’re curious:
- Calories: Approximately 220-250 per mummy dog (depending on hot dog brand and dough type)
- Protein: About 8-10 grams from the hot dog
- Carbohydrates: Roughly 15-18 grams from the crescent dough
- Fat: Around 14-16 grams (mostly from the dough and hot dog)
If you’re looking to lighten them up, use turkey hot dogs and reduced-fat crescent rolls. You’ll save about 50-70 calories per serving without losing much flavor. The mustard eyes are basically calorie-free, so no worries there.
On the plus side, hot dogs do provide protein and iron. And if you’re using all-beef hot dogs, you’re getting some B vitamins too. The crescent dough gives you quick energy—perfect for fueling up before a night of trick-or-treating.
For anyone with dietary restrictions, these are not gluten-free unless you use the alternative dough mentioned in the variations section. They’re also not vegetarian unless you swap the hot dogs. But they are nut-free, egg-free (if you skip the egg wash), and relatively low in sugar.
I’m not a nutritionist, but I’ve learned that balance is key. Serve these alongside some veggie sticks or a fresh salad, and you’ve got a meal that feels indulgent without going overboard. Or just enjoy them as the occasional Halloween treat—that works too.
Conclusion
These Easy Mummy Hot Dog Crescent Rolls with Mustard Eyes have become my go-to Halloween recipe for a reason. They’re quick, they’re fun, and they make people smile in a way that fancier dishes just can’t match. There’s something about that little mustard face staring up at you from the plate that turns even the grumpiest party guest into a kid again.
I love that this recipe doesn’t take itself too seriously. It’s not about perfect technique or fancy ingredients—it’s about making something that brings joy to a table full of ghosts, witches, and superheroes. Whether you’re hosting a big Halloween bash or just looking for a fun snack to make with the kids, these mummy dogs are the answer.
Go ahead and customize them however you like. Add cheese, swap the hot dogs, make them spicy or mild. The base recipe is forgiving and flexible, which is exactly what you want when you’re juggling costumes, candy, and a house full of excited children.
If you make these, I’d love to hear how they turned out. Drop a comment below and let me know if your kids called them “angry mummies” too, or if you came up with an even better name. And if you’re looking for more Halloween inspiration, don’t miss my Candy Corn Rice Krispie Treats or the Spiderweb Halloween Cookie Cake—both are crowd-pleasers that come together just as easily.
Happy Halloween, and happy snacking!
Frequently Asked Questions
Can I make these ahead of time?
Absolutely. You can assemble the mummy dogs up to 24 hours in advance and keep them covered in the refrigerator. Just add a minute or two to the baking time since they’ll be starting from cold. Don’t add the mustard eyes until after they’re baked.
Can I use puff pastry instead of crescent rolls?
Yes, but the texture will be different. Puff pastry is flakier and less tender than crescent dough. If you use puff pastry, cut it into thinner strips and expect a slightly longer baking time. The mummies will look more “bandaged” with the extra layers.
How do I get the mustard eyes to stick better?
Make sure the hot dog surface is dry before applying the mustard. If the hot dog is greasy, the mustard might slide off. You can also dab the area with a paper towel before dotting on the eyes. Adding the mustard while the mummies are still warm helps it adhere.
Can I use something other than mustard for the eyes?
Sure! Ketchup works, but it’s less visible against the brown hot dog. You can also use sriracha for spicy red eyes, or even small dots of cream cheese if you want white eyes. Just keep in mind that the yellow mustard gives the most recognizable “mummy” look.
How many mummy dogs should I make per person?
For a party where other snacks are available, plan on 2-3 per adult and 1-2 per child. If these are the main dish, go with 3-4 per person. I always make extra because they disappear faster than you’d expect—I’ve seen grown adults eat six in one sitting without blinking.
Pin This Recipe!
Easy Mummy Hot Dog Crescent Rolls with Mustard Eyes: Best Halloween Snack
These Easy Mummy Hot Dog Crescent Rolls with Mustard Eyes are a quick, fun, and kid-friendly Halloween snack. Ready in 20 minutes with just five ingredients, they feature flaky crescent dough wrapped around juicy hot dogs with tangy mustard eyes that make them look like adorable angry mummies.
- Prep Time: 10 minutes
- Cook Time: 15 minutes
- Total Time: 25 minutes
- Yield: 8 servings 1x
- Category: Appetizer
- Cuisine: American
Ingredients
- 1 can (8 oz) refrigerated crescent roll dough (Pillsbury original recommended)
- 8 hot dogs (standard size, not jumbo)
- Yellow mustard (French’s recommended)
- Optional: Cream cheese or ketchup for dipping
- Non-stick cooking spray or parchment paper
Instructions
- Preheat your oven to 375°F (190°C). Line a baking sheet with parchment paper or spray with non-stick cooking spray.
- Open the can of crescent rolls. Unroll the dough and separate it along the perforated lines into 8 triangles. Lay them flat on your work surface.
- Using a sharp knife or pizza cutter, cut each triangle lengthwise into 3 long strips. You’ll end up with 24 strips total.
- Take one hot dog and start wrapping a dough strip around it, stretching the dough slightly as you go. Leave a small gap at the top (about a half inch) where the mummy’s face will be. Use 2-3 strips per hot dog, overlapping them slightly.
- Arrange the wrapped hot dogs on your prepared baking sheet, leaving about an inch of space between each one.
- Bake for 12-15 minutes until the dough is golden brown and puffed, and the hot dogs are heated through.
- Remove from the oven and let them rest on the baking sheet for about 2-3 minutes.
- While still warm, dip a toothpick into yellow mustard and dot two small eyes onto the exposed hot dog at the top of each mummy.
- Serve warm with optional cream cheese dip or extra mustard on the side.
Notes
Don’t stretch the dough too thin; keep strips about 1/4-inch thick. Use room temperature crescent dough for easier handling. Add mustard eyes after baking to prevent running. For mini versions, cut hot dogs into thirds and bake for 10 minutes. Double the batch for crowds (plan 2-3 per person). Underbake by 1 minute if making ahead, then reheat before serving.
Nutrition
- Serving Size: 1 mummy dog
- Calories: 235
- Sugar: 3
- Sodium: 620
- Fat: 15
- Saturated Fat: 5
- Carbohydrates: 16
- Protein: 9
Keywords: Halloween snack, mummy hot dogs, crescent roll appetizer, easy Halloween recipe, kid-friendly snack, spooky snacks, party food