My brother showed up with eight friends and a cooler full of beer at noon on a Saturday. The fridge had ground beef, a block of cheddar, and half an onion rolling around the crisper drawer. I had twenty minutes and a crowd that was already hungry—the kind of hungry that gets loud if you don’t move fast.
I grabbed a sheet pan (the big one I usually use for roasting vegetables), cranked the oven, and started layering. Tortilla chips went down first, then a quick chili I threw together from that ground beef, some canned tomatoes I found in the pantry, and a handful of spices I probably over-measured in my hurry. The cheese went on top, thick and messy, and I slid the whole thing into the oven hoping for the best.
Honestly? It was chaos. But when I pulled that pan out—bubbling, golden, smelling like every tailgate I’d ever been to—the room went quiet for exactly three seconds before everyone grabbed a plate. That’s when I knew this chili cheese nachos recipe was something special. Not because it was fancy, but because it worked when it had to.
I’ve been making these best chili cheese tailgate nachos for a crowd ever since, tweaking the layers and the cheese-to-chip ratio until every bite hits that perfect salty, meaty, melty spot. This is the recipe that turned me into the person who says “I’ll bring the nachos” without a second thought.
Why You’ll Love This Recipe
Let me tell you why this recipe has become my go-to for game days, parties, and any gathering where people need to eat standing up with a drink in one hand.
- Feeds a Crowd Without the Fuss: One sheet pan feeds 8-10 people easily. No individual plates, no complicated assembly. Just one giant pan of pure happiness.
- Ready in Under 30 Minutes: From fridge to table in about 25 minutes. The chili comes together while the oven preheats, and the whole thing bakes in 10-12 minutes.
- Simple Ingredients, Big Flavor: Ground beef, canned tomatoes, beans, cheese, and chips. Nothing fancy, but the way they layer together creates something that tastes like you spent hours in the kitchen.
- Perfect for Tailgating and Parties: This is the ultimate crowd-pleaser. It travels well, stays warm for a good 20 minutes on the pan, and everyone loves it—kids, adults, picky eaters, everyone.
- Customizable to the Max: Swap the protein, change the cheese, add your favorite toppings. This recipe is a base for your creativity, not a rigid set of rules.
What makes this recipe different from every other nacho recipe out there is the layering technique. Most people just dump everything on top of chips and hope for the best. I’ve learned that building the layers—chips, chili, cheese, more chips, more chili, more cheese—ensures every chip gets some love. No sad, dry chips at the bottom of the pan.
This is the kind of recipe that makes you close your eyes after the first bite. It’s comfort food at its finest—warm, cheesy, slightly spicy, and completely satisfying. Perfect for impressing a crowd without breaking a sweat.
What Ingredients You Will Need
This recipe uses simple, mostly pantry-staple ingredients to deliver big, bold flavor. Here’s what you’ll need to make the best chili cheese tailgate nachos for a crowd.
For the Chili
- 1 pound ground beef (80/20 works best—enough fat for flavor, not so much that it gets greasy)
- 1 medium yellow onion, diced (about 1 cup)
- 3 cloves garlic, minced (or 1 teaspoon garlic powder in a pinch)
- 1 can (15 ounces) diced tomatoes, undrained (I prefer fire-roasted for extra smoky flavor)
- 1 can (15 ounces) kidney beans, drained and rinsed (black beans or pinto beans work great too)
- 2 tablespoons chili powder (adjust based on your heat preference)
- 1 teaspoon ground cumin
- 1 teaspoon smoked paprika (adds that tailgate-style depth)
- 1/2 teaspoon salt
- 1/4 teaspoon black pepper
- 1/2 cup beef broth or water (to help the chili come together)
For the Nachos
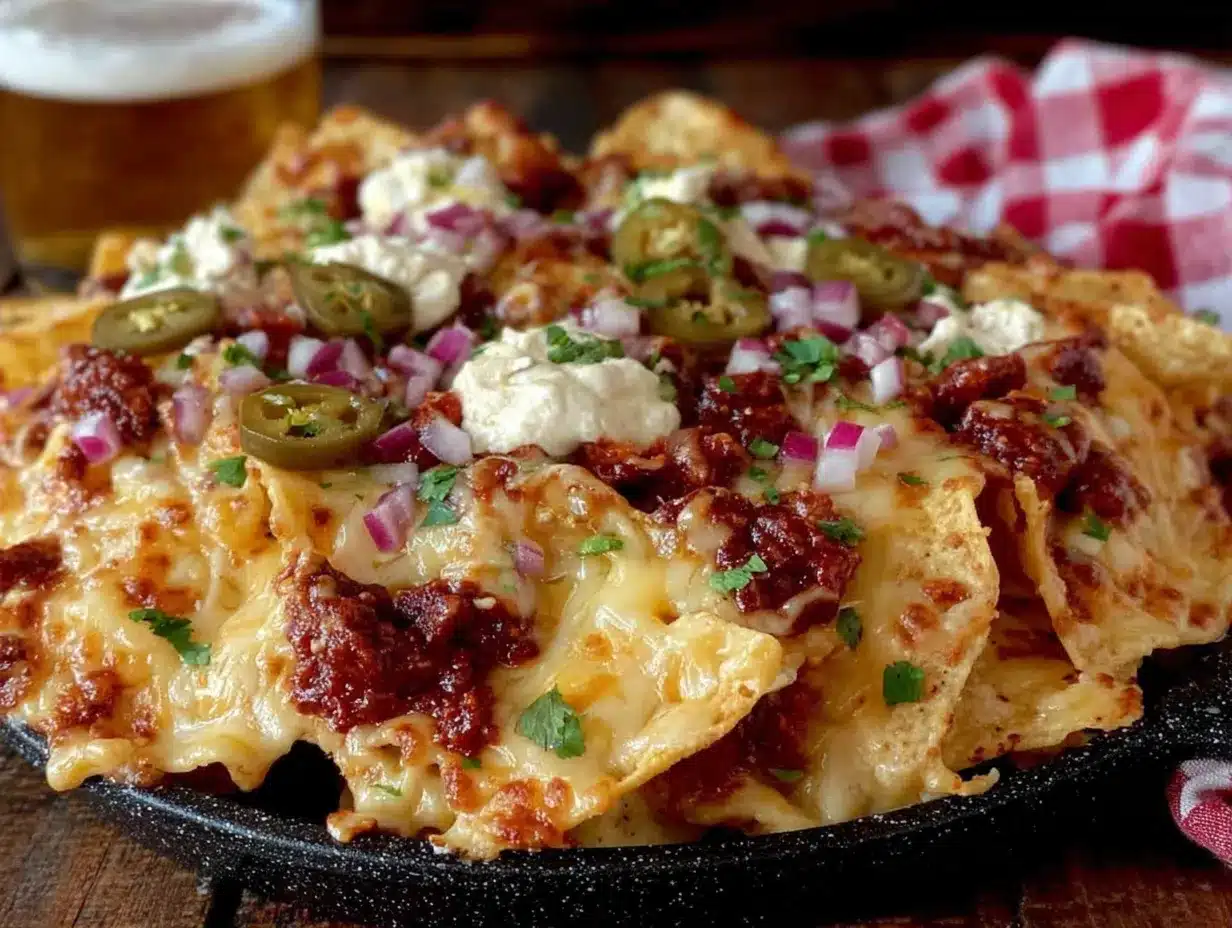
- 1 large bag (13-16 ounces) restaurant-style tortilla chips (the sturdy kind, not the thin ones that break under pressure)
- 3 cups shredded sharp cheddar cheese (about 12 ounces—shred it yourself for better melting)
- 1 cup shredded Monterey Jack cheese (about 4 ounces—adds creaminess)
For Topping (Optional but Highly Recommended)
- 1/2 cup sour cream
- 1/2 cup pickled jalapeños (drained)
- 1/2 cup fresh salsa or pico de gallo
- 1/4 cup chopped fresh cilantro
- 1 avocado, diced (or guacamole if you’re feeling fancy)
- 1 lime, cut into wedges
Ingredient Tips from My Kitchen: I’ve tested this with ground turkey and it works fine, but ground beef gives that classic tailgate flavor. For a vegetarian version, swap the beef with two cans of black beans or a plant-based ground meat substitute. I recommend Tillamook or Cabot for the cheddar—they melt beautifully and have that sharp, tangy flavor that cuts through the richness of the chili.
If you’re making these for a game day party, double the chili recipe. Trust me, people will go back for seconds and thirds. I learned this the hard way when I made a single batch for my brother’s birthday party and ran out in fifteen minutes.
Equipment Needed
You don’t need a fully stocked kitchen to make these nachos, but having the right tools makes the process smoother.
- Large sheet pan (half-sheet size, about 18×13 inches—the rimmed kind is essential to catch all the goodness)
- Large skillet or Dutch oven (for making the chili)
- Wooden spoon or spatula (for breaking up the ground beef)
- Cheese grater (skip the pre-shredded cheese if you can—it has anti-caking agents that prevent smooth melting)
- Cutting board and knife (for dicing the onion and garlic)
- Measuring spoons (for the spices)
- Can opener (obvious, but don’t forget it like I did once)
- Aluminum foil (for easy cleanup—seriously, line that pan)
Budget-Friendly Alternatives: No sheet pan? Use a 9×13 baking dish or even a cast iron skillet. The layers will be a bit thicker, but the flavor is the same. No Dutch oven? Any large skillet works—just make sure it’s deep enough to hold the chili without splattering.
I use my Nordic Ware half-sheet pan for everything from nachos to roasting vegetables, and it’s worth every penny. But honestly, a $10 pan from the grocery store works just as well for this recipe.
Preparation Method
Let me walk you through this step by step. I’ve made these best chili cheese tailgate nachos for a crowd more times than I can count, so I’ve got the timing down to a science.
- Preheat your oven to 400°F (200°C). Line your sheet pan with aluminum foil for easy cleanup. Trust me on this—scorched cheese is a nightmare to scrub off.
- Start the chili. Heat your large skillet over medium-high heat. Add the ground beef and cook, breaking it up with your spoon, until browned—about 5-7 minutes. Don’t drain all the fat; leave about a tablespoon in the pan for flavor.
- Add the aromatics. Toss in the diced onion and cook for 2-3 minutes until it starts to soften. Add the minced garlic and cook for another 30 seconds until fragrant. Your kitchen should smell amazing at this point.
- Build the chili flavor. Stir in the chili powder, cumin, smoked paprika, salt, and pepper. Let the spices toast for about 30 seconds—this wakes up their flavor. Then add the diced tomatoes (with their juices), the drained kidney beans, and the beef broth. Bring everything to a simmer and let it cook for 5-7 minutes, stirring occasionally, until it thickens slightly. You want a chili that’s thick enough to stay on the chips, not runny.
- Layer the nachos. Spread half the tortilla chips in an even layer on your prepared sheet pan. Spoon half the chili over the chips, making sure to distribute it evenly. Sprinkle half the shredded cheddar and half the Monterey Jack over the chili layer.
- Add the second layer. Top with the remaining chips, then the remaining chili, and finally the remaining cheese. This double-layering technique is the secret to ensuring every chip gets some chili and cheese. No dry chips allowed here.
- Bake until bubbly. Place the sheet pan in the preheated oven and bake for 10-12 minutes, until the cheese is fully melted and starting to bubble around the edges. The chips on top should be slightly golden but not burnt. Keep an eye on it after 10 minutes—ovens vary, and nobody wants burnt nachos.
- Add the toppings. Remove from the oven and let it cool for 2-3 minutes (the cheese will be molten hot). Dollop spoonfuls of sour cream over the top, scatter the pickled jalapeños, sprinkle the fresh salsa or pico de gallo, and finish with chopped cilantro and diced avocado. Squeeze a lime wedge or two over everything for brightness.
- Serve immediately. Bring the whole sheet pan to the table with a stack of plates and let everyone dig in. This is not a dish that waits well—the chips start to soften after about 10 minutes, so eat while they’re still crispy.
Visual Cue Check: When you pull the pan from the oven, the cheese should be fully melted with a few golden-brown spots. The chili should be bubbling at the edges. If you see any dry chips, they didn’t get enough chili coverage—next time, be more generous with your layering.
Cooking Tips & Techniques
I’ve made every mistake in the book with nachos, so you don’t have to. Here’s what I’ve learned.
The Chip Selection Matters: Don’t use thin, delicate chips. They’ll break under the weight of the chili and turn into sad, soggy messes. Go for restaurant-style or “scoop” chips—they’re sturdy enough to hold up to the layers. I learned this the hard way when I used thin tortilla chips for a Super Bowl party and ended up with a pan of chili-cheese mush.
Shred Your Own Cheese: Pre-shredded cheese has cellulose (wood pulp, essentially) to prevent clumping, which means it doesn’t melt as smoothly. Take the extra 3 minutes to shred a block of cheddar and Monterey Jack. The difference in texture is night and day—creamy, stretchy, and perfectly melted instead of grainy and clumpy.
Don’t Overload the Pan: It’s tempting to pile on as much as possible, but too many chips and too much chili leads to a soggy, uneven mess. Stick to a single layer of chips per layer, and don’t drown them in chili. The chips should be visible between the chili dollops.
Temperature Control: Make sure your chili is hot when you layer it on the chips. Cold chili won’t heat through properly in the short baking time, and you’ll end up with cold spots. I usually make the chili while the oven preheats, so everything comes together at the same temperature.
Timing is Everything: These nachos are best eaten within 10 minutes of coming out of the oven. Plan your timing so you’re pulling the pan out right when people are ready to eat. If you’re making these for a party, have all your toppings prepped and ready to go before you start baking.
Variations & Adaptations
This recipe is incredibly flexible. Here are some of my favorite variations.
Protein Swaps
Chicken Chili Nachos: Swap the ground beef for shredded rotisserie chicken or ground chicken. Add an extra teaspoon of cumin for depth. I’ve made this for a crowd that included someone who doesn’t eat red meat, and it was a hit.
Vegetarian Black Bean Nachos: Use two cans of black beans (drained and rinsed) instead of ground beef. Mash half the beans with a fork before adding to the skillet for a meatier texture. My vegetarian sister-in-law requests this version every time she visits.
Dietary Adaptations
Gluten-Free: This recipe is naturally gluten-free as long as you check your spice blends and canned goods. Some chili powders contain wheat flour as a filler, so read labels if you’re serving someone with celiac disease.
Dairy-Free: Use dairy-free shredded cheese (I like Violife or Miyoko’s) and skip the sour cream or use a dairy-free alternative. The chili itself is dairy-free, so you’re only swapping the cheese and toppings.
Flavor Twists
Smoky Chipotle Nachos: Add 1-2 minced chipotle peppers in adobo sauce to the chili along with the spices. The smoky heat is incredible and gives the nachos a deeper, more complex flavor.
Loaded Baked Potato Nachos: Top the finished nachos with crumbled cooked bacon, sliced green onions, and an extra dollop of sour cream. This is my personal favorite variation—it’s over the top in the best way.
I once made a batch with leftover carnitas from a taco night, and it was honestly better than the original. If you’ve got leftover Hatch green chili pork carnitas in the fridge, this is a fantastic way to use them up.
Serving & Storage Suggestions
These nachos are best served fresh and hot, right from the oven. But here’s how to handle leftovers if you have them (which is rare in my house).
Serving Temperature: Serve immediately after baking, while the cheese is still molten and the chips are crispy. The toppings should be cold or room temperature to contrast with the hot chili and cheese.
Presentation: Bring the whole sheet pan to the table. It’s dramatic, communal, and saves you from plating individual servings. Set out small bowls of extra toppings so people can customize their portions.
Complementary Dishes: These nachos are a meal on their own, but if you’re building a spread, they pair beautifully with crispy beer-battered pickle chips or a fresh watermelon feta mint skewer for contrast. For drinks, cold beer or margaritas are the obvious choice.
Storage: If you have leftovers (unlikely, but possible), let them cool completely, then transfer to an airtight container. Store in the refrigerator for up to 2 days. The chips will be soft, but the flavor will still be good.
Reheating: The best way to revive leftover nachos is in the oven or air fryer. Spread them on a sheet pan and reheat at 350°F for 5-7 minutes. The microwave will make them soggy, so avoid it if you can. I’ve also had success reheating them in a skillet over medium heat, which crisps up the bottom chips a bit.
Flavor Development: The chili actually tastes better the next day, so if you’re planning ahead, make the chili a day in advance and reheat it before assembling the nachos. The spices meld together overnight and create a deeper, more rounded flavor.
These nachos are also perfect for a game day spread alongside other crowd-pleasers like savory loaded pulled pork totchos or crispy buffalo chicken flatbread.
Nutritional Information & Benefits
Let’s be real—these are tailgate nachos, not health food. But here’s the breakdown so you know what you’re working with.
Estimated Nutritional Values (per serving, based on 8 servings):
- Calories: 520
- Protein: 28g
- Fat: 32g
- Carbohydrates: 35g
- Fiber: 6g
- Sugar: 5g
- Sodium: 890mg
Health Highlights: The kidney beans add fiber and plant-based protein, which helps balance out the richness of the cheese and beef. The tomatoes provide vitamin C and lycopene, an antioxidant that’s been linked to heart health. If you add avocado, you’re getting healthy monounsaturated fats and potassium.
Dietary Considerations: This recipe is naturally gluten-free (check your spice blends). For a lower-calorie version, use ground turkey instead of beef, reduce the cheese by half, and load up on fresh toppings like salsa and lettuce. For a lower-carb version, use pork rinds instead of tortilla chips—it sounds weird, but it actually works.
Allergen Note: This recipe contains dairy (cheese, sour cream) and possible gluten (check your chili powder and tortilla chips).
I’m not a nutritionist, and I don’t pretend to be. These nachos are about enjoyment and celebration, not daily nutrition. But I do feel better knowing there are beans and tomatoes in there, even if they’re buried under a mountain of cheese.
Conclusion
These best chili cheese tailgate nachos for a crowd have become my signature party dish for a reason. They’re simple enough to throw together on a weeknight, impressive enough to serve at a Super Bowl party, and customizable enough to please just about any eater.
The beauty of this recipe is that it’s a starting point, not a rulebook. Use whatever protein you have on hand, swap in your favorite beans, pile on the toppings that make you happy. The layering technique is the only non-negotiable part—that’s what ensures every chip gets its fair share of chili and cheese.
I still think about that first chaotic batch I made for my brother and his friends. The nachos were messy, the kitchen was a disaster, and everyone ate until they couldn’t move. That’s what this recipe is about—good food, good people, and the kind of meal that makes you feel like you’ve got it all figured out, even when you’re just making it up as you go.
Try this recipe for your next game day, party, or just a Tuesday night that needs a little extra excitement. And when you do, come back and tell me how it went. I love hearing about your variations and successes—it’s why I keep sharing these recipes.
Now go make some nachos. Your crowd is waiting.
Frequently Asked Questions
Can I make these nachos ahead of time?
You can prep the chili up to 3 days in advance and store it in the refrigerator. Assemble and bake the nachos just before serving for the best texture. Pre-baked nachos will get soggy quickly.
What’s the best cheese for nachos?
A blend of sharp cheddar and Monterey Jack is my go-to. The cheddar provides sharp flavor, while the Monterey Jack adds creamy meltability. Avoid pre-shredded cheese—it doesn’t melt as smoothly.
How do I keep the chips from getting soggy?
Use sturdy restaurant-style chips, don’t overload the pan, and make sure your chili is thick (not watery). The double-layering technique also helps because the chips on top stay crispier.
Can I make this recipe vegetarian or vegan?
Absolutely. For vegetarian, swap the ground beef with two cans of black beans or a plant-based meat substitute. For vegan, use dairy-free cheese and sour cream, and skip the meat entirely. The chili base is naturally vegan-friendly.
How many people does this recipe serve?
One sheet pan serves 8-10 people as an appetizer or 4-6 as a main course. For a large party, I recommend making two pans—they disappear fast.
Pin This Recipe!
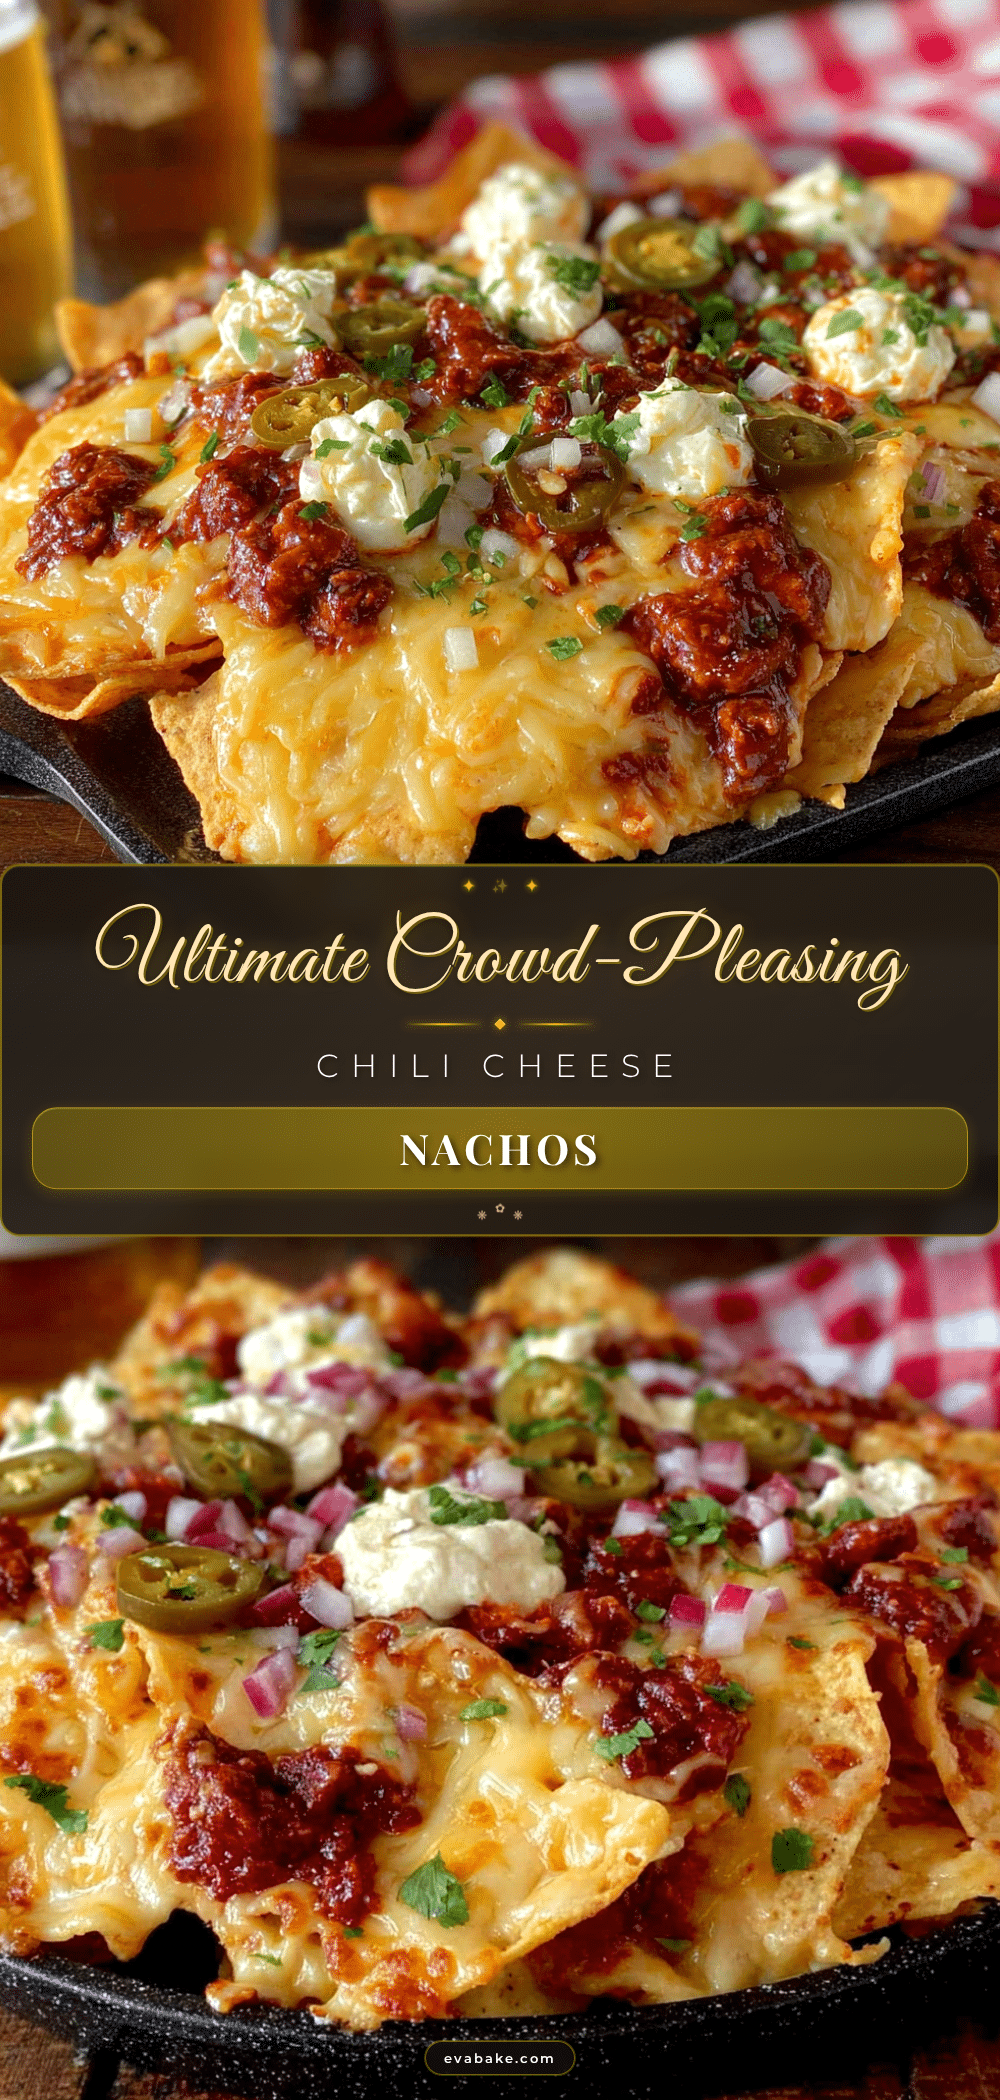
Best Chili Cheese Nachos for a Crowd

These sheet pan chili cheese nachos are loaded with seasoned ground beef, beans, and a blend of melted cheeses, baked until bubbly and golden. Perfect for feeding a hungry crowd in under 30 minutes.
- Prep Time: 15 minutes
- Cook Time: 12 minutes
- Total Time: 27 minutes
- Yield: 8-10 servings 1x
- Category: Appetizer
- Cuisine: Mexican-American
Ingredients
- 1 pound ground beef (80/20)
- 1 medium yellow onion, diced (about 1 cup)
- 3 cloves garlic, minced (or 1 teaspoon garlic powder)
- 1 can (15 ounces) diced tomatoes, undrained (fire-roasted preferred)
- 1 can (15 ounces) kidney beans, drained and rinsed
- 2 tablespoons chili powder
- 1 teaspoon ground cumin
- 1 teaspoon smoked paprika
- 1/2 teaspoon salt
- 1/4 teaspoon black pepper
- 1/2 cup beef broth or water
- 1 large bag (13–16 ounces) restaurant-style tortilla chips
- 3 cups shredded sharp cheddar cheese (about 12 ounces)
- 1 cup shredded Monterey Jack cheese (about 4 ounces)
- 1/2 cup sour cream
- 1/2 cup pickled jalapeños, drained
- 1/2 cup fresh salsa or pico de gallo
- 1/4 cup chopped fresh cilantro
- 1 avocado, diced
- 1 lime, cut into wedges
Instructions
- Preheat your oven to 400°F (200°C). Line a large sheet pan with aluminum foil for easy cleanup.
- Heat a large skillet over medium-high heat. Add the ground beef and cook, breaking it up, until browned, about 5-7 minutes. Leave about 1 tablespoon of fat in the pan.
- Add the diced onion and cook for 2-3 minutes until softened. Add the minced garlic and cook for 30 seconds until fragrant.
- Stir in the chili powder, cumin, smoked paprika, salt, and pepper. Toast the spices for 30 seconds. Add the diced tomatoes (with juices), kidney beans, and beef broth. Bring to a simmer and cook for 5-7 minutes, stirring occasionally, until slightly thickened.
- Spread half the tortilla chips in an even layer on the prepared sheet pan. Spoon half the chili over the chips. Sprinkle half the cheddar and half the Monterey Jack over the chili.
- Top with the remaining chips, then the remaining chili, and finally the remaining cheese.
- Bake for 10-12 minutes, until the cheese is fully melted and bubbling around the edges. The top chips should be slightly golden.
- Remove from the oven and let cool for 2-3 minutes. Dollop sour cream over the top, scatter pickled jalapeños, sprinkle salsa, and finish with chopped cilantro and diced avocado. Squeeze lime wedges over everything.
- Serve immediately while the chips are still crispy.
Notes
Use sturdy restaurant-style chips to prevent sogginess. Shred your own cheese for the best melt. Make sure the chili is hot when layering. Serve immediately for maximum crispiness. Leftovers can be stored in the refrigerator for up to 2 days and reheated in the oven or air fryer.
Nutrition
- Serving Size: 1 serving (based on
- Calories: 520
- Sugar: 5
- Sodium: 890
- Fat: 32
- Saturated Fat: 12
- Carbohydrates: 35
- Fiber: 6
- Protein: 28
Keywords: chili cheese nachos, sheet pan nachos, tailgate nachos, game day nachos, crowd-pleasing nachos, easy nachos recipe