It was 9:47 PM on a rainy Thursday in late October, and I was supposed to be making a proper charcuterie board for a Friendsgiving potluck the next day. I had all these grand plans—aged gouda, prosciutto rosettes, the whole nine yards. But honestly? The grocery store had been a zoo, my apartment smelled like wet dog from the rain, and I was one cranky shopper. So I came home with what was actually available: a block of cheddar, some sad-looking salami, and a bag of mixed fall apples that were probably meant for a pie.
I stood in my kitchen, staring at this motley crew of ingredients, and felt that familiar pang of “this is going to be a disaster.” But then something clicked. I remembered a conversation with my neighbor, Dave, who always raves about how the best meals come from making do with what you’ve got. So I grabbed a wooden board, started arranging things, and before I knew it, I was layering slices of honeycrisp apple next to sharp cheddar, and it looked… actually stunning. I mean, the colors alone—deep reds, golden yellows, that creamy white of the cheese—it was like autumn on a plate.
That night, I couldn’t sleep, so I kept tweaking the board. I added a handful of dried cranberries I found in the back of the pantry, some walnuts I’d forgotten about, and a drizzle of honey that I figured couldn’t hurt. By midnight, I had this gorgeous, messy, utterly delicious spread that felt more like a hug than a recipe. The next day at Friendsgiving, everyone asked for the “secret” to my board, and I just smiled. The secret was that I didn’t try so hard. Maybe you’ve been there—staring at a half-empty fridge, convinced you can’t pull off something special. Trust me, you can. This cozy Friendsgiving charcuterie board with fall fruits became my go-to because it’s forgiving, flexible, and tastes like the season itself.
Why You’ll Love This Recipe
This isn’t just another charcuterie board—it’s the one that’ll make your Friendsgiving unforgettable. I’ve tested this version with at least a dozen different groups, from picky eaters to foodie friends, and it never fails to get rave reviews. Here’s why it works:
- Quick & Easy: Comes together in under 20 minutes, perfect for last-minute gatherings or when you’re hosting and need one less thing to stress about.
- Simple Ingredients: No fancy grocery trips needed; you likely already have most of these items in your kitchen or can grab them at any store.
- Perfect for Friendsgiving: It’s the ultimate sharing dish—everyone can graze, chat, and go back for more without formal plating.
- Crowd-Pleaser: Always gets rave reviews from kids and adults alike. The combination of sweet, salty, and savory hits every craving.
- Unbelievably Delicious: The texture and flavor combo is next-level comfort food. Think crisp apples against creamy brie, salty prosciutto wrapped around sweet figs, and crunchy nuts balancing everything out.
What makes this recipe different from the rest? It’s the balance. Most boards lean too heavy on meat or cheese, but this one celebrates fall fruits as the stars. The honeycrisp apples add a refreshing crunch, the dried figs bring natural sweetness, and the pomegranate seeds pop with tartness. I’ve also learned a trick from my chef friend, Maria: always add a spreadable element like fig jam or honeycomb to tie everything together. It’s that little touch that makes people close their eyes after the first bite. Honestly, this board isn’t just good—it’s the kind that makes you feel warm inside, like a cozy sweater for your taste buds.
What Ingredients You Will Need
This recipe uses simple, wholesome ingredients to deliver bold flavor and satisfying texture without the fuss. Most are pantry staples or easy to find at any grocery store, especially during fall.
- For the Cheeses:
- 8 oz sharp cheddar cheese, sliced (adds a tangy bite; I prefer Cabot or a local farm brand)
- 8 oz brie cheese, at room temperature (creamy and mild; a triple-cream brie works best)
- 4 oz goat cheese log, crumbled (adds a tangy, soft texture; use a plain or herbed variety)
- For the Meats:
- 6 oz prosciutto, thinly sliced (saltiness balances the sweet fruits)
- 6 oz salami, such as Genoa or soppressata, sliced (adds a peppery kick)
- For the Fall Fruits:
- 2 honeycrisp apples, cored and sliced (crisp and sweet; you can substitute with fuji or pink lady)
- 1 cup dried figs, halved (chewy and sweet; look for Turkish or mission figs)
- 1/2 cup pomegranate seeds (adds a burst of tartness and color)
- 1 cup red grapes, washed and left in small clusters (classic and sweet)
- For the Crunch:
- 1/2 cup walnuts, toasted (adds earthy crunch; I recommend buying raw and toasting yourself for best flavor)
- 1/2 cup pecans, toasted (buttery and rich; swap with almonds if needed)
- For the Spreads & Accompaniments:
- 1/4 cup fig jam or honey (adds a sweet, sticky element to pair with cheese)
- 1 small baguette, sliced and toasted (for scooping and spreading)
- 1 cup assorted crackers (choose a neutral flavor like water crackers or buttery rounds)
- For Garnish (Optional but Lovely):
- Fresh rosemary sprigs (adds a woodsy aroma and visual appeal)
- Edible flowers like pansies or nasturtiums (for a pop of color)
- Flaky sea salt, for sprinkling over the cheese
When selecting ingredients, here are a few tips I’ve picked up: Look for firm apples without bruises—they’ll hold up better on the board. For the brie, let it sit at room temperature for at least 30 minutes before serving; it gets that luscious, spreadable texture. If you can’t find fresh figs, dried ones work perfectly, or swap in sliced pear for a similar sweetness. I always recommend toasting the nuts yourself—just toss them in a dry pan over medium heat for 3-4 minutes until fragrant. It takes two extra minutes but makes a world of difference in flavor.
Equipment Needed
You don’t need a ton of fancy tools for this board, but a few key items make the process smoother:
- Large Wooden Board or Serving Platter: Aim for at least 12×16 inches to give everything room to breathe. I use a reclaimed wood board I found at a flea market, but a large ceramic platter works too.
- Small Bowls: For the fig jam, pomegranate seeds, and nuts. Ceramic or glass bowls in varying sizes add visual interest.
- Cheese Knives: At least two—one for soft cheese (brie) and one for hard cheese (cheddar). If you don’t have dedicated cheese knives, a small butter knife works for soft cheeses.
- Toaster or Oven: For toasting the baguette slices. A toaster oven is perfect, but a regular oven at 350°F for 5-7 minutes does the trick.
- Cutting Board and Sharp Knife: For slicing apples and cheese. A serrated knife works best for baguettes.
- Tongs or Small Spoons: For serving the spreads and nuts, so guests don’t double-dip.
If you’re on a budget, don’t stress. A large baking sheet lined with parchment paper makes an excellent alternative to a wooden board. I’ve done it many times, and it looks rustic and charming. For the cheese knives, just use regular butter knives—it’s more casual and fits the Friendsgiving vibe anyway.
Preparation Method
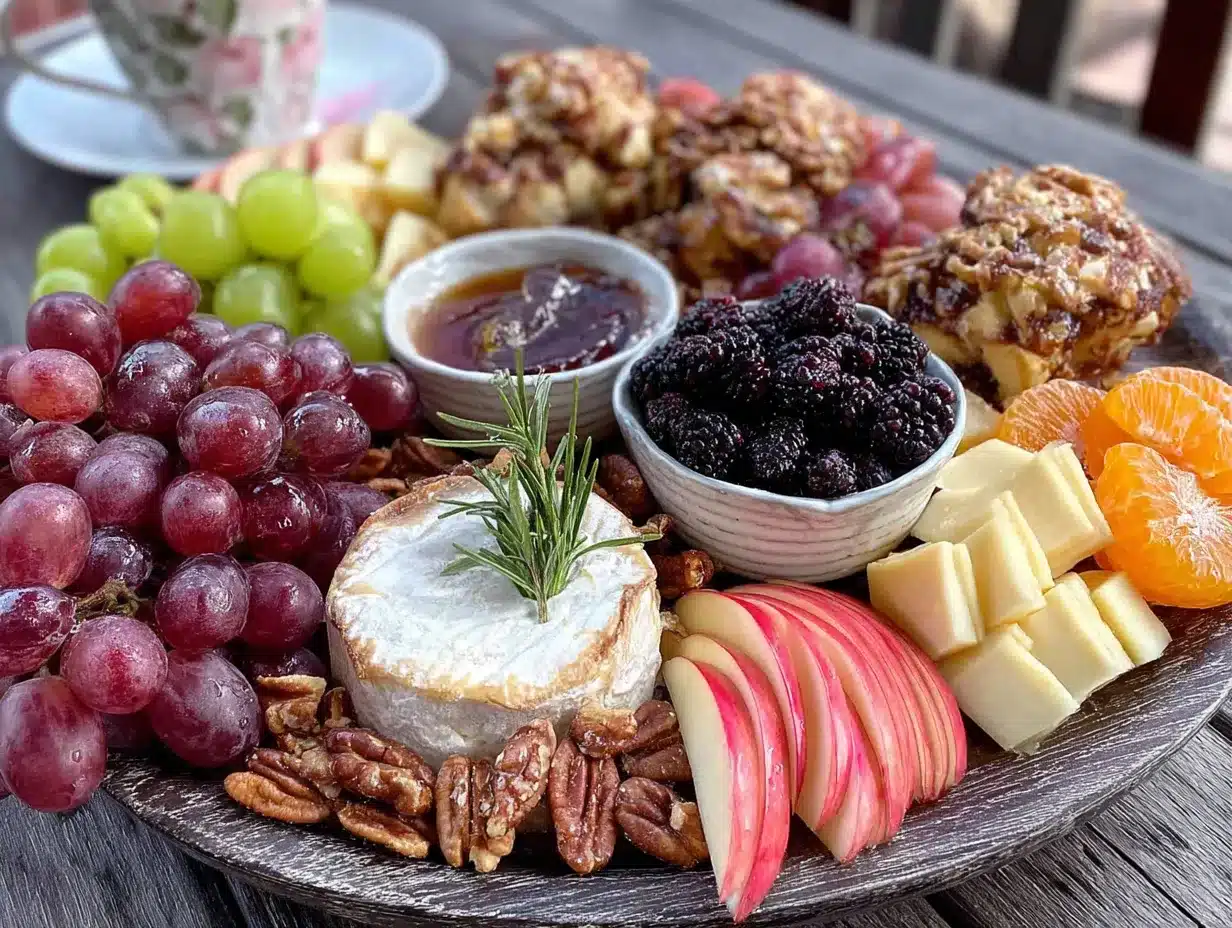
Follow these steps to build a gorgeous, balanced board that’ll impress your guests without stressing you out. Total prep time: about 20 minutes.
- Prep the Fruits and Nuts (5 minutes): Start by washing and drying the apples and grapes. Core the apples and slice them into thin wedges—about 1/4-inch thick. Toss them in a bowl with a squeeze of lemon juice to prevent browning (trust me, this is a game-changer if you’re making the board ahead). Halve the dried figs. If you’re using fresh pomegranate, cut it in half and tap the seeds out with a wooden spoon over a bowl. Toast the walnuts and pecans in a dry skillet over medium heat for 3-4 minutes, shaking the pan occasionally, until they smell nutty and are lightly golden. Set aside to cool.
- Toast the Baguette (5 minutes): Slice the baguette into 1/2-inch rounds. Arrange them on a baking sheet in a single layer. Brush lightly with olive oil if desired (optional, but adds flavor). Toast in a 375°F oven for 5-7 minutes, flipping halfway, until golden and crispy. Keep an eye on them—they go from perfect to burnt fast. Let them cool on the baking sheet while you assemble the board.
- Arrange the Cheeses (3 minutes): Place the cheeses on the board first, as they’re the anchor points. Position the brie wheel in the center-left area. Slice the cheddar into thin triangles and fan them out in a neat row on the right side. Crumble the goat cheese into a small pile near the brie. Leave a little space around each cheese so guests can easily cut or spread. If the board feels crowded, use small bowls for the crumbled goat cheese or jam.
- Add the Meats (3 minutes): Fold the prosciutto slices into loose ribbons or rosettes. To make rosettes, take one slice, fold it in half lengthwise, then roll it up loosely. Place them in clusters near the cheeses. Arrange the salami slices in overlapping rows or fan them out like playing cards. I like to put the meats on opposite sides of the board to encourage movement—guests will have to walk around the board to get everything, which makes for natural mingling.
- Layer the Fruits and Nuts (4 minutes): Now the fun part—fill in the gaps. Scatter the apple slices in a few small piles, not all in one spot. Tuck the dried figs between the cheeses and meats. Sprinkle the pomegranate seeds over the board like little jewels—they add a pop of color and tartness that cuts through the richness. Place small clusters of grapes in the corners. Add the toasted walnuts and pecans in little mounds, making sure they’re easy to grab.
- Add Spreads and Garnishes (2 minutes): Spoon the fig jam into a small bowl and nestle it into the board. Drizzle a little honey over the brie or goat cheese for a sweet touch. Tuck fresh rosemary sprigs around the board for a woodsy aroma—they’re not just decorative; they smell amazing. Sprinkle a pinch of flaky sea salt over the cheddar and brie to enhance the flavors.
- Final Check and Serve (1 minute): Step back and look at your board. Does it look balanced? Are there empty spots? Fill any gaps with extra crackers or a few more apple slices. Arrange the toasted baguette slices and crackers in a basket or on the side of the board. Serve immediately, or cover with plastic wrap and refrigerate for up to 2 hours. If refrigerating, let it sit at room temperature for 15 minutes before serving to let the flavors come alive.
A quick note: If you’re making this for a larger crowd, double the quantities and use two boards or a larger platter. I once made this for 12 people using a 20-inch wooden board, and it was perfect. Also, don’t stress about the arrangement—charcuterie is forgiving. If something looks messy, just add a sprig of rosemary or a few extra pomegranate seeds to distract the eye. Works every time.
Cooking Tips & Techniques
Over the years, I’ve made my share of charcuterie board mistakes—like the time I forgot to take the brie out of the fridge and it was like spreading cold butter on crackers. Here are the lessons I’ve learned so you don’t have to repeat them:
- Let Cheese Come to Room Temperature: This is non-negotiable. Brie and goat cheese need at least 30 minutes at room temp to soften and develop their full flavor. Cold cheese tastes like nothing and has a waxy texture. Set them out before you start prepping everything else.
- Toast Nuts Fresh: Pre-toasted nuts from the store are often stale or over-salted. Toasting your own takes 3-4 minutes and transforms the flavor. Just watch them closely—they burn in seconds. I once got distracted and ended up with charcoal pecans. Not my finest moment.
- Prevent Apple Browning: Toss apple slices in a little lemon juice or lime juice. It doesn’t affect the taste much, and it keeps them looking fresh for hours. You can also use a splash of pineapple juice if you have it.
- Balance Textures and Flavors: The best boards have a mix of creamy, crunchy, sweet, salty, and tangy. If you’re heavy on one element, add something to contrast. For example, if your cheese is all soft, add some sharp cheddar or aged gouda. If the fruits are too sweet, add salty prosciutto.
- Don’t Overcrowd the Board: It’s tempting to pile everything on, but guests need room to grab items without knocking things over. Leave about 20% of the board empty for visual breathing room. You can always refill as the night goes on.
- Time Your Prep: I like to do all the washing and slicing first, then arrange everything at once. It’s faster than going back and forth. Also, set out your bowls and knives before you start—it saves those “where’s the spoon?” moments.
Variations & Adaptations
One of the best things about this board is how customizable it is. Here are some ways to make it your own:
- Dietary Adaptations: For a vegetarian version, skip the meats and add more cheese varieties, like a smoked gouda or a blue cheese. For a dairy-free option, use plant-based cheeses (I like Miyoko’s brand for brie-style) and swap the honey for agave. For gluten-free guests, replace the baguette and crackers with gluten-free crackers or sliced cucumber rounds.
- Seasonal Twists: In the fall, use sliced pears instead of apples, or add fresh figs when they’re in season. In winter, swap in clementines and dried apricots. In spring, try strawberries and fresh mint. The base formula—cheese, fruit, nuts, a spread—works year-round.
- Flavor Variations: For a spicy kick, add a dollop of hot honey or red pepper flakes to the board. For a herby twist, use fresh thyme or basil alongside the rosemary. For a sweeter board, add dark chocolate squares or candied pecans.
- Other Cooking Methods: If you’re short on time, skip the toasting and use store-bought crostini or crackers. If you want a warm element, add a small bowl of roasted grapes or baked brie with honey (just bake the brie at 350°F for 10 minutes until gooey).
- Personal Variation I’ve Tried: Last year, I added a small bowl of whipped feta dip (just feta, Greek yogurt, and lemon juice blended together) and it was a hit. It added a creamy, tangy element that paired beautifully with the apples and figs. I’ve also swapped the prosciutto for smoked salmon in a pinch—it’s unconventional but delicious.
Serving & Storage Suggestions
This board is best served at room temperature, so let it sit out for 15-20 minutes after assembling. I like to place it in the center of the table so everyone can reach it easily. For presentation, arrange the items in small clusters rather than a single line—it looks more abundant and inviting.
For drinks, pair this board with a crisp white wine like Sauvignon Blanc or a light red like Pinot Noir. A sparkling apple cider or a warm spiced cider also works beautifully for a non-alcoholic option. If you’re feeling fancy, a fall-themed cocktail like a maple old fashioned or a bourbon cider punch complements the flavors perfectly.
For storage, this board doesn’t keep well once assembled because the fruits and crackers get soggy. If you have leftovers, separate the components: store cheeses in wax paper or cheese paper (not plastic wrap—it suffocates them), meats in an airtight container, and fruits in a separate container. The apples will last a day in the fridge if tossed in lemon juice. The nuts and crackers can be stored in a zip-top bag at room temperature for up to a week.
To reheat the baguette slices, pop them in a 350°F oven for 3-4 minutes. The cheeses are best eaten at room temperature, so let them sit out for 20 minutes before serving again. The flavors actually develop overnight—the brie gets creamier, and the prosciutto loses some saltiness—so leftovers can be just as good the next day, if not better.
Nutritional Information & Benefits
Here’s an approximate nutritional breakdown per serving (based on 8 servings, assuming a balanced mix of all components):
| Nutrient | Amount per Serving |
|---|---|
| Calories | 380-420 kcal |
| Protein | 15-18 g |
| Fat | 22-28 g |
| Carbohydrates | 30-35 g |
| Fiber | 4-6 g |
| Sugar | 18-22 g (mostly from fruits) |
| Sodium | 600-800 mg |
The health benefits here come from the whole foods. Apples are packed with fiber and vitamin C, while nuts provide healthy fats and protein that keep you full. Pomegranate seeds are rich in antioxidants, and the cheeses offer calcium and protein. This board is naturally gluten-free if you skip the crackers and baguette, and you can easily make it lower in sodium by choosing low-sodium meats and unsalted nuts.
One thing I love about this board is that it feels indulgent without being heavy. It’s the kind of appetizer that satisfies your cravings without leaving you sluggish. I’ve had guests who are usually wary of “healthy” foods go back for thirds because the flavors are so balanced. It’s comfort food that happens to be good for you—what’s not to love?
Conclusion
This cozy Friendsgiving charcuterie board with fall fruits has become a staple in my kitchen, and I hope it becomes one in yours too. It’s forgiving, flexible, and always delivers—whether you’re hosting a big gathering or just want a special snack for yourself on a rainy evening. The best part? You can tweak it based on what you have, what’s in season, or what your guests love. That’s the beauty of a board like this—it’s never the same twice, and that’s exactly how it should be.
I’d love to hear how yours turns out. Did you add something unexpected? Swap an ingredient? Forget the nuts and improvise? Drop a comment below and share your version—I genuinely read every one and get inspired by your creativity. And if you have a friend who’s nervous about hosting Friendsgiving, send them this recipe. Trust me, it’ll make their life easier and their table prettier.
Now go on, grab a board, and make something that tastes like fall. You’ve got this!
Frequently Asked Questions (FAQs)
Can I make this charcuterie board ahead of time?
Yes, you can prep most components a day ahead. Slice the apples and toss them in lemon juice, toast the nuts, and slice the cheeses. Store everything separately in the fridge. Assemble the board no more than 2 hours before serving to keep the fruits fresh and crackers crisp.
What if I don’t have a wooden board?
No worries! Use a large baking sheet, a cutting board, or even a clean pizza pan. Line it with parchment paper for a rustic look. The presentation is more about the arrangement than the vessel.
How do I keep the apples from turning brown?
Toss the apple slices in a bowl with a tablespoon of lemon juice or lime juice. This acid slows down oxidation. You can also use pineapple juice or a commercial product like Fruit-Fresh. The apples will stay bright for several hours.
Can I add hot elements to the board?
Absolutely! A small bowl of baked brie with honey or roasted grapes adds a warm, gooey element that’s perfect for fall. Just make sure to serve it immediately and place it on a trivet if the bowl is hot. It’s a game-changer for chilly evenings.
How much should I make per person?
For a main appetizer at a Friendsgiving, plan for about 2-3 ounces of cheese and 2 ounces of meat per person. For fruits and nuts, about 1/2 cup total per person. If you’re serving other heavy dishes, you can scale back slightly. It’s always better to have too much than too little—leftovers make great snacks the next day.
Pin This Recipe!
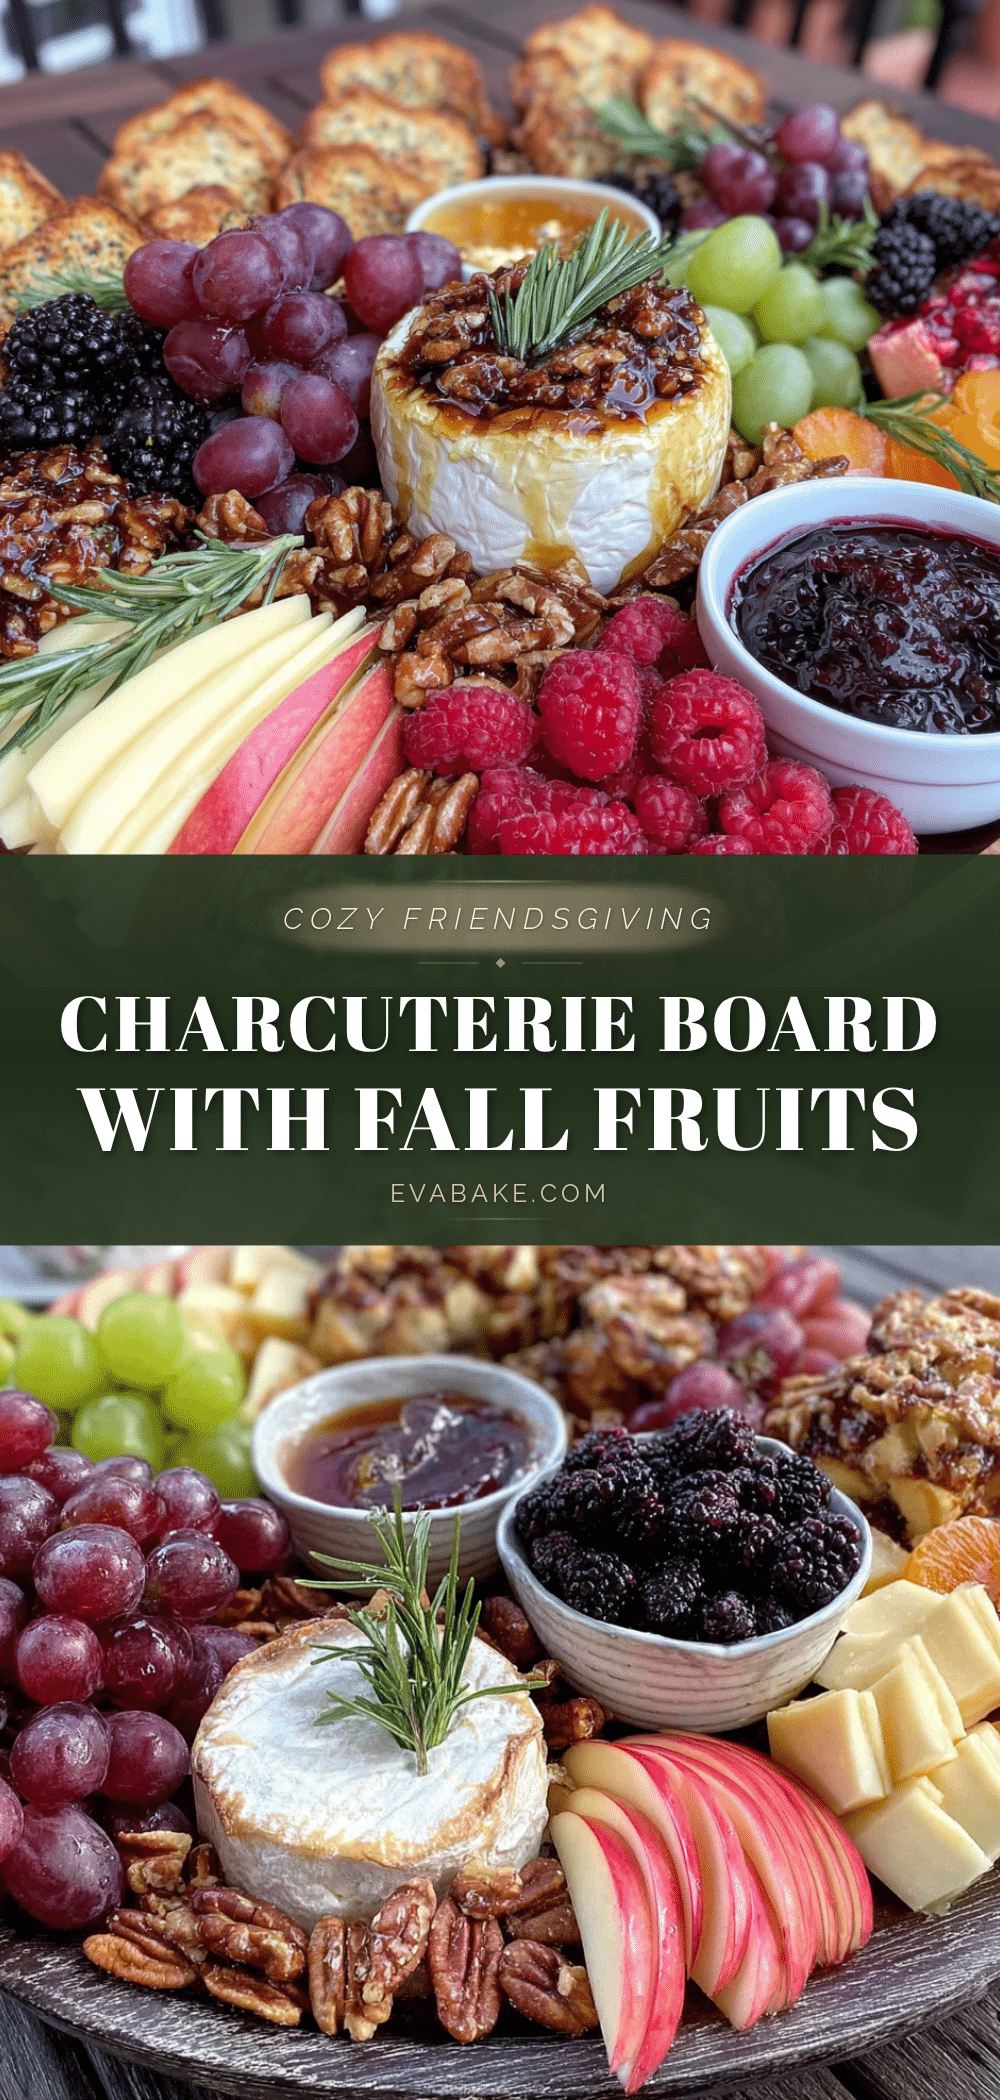
Best Cozy Friendsgiving Charcuterie Board with Fall Fruits
A forgiving, flexible charcuterie board that celebrates fall fruits as the stars, with crisp apples, creamy brie, salty prosciutto, and crunchy nuts. Perfect for Friendsgiving or any cozy gathering.
- Prep Time: 20 minutes
- Cook Time: 10 minutes
- Total Time: 30 minutes
- Yield: 8 servings 1x
- Category: Appetizer
- Cuisine: American
Ingredients
- 8 oz sharp cheddar cheese, sliced
- 8 oz brie cheese, at room temperature
- 4 oz goat cheese log, crumbled
- 6 oz prosciutto, thinly sliced
- 6 oz salami (Genoa or soppressata), sliced
- 2 honeycrisp apples, cored and sliced
- 1 cup dried figs, halved
- 1/2 cup pomegranate seeds
- 1 cup red grapes, washed and in small clusters
- 1/2 cup walnuts, toasted
- 1/2 cup pecans, toasted
- 1/4 cup fig jam or honey
- 1 small baguette, sliced and toasted
- 1 cup assorted crackers
- Fresh rosemary sprigs (optional)
- Edible flowers like pansies or nasturtiums (optional)
- Flaky sea salt (optional)
Instructions
- Prep the Fruits and Nuts (5 minutes): Wash and dry apples and grapes. Core apples and slice into thin wedges (about 1/4-inch thick). Toss with a squeeze of lemon juice to prevent browning. Halve dried figs. If using fresh pomegranate, cut in half and tap seeds out with a wooden spoon. Toast walnuts and pecans in a dry skillet over medium heat for 3-4 minutes until fragrant and lightly golden. Set aside to cool.
- Toast the Baguette (5 minutes): Slice baguette into 1/2-inch rounds. Arrange on a baking sheet in a single layer. Brush lightly with olive oil if desired. Toast in a 375°F oven for 5-7 minutes, flipping halfway, until golden and crispy. Let cool on baking sheet.
- Arrange the Cheeses (3 minutes): Place cheeses on the board first. Position brie wheel in center-left. Slice cheddar into thin triangles and fan out on the right side. Crumble goat cheese into a small pile near the brie. Leave space around each cheese.
- Add the Meats (3 minutes): Fold prosciutto slices into loose ribbons or rosettes. Place in clusters near cheeses. Arrange salami slices in overlapping rows or fan them out. Place meats on opposite sides of the board.
- Layer the Fruits and Nuts (4 minutes): Scatter apple slices in small piles. Tuck dried figs between cheeses and meats. Sprinkle pomegranate seeds over the board. Place grape clusters in corners. Add toasted walnuts and pecans in little mounds.
- Add Spreads and Garnishes (2 minutes): Spoon fig jam into a small bowl and nestle into the board. Drizzle honey over brie or goat cheese. Tuck fresh rosemary sprigs around the board. Sprinkle flaky sea salt over cheddar and brie.
- Final Check and Serve (1 minute): Step back and check for balance. Fill any gaps with extra crackers or apple slices. Arrange toasted baguette slices and crackers in a basket or on the side. Serve immediately, or cover and refrigerate for up to 2 hours. If refrigerating, let sit at room temperature for 15 minutes before serving.
Notes
Let brie and goat cheese come to room temperature for at least 30 minutes before serving. Toast nuts fresh for best flavor. Toss apple slices in lemon juice to prevent browning. Don’t overcrowd the board; leave about 20% empty for visual breathing room. For a larger crowd, double quantities and use two boards.
Nutrition
- Serving Size: 1 serving (approxima
- Calories: 400
- Sugar: 20
- Sodium: 700
- Fat: 25
- Saturated Fat: 10
- Carbohydrates: 33
- Fiber: 5
- Protein: 16
Keywords: charcuterie board, Friendsgiving, fall fruits, appetizer, cheese board, easy entertaining


