For a while, I just accepted that thumbprint cookies weren’t going to taste like anything more than a sweet little afterthought. They looked charming on cookie trays, sure, but the texture often left me wanting something a bit more satisfying—something chewy, rich, and honestly with a bit more personality. I remember afternoons spent fiddling with jam-filled cookies that just crumbled too easily or felt too dry. It wasn’t that I was in a rush or anything; I just wanted a cookie that could handle a generous dollop of preserves without falling apart, that had a tender chew but wasn’t gummy or sticky. Fig preserves, in particular, seemed like a natural fit, but the versions I tried never really brought out that deep, luscious flavor the fruit deserves.
One day, while pulling out an old jar of fig preserves from the back of the pantry, I started thinking about the perfect chewy texture and the way the jam’s sweetness could balance with a buttery cookie base. That quiet afternoon experiment turned into the cookie recipe I keep coming back to. It’s not flashy, but it’s reliable—the kind of treat that quietly steals the show when you serve it, especially with a cup of tea or coffee. The dough is soft enough to press your thumb into without cracking, and the fig preserves bake down just right, keeping that sticky, fruity heart intact.
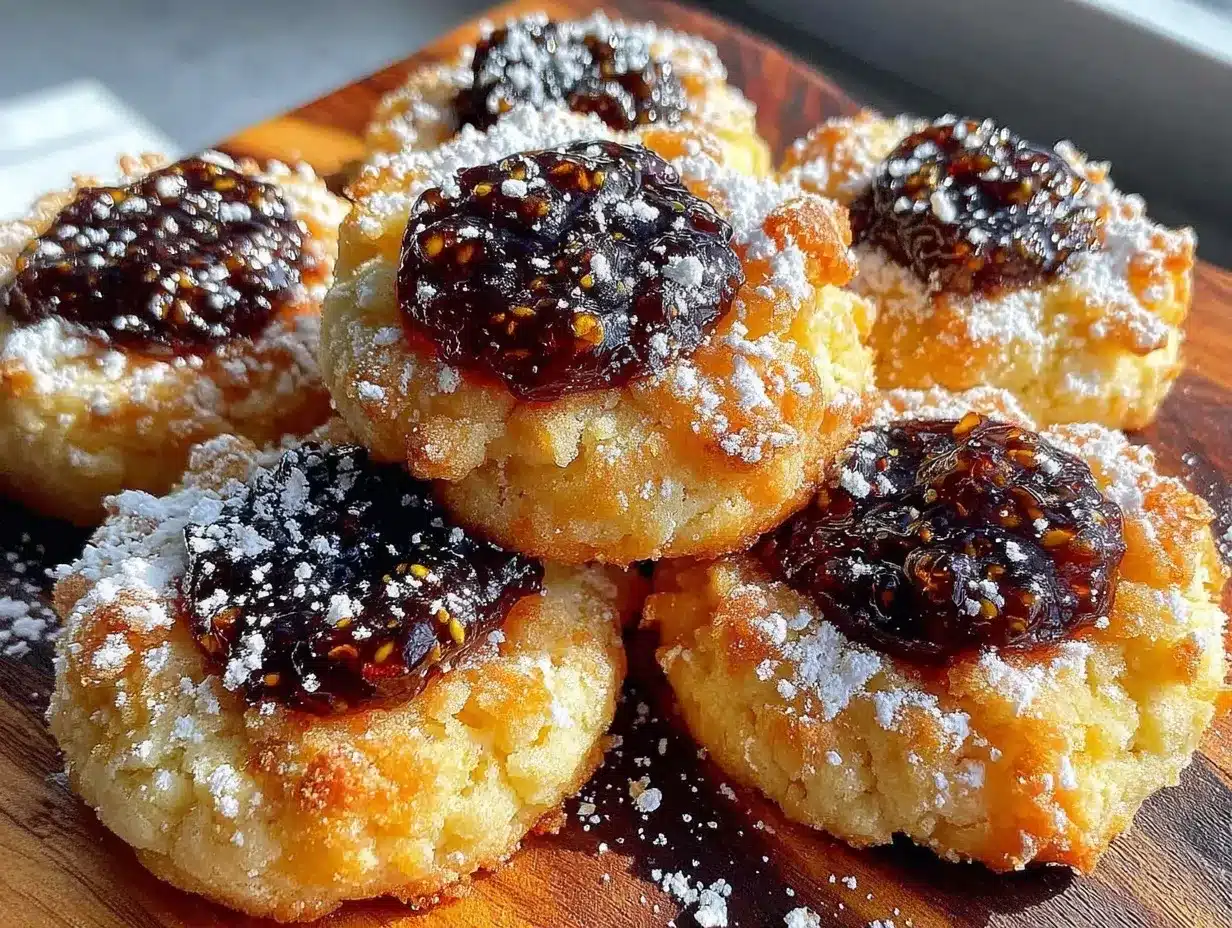
These Irresistible Chewy Fig Preserves Thumbprint Cookies stuck around because they hit that sweet spot between texture and flavor that I thought was missing. They’re the ones I reach for when I want something homemade but fuss-free, the kind of cookie that feels warm and familiar without trying too hard. And honestly, that’s why this recipe has become a quiet favorite in my kitchen—because it fills a little gap I didn’t even realize was there.
Why You’ll Love This Recipe
This recipe isn’t just another thumbprint cookie variety. After several rounds of testing and tweaking, it’s shaped up into something that’s as practical as it is tasty. Here’s why I keep baking these chewy fig preserves thumbprint cookies:
- Quick & Easy: It all comes together in under 30 minutes, perfect for those moments when you want a sweet but don’t want to spend hours baking.
- Simple Ingredients: No need for specialty stores—most ingredients are pantry staples, and the fig preserves add that special touch without extra effort.
- Perfect for Gifting or Sharing: These cookies have a homemade look and feel that’s great for holiday trays, potlucks, or just a thoughtful surprise for neighbors.
- Crowd-Pleaser: They get rave reviews from kids and adults alike—there’s just something about that chewy bite combined with fig’s subtle sweetness.
- Unique Texture & Flavor Balance: Unlike many thumbprint cookies, these stay chewy without becoming tough, and the fig preserves meld beautifully without becoming overly sticky or runny.
What makes this recipe truly stand out is the gentle folding of the dough and the timing of adding the fig preserves before baking, which helps keep that soft texture intact. I’ve even swapped in almond flour once for a gluten-free twist, and it worked surprisingly well, keeping the chewiness intact. It’s not just a cookie; it’s a little moment of comfort, a nostalgic nod with a fresh texture that never feels stale. It’s the kind of cookie that makes you want to close your eyes and savor the bite slowly.
What Ingredients You Will Need
This recipe uses simple, wholesome ingredients to deliver that chewy, buttery texture with a sweet fig center, no fuss necessary. Most of the items are pantry staples, and the fig preserves bring a great seasonal or year-round flavor depending on what you find in the store.
- All-purpose flour (2 cups / 250g) – The base of the cookie, providing structure.
- Unsalted butter (1 cup / 227g), softened – Adds richness and chewiness; I usually pick a good quality brand like Kerrygold for the best flavor.
- Granulated sugar (¾ cup / 150g) – Sweetens the dough without overpowering the fig preserves.
- Brown sugar (¼ cup / 50g), packed – Helps keep the cookies soft and adds subtle caramel notes.
- Large egg (1), room temperature – Binds everything together and adds moisture.
- Vanilla extract (1 teaspoon) – For warmth and depth.
- Baking powder (1 teaspoon) – Gives a gentle rise while keeping the cookie tender.
- Salt (½ teaspoon) – Balances the sweetness and enhances flavor.
- Fig preserves (½ cup / 160g) – The star ingredient; opt for chunky preserves for texture or smooth ones if you prefer a silkier filling.
Substitution tips: You can swap out all-purpose flour for a gluten-free blend if needed, but expect a slight change in texture. If you’re after a dairy-free version, coconut oil works in place of butter, though the flavor shifts a bit. For preserves, any high-quality fruit jam can work, but fig’s naturally rich sweetness and texture make it special here.
Equipment Needed
- Mixing bowls – A medium bowl for dry ingredients and a larger one for creaming butter and sugars.
- Electric mixer or stand mixer – Makes creaming the butter and sugar easier; I’ve done it by hand, but it’s more effort.
- Measuring cups and spoons – For accuracy in baking.
- Baking sheet – A rimmed one is best to prevent cookies from sliding off.
- Parchment paper or silicone baking mat – For easy cleanup and preventing sticking.
- Teaspoon or small spoon – To make the thumbprint indentations and dollop preserves.
- Cooling rack – To let the cookies cool evenly without getting soggy bottoms.
If you don’t have a stand mixer, a hand mixer or even a sturdy wooden spoon will do, just takes a bit more elbow grease. I’ve found silicone baking mats last longer than parchment sheets and are a good investment if you bake cookies often. Also, a small melon baller works nicely to create perfectly sized thumbprints if you want uniformity.
Preparation Method
- Preheat your oven to 350°F (175°C). Line a baking sheet with parchment paper or a silicone baking mat. This prep saves you from a sticky mess later.
- Cream the butter and sugars: In a large bowl, beat together 1 cup softened unsalted butter, ¾ cup granulated sugar, and ¼ cup packed brown sugar until light and fluffy (about 3-4 minutes). This step is crucial for the cookie’s chewy texture.
- Add the egg and vanilla: Crack in 1 large egg and 1 teaspoon vanilla extract, mixing until just combined. The dough will look smooth and shiny here.
- Mix dry ingredients: In a separate bowl, whisk together 2 cups all-purpose flour, 1 teaspoon baking powder, and ½ teaspoon salt. This ensures even distribution of leavening.
- Combine wet and dry: Gradually add the dry ingredients to the wet mixture, stirring with a spatula or mixer on low speed until just combined. Avoid overmixing or the cookies can turn tough.
- Shape the dough: Scoop out dough balls about 1 tablespoon (15g) each and roll them between your palms to form smooth balls. Place them 2 inches apart on the prepared baking sheet.
- Create thumbprints: Use your thumb or the back of a teaspoon to gently press an indentation into the center of each cookie. Don’t press too hard to avoid cracks.
- Add fig preserves: Spoon about ½ teaspoon of fig preserves into each indentation. Be careful not to overfill, or the jam will overflow during baking.
- Bake: Place the tray in the oven and bake for 12-15 minutes, until the edges turn light golden but the centers remain soft. The smell of buttery dough mingling with warm figs is a good sign it’s time.
- Cool: Let the cookies cool on the baking sheet for 5 minutes before transferring them to a wire rack to cool completely. This helps them firm up without drying out.
Quick tip: If your dough feels too soft to shape, pop it in the fridge for 10 minutes before rolling. Also, if you want a shinier jam top, brush preserves lightly with a bit of warm water before baking.
Cooking Tips & Techniques
Making chewy thumbprint cookies might seem straightforward, but a few tricks make all the difference. Honestly, I learned the hard way that overbaking dries these cookies out fast, so keep a close eye during the last few minutes. Pulling them out when the edges are just golden and the centers still look a little underdone guarantees that chewy finish.
When mixing, it’s tempting to throw everything in at once, but beating butter and sugar first creates tiny air pockets that give the cookies their tender crumb. I’ve found that mixing in the flour slowly prevents overworking the dough, which can toughen the cookie. And don’t skip chilling the dough if your kitchen is warm—it keeps the cookies from spreading too much during baking.
Using chunky fig preserves adds a delightful texture contrast, but smooth preserves work if you prefer a uniform jam center. Also, I sometimes sprinkle a pinch of flaky sea salt on top right after baking for an extra flavor pop. It’s subtle but worth trying.
Multitasking tip: While the cookies bake, you can prep a quick beverage or tidy up the kitchen, but resist opening the oven door too often—that sudden temperature drop can affect how the cookies rise and bake.
Variations & Adaptations
These chewy fig preserves thumbprint cookies are pretty flexible, so feel free to tweak them to suit your taste or dietary needs:
- Nutty Twist: Add ½ cup chopped walnuts or pecans to the dough for crunch and a toasty flavor that plays nicely with fig preserves.
- Spiced Version: Stir in ½ teaspoon cinnamon and a pinch of nutmeg to the dry ingredients for a warm, cozy spice note perfect for fall or winter baking.
- Gluten-Free: Swap the all-purpose flour for a 1:1 gluten-free baking blend. I used Bob’s Red Mill gluten-free flour with great results—the cookies stayed chewy and flavorful.
- Dairy-Free: Replace butter with solid coconut oil or a vegan buttery spread. The texture shifts slightly but remains tender and delicious.
- Alternate Jam: While fig preserves are the star here, you can switch to apricot, raspberry, or even orange marmalade if you want a brighter, tangier profile.
I once tried a batch with a swirl of cream cheese in the dough, which added a subtle tang and richness—definitely worth experimenting if you like a layered flavor.
Serving & Storage Suggestions
These chewy thumbprint cookies are best enjoyed at room temperature, letting the fig preserves remain soft and luscious. They make a lovely addition to any cookie tray or dessert plate, especially when paired with a hot cup of tea or coffee for an afternoon pick-me-up.
For parties or casual gatherings, they pair well with cheeses and nuts—think a simple charcuterie board, like the star-shaped cheese cutouts I used for a recent summer get-together. Their sweet chewiness complements savory bites nicely.
Store the cookies in an airtight container at room temperature for up to 5 days. If you want to keep them longer, freeze the baked cookies in a single layer with parchment between layers for up to 3 months. When ready to enjoy, thaw at room temperature or warm gently in the oven for a few minutes to bring back that fresh-baked softness.
Over time, the fig preserves soak slightly into the cookie base, deepening the flavor and melding the textures. This slow flavor development means they can taste even better the next day—though they rarely last that long in my house!
Nutritional Information & Benefits
Each chewy fig preserves thumbprint cookie clocks in around 120-140 calories, depending on the size and amount of preserves used. They provide a modest amount of carbohydrates from the flours and sugars, with a touch of protein and fat from the butter and egg.
Fig preserves add a dose of dietary fiber and natural fruit sugars, making these cookies a slightly more wholesome treat than those loaded purely with processed fillings. The butter offers some fat-soluble vitamins, and the recipe’s simplicity keeps additives to a minimum.
For those watching gluten or dairy, the variations allow for easy adjustments without losing the chewy, satisfying texture. Just be mindful of nut additions if allergies are a concern. Overall, these cookies fit nicely into a balanced diet when enjoyed in moderation—and they’re a great way to satisfy a sweet craving with something homemade and thoughtfully prepared.
Conclusion
These Irresistible Chewy Fig Preserves Thumbprint Cookies have quietly become a staple when I want a simple, no-fuss homemade treat that feels a little special. The chewy texture combined with that rich fig center hits just the right note every time, whether it’s for a casual afternoon snack or a thoughtful gift.
The recipe’s flexibility means you can make it your own, swapping in spices, nuts, or different preserves to keep things interesting. I love how these cookies manage to feel both nostalgic and fresh, a reminder that sometimes the best recipes are the ones you come back to again and again, quietly satisfying that sweet spot in your baking repertoire.
If you try them, I’d love to hear how you customize your batch or what occasion you serve them for. Sharing your tweaks or favorite pairings always makes this little corner of the kitchen feel more connected and fun.
Frequently Asked Questions
Can I use other types of jam instead of fig preserves?
Yes! Apricot, raspberry, or strawberry jams work well. Just choose a thick preserve to prevent spreading during baking.
How do I keep the cookies chewy and not crunchy?
Don’t overbake—remove them when edges are lightly golden but centers are still soft. Also, using brown sugar helps retain moisture.
Can I make the dough ahead of time?
Absolutely. Refrigerate the dough for up to 24 hours before shaping and baking. This can improve flavor and texture.
What if my fig preserves are too runny?
Try reducing them in a small saucepan over low heat to thicken before adding to cookies, or use less jam per cookie.
Are these cookies freezer-friendly?
Yes, you can freeze baked cookies or dough balls. Freeze baked cookies in a single layer, wrapped tightly, for up to 3 months.
Pin This Recipe!

Chewy Fig Preserves Thumbprint Cookies

These chewy thumbprint cookies feature a buttery base with a rich, luscious fig preserves center, offering a perfect balance of texture and flavor. Ideal for gifting, sharing, or a cozy homemade treat.
- Prep Time: 15 minutes
- Cook Time: 15 minutes
- Total Time: 30 minutes
- Yield: 24 cookies 1x
- Category: Dessert
- Cuisine: American
Ingredients
- 2 cups all-purpose flour (250g)
- 1 cup unsalted butter, softened (227g)
- 3/4 cup granulated sugar (150g)
- 1/4 cup packed brown sugar (50g)
- 1 large egg, room temperature
- 1 teaspoon vanilla extract
- 1 teaspoon baking powder
- 1/2 teaspoon salt
- 1/2 cup fig preserves (160g)
Instructions
- Preheat your oven to 350°F (175°C). Line a baking sheet with parchment paper or a silicone baking mat.
- In a large bowl, beat together softened unsalted butter, granulated sugar, and brown sugar until light and fluffy, about 3-4 minutes.
- Add the egg and vanilla extract to the butter mixture and mix until just combined.
- In a separate bowl, whisk together all-purpose flour, baking powder, and salt.
- Gradually add the dry ingredients to the wet mixture, stirring on low speed until just combined. Avoid overmixing.
- Scoop out dough balls about 1 tablespoon (15g) each and roll them between your palms to form smooth balls. Place them 2 inches apart on the prepared baking sheet.
- Use your thumb or the back of a teaspoon to gently press an indentation into the center of each cookie without cracking.
- Spoon about 1/2 teaspoon of fig preserves into each indentation, being careful not to overfill.
- Bake for 12-15 minutes, until edges are light golden but centers remain soft.
- Let the cookies cool on the baking sheet for 5 minutes, then transfer to a wire rack to cool completely.
Notes
Do not overbake to keep cookies chewy; remove when edges are golden and centers still soft. Chill dough for 10 minutes if too soft to shape. For shinier jam tops, brush preserves lightly with warm water before baking. Optionally sprinkle flaky sea salt on top after baking for extra flavor.
Nutrition
- Serving Size: 1 cookie
- Calories: 130
- Sugar: 11
- Sodium: 90
- Fat: 7
- Saturated Fat: 4
- Carbohydrates: 18
- Fiber: 1
- Protein: 2
Keywords: thumbprint cookies, fig preserves, chewy cookies, homemade cookies, easy cookie recipe, holiday cookies, fig jam cookies


