The crackle. That’s what gets me every single time. Not the taste first—though that follows fast—but the sound of a preschooler biting into a frozen piece of yogurt bark and the way their eyes go wide for a split second before they chew. I didn’t set out to make a snack that sounded like stepping on a perfect autumn leaf. I set out to survive a Tuesday afternoon.
It was one of those afternoons where my three-year-old had rejected every single thing I offered. The cheese stick sat abandoned. The apple slices might as well have been rocks. And I was this close to just handing over a bag of crackers when I remembered the tub of Greek yogurt in the fridge and the bag of frozen blueberries lurking in the back of the freezer. I’d seen those smoothie bowl videos floating around social media, the ones where people swirl yogurt into art, but honestly? I had neither the patience nor the talent. What I did have was a sheet pan, some parchment paper, and a desperate need for something—anything—that would get this kid to eat.
So I spread the yogurt thin, scattered the blueberries, and froze the whole thing. An hour later, I broke it into jagged pieces and placed one in front of my daughter. She picked it up, studied it like a tiny archaeologist examining a fossil, and then—crack. She bit down. She smiled. She grabbed another piece. And just like that, the Easy 3-Ingredient Yogurt Bark for Preschoolers was born. Not from a cookbook. Not from a food blog. From a Tuesday and a tired mom who needed a win.
Why You’ll Love This Recipe
Let me tell you why this little snack has become a staple in our house—and why I think it’ll become one in yours too.
- Three Ingredients. That’s it. Yogurt, fruit, and a little sweetness. No strange powders, no complicated steps, no grocery store scavenger hunt. You probably have everything right now.
- Takes 5 Minutes of Actual Work. I’m not exaggerating. Spread, sprinkle, freeze. That’s the whole process. The freezer does the heavy lifting.
- Preschooler-Approved Texture. That crackle I mentioned? Kids love it. It’s like a chip but made of yogurt. Cold, creamy, and satisfying in a way that room-temperature snacks just aren’t.
- Actually Good for Them. We’re talking protein from the yogurt, vitamins from the fruit, and zero artificial anything. You can feel good about handing over a handful of these.
- Endlessly Adaptable. I’ve made this with strawberries, mango, even a drizzle of peanut butter. It never gets boring, and it never stops being a hit.
What makes this different from every other yogurt bark recipe out there? Honestly, it’s the simplicity. Most recipes want you to swirl in honey, layer in granola, drizzle chocolate. And those are delicious—don’t get me wrong. But for a preschooler’s snack? Less is more. This version strips away the fuss and leaves you with something pure and genuinely kid-friendly. It’s the kind of snack that makes you feel like a good parent without spending an hour in the kitchen.
This recipe is comfort food for the lunchbox set. It’s the snack that makes your kid feel like they’re getting a treat while you know they’re getting something nourishing. And honestly? That feeling never gets old.
What Ingredients You Will Need
This recipe uses three simple ingredients to create something that feels way more special than it has any right to be. Here’s what you’ll need and why each one matters.
- Greek Yogurt (2 cups, plain or vanilla) — This is the backbone of the whole operation. Greek yogurt gives you that thick, creamy base that freezes beautifully without turning into a block of ice. I prefer full-fat for the best texture and to keep little bellies full longer, but 2% works too. If you use plain, you’ll want to add a little sweetener (see below). My go-to brand is Fage or Stonyfield—they’re thick enough to spread without being watery.
- Mixed Berries (1 cup, fresh or frozen) — Blueberries, raspberries, chopped strawberries, or a mix. Frozen berries work perfectly here and actually help the bark freeze faster. If using fresh, just make sure they’re dry so they don’t make the yogurt watery. I usually grab a bag of frozen mixed berries from Costco and keep it in the freezer specifically for this recipe.
- Honey or Maple Syrup (1-2 tablespoons, optional but recommended) — If you’re using plain yogurt, you’ll want a little sweetness to balance the tartness. Honey is my personal favorite because it blends smoothly, but maple syrup works great too, especially if you’re serving this to a baby under one (honey isn’t safe for infants). You can also skip it entirely if you’re using vanilla yogurt or if your kid prefers a tangier flavor.
That’s genuinely it. Three ingredients, no hidden surprises. You can also add a tiny pinch of vanilla extract if you’re feeling fancy, but honestly? It’s not necessary. The fruit does the heavy lifting on flavor.
One quick note on yogurt selection: avoid Greek yogurt that has added gelatin or thickeners—they can create a weird texture when frozen. Stick with simple, strained yogurt. The ingredient list should say “cultured milk” and not much else.
Equipment Needed
You don’t need much here, which is part of the beauty. Here’s what you’ll want to have on hand:
- Baking Sheet (half-sheet size, 13×18 inches) — A standard baking sheet gives you plenty of room to spread the yogurt thin. If you only have a smaller one, just make two batches or spread it a little thicker.
- Parchment Paper — Non-negotiable. Without it, your yogurt bark will stick to the pan and you’ll spend ten minutes chipping it off with a spatula. Parchment paper makes removal effortless.
- Spatula or Offset Spatula — For spreading the yogurt into an even layer. An offset spatula is nice but not required; the back of a spoon works perfectly fine.
- Freezer — Obviously. You’ll need a flat surface in your freezer where the baking sheet can sit undisturbed for at least 2 hours.
- Sharp Knife or Your Hands — For breaking the bark into pieces once it’s frozen. I honestly prefer using my hands—it gives you more control over the size of the pieces and feels oddly satisfying.
That’s the whole list. No food processor. No blender. No special molds. Just basic kitchen equipment that you almost certainly already own.
Preparation Method
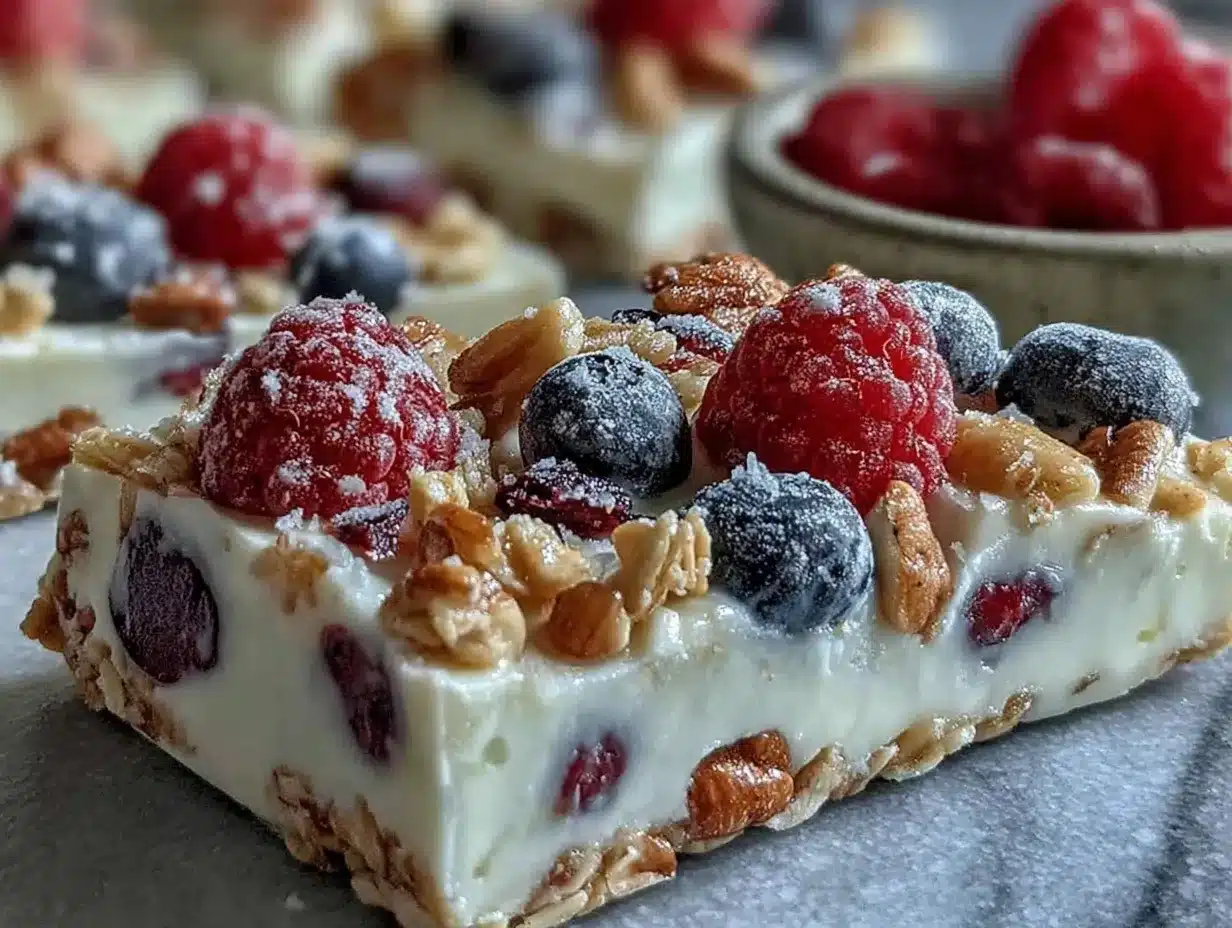
- Line your baking sheet with parchment paper. Make sure the paper lies flat and extends slightly up the edges if possible. This prevents any yogurt from sneaking underneath. Press out any air bubbles so you get a smooth surface.
- Stir your yogurt. If you’re using plain yogurt, stir in your honey or maple syrup now. Taste it—it should be slightly sweeter than you want the final product to be because freezing dulls sweetness a little. If it tastes perfect at this stage, it’ll be a tiny bit tart after freezing, which is fine for some kids but not all.
- Spread the yogurt onto the parchment paper. Use your spatula to spread it into an even rectangle, about ¼ inch thick. Don’t go thinner than that or the bark will be too fragile. Don’t go thicker or it’ll take forever to freeze and be harder to bite through. Aim for a smooth, even layer. It doesn’t have to be perfect—rustic edges are part of the charm.
- Scatter the berries over the yogurt. Press them gently into the surface so they’re partially submerged. If you’re using larger berries like strawberries, chop them into small pieces first. For blueberries and raspberries, leave them whole. Distribute them evenly so every piece of bark gets some fruit.
- Place the baking sheet in the freezer. Make sure it’s on a flat, level surface. Freeze for at least 2 hours, but 3-4 is better if you have the time. The bark should be completely solid—when you tap it, it should feel hard, not bendy.
- Remove from the freezer and break into pieces. Lift the parchment paper off the baking sheet. Place the frozen yogurt sheet on a cutting board. Use your hands to break it into irregular pieces, or use a sharp knife to cut it into squares or rectangles. I like irregular shapes because they feel more natural and kid-friendly.
- Transfer to a freezer-safe container. Layer the pieces between sheets of parchment paper so they don’t stick together. Store in the freezer until ready to serve.
Pro tip from personal experience: Don’t let the bark sit out at room temperature for more than a minute or two before serving. It starts to soften quickly, and while it’s still delicious, it loses that satisfying crackle. Serve it straight from the freezer for the best texture.
Cooking Tips & Techniques
I’ve made this recipe probably fifty times by now, and I’ve learned a few things the hard way. Here are my best tips so you don’t have to make the same mistakes I did.
Don’t over-sweeten. The first time I made this, I added three tablespoons of honey because I thought my kid would need it to be candy-sweet. She ate one piece and made a face. Turns out, kids actually like the tanginess of yogurt—especially when it’s balanced by the natural sweetness of berries. Start with one tablespoon and adjust from there.
Press the fruit in gently. If you just scatter berries on top without pressing them in, they’ll fall off when you break the bark. You’ll end up with a pile of frozen berries and a pile of plain yogurt pieces. Press them just enough so they’re anchored in the yogurt but not so deep that they disappear.
Use a thin, even layer. Thicker spots take longer to freeze and create uneven texture. I use the back of my offset spatula to smooth everything out, but a regular spoon works too. If you see thin spots, patch them with a little extra yogurt.
Freeze on a flat surface. I once put my baking sheet in the freezer on top of a bag of frozen peas. The uneven surface meant the yogurt pooled to one side, and I ended up with bark that was paper-thin on one end and half-inch thick on the other. Lesson learned.
Break it while it’s cold. If the bark starts to soften while you’re breaking it, pop it back in the freezer for 10 minutes. Warm bark doesn’t break cleanly—it squishes and cracks in weird places. Cold bark breaks with a satisfying snap.
Variations & Adaptations
One of the best things about this recipe is how easy it is to change up. Here are some of my favorite variations.
Dairy-Free Version: Use coconut yogurt or a thick almond milk yogurt instead of Greek yogurt. Just make sure it’s a thick variety—thin yogurts won’t freeze well and will leave you with icy, watery bark. I like Cocojune or Siggi’s plant-based for the best texture.
Tropical Twist: Swap the berries for diced mango, kiwi, and a sprinkle of shredded coconut. This version feels like a vacation in snack form. My daughter calls it “island bark” and requests it whenever we’re stuck inside on a rainy day.
Peanut Butter Swirl: Warm up a tablespoon of peanut butter (or any nut butter) until it’s drizzle-able, then swirl it into the yogurt before freezing. Add sliced banana on top for a classic flavor combo. Just be mindful of nut allergies if you’re making this for a school snack.
Chocolate Lover’s Version: Stir a tablespoon of unsweetened cocoa powder into the yogurt before spreading. Top with raspberries or sliced strawberries. The tart fruit balances the rich chocolate perfectly. My husband, who claims he doesn’t like yogurt, will eat an entire batch of this version in one sitting.
Freeze-Dried Fruit Option: If you don’t have fresh or frozen berries, crush up some freeze-dried fruit and sprinkle it over the yogurt. It rehydrates slightly as it freezes and creates a fun, crunchy texture. This is great for camping or travel when fresh fruit isn’t available.
Serving & Storage Suggestions
This yogurt bark is best served straight from the freezer. I like to pull out a few pieces at a time and let them sit for about 30 seconds before handing them to my daughter. That brief thaw makes them easier to bite without being mushy.
For presentation, arrange the pieces on a small plate or in a little bowl. Kids love the irregular shapes—it makes the snack feel more like a treat than a structured meal. You can also stack them in a small container for a lunchbox addition, though they’ll soften a bit by lunchtime if you don’t add an ice pack.
Storage: Keep the bark in a freezer-safe container or zip-top bag. Layer pieces between sheets of parchment paper to prevent them from sticking together. Properly stored, the bark will keep for up to 3 months. After that, the texture starts to degrade and the yogurt can develop ice crystals.
Reheating: You don’t reheat this—it’s meant to be eaten frozen. But if you accidentally leave it out and it thaws completely, don’t throw it away. Let it thaw fully in the fridge, then eat it like a yogurt parfait. The texture will be different, but the flavor is still great.
One thing I’ve noticed: the flavors actually meld together a bit after a day or two in the freezer. The berries release a little juice into the surrounding yogurt, creating these beautiful swirls of color and flavor. I actually prefer the bark on day two for that reason.
Nutritional Information & Benefits
Let’s talk about why this snack is actually good for your preschooler—not just “not bad,” but genuinely beneficial.
Estimated Nutrition (per ¼ of recipe):
- Calories: 85-100
- Protein: 8-10g
- Fat: 4-5g (from full-fat yogurt)
- Carbohydrates: 12-15g
- Fiber: 1-2g
- Sugar: 8-10g (mostly from fruit and a touch of honey)
Greek yogurt is packed with protein, which helps keep little ones full and focused—crucial for those long preschool mornings. It also contains probiotics for gut health and calcium for growing bones. The berries add antioxidants, vitamin C, and fiber. And because you’re controlling the sweetener, you’re avoiding the added sugars found in most packaged kids’ snacks.
Dietary Notes: This recipe is naturally gluten-free and vegetarian. For a dairy-free version, use coconut yogurt. For a nut-free version, skip any nut butter swirls. For babies under one, use maple syrup instead of honey.
I’m not a nutritionist, but I’ve done enough label-reading to know that this snack beats the pants off most store-bought options. And honestly? Even if it weren’t packed with good stuff, I’d still make it because my kid actually eats it without a fight. That’s a win in my book.
Conclusion
Look, I know there are a million snack recipes out there. I’ve tried more than my fair share, and most of them end up in the back of my fridge, forgotten and sad. But this Easy 3-Ingredient Yogurt Bark for Preschoolers? It stuck. Not because it’s fancy or trendy or photo-ready for Instagram (though it does photograph pretty nicely, I’ll admit). It stuck because it works. It’s fast, it’s flexible, and it makes my kid happy.
I love that I can make a batch on Sunday afternoon and have snacks ready for the entire week. I love that I can throw in whatever fruit is about to go bad and call it intentional. And I really love watching my daughter’s face light up when she sees me pull the baking sheet out of the freezer. She knows what’s coming.
So give it a try. Use whatever yogurt you have. Scatter whatever fruit is in your fridge. Adjust the sweetness to your kid’s taste. Make it your own. And then come back and tell me how it went. I genuinely want to hear about your version—the good, the messy, and the delicious.
Happy snacking, friends. You’ve got this.
Frequently Asked Questions
Can I use regular yogurt instead of Greek yogurt?
You can, but the texture will be different. Regular yogurt has a higher water content, which means it’ll freeze into a more icy, less creamy bark. If you only have regular yogurt, strain it through a cheesecloth or fine-mesh sieve for a few hours first to remove some of the liquid. It won’t be quite as thick as Greek yogurt, but it’ll work in a pinch.
How long does yogurt bark last in the freezer?
Properly stored in an airtight container with parchment paper between layers, yogurt bark will stay good for up to 3 months. After that, it can develop ice crystals and lose some of its creamy texture. I usually make a batch and we finish it within two weeks, so I’ve never had it go bad.
Can I add granola or other crunchy toppings?
Absolutely! Just be aware that granola will soften as it freezes and thaws. If you want crunchy toppings, add them right before serving rather than freezing them into the bark. I sometimes sprinkle crushed freeze-dried fruit or a few cacao nibs on top after breaking the bark for a little extra texture.
Is this safe for babies under one year old?
Yes, with one important modification: replace honey with maple syrup or simply skip the sweetener entirely. Honey isn’t safe for infants under 12 months due to the risk of botulism. Also, make sure the fruit pieces are small enough to prevent choking. I’d recommend mashing the berries slightly for younger babies.
Can I make this with flavored yogurt?
You can, but watch the sugar content. Many flavored yogurts have a surprising amount of added sugar—sometimes 12-15 grams per serving. If you use flavored yogurt, skip the extra sweetener and just use plain fruit. Vanilla yogurt is a good middle ground if you want a little sweetness without going overboard.
If you’re looking for more easy, kid-friendly snacks, you might enjoy our no-bake peanut butter energy balls for another quick option, or our nut-free sunflower butter granola bars for a school-safe alternative. Both are just as simple and just as loved in our house.
Pin This Recipe!
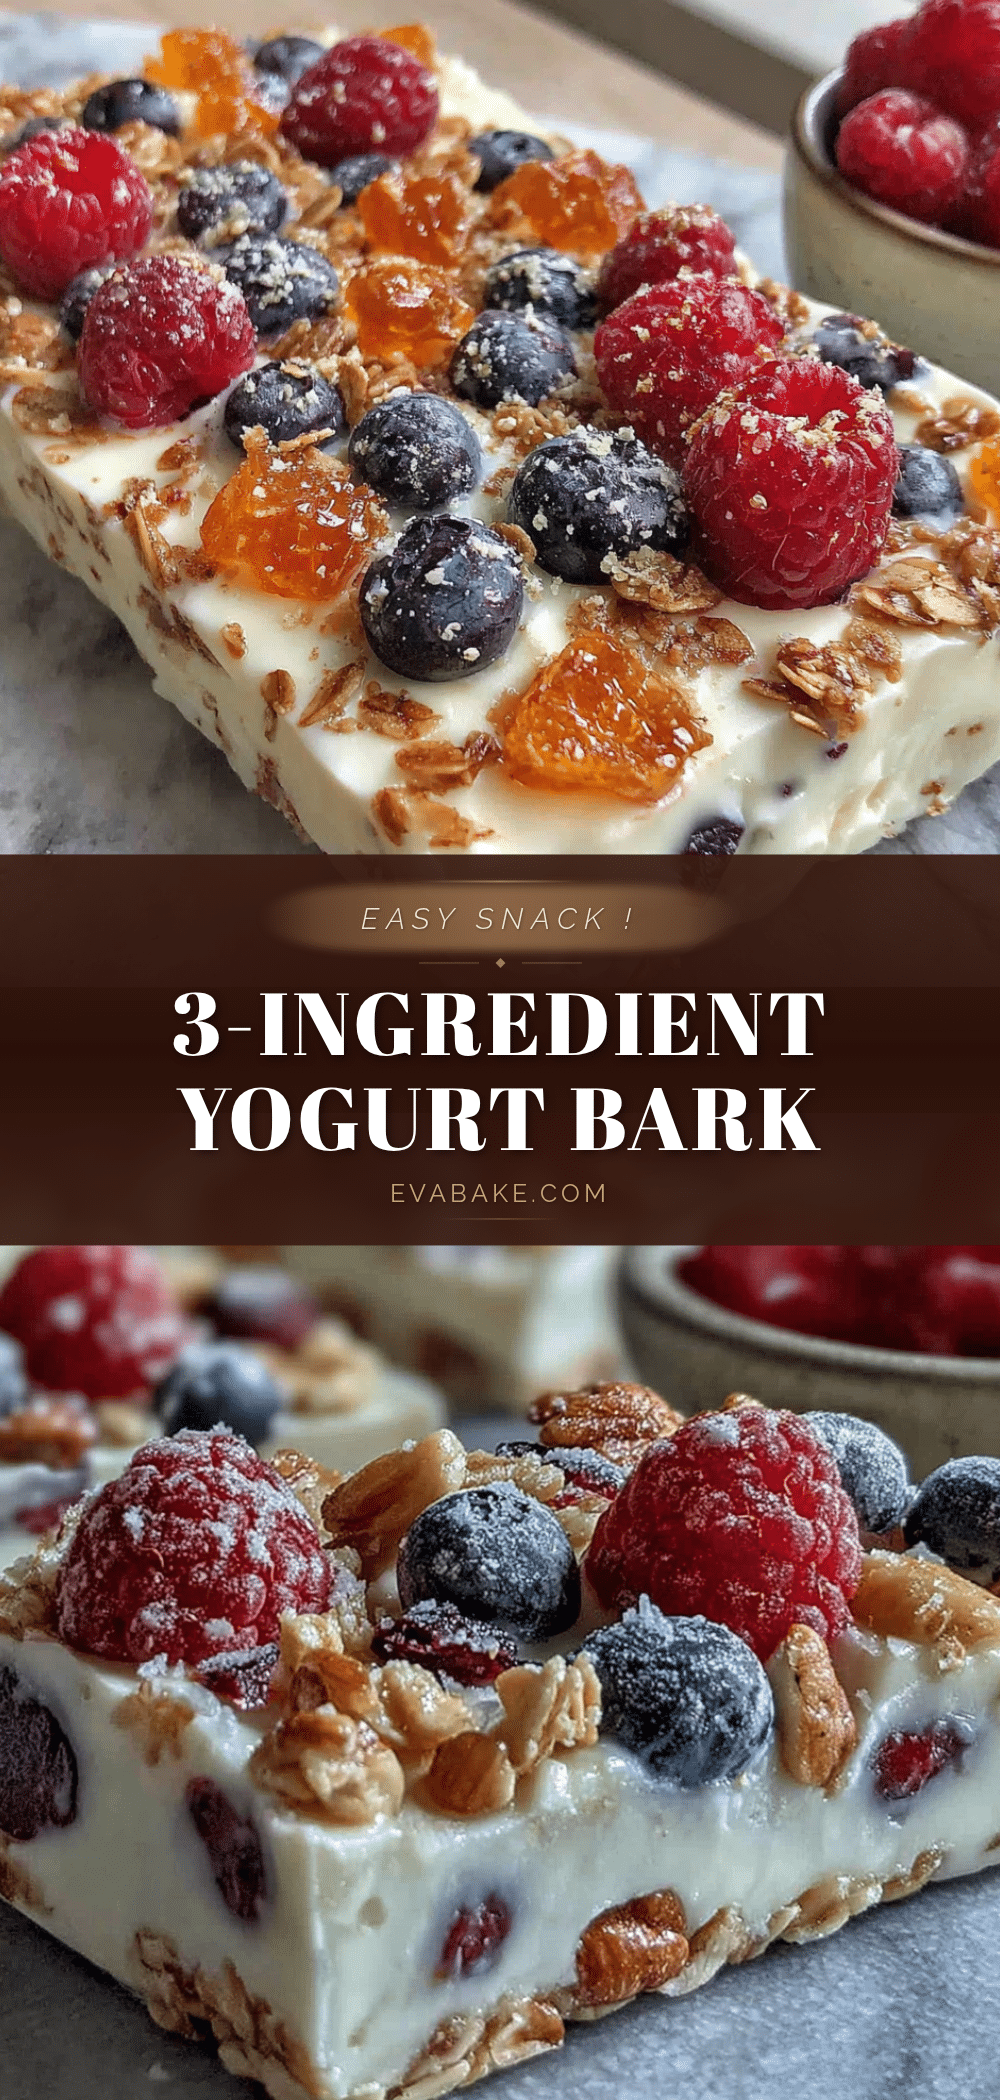
Easy 3-Ingredient Yogurt Bark for Preschoolers
A simple, healthy frozen yogurt bark made with just three ingredients. Perfect for a quick preschooler snack that’s both nutritious and delicious.
- Prep Time: 5 minutes
- Cook Time: 0 minutes
- Total Time: 2 hours 5 minutes (includes freezing time)
- Yield: 4 servings 1x
- Category: Snack
- Cuisine: American
Ingredients
- 2 cups Greek yogurt (plain or vanilla)
- 1 cup mixed berries (fresh or frozen)
- 1–2 tablespoons honey or maple syrup (optional, recommended for plain yogurt)
Instructions
- Line a baking sheet with parchment paper, ensuring it lies flat and extends slightly up the edges.
- If using plain yogurt, stir in honey or maple syrup. Taste and adjust sweetness as needed.
- Spread the yogurt onto the parchment paper into an even rectangle, about 1/4 inch thick.
- Scatter the berries over the yogurt, pressing them gently into the surface so they are partially submerged.
- Place the baking sheet in the freezer on a flat, level surface. Freeze for at least 2 hours, preferably 3-4 hours, until completely solid.
- Remove from the freezer and lift the parchment paper off the baking sheet. Break the frozen yogurt into irregular pieces using your hands or a sharp knife.
- Transfer the pieces to a freezer-safe container, layering them between sheets of parchment paper to prevent sticking. Store in the freezer until ready to serve.
Notes
Serve straight from the freezer for the best crackle texture. Don’t let it sit at room temperature for more than a minute or two. For babies under one year, use maple syrup instead of honey. For dairy-free, use thick coconut yogurt or almond milk yogurt.
Nutrition
- Serving Size: 1/4 of recipe
- Calories: 85100
- Sugar: 810
- Sodium: 5070
- Fat: 45
- Saturated Fat: 23
- Carbohydrates: 1215
- Fiber: 12
- Protein: 810
Keywords: yogurt bark, healthy snack, preschooler snack, easy snack, 3-ingredient, frozen yogurt, kid-friendly


