The school Halloween party was in six hours and I’d completely forgotten. My son had reminded me three times that week — I even wrote it on the calendar in red pen. But there it was, 9 AM on party day, and I was staring into a pantry that contained exactly: one package of Oreos, a bag of semi-sweet chocolate chips, and some butter. Everyone else would be bringing elaborate skeleton cakes and pumpkin-shaped cookies they’d spent days decorating. I had a mini panic attack right there in my kitchen, clutching that Oreo package like it was a lifeline. Honestly, I almost just stopped at the store for cupcakes on the way.
But then I remembered these Halloween Dirt Cups my aunt made one year — the ones with the crushed Oreos that look exactly like potting soil. I had most of the stuff already, and the gummy worms were something I could grab at the corner store. So I threw it together in about fifteen minutes, layered everything in some clear plastic cups I found under the sink, and ran out the door. Let me tell you, when I walked into that classroom with my little cups of “dirt,” I felt so underdressed compared to the elaborate treats on the snack table. Then the kids went absolutely wild for them. Like, fighting over who got the most gummy worms wild. The teacher asked me for the recipe before I even left the parking lot.
That’s the thing about these Easy Halloween Dirt Cups — they look like you spent way more time than you actually did. The crushed Oreo crumbs really do look like fresh dirt, and when you poke those gummy worms up through the chocolate pudding, it’s just gross enough to be perfect for Halloween. I’ve been making them every year since, and they never fail to be the first thing to disappear. Maybe you’ve been there — scrambling for a last-minute treat that doesn’t look last-minute. This one’s for you.
Why You’ll Love This Recipe
Let me be real with you — I’ve tested a lot of Halloween treats over the years, and these dirt cups win every single time. Here’s why they’ve become my go-to for every spooky gathering:
- Ready in 15 Minutes: I mean it. From start to finish, you can have these assembled and in the fridge in the time it takes to watch one episode of a sitcom. Perfect for those “oh no, the party is today” moments we all have.
- No Baking Required: Zero oven time. No waiting for things to cool. Just mix, layer, and chill. This is practically a no-cook recipe, which is a lifesaver when you’re short on time or energy.
- Simple Pantry Ingredients: You probably already have most of this stuff. Oreos, chocolate pudding mix, milk, and cream cheese are all things I usually have on hand. The gummy worms are the only special purchase, and you can find them at any grocery store during October.
- Kid-Approved & Parent-Approved: My kids beg for these all year round, not just at Halloween. And as a parent, I love that I can make them with the kids — it’s a fun activity that doesn’t require a lot of supervision.
- Perfect for Parties & Potlucks: These individual servings are so easy to transport and serve. No slicing, no plates needed — just grab a cup and go. They’re always the first thing to run out at school parties and neighborhood gatherings.
What makes these different from other dirt cup recipes is the texture. I spent a few batches getting it just right — the Oreo crumbs need to be fine enough to look like real dirt but not so fine they turn into paste. And the pudding layer? It’s perfectly creamy, not too thick or too runny. The cream cheese in the pudding mix is my secret trick — it adds a richness that makes these taste way more fancy than they are. Trust me, once you try this version, you won’t go back to the boxed pudding alone.
What Ingredients You Will Need
This recipe uses simple, everyday ingredients to create something that looks impressively spooky. Most of these are pantry staples, so you might not even need a grocery run.
For the Chocolate Pudding Layer:
- 1 (3.9 oz) box instant chocolate pudding mix (I prefer Jell-O brand for consistent texture)
- 2 cups cold milk (whole milk gives the richest result, but 2% works great too)
- 4 oz cream cheese, softened (this is my secret ingredient — adds richness and helps the pudding set up firmer)
- 1/4 cup powdered sugar (to sweeten the cream cheese just a touch)
For the Dirt Layer:
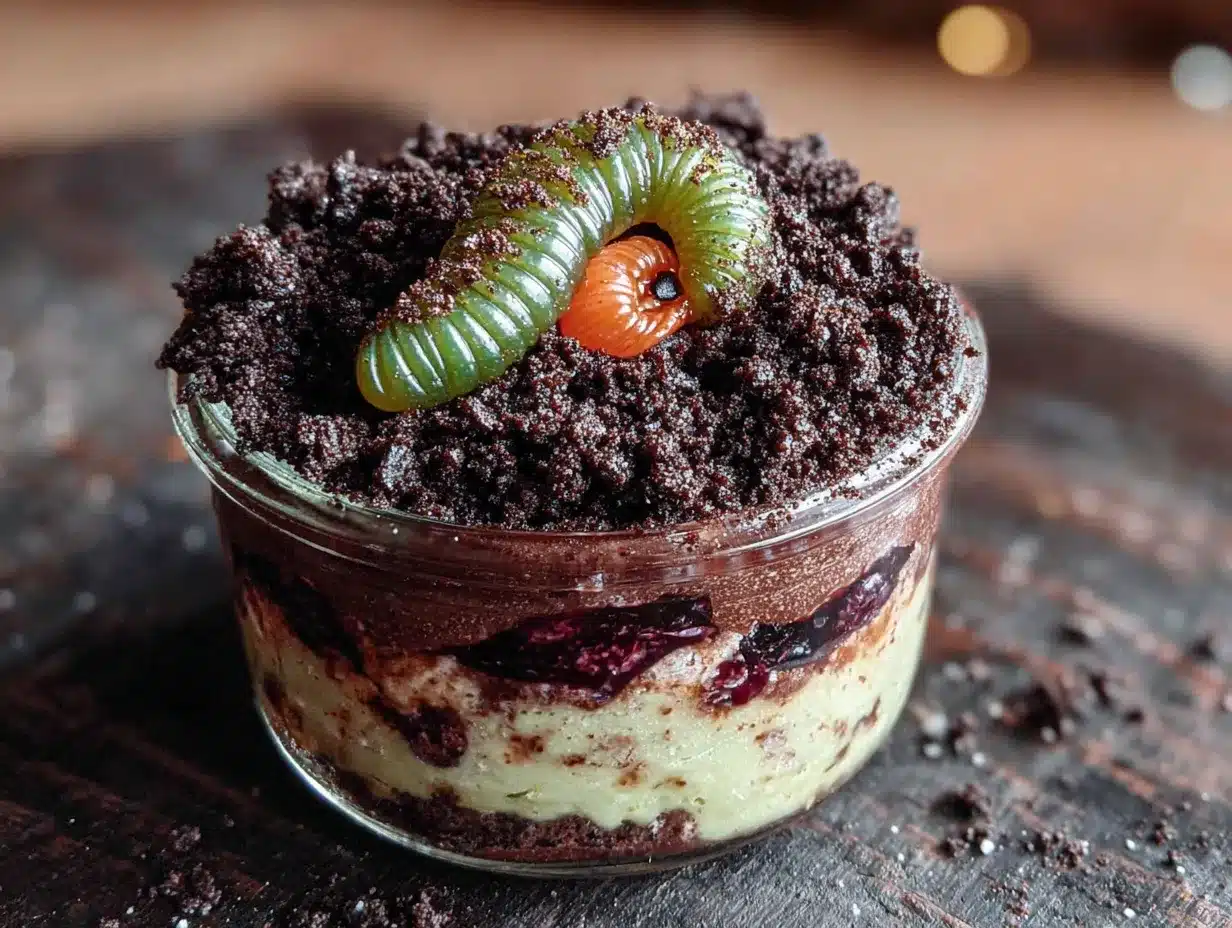
- 1 (14.3 oz) package Oreo cookies (about 36 cookies — regular, not double stuff for easier crushing)
- 2 tablespoons melted butter (optional, but helps the crumbs clump together like real soil)
For the Decoration:
- 1 bag gummy worms (about 20-24 worms, depending on how many cups you make)
- Optional: green-tinted shredded coconut for “grass” effect
- Optional: small plastic spiders or tombstones for extra spooky vibes
Let me talk about the Oreos for a second. I’ve tried this with generic chocolate sandwich cookies, and honestly, they just don’t crush the same way. Oreos have that perfect crumb structure that looks exactly like dark, rich soil. You want the kind that crumbles into small, dark pieces with little white flecks from the cream — that’s what makes the “dirt” look so realistic.
For the pudding, instant is non-negotiable here. Cook-and-serve pudding won’t set up properly in the fridge in time, and you’ll end up with soupy cups. I’ve made that mistake exactly once, and it was not pretty. The cream cheese is optional but highly recommended — it gives the pudding a slight tang that balances the sweetness of the Oreos perfectly. If you’re dairy-free, you can use a dairy-free cream cheese alternative and non-dairy milk, but the texture will be slightly less firm.
As for the gummy worms, get the sour kind if you can. The tanginess cuts through all the sweetness and adds a nice little surprise. My kids love the ones that are half-green, half-red — they look extra worm-like poking out of the dirt.
Equipment Needed
You don’t need anything fancy for these Halloween Dirt Cups, which is part of why I love them so much. Here’s what you’ll need:
- 8 small clear plastic cups or glass jars (I use 8-ounce cups — the clear ones let you see the layers, which is half the fun)
- Food processor or zip-top bag and rolling pin (for crushing the Oreos — I’ve used both methods, and the bag and rolling pin is actually more fun for kids)
- Electric hand mixer or stand mixer (for beating the cream cheese and pudding — you can do it by hand, but your arm will get tired)
- Medium mixing bowls (two — one for the pudding, one for the Oreo crumbs)
- Rubber spatula (for scraping every last bit of pudding into the cups)
- Measuring cups and spoons
If you don’t have a food processor, don’t worry. Put the Oreos in a large zip-top bag, squeeze out the air, and let your kids go to town with a rolling pin. It’s a great way to get their energy out and involves them in the process. Just make sure the bag doesn’t have any holes — speaking from experience, Oreo dust all over the kitchen floor is not fun to clean up.
For the cups, I recommend clear plastic ones because they’re cheap, disposable, and you can see the layers. But any small glass jar or even a mason jar works beautifully. I’ve used little mason jars for Halloween parties before, and they look adorable tied with a bit of orange ribbon.
Preparation Method
Alright, let’s get these spooky treats made. I promise, this is the easiest Halloween recipe you’ll make all season.
-
Crush the Oreos. Place the entire package of Oreos (cream filling and all) in your food processor. Pulse until you have fine, dark crumbs that look like potting soil. If you’re using the bag method, put the cookies in a large zip-top bag and crush them with a rolling pin until they’re evenly broken into small pieces. You want some variety in texture — a few slightly larger chunks are fine, as real dirt isn’t perfectly uniform. Set the crumbs aside in a bowl.
-
Make the cream cheese base. In a medium mixing bowl, beat the softened cream cheese with the powdered sugar until it’s smooth and fluffy — about 2 minutes with an electric mixer. Make sure your cream cheese is truly softened to room temperature, or you’ll end up with little white lumps in your pudding. I learned this the hard way when I was rushing one year.
-
Prepare the pudding. In another bowl, whisk the instant chocolate pudding mix with the cold milk for about 2 minutes until it starts to thicken. It should be smooth and glossy. Then fold the cream cheese mixture into the pudding until it’s fully combined. Don’t overmix, or the pudding can get a little thin. The mixture should be thick and creamy.
-
Layer the cups. This is where the fun begins. Start with a layer of Oreo crumbs at the bottom of each cup — about 2 tablespoons each. Press it down gently with the back of a spoon. This creates a solid “dirt” base. Then spoon the chocolate pudding mixture on top, filling each cup about two-thirds full. You want enough room for the top layer of crumbs.
-
Add the top dirt layer. Sprinkle another generous layer of Oreo crumbs on top of the pudding. This should completely cover the chocolate layer so it looks like a cup of dirt. Use about 2-3 tablespoons per cup. Don’t press this layer down — you want it to look loose and crumbly, like fresh soil.
-
Insert the gummy worms. Here’s the creepy part. Take 2-3 gummy worms per cup and gently push them into the top layer of crumbs. Some should be barely poking out, as if the worms are crawling out of the dirt. Others can be partially buried, with just a tail end visible. This is where you can get creative — make it look as gross and worm-infested as you like!
-
Chill before serving. Place the cups in the refrigerator for at least 30 minutes before serving. This allows the pudding to set completely and the Oreo crumbs to soften just slightly, mimicking the texture of real dirt. They’re best within 4 hours of assembly, but they’ll keep in the fridge for up to 2 days.
A quick note on timing: if you’re making these for a party, you can absolutely prep everything ahead of time. Crush the Oreos and make the pudding the night before, then assemble the cups the day of. Just keep the Oreo crumbs and pudding separate until you’re ready to layer — if you assemble them too far in advance, the crumbs can get soggy.
Cooking Tips & Techniques
After making these Halloween Dirt Cups for every party, school event, and playdate for the past five years, I’ve picked up a few tricks that make a big difference.
Don’t overcrush the Oreos. This was my biggest mistake early on. I wanted the crumbs to be super fine, like actual dirt, so I pulsed the food processor way too long. The result was a paste that looked more like mud than dirt. You want some texture — small pieces of cookie with visible white flecks from the cream. Think garden soil, not potting mix from a bag.
Use room temperature cream cheese. I cannot stress this enough. Cold cream cheese will leave lumps in your pudding that no amount of mixing will fix. Let it sit on the counter for at least 30 minutes before you start. If you’re in a hurry, you can microwave it for about 10 seconds, but watch it carefully — you don’t want melted cream cheese.
Chill the pudding before layering. If you have time, let the pudding mixture sit in the fridge for about 10 minutes before you start assembling. It thickens up just enough that it won’t run into the Oreo crumbs and make everything muddy. This is a pro tip I picked up from a pastry chef friend, and it makes the layers so much cleaner.
Make extra Oreo crumbs. I always crush more than I think I need. Kids love sneaking extra “dirt” on top, and having a little bowl of extra crumbs on the side lets them customize their cups. Plus, leftover Oreo crumbs are amazing on ice cream or yogurt.
Use clear cups. This seems obvious, but the visual effect of seeing the layers — the dark dirt, the creamy pudding, the worms poking through — is half the appeal. I’ve seen people use opaque cups, and it just doesn’t have the same spooky impact.
Variations & Adaptations
One of the best things about this recipe is how easy it is to change up. Here are some variations I’ve tried over the years:
Peanut Butter Dirt Cups: Add 1/4 cup creamy peanut butter to the cream cheese mixture before mixing in the pudding. It adds a salty-sweet depth that’s absolutely incredible. Just make sure no one at your party has peanut allergies.
Vegan Version: Use dairy-free cream cheese, non-dairy milk (I like oat milk for the creamiest texture), and vegan chocolate pudding mix. Most Oreos are actually vegan, so you’re good there. The texture is slightly less firm, but still delicious.
Pumpkin Patch Dirt Cups: For a fall twist, replace the gummy worms with candy pumpkins or candy corn. The orange and white colors look adorable against the dark “dirt.” I made these for a Thanksgiving potluck once, and they were a huge hit.
Gluten-Free Option: Use gluten-free chocolate sandwich cookies — there are several good brands available now. Everything else in the recipe is naturally gluten-free, so it’s an easy swap.
Extra Spooky Version: Add a few drops of green food coloring to the pudding mixture to make it look like slime. Or mix in some crushed freeze-dried raspberries for “blood” spots. My kids love making the grossest versions they can think of.
I’ve also tried this with vanilla pudding instead of chocolate, and it looks like sandy soil — perfect for a beach-themed Halloween party. The vanilla version is a little sweeter, so I cut back on the powdered sugar in the cream cheese mixture.
Serving & Storage Suggestions
These Halloween Dirt Cups are best served cold — straight from the fridge. The contrast between the chilly pudding and the slightly softened Oreo crumbs is what makes them so satisfying. I like to serve them right in the cups, with a small spoon tucked in the side.
For presentation, arrange the cups on a platter or tray with some fake spiderwebs draped around them. Add a few plastic spiders crawling over the cups for extra creepiness. I once served these on a black platter with battery-operated tea lights scattered around, and it looked amazing in the dark.
As for what to serve alongside them, these dirt cups are pretty rich on their own. I usually pair them with something lighter, like fresh fruit skewers or popcorn balls. A warm drink like apple cider or hot chocolate is perfect for a chilly Halloween night.
Storage: These will keep in the refrigerator for up to 2 days, but they’re best within 24 hours of assembly. The longer they sit, the more the Oreo crumbs absorb moisture from the pudding and lose their crunchy texture. If you’re making them ahead, I recommend storing the crumbs and pudding separately and assembling a few hours before serving.
Freezing: I don’t recommend freezing these — the pudding gets watery and the texture is off when thawed. They’re so quick to make that freezing isn’t really necessary anyway.
Reheating: No reheating needed! These are served cold. If they’ve been in the fridge for more than a day and the crumbs have gotten soft, just sprinkle a fresh layer of Oreo crumbs on top before serving.
Nutritional Information & Benefits
Let’s be honest — these are a treat, not a health food. But here’s the estimated nutritional breakdown per serving (based on 8 servings):
| Nutrient | Amount per Serving |
|---|---|
| Calories | 385 |
| Total Fat | 18g |
| Saturated Fat | 9g |
| Cholesterol | 25mg |
| Sodium | 380mg |
| Total Carbohydrates | 52g |
| Dietary Fiber | 2g |
| Sugars | 38g |
| Protein | 5g |
On the positive side, the cream cheese adds some calcium and protein, and the milk contributes vitamin D. The Oreos have a surprising amount of iron, believe it or not. But really, this is a once-in-a-while treat for special occasions. The portion control of individual cups actually helps — you’re less likely to go back for seconds when you have your own little cup.
If you’re looking for a slightly lighter version, you can use reduced-fat cream cheese, skim milk, and sugar-free pudding mix. It won’t be as rich, but it’ll still satisfy that Halloween craving.
Conclusion
Look, I know there are fancier Halloween desserts out there. I’ve seen the elaborate cakes shaped like haunted houses and the intricate sugar cookies that look like works of art. But there’s something special about these Easy Halloween Dirt Cups — they’re honest, they’re fun, and they taste exactly like the childhood Halloweens we all remember.
What I love most is that they bring people together. Every time I make them, I watch kids’ faces light up when they see the gummy worms poking out of the “dirt.” I watch adults sneak a second cup when they think no one’s looking. It’s pure, unpretentious joy in a cup.
So whether you’re scrambling for a last-minute school party contribution, planning a Halloween gathering, or just want a fun afternoon project with the kids, give these a try. Customize them however you like — more worms, different candies, extra spooky decorations. Make them your own.
I’d love to hear how yours turn out! Drop a comment below and let me know if your kids fought over the gummy worms like mine do. And if you come up with a fun variation, share that too — I’m always looking for new ideas. Happy Halloween, and happy eating!
Frequently Asked Questions
Can I make these Halloween Dirt Cups ahead of time?
Yes! You can assemble them up to 24 hours in advance. Just keep them covered in the refrigerator. If you’re making them more than a day ahead, store the Oreo crumbs separately and add them just before serving to keep them crunchy.
Can I use homemade chocolate pudding instead of instant?
Technically yes, but it won’t set up as firmly. Instant pudding is designed to thicken quickly in the fridge, while cooked pudding stays softer. If you use homemade, expect a looser texture and plan to serve them within a few hours of assembly.
How many cups does this recipe make?
This recipe makes 8 servings in standard 8-ounce cups. You can adjust the portion size by using smaller cups (like 4-ounce cups) for a party, which would yield about 16 mini cups.
Can I use other cookies instead of Oreos?
Absolutely! Chocolate wafer cookies, chocolate graham crackers, or even crushed chocolate chip cookies work well. The key is to use a dark-colored cookie that looks like dirt when crushed. Avoid light-colored cookies like vanilla wafers — they look more like sand than soil.
My pudding came out runny. What went wrong?
This usually happens for one of two reasons: either the cream cheese wasn’t fully softened and didn’t incorporate properly, or the pudding wasn’t given enough time to set. Make sure your cream cheese is at room temperature, and don’t skip the chilling step. If it’s still runny after 30 minutes in the fridge, try adding a little more crushed Oreo crumbs to absorb the excess moisture.
Pin This Recipe!
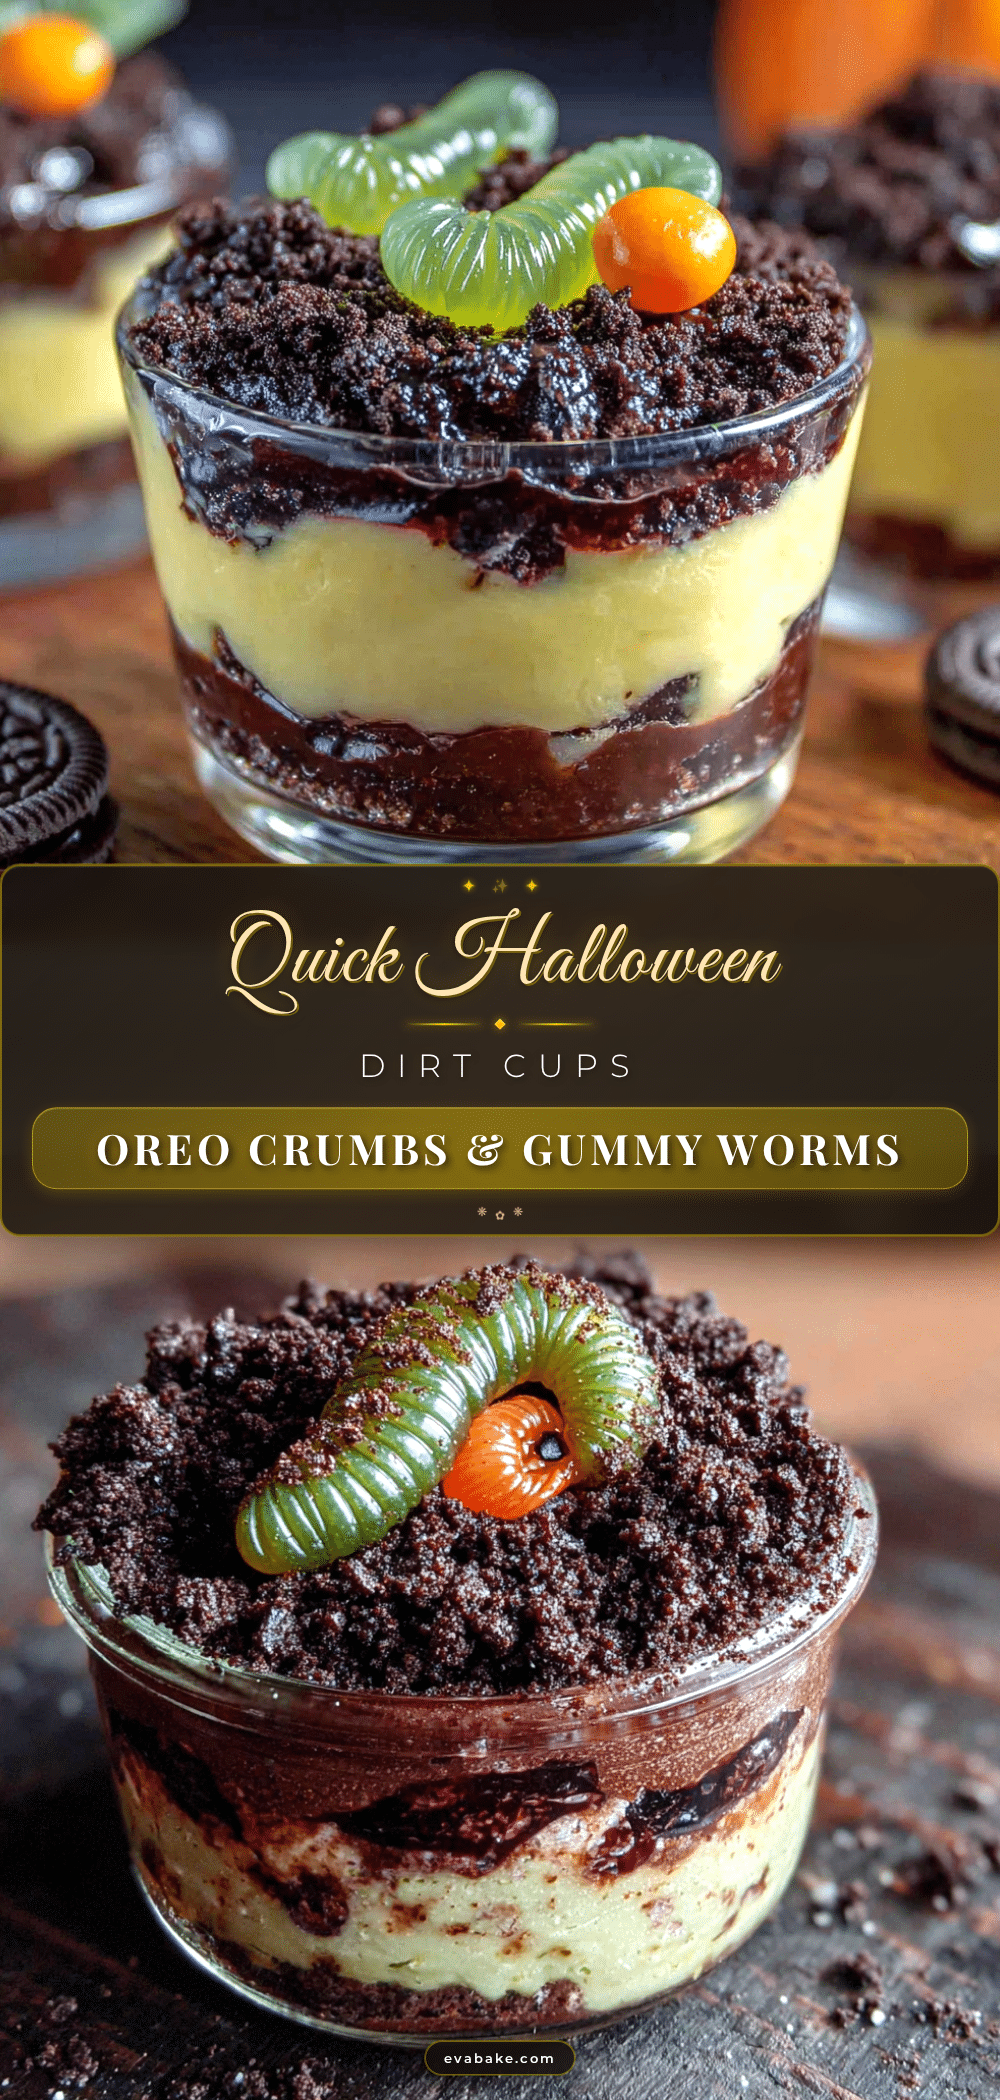
Easy Halloween Dirt Cups with Oreo & Gummy Worms

These no-bake Halloween Dirt Cups are a quick and fun treat made with crushed Oreos, creamy chocolate pudding, and gummy worms. Perfect for last-minute parties, they look like spooky cups of dirt and are always a hit with kids and adults alike.
- Prep Time: 15 minutes
- Cook Time: 0 minutes
- Total Time: 45 minutes (includes 30 minutes chilling)
- Yield: 8 servings 1x
- Category: Dessert
- Cuisine: American
Ingredients
- 1 (3.9 oz) box instant chocolate pudding mix
- 2 cups cold milk
- 4 oz cream cheese, softened
- 1/4 cup powdered sugar
- 1 (14.3 oz) package Oreo cookies (about 36 cookies)
- 2 tablespoons melted butter (optional)
- 1 bag gummy worms (about 20–24 worms)
- Optional: green-tinted shredded coconut for ‘grass’ effect
- Optional: small plastic spiders or tombstones for decoration
Instructions
- Crush the Oreos: Place the entire package of Oreos (cream filling and all) in a food processor. Pulse until you have fine, dark crumbs that look like potting soil. Alternatively, put the cookies in a large zip-top bag and crush them with a rolling pin. Set the crumbs aside in a bowl.
- Make the cream cheese base: In a medium mixing bowl, beat the softened cream cheese with the powdered sugar until smooth and fluffy, about 2 minutes with an electric mixer.
- Prepare the pudding: In another bowl, whisk the instant chocolate pudding mix with the cold milk for about 2 minutes until it starts to thicken. Fold the cream cheese mixture into the pudding until fully combined.
- Layer the cups: Start with a layer of Oreo crumbs at the bottom of each cup (about 2 tablespoons each). Press it down gently with the back of a spoon. Then spoon the chocolate pudding mixture on top, filling each cup about two-thirds full.
- Add the top dirt layer: Sprinkle another generous layer of Oreo crumbs on top of the pudding (about 2-3 tablespoons per cup). Do not press this layer down.
- Insert the gummy worms: Take 2-3 gummy worms per cup and gently push them into the top layer of crumbs. Some should be barely poking out, others partially buried.
- Chill before serving: Place the cups in the refrigerator for at least 30 minutes before serving. They are best within 4 hours of assembly but will keep in the fridge for up to 2 days.
Notes
For best results, use room temperature cream cheese to avoid lumps. Do not overcrush the Oreos; some texture is desirable. If assembling ahead, store Oreo crumbs and pudding separately and assemble a few hours before serving to keep crumbs crunchy. For a dairy-free version, use dairy-free cream cheese, non-dairy milk, and vegan chocolate pudding mix.
Nutrition
- Serving Size: 1 cup (8 oz)
- Calories: 385
- Sugar: 38
- Sodium: 380
- Fat: 18
- Saturated Fat: 9
- Carbohydrates: 52
- Fiber: 2
- Protein: 5
Keywords: Halloween dirt cups, Oreo dirt cups, gummy worms, no-bake dessert, easy Halloween treat, chocolate pudding cups, kid-friendly dessert


