I burned the first batch of Rice Krispie treats I ever made for a school birthday. Not a little brown around the edges—I mean charred, stuck-to-the-bottom-of-the-pot, had-to-soak-it-overnight burned. My son was in kindergarten, and I wanted to do something special for his class, something that felt homemade but wasn’t going to crumble into a million pieces in a lunchbox. I was so focused on getting the marshmallows fully melted that I just… forgot them on the stove. The whole kitchen smelled like a campfire that went wrong.
That failure actually taught me something important. I realized the problem wasn’t my ambition; it was my approach. I needed a version of this classic treat that was portable, portion-controlled, and forgiving enough for a busy parent making them the night before a school party. So I started experimenting with making them in individual cups—and honestly, I never looked back. These Easy Individual Rice Krispie Treat Cups for School Birthdays are the result of that burnt-pot disaster, and they’ve become my go-to for every classroom celebration since.
There’s something about handing a kid their own little cup of crispy, marshmallow-y goodness. No fighting over who gets the corner piece. No sticky fingers passing germs around a shared pan. Just a perfectly portioned treat that feels special without causing a mess. And the best part? They come together in about 15 minutes of active work. You can make a whole batch while your coffee is still hot. If you’ve been dreading the classroom birthday treat dilemma, this is your answer.
Why You’ll Love This Recipe
I’ve tested this recipe more times than I care to count—probably twenty batches across different marshmallow brands, butter amounts, and even cereal types. What I landed on is the sweet spot between chewy and crisp, with just enough butter to keep things from turning into a sticky brick by lunchtime. These cups have survived being packed in backpacks, sitting in cubbies, and even getting dropped on the playground (yes, my son tested that for me).
- Totally Portable : No plates, no napkins, no crumbling mess. Each cup is self-contained and easy for little hands to hold.
- Perfectly Portioned : Every kid gets the same amount. No more worrying about cutting even squares or someone getting a tiny piece.
- Classroom-Safe : These are nut-free as written (just double-check your marshmallow and cereal labels), making them perfect for schools with allergy policies.
- Incredibly Fast : From start to finish, you’re looking at about 15 minutes of hands-on time. The hardest part is waiting for them to set.
- Customizable for Any Theme : Add sprinkles, food coloring, or even a drizzle of chocolate to match class colors or holiday themes.
What makes these different from every other Rice Krispie treat recipe out there is the ratio. Most recipes use too much butter, which makes the treats greasy and causes them to separate in the cup. I figured this out through trial and error—and a few sad, oily batches. My version uses just enough butter to coat the marshmallows without weighing them down, and I add a pinch of salt to balance all that sweetness. It’s a small tweak, but it makes a huge difference in the final texture.
Honestly, this is the kind of recipe that makes you feel like a hero parent without actually working that hard. You walk into the classroom with a tray of these cups, and the kids lose their minds. The teachers love them because there’s zero cleanup. And you get to enjoy the glow of being the birthday parent without spending hours in the kitchen. It’s a win all around.
What Ingredients You Will Need
This recipe uses simple, everyday ingredients that you probably already have in your pantry. The magic is in how they come together, not in fancy components. Here’s what you’ll need to make about 12 individual cups:
For the Base
- 3 tablespoons unsalted butter (I prefer Land O’Lakes or Kerrygold for the best flavor, but any brand works fine)
- 1 package (10 ounces) marshmallows (standard size, not mini—they melt more evenly. Jet-Puffed is my go-to brand)
- 6 cups Rice Krispies cereal (or any crispy rice cereal; store brands work just as well here)
- ¼ teaspoon fine sea salt (this is non-negotiable for balancing sweetness)
- ½ teaspoon vanilla extract (pure, not imitation—you can taste the difference)
Optional Add-Ins
- Food coloring (gel-based works best; add it with the vanilla for even color distribution)
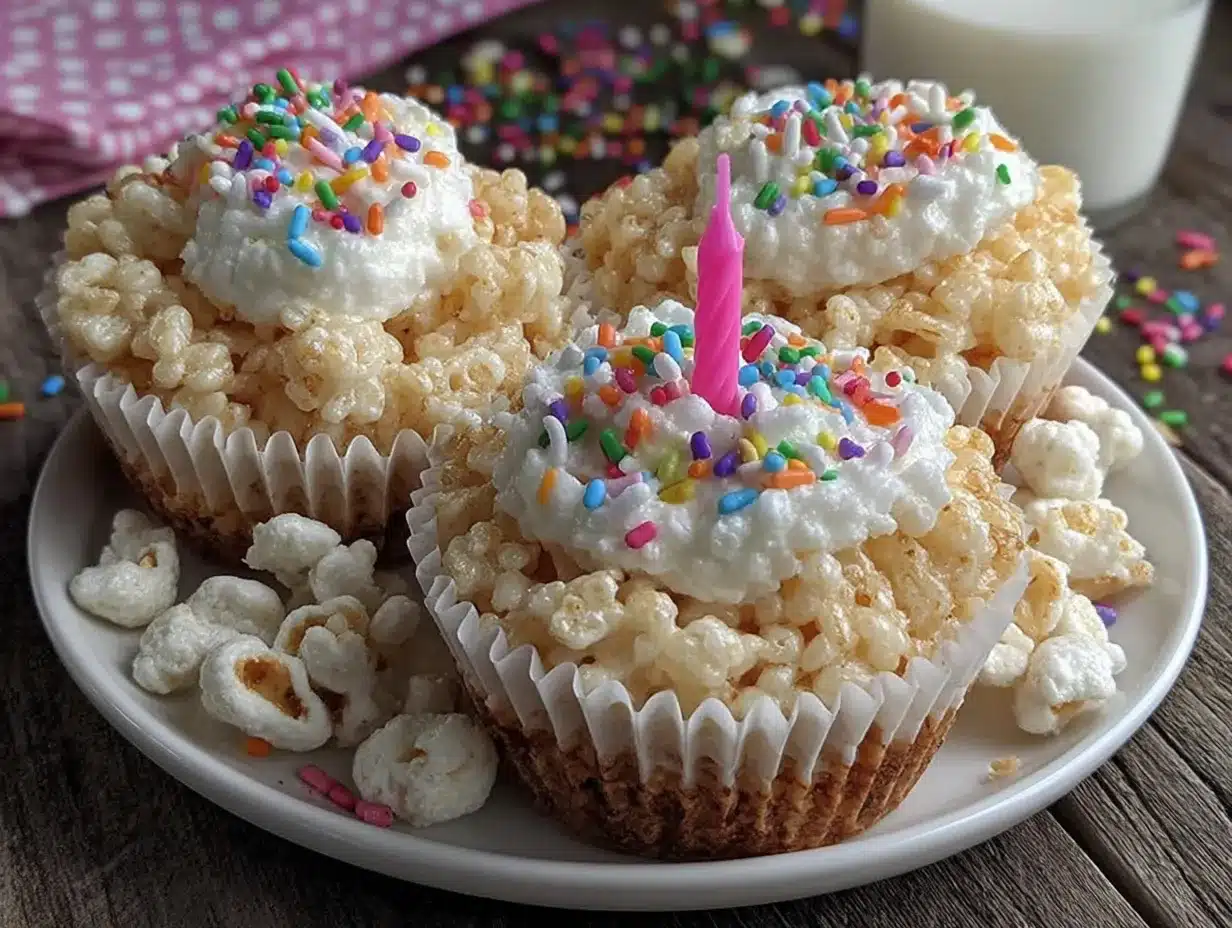
- Sprinkles (rainbow, seasonal, or themed—add them right after pressing into cups)
- Mini chocolate chips (about ¼ cup, stirred in with the cereal)
If you’re making these for a school with strict nut policies, I recommend checking your marshmallow and cereal labels carefully. Most major brands are processed in nut-free facilities, but it’s always worth confirming. For a dairy-free version, swap the butter for a plant-based alternative like Miyoko’s or Earth Balance—just note that the texture will be slightly softer.
One thing I learned the hard way: don’t use stale marshmallows. If your bag has been sitting in the pantry for months, the marshmallows will be hard and won’t melt smoothly. Fresh marshmallows give you that stretchy, gooey texture that makes these treats so good. Same goes for the cereal—if your box has been open for weeks, the cereal might be stale and won’t have that satisfying crunch.
Equipment Needed
You don’t need any fancy gadgets for this recipe, which is part of the beauty. Here’s what you’ll need:
- Large pot or Dutch oven (at least 4 quarts—the cereal needs room to mix without spilling everywhere)
- Rubber spatula (silicone is best; it won’t scratch your pot and makes scraping the sides easy)
- 12-cup standard muffin tin (non-stick is ideal, but any metal or silicone pan works)
- Measuring cups and spoons (dry measuring cups for the cereal, liquid measuring cup for nothing here—just spoons)
- Small bowl of water (for wetting your fingers to press the mixture into cups without sticking)
If you don’t have a muffin tin, you can use silicone muffin cups set on a baking sheet—they peel off easily once set. I’ve also used paper liners in a regular muffin tin, but they tend to stick a bit more. Honestly, spraying the muffin tin with non-stick spray works better than liners for these cups. I’ve tried both, and the direct-spray method gives you cleaner edges and easier removal.
One tip: if you’re using a metal muffin tin, let the cups cool completely before trying to pop them out. Warm treats will tear and stick. Silicone pans are more forgiving, but they also need a full cool-down for the best shape. Patience is the hardest part of this recipe, I swear.
Preparation Method
Let me walk you through this step by step. I’ve made these so many times that I could do it in my sleep, but I still remember how nervous I was the first time I tried making individual cups. Trust the process—it’s easier than it looks.
- Prep your muffin tin. Spray a 12-cup standard muffin tin generously with non-stick cooking spray. Make sure you get the spray into the crevices between the cups. Set it aside on a cooling rack or counter. (Prep time: 2 minutes)
- Melt the butter. Place your large pot over medium-low heat and add the 3 tablespoons of butter. Let it melt slowly, swirling the pot occasionally. You want it fully melted but not bubbling or browning—that’s a sign the heat is too high. (Cooking time: 2-3 minutes)
- Add the marshmallows. Dump the entire 10-ounce bag of marshmallows into the pot with the melted butter. Stir constantly with your rubber spatula, scraping the bottom and sides to prevent sticking. The marshmallows will start to soften and then collapse into a gooey mass. Keep stirring until they’re about 90% melted—you want a few small lumps remaining, not a completely smooth liquid. (Cooking time: 4-5 minutes)
- Remove from heat and add flavorings. Take the pot off the burner immediately. Stir in the ¼ teaspoon of salt and ½ teaspoon of vanilla extract. If you’re using food coloring, add it now. The residual heat will finish melting the marshmallows while you stir. (Time: 30 seconds)
- Fold in the cereal. Add the 6 cups of Rice Krispies cereal all at once. Fold gently with your spatula, using a cutting motion rather than stirring—this prevents crushing the cereal. Work from the bottom up, making sure every piece of cereal gets coated. Stop folding as soon as you don’t see any white marshmallow streaks. Overmixing makes the treats dense and hard. (Time: 1-2 minutes)
- Fill the cups. Working quickly (the mixture sets fast), use a cookie scoop or two spoons to divide the mixture evenly among the 12 muffin cups. Each cup should be filled about ¾ full. Don’t press down yet—just get the mixture distributed. (Time: 2 minutes)
- Press into shape. Dip your fingers in the small bowl of water (this prevents sticking) and gently press the mixture into each cup. Don’t pack it too tight—you want them to hold together but still have some airiness. I use a gentle pressing motion, almost like I’m shaping a snowball. Rewet your fingers as needed. (Time: 3-4 minutes)
- Add toppings (optional). If you’re using sprinkles or any other toppings, sprinkle them on now while the tops are still slightly sticky. They’ll adhere better than if you wait until the cups are fully set.
- Let them set. Leave the muffin tin on the counter at room temperature for at least 30 minutes. Don’t rush this—warm cups will fall apart when you try to remove them. I usually let mine sit for about an hour while I clean up the kitchen. (Setting time: 30-60 minutes)
- Remove and serve. Once fully cooled and set, run a thin knife or offset spatula around the edge of each cup to loosen it. Pop them out gently. If any stick, let them sit a few more minutes—the longer they set, the easier they release. (Time: 5 minutes)
Your cups should be golden and slightly glossy on top, with a soft give when you squeeze them gently. They should hold their shape when picked up but still have a little chew when you bite into them. If they feel rock-hard, you pressed them too firmly. If they’re falling apart, you didn’t let them set long enough. Both issues are fixable with practice—I’ve made both mistakes more than once.
Cooking Tips & Techniques
I’ve made enough batches of these to fill a small bakery, and I’ve picked up a few tricks along the way. Here’s what I wish someone had told me before I started:
Low and slow is the rule. The biggest mistake people make is cranking up the heat to melt the marshmallows faster. High heat scorches the sugar and gives the treats a burnt, bitter taste. Keep your burner on medium-low and be patient. If you see steam rising from the marshmallows, your heat is too high. Back it off immediately.
Wet hands are your best friend. I cannot stress this enough. The mixture is incredibly sticky when warm, and trying to press it with dry fingers is a nightmare. Keep that small bowl of water nearby and rewet your fingers between every cup. It makes the process so much smoother—and less frustrating.
Don’t overmix the cereal. I know it’s tempting to keep stirring until everything looks perfectly uniform, but that crushes the cereal and gives you dense, hard treats. You want to fold just until the marshmallows coat the cereal. A few streaks of marshmallow are totally fine—they’ll distribute as you press the mixture into the cups.
Let them rest overnight for best texture. If you’re making these for a school birthday, make them the night before and let them sit in the muffin tin overnight. They’ll be perfectly set by morning, and the texture will be chewy but not hard. I’ve tested this against same-day batches, and the overnight ones are always better.
Use a cookie scoop for even portions. A #20 or #24 cookie scoop (about 3 tablespoons) gives you perfectly even cups every time. No more guessing or ending up with one huge cup and one tiny one. It’s a small investment that pays off in consistency.
One failure I’ll admit: I once tried to double the recipe in the same pot. Big mistake. The mixture overflowed, stuck to the burner, and I spent an hour scrubbing melted marshmallow off my stovetop. Stick to single batches unless you have a massive pot. Trust me on this one.
Variations & Adaptations
These cups are endlessly customizable, which is part of why I love them. Here are some variations I’ve tested and loved:
Chocolate Lover’s Version: Stir in ¼ cup of mini chocolate chips with the cereal, and drizzle melted chocolate over the tops after they set. My kids beg for this version every time. It turns a simple treat into something that feels decadent.
Holiday-Themed Cups: Add a few drops of gel food coloring with the vanilla—red and green for Christmas, orange for Halloween, pastel pink for Valentine’s Day. Then top with matching sprinkles. I made a batch of green and red cups for a winter class party, and the teacher asked for the recipe immediately.
Peanut Butter Swirl: For home (not school, due to allergies), warm 2 tablespoons of peanut butter in the microwave and swirl it into the marshmallow mixture before adding the cereal. The peanut butter ribbons add a salty-savory note that balances the sweetness beautifully.
Gluten-Free Option: This recipe is naturally gluten-free as long as you use certified gluten-free crispy rice cereal. Brands like One Degree Organics make a great option. The texture is identical to the original.
Vegan Version: Use vegan marshmallows (Dandies brand works perfectly) and plant-based butter. The process is exactly the same, though vegan marshmallows take a minute or two longer to melt. I’ve made these for a friend’s vegan birthday party, and no one could tell the difference.
If you’re feeling adventurous, try swapping half the Rice Krispies for puffed rice or even crushed-up crispy chickpeas for a savory-sweet twist. I tested this once on a whim, and it was surprisingly good—though my kids preferred the original.
Serving & Storage Suggestions
These cups are best served at room temperature, right out of the muffin tin. They’re sturdy enough to stack in a container for transport, but I recommend arranging them in a single layer if you’re taking them to school. They’ll look prettier and won’t risk getting squished.
For a classroom birthday, I arrange the cups on a disposable platter and cover them with plastic wrap. The teacher can set them out during snack time or at the end of the day. They’re also perfect for lunchboxes—just pop one in a small container, and your kid gets a treat that won’t crumble into crumbs by lunchtime.
Storage: Keep leftover cups in an airtight container at room temperature for up to 5 days. Don’t refrigerate them—the cold makes them hard and stale. If you need to store them longer, freeze them in a single layer on a baking sheet, then transfer to a freezer bag. They’ll keep for up to 3 months. Thaw at room temperature for about 30 minutes before serving.
One thing I’ve noticed: these cups actually get better on day two. The flavors meld, and the texture becomes perfectly chewy without being hard. If you can resist eating them all on day one, you’re in for a treat on day two. I’ve made batches on a Friday for a Monday school party, and they were still perfect.
For a party spread, these pair beautifully with fresh fruit skewers or easy Caprese tortellini skewers for a sweet-and-savory balance. The contrast between the sweet, crunchy cups and something light and fresh is really lovely.
Nutritional Information & Benefits
Let’s be real—these are a treat, not a health food. But knowing what’s in them helps with planning. Here’s the estimated nutritional breakdown per cup (based on 12 servings):
| Nutrient | Amount per Cup |
|---|---|
| Calories | 185 |
| Total Fat | 6g |
| Saturated Fat | 3.5g |
| Carbohydrates | 32g |
| Sugar | 18g |
| Protein | 2g |
| Sodium | 185mg |
The main ingredients—crispy rice cereal and marshmallows—are low in fat and provide quick energy, which is perfect for active kids. The butter adds a small amount of fat that helps with satiety and texture. If you’re watching sugar intake, you can reduce the marshmallows by about a quarter cup (use ¾ of the bag), but the texture will be slightly less gooey.
These cups are nut-free, egg-free, and can be made dairy-free and vegan with simple substitutions. They’re also relatively low in calories for a dessert, making them a reasonable option for classroom celebrations where you want to give kids something special without overdoing it.
As with all treats, moderation is key. I tell my kids that these are “sometimes foods,” not everyday snacks. But honestly, a school birthday is exactly the right time for a “sometimes food.”
Conclusion
These Easy Individual Rice Krispie Treat Cups for School Birthdays have saved me more times than I can count. They’re the recipe I turn to when I want to feel like a supermom without actually spending hours in the kitchen. The kids love them, the teachers appreciate the lack of mess, and I get to enjoy the satisfaction of making something homemade that actually works.
I encourage you to make these your own. Add your favorite sprinkles, match them to a holiday theme, or keep them classic and simple. The beauty of this recipe is that it’s forgiving—even if you press too hard or let them set a little too long, they’re still delicious. And if you burn the first batch like I did? Don’t worry. You’ll figure it out. I promise.
Have you tried these cups for a school birthday? I’d love to hear how they turned out—drop a comment below and let me know what variations you tried. And if you’re looking for more easy school-friendly treats, check out these nut-free sunflower butter granola bars or these no-bake peanut butter energy balls for more lunchbox-friendly options. Happy baking!
Frequently Asked Questions
Can I use mini marshmallows instead of regular-sized ones?
Yes, you can, but they melt faster and can burn more easily if you’re not careful. If using mini marshmallows, reduce your cooking time by about a minute and watch them closely. The final texture will be slightly softer, but they’ll still work great.
Why are my Rice Krispie treats hard and crunchy instead of chewy?
This usually happens from overmixing or pressing the mixture too firmly into the cups. Fold the cereal gently until just combined, and use a light touch when pressing into the cups. Also, make sure your heat isn’t too high—high heat makes the sugar crystallize, which gives you a hard texture.
Can I make these cups ahead of time for a party?
Absolutely! These cups actually taste better on day two. Make them the night before, let them set in the muffin tin overnight, and pop them out in the morning. Store in an airtight container at room temperature for up to 5 days.
How do I keep the cups from sticking to the muffin tin?
Spray the muffin tin generously with non-stick cooking spray before adding the mixture. Let the cups cool completely before removing them—warm treats are more likely to stick. If you’re still having trouble, try using silicone muffin cups or lining the tin with paper liners (sprayed lightly).
Are these cups safe for kids with nut allergies?
As written, this recipe is nut-free. However, always check the labels on your marshmallows and cereal to confirm they were processed in a nut-free facility. Some brands may have cross-contamination risks. When in doubt, contact the manufacturer directly before serving to a child with allergies.
Pin This Recipe!
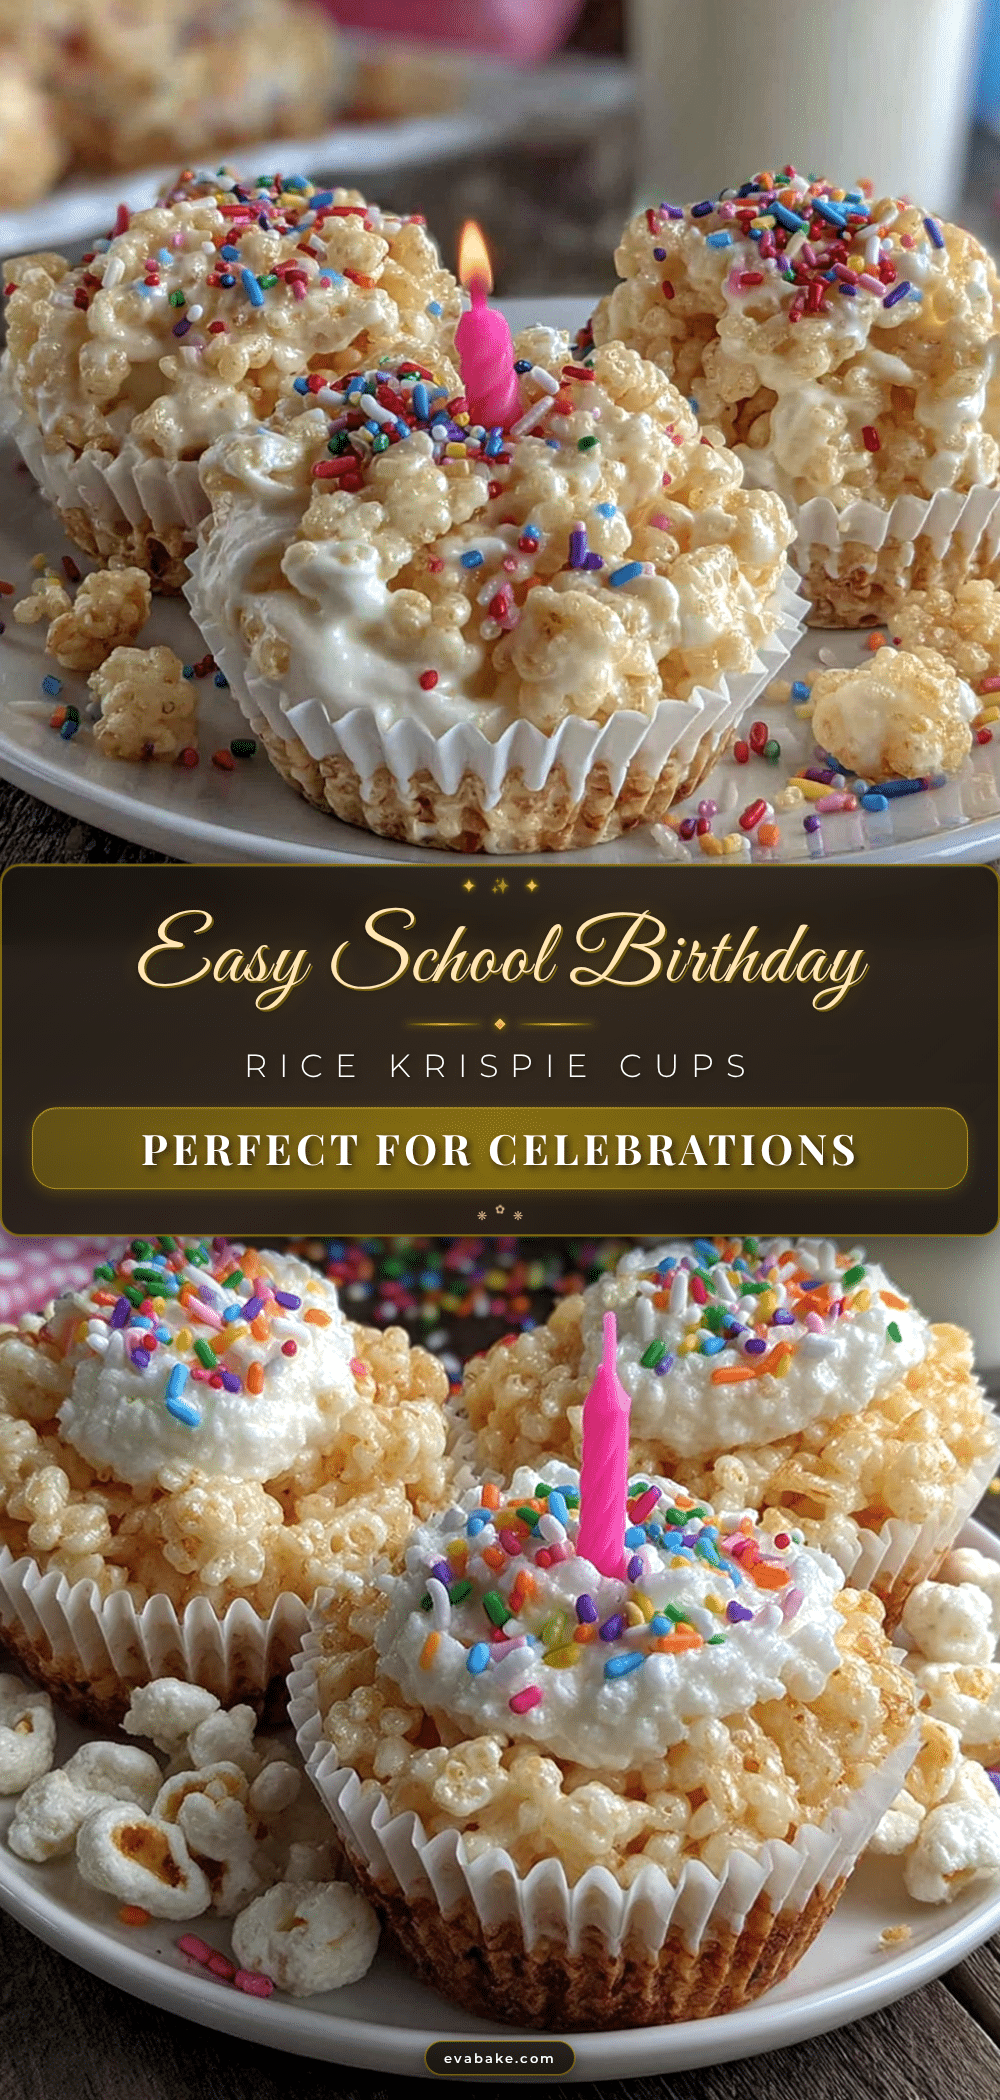
Easy Individual Rice Krispie Treat Cups for School Birthdays
Perfectly portioned, portable, and classroom-safe Rice Krispie treat cups that come together in about 15 minutes of active work. These nut-free, no-mess cups are ideal for school birthday celebrations and lunchboxes.
- Prep Time: 15 minutes
- Cook Time: 10 minutes
- Total Time: 45 minutes (including setting time)
- Yield: 12 cups 1x
- Category: Dessert
- Cuisine: American
Ingredients
- 3 tablespoons unsalted butter
- 1 package (10 ounces) marshmallows (standard size)
- 6 cups Rice Krispies cereal
- ¼ teaspoon fine sea salt
- ½ teaspoon vanilla extract (pure)
- Food coloring (gel-based, optional)
- Sprinkles (optional)
- Mini chocolate chips (¼ cup, optional)
Instructions
- Prep your muffin tin: Spray a 12-cup standard muffin tin generously with non-stick cooking spray. Set aside.
- Melt the butter: Place a large pot over medium-low heat and add 3 tablespoons of butter. Let it melt slowly, swirling occasionally, until fully melted but not bubbling or browning (2-3 minutes).
- Add the marshmallows: Dump the entire 10-ounce bag of marshmallows into the pot. Stir constantly with a rubber spatula, scraping the bottom and sides, until marshmallows are about 90% melted with a few small lumps remaining (4-5 minutes).
- Remove from heat and add flavorings: Take the pot off the burner. Stir in ¼ teaspoon salt and ½ teaspoon vanilla extract. Add food coloring if using. Stir for about 30 seconds.
- Fold in the cereal: Add 6 cups of Rice Krispies cereal all at once. Fold gently with a cutting motion until no white marshmallow streaks remain (1-2 minutes). Do not overmix.
- Fill the cups: Working quickly, use a cookie scoop or two spoons to divide the mixture evenly among the 12 muffin cups, filling each about ¾ full.
- Press into shape: Dip your fingers in a small bowl of water to prevent sticking. Gently press the mixture into each cup without packing too tight (3-4 minutes). Rewet fingers as needed.
- Add toppings (optional): Sprinkle sprinkles or other toppings on top while still slightly sticky.
- Let them set: Leave the muffin tin at room temperature for at least 30 minutes (preferably 1 hour or overnight).
- Remove and serve: Once fully cooled and set, run a thin knife around the edge of each cup to loosen. Pop them out gently.
Notes
Use fresh marshmallows for best texture. Keep heat on medium-low to avoid scorching. Wet hands prevent sticking when pressing mixture into cups. For best texture, make the night before and let set overnight. Store in airtight container at room temperature for up to 5 days, or freeze for up to 3 months. Do not refrigerate.
Nutrition
- Serving Size: 1 cup
- Calories: 185
- Sugar: 18
- Sodium: 185
- Fat: 6
- Saturated Fat: 3.5
- Carbohydrates: 32
- Protein: 2
Keywords: Rice Krispie treats, school birthday treats, individual dessert cups, nut-free treats, easy dessert, classroom treats, portable snacks


