Three different people texting me “what can I bring?” twenty minutes before I’d even figured out what I was making for Friendsgiving. That’s how this whole thing started. I stared into my fridge like it owed me answers — half a rotisserie chicken from two nights ago, a sad bundle of thyme that was definitely on its last leg, and a single sheet of puff pastry I’d been saving for some undefined “special occasion.” The occasion had officially found me.
I needed something that felt like a real dish, not a thrown-together afterthought. Something that said “I put effort into this” without actually requiring me to spend the afternoon in the kitchen while everyone else was already gathered around the living room. Individual pot pies popped into my head — those cute little personal-sized pies you see in cozy cafes, the ones that make you feel like you’re getting your own little present when they come to the table. But I’d never actually made them before. Honestly, I wasn’t even sure I owned the right size ramekins.
Turns out, I owned exactly four. And that was the perfect number for a small Friendsgiving gathering. I threw together what I had, crossed my fingers, and hoped the puff pastry would do its magic thing in the oven. When I pulled those golden, puffed-up little pies out of the oven, the butter smell hitting me before I even set the pan down, I knew I’d accidentally created something that needed to be a tradition. These easy individual turkey pot pies for Friendsgiving are now my go-to, and honestly, they might be yours too after the first bite.
Why You’ll Love This Recipe
Let me tell you why these little pies are basically the perfect Friendsgiving dish. I’ve tested this recipe through three different gatherings now, and every single time, people go quiet for the first few bites. That’s the sign of a winner in my book.
- Completely Make-Ahead Friendly : You can assemble these the night before, keep them in the fridge, and pop them in the oven when guests arrive. No last-minute scrambling while trying to hold a conversation.
- No Fancy Skills Required : If you can stir a pot and unfold a sheet of puff pastry, you can make these. I promise. The filling comes together in one skillet, and the pastry does all the heavy lifting in the oven.
- Perfect for Friendsgiving : Everyone gets their own personal pie — no awkward scooping from a giant dish, and the presentation is genuinely impressive without being fussy.
- Uses Leftover Turkey (or Rotisserie Chicken) : This is the hero recipe for post-Thanksgiving leftovers, but it works just as well with a store-bought rotisserie chicken any time of year.
- Comfort Food That Actually Feels Special : The creamy filling with tender turkey, sweet peas, and carrots under that flaky, buttery crust — it’s the kind of meal that makes you slow down and actually enjoy eating.
What makes this version different from the standard pot pie recipe? It’s the little things. I use a splash of white wine in the filling — it adds a brightness that cuts through the richness. And instead of fussing with homemade pie dough (who has time for that at a gathering?), store-bought puff pastry gives you that bakery-style flaky top without the work. The filling is thickened just enough to be luxurious without being gloppy. It’s comfort food that feels thoughtful, not heavy.
These pies are the kind of dish that makes people close their eyes after the first forkful. It’s Friendsgiving food that actually feels like a celebration — warm, personal, and made with care. Plus, you can make the filling a day ahead and just assemble before baking, which means you actually get to enjoy your own party.
What Ingredients You Will Need
This recipe uses simple, wholesome ingredients to deliver that rich, creamy, soul-warming flavor without requiring a specialty grocery run. Most of these are probably already in your kitchen, especially if you’ve recently had a turkey dinner or rotisserie chicken night.
- Cooked turkey or chicken, shredded or diced — About 3 cups. Leftover Thanksgiving turkey is perfect here, but a rotisserie chicken from the store works beautifully too. I recommend using both white and dark meat for the best flavor and moisture.
- Unsalted butter — 4 tablespoons, divided. We use some for sautéing the vegetables and some for the roux that thickens the filling. I prefer Kerrygold for its rich flavor, but any good unsalted butter works.
- Yellow onion, diced — 1 medium onion, about 1 cup. Sweet or yellow onion gives the best savory base without being too sharp.
- Carrots, diced — 2 medium carrots, about 1 cup. I like to dice them small so they cook evenly and fit nicely in each bite.
- Celery stalks, diced — 2 stalks, about ½ cup. That classic mirepoix base is non-negotiable for pot pie flavor.
- Garlic cloves, minced — 2 cloves. Fresh garlic adds that aromatic punch that jarred stuff just doesn’t deliver.
- All-purpose flour — ⅓ cup. This thickens the filling to that perfect creamy consistency. For a gluten-free version, you can use a 1:1 gluten-free flour blend.
- Chicken or turkey broth — 2 cups. Use good quality broth here — it’s the backbone of the sauce. I like Swanson or Kitchen Basics for reliable flavor.
- Whole milk or half-and-half — 1 cup. Whole milk gives a creamy texture without being too heavy. Half-and-half makes it extra luxurious. Avoid skim milk here — it won’t give you that velvety sauce.
- Dry white wine — ¼ cup. This is optional but highly recommended. It adds acidity that balances the richness. Use something you’d drink — I usually grab a Sauvignon Blanc.
- Frozen peas — 1 cup. No need to thaw them first. They add that pop of sweetness and color that makes pot pie feel complete.
- Fresh thyme — 4-5 sprigs, leaves stripped. Dried thyme works in a pinch, but fresh really makes a difference here.
- Fresh parsley, chopped — 2 tablespoons, for garnish and freshness at the end.
- Salt and black pepper — To taste. I use about 1 teaspoon salt and ½ teaspoon pepper, but season to your preference.
- Frozen puff pastry sheets — 1 package (17.3 ounces, usually 2 sheets). Thaw according to package directions. Pepperidge Farm is my go-to — it’s reliable and puffs beautifully.
- Egg — 1 large, beaten with 1 tablespoon water for the egg wash. This gives that gorgeous golden-brown crust.
Ingredient Selection Tips : For the best texture, make sure your puff pastry is fully thawed but still cold when you work with it. If it gets too warm, it won’t puff as dramatically. For the vegetables, dice them all roughly the same size — about ¼-inch pieces — so they cook evenly. And if you’re using leftover turkey, shred it into bite-sized pieces rather than leaving it in big chunks. It distributes better in the filling.
Equipment Needed
You don’t need a fully stocked professional kitchen for these pies, but having the right tools makes the process smooth and enjoyable. Here’s what you’ll need:
- 4 (10-ounce) oven-safe ramekins or small baking dishes — These are the star of the show. You want individual-sized dishes that hold about 1 to 1¼ cups of filling each. I use classic white ceramic ramekins, and they work perfectly. No ramekins? You can use small oven-safe soup crocks or even a standard muffin tin in a pinch.
- Large skillet or sauté pan — A 12-inch skillet with high sides gives you plenty of room to cook the vegetables and make the sauce without splattering everywhere.
- Medium saucepan — For warming the broth and milk before adding them to the roux. This prevents lumps and helps the sauce come together smoothly.
- Cutting board and sharp chef’s knife — Dicing vegetables uniformly is much easier with a good knife. I use my 8-inch chef’s knife for everything here.
- Wooden spoon or silicone spatula — For stirring the roux and filling. A wooden spoon gives you good leverage for scraping the bottom of the pan.
- Whisk — Essential for smoothing out the sauce after you add the liquids. No one wants lumpy gravy in their pot pie.
- Rolling pin — For gently rolling out the puff pastry sheets to fit your ramekins. If you don’t have one, a wine bottle works in a pinch.
- Pastry brush — For applying the egg wash. A silicone brush is easy to clean, but any brush works.
- Baking sheet — Place the ramekins on a baking sheet before baking. This catches any filling that bubbles over and makes cleanup a breeze.
Budget-Friendly Tip : You can find a set of four ramekins at most grocery stores or online for under $15. They’re one of those kitchen tools you’ll use way more than you expect — for individual desserts, dips, and mini casseroles. If you’re not ready to invest, small oven-safe bowls or even large foil baking cups work for this recipe.
Preparation Method
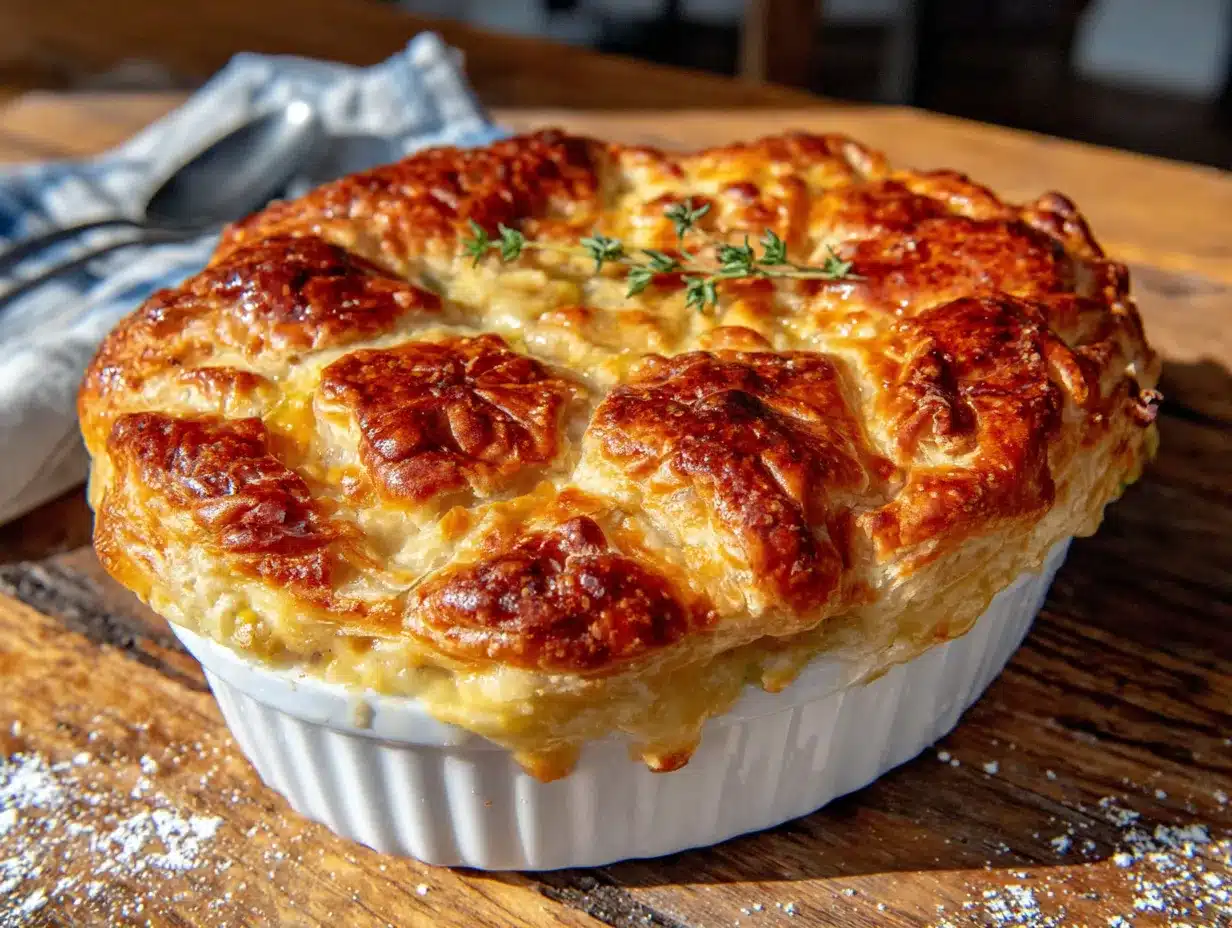
Let’s make these pies! I’ve broken this down into clear steps so you can follow along without stress. The whole process takes about 45 minutes of active time, plus 25-30 minutes of baking.
- Preheat your oven to 400°F (200°C). Place a rack in the center position. Line a baking sheet with parchment paper or foil for easy cleanup.
- Start the filling base. In your large skillet, melt 2 tablespoons of the butter over medium heat. Add the diced onion, carrots, and celery. Cook, stirring occasionally, for about 6-7 minutes until the vegetables have softened and the onion is translucent. The carrots should be tender when pierced with a fork. Add the minced garlic and cook for another 30 seconds until fragrant — don’t let it burn.
- Build the roux. Push the vegetables to one side of the skillet and add the remaining 2 tablespoons of butter to the empty space. Let it melt, then sprinkle the flour over the entire pan. Stir everything together — the flour will coat the vegetables and start to form a paste. Cook this for 1-2 minutes, stirring constantly. You want the raw flour taste to cook off, but don’t let it brown too much. It should look like a pale golden paste.
- Add the liquids gradually. Slowly pour in the white wine while whisking continuously. It will sizzle and steam — that’s good. Let it cook for about 30 seconds. Then, in a slow stream, add the warm chicken broth while whisking. Follow with the warm milk. Keep whisking until the sauce is smooth and starts to thicken, about 2-3 minutes. It should coat the back of a spoon.
- Season and finish the filling. Stir in the fresh thyme leaves, salt, and pepper. Add the shredded turkey and frozen peas. Stir everything together and let it simmer gently for 2-3 minutes so the flavors meld. Taste and adjust seasoning — you might want a little more salt or a crack of fresh pepper. Remove from heat and stir in the chopped parsley. The filling should be thick but still saucy, not pasty.
- Divide the filling among the ramekins. Spoon the filling evenly into your four ramekins, filling them almost to the top. Leave about ¼ inch of space at the top for the pastry to expand. Set the ramekins on your prepared baking sheet.
- Prepare the pastry tops. On a lightly floured surface, gently roll out each puff pastry sheet just slightly — you want it thin enough to cover the ramekins but still thick enough to puff beautifully. Cut each sheet into four squares or rounds large enough to overhang the ramekins by about ½ inch on all sides. (I usually cut squares because it’s easier and looks rustic and charming.)
- Top the pies. Place a pastry square over each ramekin. Gently press the edges against the rim of the dish to seal. You don’t need to crimp fancy edges — just press gently with your fingers. Cut 2-3 small slits in the top of each pastry to allow steam to escape. This prevents the pastry from getting soggy.
- Apply the egg wash. Brush the beaten egg mixture generously over each pastry top. This is what gives you that gorgeous golden-brown, glossy finish. Don’t skip this step — it makes a real difference.
- Bake the pies. Place the baking sheet with the ramekins in the preheated oven. Bake for 25-30 minutes, until the pastry is puffed and deep golden brown and the filling is bubbling up through the slits. If the pastry is browning too quickly after 20 minutes, tent loosely with foil for the remaining time.
- Rest before serving. Let the pies cool on a wire rack for 5-10 minutes. This is important — the filling is molten hot straight out of the oven and needs time to set slightly. The pies will still be piping warm when you serve them, but no one will burn their mouth.
Sensory Cue : When the pies are done, you’ll hear them gently bubbling through the slits. The kitchen will smell like butter, thyme, and comfort. The pastry should be a deep golden brown — not pale, not burnt. If you tap it gently with a fork, it should feel crisp and flaky.
Cooking Tips & Techniques
After making these pies more times than I can count, I’ve picked up a few tricks that make the process easier and the results better. Let me share what I’ve learned the hard way so you don’t have to.
Don’t skip warming the liquids. I learned this lesson the messy way. When you add cold broth or cold milk to a hot roux, it seizes up and you end up with lumps that are nearly impossible to smooth out. Warm your broth and milk in a small saucepan or microwave before adding them. It takes an extra 60 seconds and guarantees a silky sauce every time.
The filling should be slightly thinner than you think. Here’s the thing — the filling thickens more as it bakes in the oven. If it looks perfect on the stovetop, it will be too thick after baking. Aim for a consistency that’s a little looser than you’d want in the final dish. It should coat a spoon but still drip off slowly. Trust the process.
Let the puff pastry stay cold. Warm puff pastry doesn’t puff — it just melts into a sad, flat layer. Keep the pastry in the fridge until you’re ready to use it. Work quickly when cutting and placing it on the ramekins. If the pastry gets sticky or soft, pop it back in the fridge for 10 minutes to firm up.
Make the filling a day ahead. This is my favorite trick for Friendsgiving hosting. Make the filling completely, let it cool, and store it covered in the fridge overnight. The next day, just reheat it gently on the stovetop (add a splash of broth if it’s too thick), spoon it into the ramekins, top with pastry, and bake. It actually tastes better the next day because the flavors have time to meld.
Use a baking sheet under the ramekins. I cannot stress this enough. Even with careful filling, some bubbling over is inevitable. A baking sheet catches the drips and prevents your oven from becoming a smoky mess. Plus, it makes transferring the hot ramekins in and out of the oven much safer.
One mistake I made early on — I didn’t cut enough steam vents in the pastry. The filling needs somewhere for the steam to escape, or the pastry gets soggy and the filling can bubble out from underneath. Three small slits per pie is the sweet spot. Use a sharp knife and cut cleanly through the pastry.
Variations & Adaptations
One of the best things about this recipe is how flexible it is. You can adapt it to fit almost any dietary need or flavor preference. Here are some variations I’ve tried and loved:
Vegetarian Version : Swap the turkey for 2 cups of diced mushrooms (cremini or baby bella work great) and 1 cup of cooked lentils or chickpeas. Sauté the mushrooms with the vegetables until they release their liquid and start to brown. The earthy flavor is fantastic, and the lentils add protein and texture. Add an extra ½ cup of broth since mushrooms absorb liquid.
Gluten-Free Adaptation : Use a gluten-free all-purpose flour blend (like Bob’s Red Mill 1:1) for the roux. It works surprisingly well — just whisk a little longer to make sure it’s smooth. For the topping, you can use gluten-free puff pastry (I’ve found it at specialty grocery stores) or make a simple biscuit topping using gluten-free baking mix.
Dairy-Free Option : Substitute the butter with a good vegan butter (I like Miyoko’s) and use unsweetened oat milk or cashew milk instead of whole milk. The sauce will be slightly less rich but still creamy and delicious. Add an extra tablespoon of flour to help with thickening since dairy-free milks are thinner.
Spicy Southwest Twist : Add 1 diced jalapeño (seeds removed for less heat) with the vegetables, substitute ½ cup of the broth with green chile enchilada sauce, and stir in ½ cup of corn kernels with the peas. Top with a sprinkle of smoked paprika before baking. This version is incredible if you’re serving a crowd that likes a little heat.
Herb Garden Variation : Swap the thyme and parsley for a mix of fresh rosemary, sage, and tarragon. These herbs are classic with poultry and give the filling a more sophisticated, almost Thanksgiving-dinner flavor. Use about 1 teaspoon each, finely chopped.
Individual Biscuit Topping : If you don’t have puff pastry or just want a different texture, drop a large spoonful of refrigerated biscuit dough (like Pillsbury) on top of each ramekin instead. Bake at 375°F for about 20-22 minutes until the biscuits are golden and cooked through. It’s less fancy but equally delicious — and honestly, biscuits and gravy vibes are never a bad thing.
I personally love the spicy Southwest version when I’m serving these at a casual gathering. It feels unexpected and fun, and people always ask for the recipe. But the classic version with fresh thyme and parsley is the one I make when I want that pure, nostalgic comfort food experience.
Serving & Storage Suggestions
These individual pot pies are best served warm, straight from the oven, when the pastry is at its flakiest and the filling is bubbling and fragrant. Here’s how to make the most of them:
Serving Temperature and Presentation : Let the pies rest for 5-10 minutes after baking — this prevents burns and lets the filling set slightly. Place each ramekin on a small plate or napkin. I like to garnish with a sprig of fresh thyme or a sprinkle of flaky sea salt on the pastry. It adds a touch of elegance that feels special for Friendsgiving.
What to Serve With Them : A simple green salad with a bright vinaigrette is the perfect side — the acidity cuts through the richness of the pot pie. I also love serving these with roasted green beans or a simple cranberry sauce on the side for that Thanksgiving flavor echo. If you’re going all out, these pies pair beautifully with a summer grazing board as a starter for a more elaborate Friendsgiving spread.
Storage Instructions : Baked pot pies can be stored in the refrigerator for up to 3 days. Cover each ramekin tightly with plastic wrap or foil. The pastry will lose some of its crispness, but the flavor will still be excellent.
Reheating Methods : For best results, reheat in a 350°F oven for 15-20 minutes until the filling is hot and the pastry crisps back up. The microwave works in a pinch (about 2-3 minutes on high), but the pastry will be soft rather than flaky. If you’re reheating from frozen, thaw overnight in the refrigerator first, then follow the oven method.
Freezer Instructions : These pies freeze beautifully, either baked or unbaked. For unbaked pies, assemble completely but don’t apply the egg wash. Wrap each ramekin tightly in plastic wrap, then foil. Freeze for up to 3 months. To bake from frozen, remove the wrapping, apply the egg wash, and bake at 400°F for 40-45 minutes, tenting with foil if the pastry browns too quickly. For baked pies, freeze after cooling completely, then reheat directly from frozen in a 350°F oven for 25-30 minutes.
Flavor Development Note : Like many comfort dishes, the filling actually tastes better the next day. The flavors meld and deepen overnight. If you’re making these for a special occasion, I highly recommend making the filling a day ahead and assembling just before baking.
Nutritional Information & Benefits
While these pot pies are definitely comfort food, they also offer some solid nutritional benefits. Here’s a rough estimate per serving (one individual pie):
| Nutrient | Amount Per Serving |
|---|---|
| Calories | 480-520 |
| Protein | 28-32g |
| Fat | 28-32g |
| Carbohydrates | 35-40g |
| Fiber | 3-4g |
| Sugar | 6-8g |
| Sodium | 680-750mg |
Health Benefits of Key Ingredients : Turkey is a lean protein source rich in B vitamins and selenium, which supports immune function. Carrots provide beta-carotene for eye health, while celery offers vitamin K and antioxidants. Peas add fiber and plant-based protein. The butter and milk provide calcium and vitamin D, though you can adjust the dairy content to suit your needs.
Dietary Considerations : This recipe can be made gluten-free, dairy-free, or vegetarian with the substitutions noted above. It’s naturally nut-free and egg-free (aside from the egg wash, which can be replaced with a milk wash).
My Personal Take : I don’t make these every week, but when I do, I don’t feel guilty about it. They’re a balanced meal with protein, vegetables, and carbs — all in one cozy package. The portion size is reasonable, and because they’re so satisfying, you won’t feel the need to go back for seconds. That’s a win in my book.
Conclusion
These easy individual turkey pot pies for Friendsgiving have become my signature dish for fall gatherings, and I think they deserve a spot in your recipe rotation too. They’re warm, comforting, and personal — everything a Friendsgiving dish should be. The best part? They look and taste like you spent hours in the kitchen, but the reality is that they come together with minimal fuss and maximum reward.
I love that this recipe lets you use what you have — leftover turkey, rotisserie chicken, even leftover roasted vegetables from another meal. It’s forgiving and flexible, which is exactly what you need when you’re hosting a gathering and trying to enjoy the company instead of stressing over the stove.
If you make these, I’d love to hear how they turn out. Did you try a variation? Did your friends go quiet after the first bite? Drop a comment below and let me know — and don’t forget to share your photos with me. There’s something special about seeing these little pies come out of someone else’s oven. Happy Friendsgiving, friends. You’ve got this.
Frequently Asked Questions
Can I make these pot pies in a regular muffin tin instead of ramekins?
Yes, absolutely! Use a standard 12-cup muffin tin and fill each cup about ¾ full with the filling. Cut the puff pastry into circles slightly larger than the muffin cups. Baking time will be shorter — about 18-22 minutes. You’ll get mini pot pies that are perfect for appetizers or smaller portions.
Can I use frozen mixed vegetables instead of fresh?
Definitely. A 10-ounce bag of frozen mixed vegetables (peas, carrots, corn, green beans) works perfectly. Add them frozen directly to the filling along with the turkey. No need to thaw first. It’s a great shortcut when you’re short on time.
Why did my puff pastry turn out soggy on the bottom?
This usually happens when the filling is too liquid or the pastry isn’t sealed properly. Make sure your filling is thick enough before spooning it into the ramekins — it should coat a spoon but not be watery. Also, press the pastry edges firmly against the rim of the dish to create a seal. Cutting steam vents in the top also helps moisture escape instead of getting trapped.
Can I double this recipe for a larger crowd?
Absolutely. The recipe scales beautifully. Just make sure you have enough ramekins and a large enough skillet to cook the filling. You may need to bake the pies in batches if your oven can’t fit all of them at once. Keep assembled but unbaked pies in the fridge while the first batch bakes.
What’s the best way to reheat leftover pot pies without drying them out?
The oven is your best friend here. Preheat to 350°F, cover the ramekin loosely with foil, and bake for 15-20 minutes. Remove the foil for the last 5 minutes to re-crisp the pastry. If you’re in a hurry, the microwave works, but the pastry will be soft. For the best texture, always go with the oven method.
Pin This Recipe!
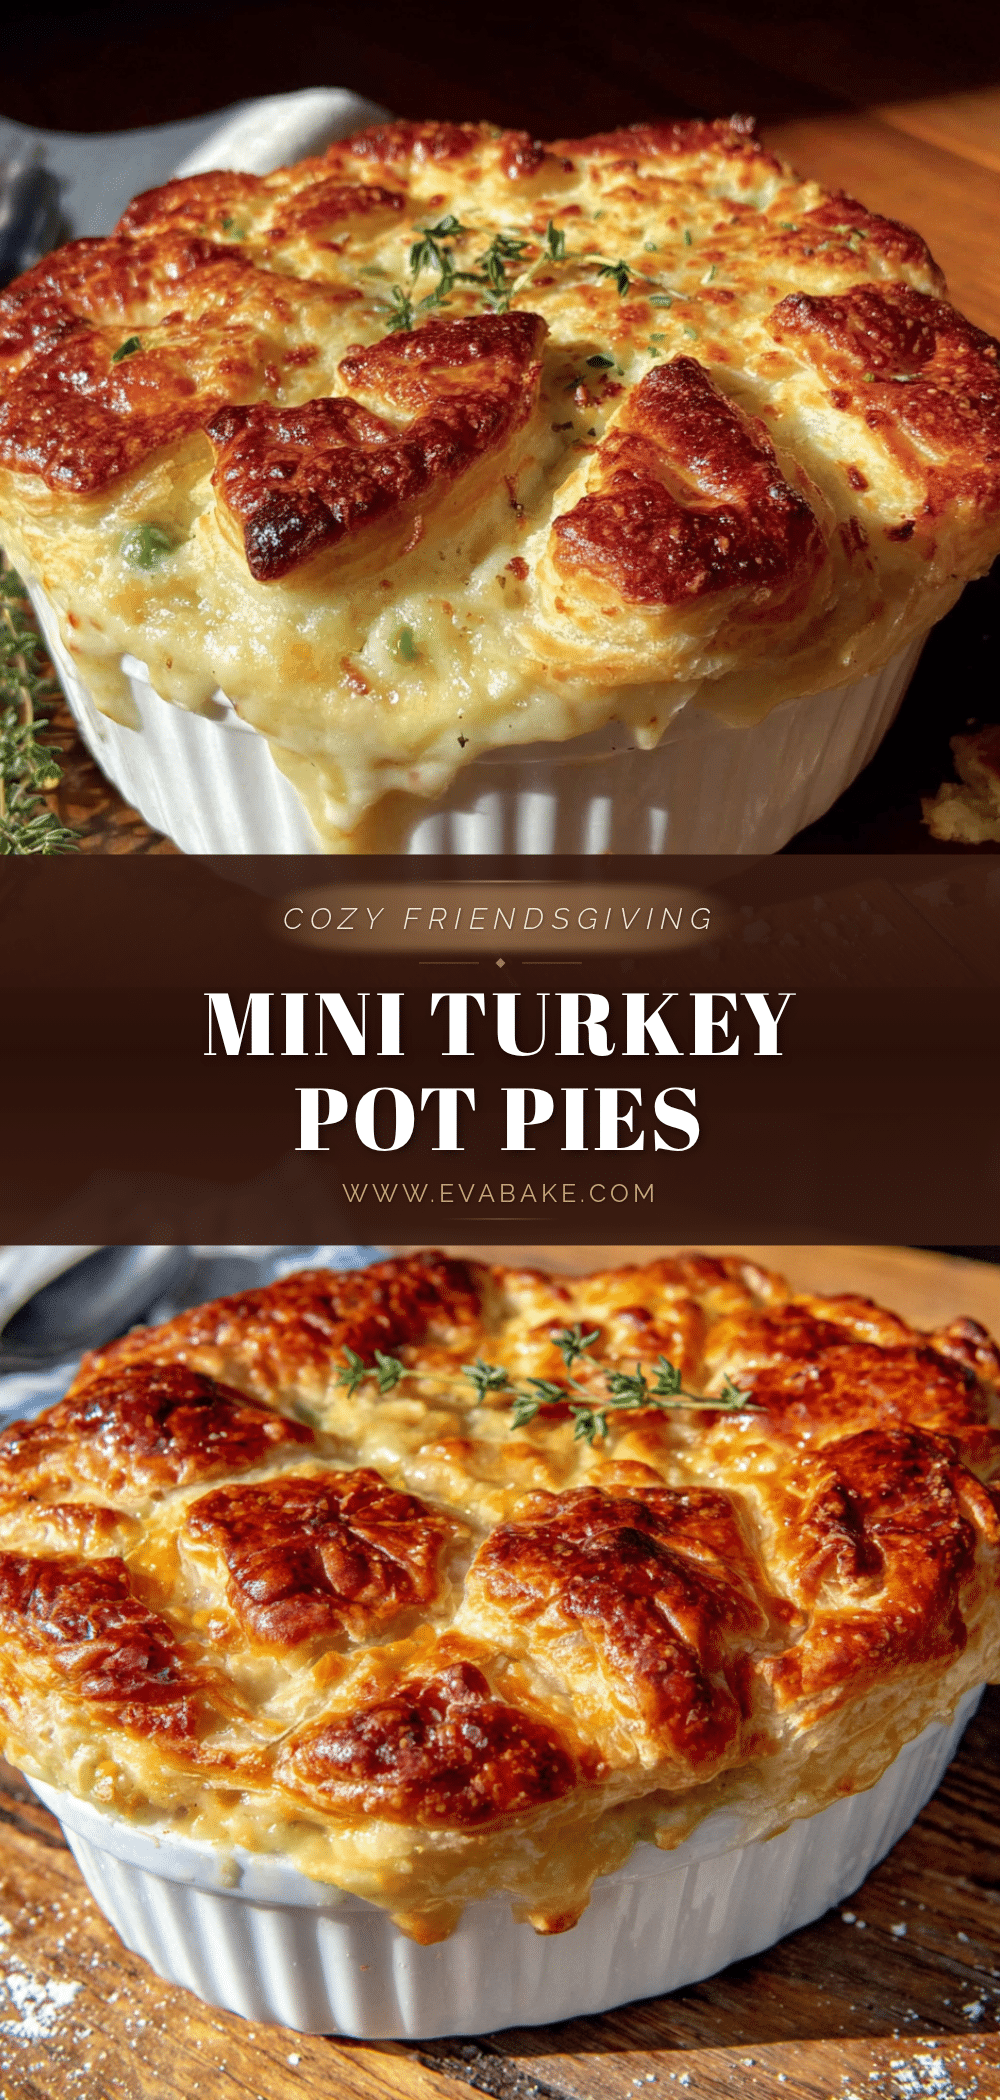
Easy Individual Turkey Pot Pies for Friendsgiving

These easy individual turkey pot pies are the perfect Friendsgiving dish—creamy, comforting, and made with leftover turkey or rotisserie chicken, topped with flaky puff pastry. Each guest gets their own personal pie, and they can be assembled ahead of time for stress-free hosting.
- Prep Time: 45 minutes
- Cook Time: 30 minutes
- Total Time: 1 hour 15 minutes
- Yield: 4 servings 1x
- Category: Main Course
- Cuisine: American
Ingredients
- 3 cups cooked turkey or chicken, shredded or diced
- 4 tablespoons unsalted butter, divided
- 1 medium yellow onion, diced (about 1 cup)
- 2 medium carrots, diced (about 1 cup)
- 2 celery stalks, diced (about ½ cup)
- 2 garlic cloves, minced
- ⅓ cup all-purpose flour
- 2 cups chicken or turkey broth
- 1 cup whole milk or half-and-half
- ¼ cup dry white wine (optional)
- 1 cup frozen peas
- 4–5 sprigs fresh thyme, leaves stripped
- 2 tablespoons fresh parsley, chopped
- 1 teaspoon salt (or to taste)
- ½ teaspoon black pepper (or to taste)
- 1 package (17.3 ounces) frozen puff pastry sheets (2 sheets), thawed
- 1 large egg, beaten with 1 tablespoon water (for egg wash)
Instructions
- Preheat oven to 400°F (200°C). Place a rack in the center. Line a baking sheet with parchment paper or foil.
- In a large skillet, melt 2 tablespoons butter over medium heat. Add onion, carrots, and celery. Cook, stirring occasionally, for 6-7 minutes until softened and onion is translucent. Add garlic and cook 30 seconds until fragrant.
- Push vegetables to one side of the skillet. Add remaining 2 tablespoons butter to the empty space. Let melt, then sprinkle flour over the entire pan. Stir to coat vegetables and form a paste. Cook 1-2 minutes, stirring constantly, until pale golden.
- Slowly pour in white wine while whisking continuously. Cook 30 seconds. Gradually add warm chicken broth while whisking, then warm milk. Continue whisking until sauce is smooth and thickens, about 2-3 minutes. It should coat the back of a spoon.
- Stir in thyme, salt, and pepper. Add shredded turkey and frozen peas. Simmer gently for 2-3 minutes. Taste and adjust seasoning. Remove from heat and stir in parsley. Filling should be thick but still saucy.
- Divide filling evenly among four 10-ounce ramekins, filling almost to the top (leave ¼ inch space). Place ramekins on prepared baking sheet.
- On a lightly floured surface, gently roll out each puff pastry sheet slightly. Cut each sheet into four squares or rounds large enough to overhang ramekins by about ½ inch.
- Place a pastry square over each ramekin. Gently press edges against the rim to seal. Cut 2-3 small slits in the top of each pastry for steam to escape.
- Brush beaten egg mixture generously over each pastry top.
- Bake for 25-30 minutes, until pastry is puffed and deep golden brown and filling is bubbling through slits. If pastry browns too quickly after 20 minutes, tent loosely with foil.
- Let pies cool on a wire rack for 5-10 minutes before serving.
Notes
Make filling a day ahead for best flavor. Keep puff pastry cold until ready to use. Warm broth and milk before adding to roux to prevent lumps. Filling should be slightly thinner than desired as it thickens during baking. Use a baking sheet under ramekins to catch drips. Cut enough steam vents (3 slits per pie) to prevent soggy pastry.
Nutrition
- Serving Size: 1 individual pie
- Calories: 500
- Sugar: 7
- Sodium: 715
- Fat: 30
- Saturated Fat: 12
- Carbohydrates: 38
- Fiber: 4
- Protein: 30
Keywords: individual pot pies, turkey pot pie, Friendsgiving, leftover turkey, puff pastry, comfort food, easy pot pie


