I had been looking for a banana bread that actually tasted like banana, not just sugar and flour with a vague fruity afterthought. For a while, I just accepted that most homemade banana loaves were either dry as a board or so wet they never cooked through in the center. The ones from bakeries were always perfect, sure, but they used three bowls and a stand mixer and a whole morning I didn’t have. I wanted something that came together in the time it took the oven to preheat. Something that didn’t require digging out the heavy mixer from the back of the cabinet. Something that felt like a real loaf, not a compromise.
This one-bowl banana bread started on a Tuesday afternoon when I had three sad, spotty bananas on the counter and a craving I couldn’t ignore. I grabbed a fork, a single bowl, and just started mixing, hoping for the best. The result was so unexpectedly good I actually stood there eating a slice before it had fully cooled. It was tender, it was moist, and the banana flavor was unmistakable. It had that perfect crackly top crust and a soft, almost creamy interior that reminded me of the loaves from my favorite café, except I had made it in about ten minutes with zero cleanup drama.
That’s the thing about this recipe. It’s not complicated, and it doesn’t pretend to be. It’s just honest, good banana bread that you can make any day of the week without a second thought. It’s the kind of recipe that becomes a habit, the one you turn to when you need something reliable and genuinely satisfying. I’ve made it dozens of times since that Tuesday, and it has never let me down.
Why You’ll Love This Recipe
This isn’t just another banana bread recipe. It’s the one that actually works, every single time, with minimal effort and maximum flavor.
- One Bowl, No Mixer: You don’t need a stand mixer, a hand mixer, or even a whisk if you’re feeling lazy. A fork and a single mixing bowl are all you need. The cleanup is almost nonexistent, which honestly might be my favorite part.
- Perfectly Moist Every Time: The ratio of wet to dry ingredients has been tested and tweaked until it produces a loaf that is tender and moist without being gummy. It stays that way for days, too.
- Deep Banana Flavor: This recipe uses very ripe bananas for maximum sweetness and flavor, plus a simple trick to intensify that banana taste without any artificial extracts.
- Simple Pantry Ingredients: You almost certainly have everything you need already. Butter, sugar, eggs, flour, baking soda, salt, and those spotty bananas you were about to toss.
- Incredibly Versatile: It’s perfect as is, but it also welcomes additions like chocolate chips, nuts, or dried fruit without any fuss. You can dress it up for company or keep it plain for a simple breakfast.
- Foolproof for Beginners: If you’ve ever had a banana bread fail on you, this recipe is the one to rebuild your confidence. It’s forgiving, straightforward, and produces a beautiful loaf even if you’re not an experienced baker.
Honestly, this is the kind of recipe that makes you feel like a hero. You take one bite of that warm, buttery, banana-packed slice and you forget you did almost no work to get there. It’s pure comfort, no stress attached.
What Ingredients You Will Need
This recipe uses simple, wholesome ingredients that come together to create a loaf that is far greater than the sum of its parts. The magic is in the ripeness of the bananas and the simplicity of the method.
Here is everything you will need:
- Unsalted Butter (1/2 cup, 113g), melted and slightly cooled: Butter gives this bread its rich flavor and tender crumb. I prefer unsalted so I can control the salt level. Melt it gently and let it sit for a minute so it’s not piping hot when it hits the eggs.
- Granulated Sugar (3/4 cup, 150g): Just enough to sweeten the bread without overpowering the banana flavor. It also helps create that beautiful golden-brown crust.
- Large Eggs (2), at room temperature: Eggs bind everything together and add structure. Room temperature eggs mix more evenly into the batter, so let them sit out for about 15 minutes if you can.
- Very Ripe Bananas (3 medium, about 1.5 cups mashed): This is non-negotiable. You want bananas that are heavily spotted, almost entirely brown, and very soft. The riper they are, the sweeter and more flavorful your bread will be. I sometimes keep a bag of overripe bananas in the freezer specifically for this recipe.
- Vanilla Extract (1 teaspoon): A good splash of vanilla rounds out the flavor and makes everything taste more, well, baked.
- All-Purpose Flour (1.5 cups, 190g): Standard all-purpose flour gives this bread the perfect structure. Spoon it into your measuring cup and level it off for accuracy.
- Baking Soda (1 teaspoon): This is our only leavening agent, and it reacts with the acidity of the bananas to help the bread rise. Make sure it’s fresh for the best results.
- Salt (1/2 teaspoon): Salt is crucial in baked goods. It doesn’t make the bread salty; it balances the sweetness and enhances all the other flavors.
- Optional Mix-Ins (1/2 cup): Chocolate chips, chopped walnuts or pecans, or dried cranberries are all excellent. I usually add a handful of dark chocolate chips because I have no self-control, and it’s wonderful.
Equipment Needed
The beauty of this recipe is that it requires almost nothing special. Here is what you will need:
- One Large Mixing Bowl: Any bowl will do, but a medium to large one gives you room to mix without splattering.
- A Fork or Whisk: A fork works perfectly for mashing the bananas and mixing the batter. A whisk is fine too, but honestly, a fork is easier to clean.
- A 9×5-inch Loaf Pan: This is the standard size for banana bread. If you use a different size, you will need to adjust the baking time.
- Parchment Paper or Non-Stick Spray: To ensure your loaf releases cleanly from the pan. Parchment paper with overhanging edges is my go-to for easy removal.
- Cooling Rack: Essential for letting the bread cool evenly and prevent a soggy bottom.
That’s it. No mixer, no sifter, no special attachments. If you have these few things, you are ready to bake. I’ve made this in a friend’s kitchen with a plastic fork and a metal loaf pan that was older than I was, and it turned out perfectly.
Preparation Method
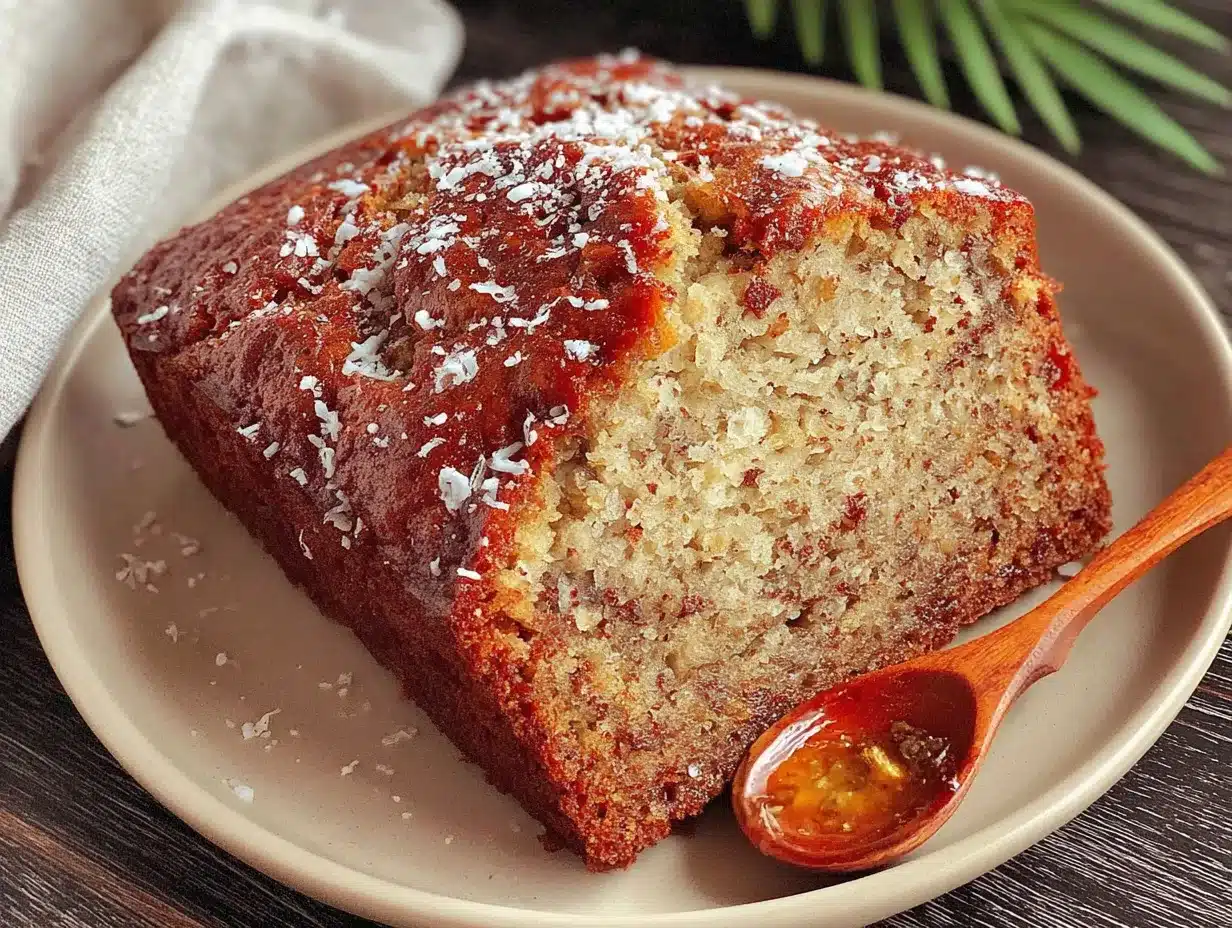
This is the easiest part. Follow these steps, and you will have a beautiful loaf of banana bread in just over an hour.
- Preheat and Prep: Preheat your oven to 350°F (175°C). Grease your 9×5-inch loaf pan with butter or non-stick spray, or line it with a strip of parchment paper leaving overhang on the long sides for easy lifting.
- Mash the Bananas: In your large mixing bowl, add the three very ripe bananas. Using your fork, mash them until they are mostly smooth with just a few small lumps remaining. You want a texture like a chunky applesauce. Don’t over-mash them into a liquid; a little texture is nice.
- Melt and Mix the Wet Ingredients: Pour the melted and slightly cooled butter over the mashed bananas. Add the granulated sugar, the two room-temperature eggs, and the vanilla extract. Stir everything together with your fork until it is well combined and smooth. It will look a little thin and slightly curdled, and that is perfectly fine.
- Add the Dry Ingredients: Sprinkle the all-purpose flour, baking soda, and salt directly over the wet mixture. Stir gently with your fork until just combined. A few streaks of flour are okay. Do not overmix the batter, or your banana bread will be tough instead of tender. If you are adding mix-ins like chocolate chips or nuts, fold them in now with a few gentle stirs.
- Bake the Loaf: Pour the batter into your prepared loaf pan and spread it into an even layer. Place it in the preheated oven and bake for 55 to 65 minutes. The bread is done when a toothpick inserted into the center comes out clean or with just a few moist crumbs. The top should be a deep golden brown and cracked beautifully.
- Cool in the Pan: Remove the loaf from the oven and place it on a cooling rack. Let it cool in the pan for about 10 to 15 minutes. This allows it to set and makes it much easier to remove.
- Remove and Cool Completely: After 15 minutes, use the parchment paper overhang to lift the loaf out of the pan and transfer it directly to the cooling rack. Let it cool completely before slicing, if you can wait that long. I usually can’t, and a warm slice with a little butter is a beautiful thing.
Cooking Tips & Techniques
Over the many loaves I have baked, I have learned a few things that make this recipe even more foolproof. Here are some tips I wish I had known from the start.
- The Ripeness Rule: Do not use yellow bananas. They are not sweet enough and will not mash properly. The bananas should be so soft that they practically squish when you peel them. If they are not there yet, you can speed up the process by baking them in their skins at 300°F (150°C) for 15-20 minutes until they are soft and blackened. Let them cool before using.
- Don’t Overmix: This is the number one mistake people make. Once you add the flour, stir only until you can’t see dry flour anymore. Overmixing develops the gluten in the flour, which will make your banana bread dense and rubbery instead of light and tender. A slightly lumpy batter is a good sign.
- Check for Doneness Early: Ovens vary wildly. Start checking your loaf at the 50-minute mark. If the top is browning too quickly but the center is still raw, tent the loaf loosely with aluminum foil for the last 15 minutes of baking.
- The Toothpick Test: Insert a wooden toothpick or a thin skewer into the very center of the loaf. If it comes out clean, it’s done. If it comes out with wet batter, it needs more time. A few moist crumbs are fine; wet batter is not.
- Let It Rest: I know it’s hard, but letting the bread cool completely before slicing makes a huge difference. It allows the crumb to set properly. If you slice it while it’s still hot, it will be crumbly and fall apart. The flavor is also better after it has rested.
Variations & Adaptations
This simple batter is a fantastic base for all kinds of delicious variations. Here are a few of my favorites.
- Chocolate Chip Banana Bread: This is my personal go-to. Fold 1/2 cup of semi-sweet or dark chocolate chips into the batter before baking. The melted pockets of chocolate are incredible with the sweet banana.
- Nutty Banana Bread: Add 1/2 cup of toasted, chopped walnuts or pecans. Toasting the nuts first in a dry pan for a few minutes really brings out their flavor and keeps them crunchy in the bread.
- Vegan Banana Bread: You can easily make this vegan. Substitute the melted butter with 1/2 cup of melted coconut oil or a neutral vegetable oil. Replace the two eggs with two flax eggs (2 tablespoons of ground flaxseed mixed with 5 tablespoons of water, left to sit for 5 minutes to thicken). The texture will be slightly different but still delicious.
- Gluten-Free Banana Bread: Swap the all-purpose flour for a good quality 1-to-1 gluten-free baking flour blend. Do not use a single type of gluten-free flour like almond or coconut flour without adjusting the recipe, as it will not work the same way.
- Spiced Banana Bread: Add 1 teaspoon of ground cinnamon and 1/2 teaspoon of ground nutmeg to the dry ingredients. A pinch of ground ginger or cloves is also lovely for a warming, cozy flavor. This is perfect for fall, and it pairs beautifully with a cozy pumpkin cream cheese swirl muffin for a full autumn brunch spread.
Serving & Storage Suggestions
This banana bread is wonderful in so many ways. Here is how to serve and store it to get the most out of every slice.
- Serving: Serve it at room temperature for the best texture. A slice is perfect on its own, but I also love it lightly toasted with a pat of salted butter. For a real treat, you can warm a slice and top it with a scoop of vanilla ice cream or a drizzle of honey. It also makes a fantastic breakfast or an afternoon snack with a cup of coffee or tea.
- Storing at Room Temperature: Wrap the completely cooled loaf tightly in plastic wrap or aluminum foil, or store it in an airtight container. It will stay moist and delicious at room temperature for up to 4 days. I find the flavor actually improves on the second day.
- Freezing: This banana bread freezes beautifully. You can freeze the whole loaf or individual slices. Wrap it tightly in a layer of plastic wrap, then a layer of aluminum foil. It will keep in the freezer for up to 3 months. To thaw, simply leave it at room temperature for a few hours or pop a frozen slice in the toaster.
- Reheating: The best way to revive a slice of banana bread is to toast it. A few minutes in a toaster or a toaster oven will crisp the edges and warm the center, making it taste almost freshly baked. You can also microwave a slice for about 15 seconds, but it will be softer and less crisp.
Nutritional Information & Benefits
While this is a treat, it does have some redeeming qualities, especially if you make a few mindful swaps.
- Estimated Per Slice (1/10th of loaf): Approximately 280 calories, 12g fat, 40g carbohydrates, 4g protein, 2g fiber. This is an estimate and will vary based on specific ingredients and any mix-ins you add.
- Bananas are a Good Source of Potassium: Bananas are well-known for being rich in potassium, which is an essential mineral for heart health and muscle function.
- Natural Sweetness: Using very ripe bananas allows you to use a little less refined sugar than some other recipes, as the fruit provides a lot of natural sweetness.
- Dietary Considerations: This recipe can be adapted to be vegan and gluten-free as noted in the variations section. It is nut-free if you omit the optional nuts and use a nut-free flour.
- Potential Allergens: This recipe contains wheat (gluten), dairy (butter), and eggs. Please adjust as needed for your dietary requirements.
Conclusion
This easy one-bowl banana bread is more than just a recipe; it’s a solution. It’s the answer to those spotty bananas on your counter, the craving for something warm and homemade, and the need for a dessert or breakfast that doesn’t require a sink full of dishes. It’s the kind of recipe you will come back to again and again, and it will never let you down.
I love this recipe because it is a true reflection of what home baking should be: simple, forgiving, and deeply satisfying. It’s a loaf that fills your kitchen with an incredible aroma and makes everyone who tries it smile. I encourage you to make it your own. Add your favorite mix-ins, try a new spice, or just enjoy it plain. The beauty is in its simplicity.
I would love to hear how yours turns out. Did you add chocolate chips? Walnuts? Did you make it gluten-free? Please leave a comment below and share your experience. And if you loved it, please share this recipe with a friend who needs a little homemade comfort in their life. Happy baking!
Frequently Asked Questions
Can I use frozen bananas for this banana bread?
Yes, absolutely. In fact, frozen bananas are perfect because they become very soft and release a lot of liquid when thawed, which intensifies the banana flavor. Thaw them completely in a bowl, then mash them with the liquid that has pooled. It adds extra moisture and flavor to the bread.
Why did my banana bread sink in the middle?
This usually happens for one of two reasons. The first is that the bread was underbaked. The center needs enough time to set. The second is that the batter was overmixed, which can create too much air that then collapses in the oven. Make sure your oven is at the right temperature and that you only mix until the ingredients are combined.
Can I make this into muffins instead of a loaf?
Yes, you can easily turn this batter into banana muffins. Line a 12-cup muffin tin with paper liners and fill each cup about 3/4 full. Bake at 350°F (175°C) for 18-22 minutes, or until a toothpick inserted into the center of a muffin comes out clean. This makes them perfect for a quick breakfast or a snack on the go.
How do I make sure my banana bread is moist?
Use very ripe bananas and do not overbake the loaf. Those are the two most critical factors. Measuring your flour correctly is also important. Too much flour will dry out the bread. Use the spoon and level method for the best results. The recipe is designed to be very moist, so trust the process.
Can I use a different type of pan?
You can, but you will need to adjust the baking time. A standard 9×5-inch loaf pan is ideal. If you use a smaller pan, the batter will be deeper and will need more time to bake. If you use a larger pan, the batter will be shallower and will bake faster. Keep a close eye on it and use the toothpick test to check for doneness.
Pin This Recipe!
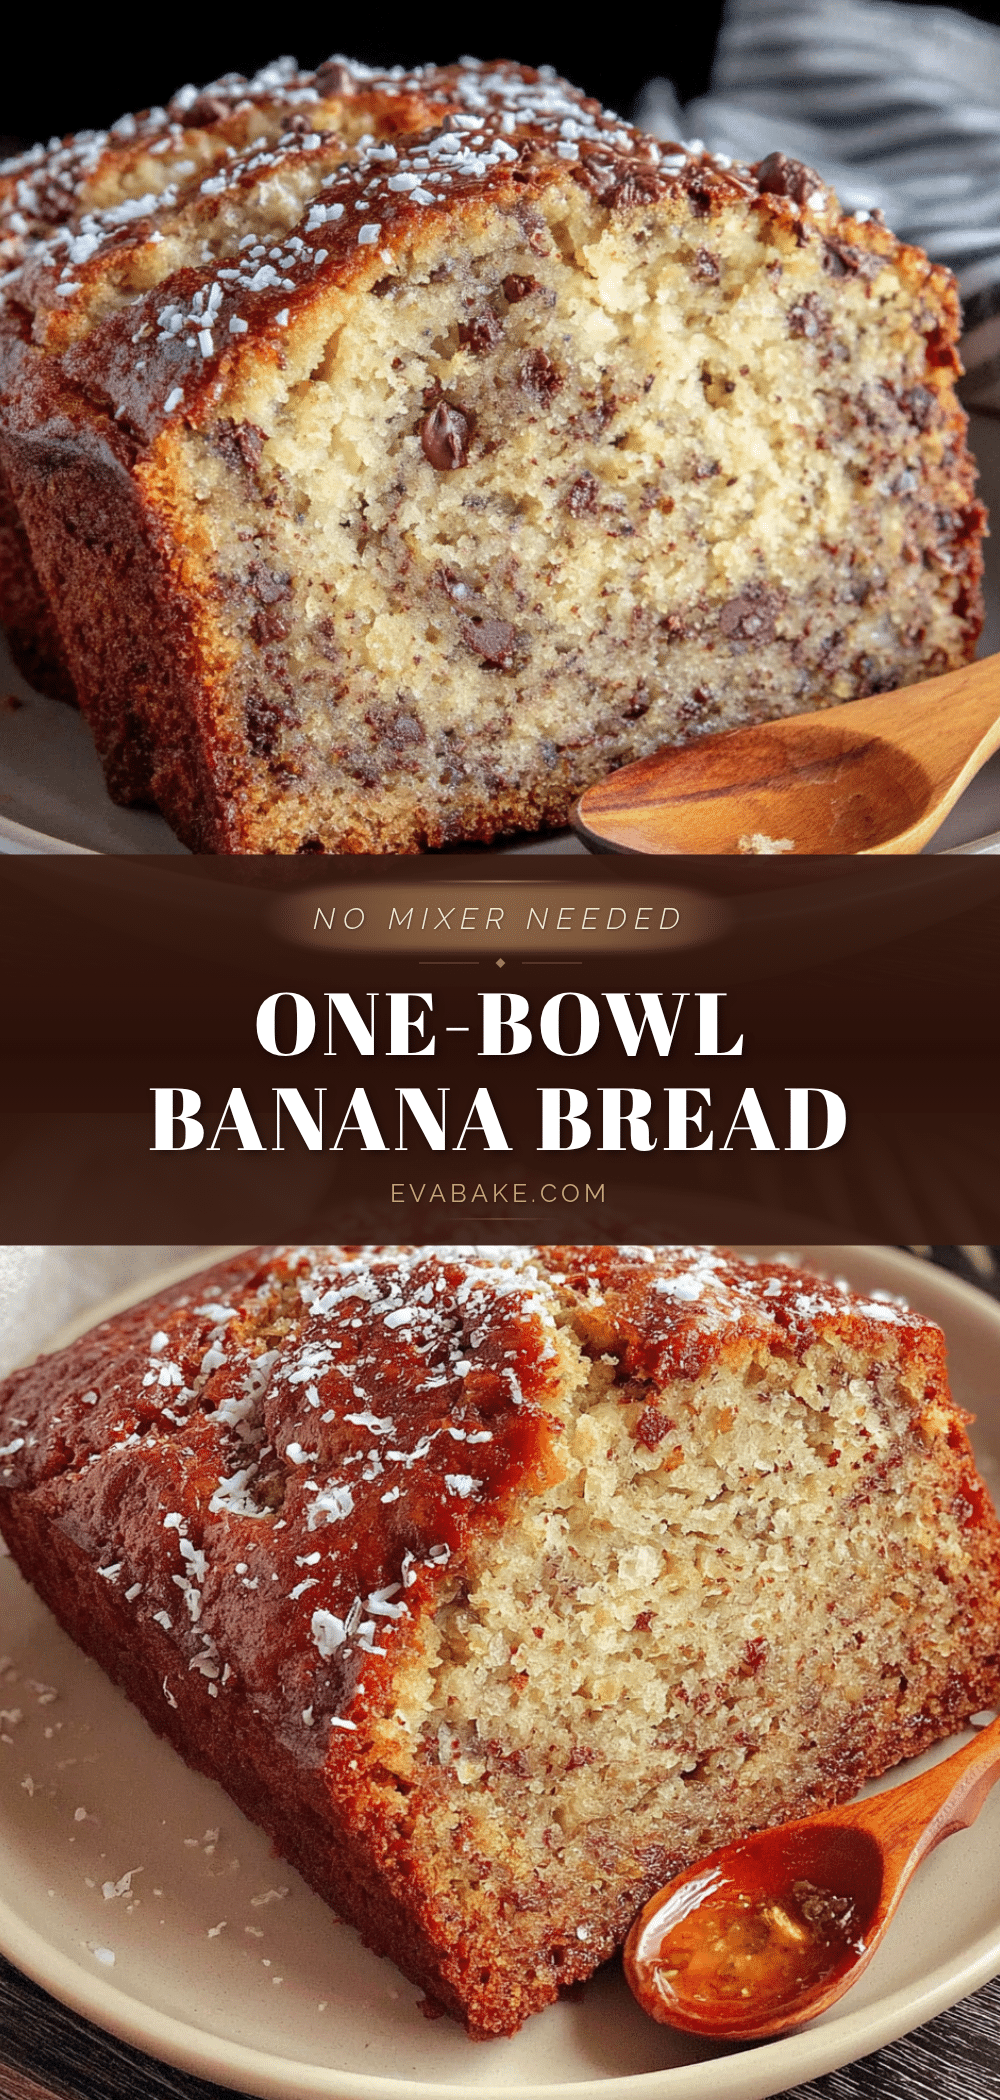
Easy One-Bowl Banana Bread Recipe (No Mixer Needed)
This one-bowl banana bread is tender, moist, and packed with deep banana flavor. Made with simple pantry ingredients and no mixer required, it’s a foolproof recipe that comes together in minutes and delivers a perfect loaf every time.
- Prep Time: 10 minutes
- Cook Time: 55 minutes
- Total Time: 1 hour 5 minutes
- Yield: 10 servings 1x
- Category: Dessert
- Cuisine: American
Ingredients
- 1/2 cup (113g) unsalted butter, melted and slightly cooled
- 3/4 cup (150g) granulated sugar
- 2 large eggs, at room temperature
- 3 medium very ripe bananas (about 1.5 cups mashed)
- 1 teaspoon vanilla extract
- 1.5 cups (190g) all-purpose flour
- 1 teaspoon baking soda
- 1/2 teaspoon salt
- 1/2 cup optional mix-ins (chocolate chips, chopped walnuts or pecans, dried cranberries)
Instructions
- Preheat your oven to 350°F (175°C). Grease a 9×5-inch loaf pan with butter or non-stick spray, or line it with parchment paper leaving overhang on the long sides.
- In a large mixing bowl, mash the three very ripe bananas with a fork until mostly smooth with a few small lumps.
- Add the melted butter, granulated sugar, eggs, and vanilla extract to the mashed bananas. Stir with a fork until well combined and smooth.
- Sprinkle the flour, baking soda, and salt over the wet mixture. Stir gently with a fork until just combined. Do not overmix. If using mix-ins, fold them in now.
- Pour the batter into the prepared loaf pan and spread evenly. Bake for 55 to 65 minutes, until a toothpick inserted into the center comes out clean or with a few moist crumbs.
- Remove from the oven and let the loaf cool in the pan on a cooling rack for 10 to 15 minutes.
- Use the parchment paper overhang to lift the loaf out of the pan and transfer it to the cooling rack. Let cool completely before slicing.
Notes
Use very ripe, heavily spotted bananas for the best flavor. Do not overmix the batter to avoid a dense loaf. For a vegan version, substitute melted coconut oil for butter and use two flax eggs. For gluten-free, use a 1-to-1 gluten-free flour blend. The bread stays moist at room temperature for up to 4 days and freezes well for up to 3 months.
Nutrition
- Serving Size: 1 slice (1/10 of loa
- Calories: 280
- Sugar: 20
- Sodium: 250
- Fat: 12
- Saturated Fat: 7
- Carbohydrates: 40
- Fiber: 2
- Protein: 4
Keywords: banana bread, easy banana bread, one bowl banana bread, no mixer banana bread, moist banana bread, homemade banana bread


