The bowl was scraped clean before I even put the chips away. My friend texted me at midnight asking for the recipe — said her kids were already planning which Halloween party to bring it to next. Honestly? I didn’t see that coming. This wasn’t some elaborate party project I’d spent hours on. It was a last-minute idea born from a half-empty fridge and a bag of tortilla chips I’d bought on a whim.
I’d been staring at a container of sour cream and a block of cream cheese, trying to figure out how to make something festive without running to the store. Halloween was two days away, and I had zero interest in spending my evening piping complicated designs or layering seven different things. Then it hit me — what if I turned that classic taco dip into something that actually looked like a spider web? Not with scary ingredients or creepy decorations, but with a simple swirl pattern that anyone could pull off. No skills required. No special tools. Just a toothpick and a little patience.
The first time I made this Easy Spider Web Taco Dip for Halloween Parties, it disappeared in under twenty minutes. People kept circling back to the table, scooping up chip after chip, and asking who brought the “spider dip.” I didn’t even have a spider on it yet — just the web pattern. That’s when I knew I’d stumbled onto something good. Something that looked like you tried way harder than you actually did. And isn’t that the whole point of Halloween hosting?
Why You’ll Love This Recipe
Let me tell you why this dip has become my go-to for every Halloween gathering. I’ve tested it at three different parties now, and it never fails to get the same reaction — people hover around it like it’s the main attraction.
Ready in 15 Minutes Flat. No joke. You can have this assembled and on the table before your guests finish taking off their coats. No baking, no simmering, no complicated steps. Just mix, spread, and swirl.
Ingredients You Already Have. Taco seasoning, sour cream, cream cheese, salsa, and shredded lettuce — these are probably in your kitchen right now. No weird specialty items that’ll sit in your pantry for months after Halloween.
Perfect for Halloween Parties. Whether you’re hosting a costume party, a kids’ Halloween movie night, or a spooky potluck, this dip fits right in. It’s festive without being fussy. And kids absolutely love the spider web design — I’ve seen them fight over who gets to scoop from the center.
Always a Crowd-Pleaser. I’ve brought this to gatherings where people claimed they “weren’t hungry” and watched them go back for thirds. It’s one of those dips that hits every craving — creamy, tangy, slightly spicy, and perfectly scoopable.
Unbelievably Easy to Customize. Want it spicier? Add hot sauce to the cream cheese layer. Need it vegetarian? Skip the meat and load up on beans and veggies. The base recipe is forgiving enough that you can tweak it without messing anything up.
What makes this different from every other taco dip out there? It’s the spider web pattern, honestly. That little touch transforms a standard party dip into something that feels special. People take photos of it. They ask how you did it. And when you tell them it took thirty seconds with a toothpick, they don’t believe you.
This is the kind of appetizer that makes you look like a Halloween hero without breaking a sweat. And honestly? That’s my favorite kind of recipe.
What Ingredients You Will Need
This recipe uses simple, everyday ingredients to create something that tastes way more impressive than it should. Most of these are pantry staples or things you probably have in your fridge right now.
For the Base Layer
- 1 block (8 oz) cream cheese, softened to room temperature — this is non-negotiable for a smooth, spreadable texture. I prefer Philadelphia brand for the creamiest results.
- 1/2 cup sour cream — full-fat works best here, but Greek yogurt is a fine substitute if you want a lighter option.
- 1 packet (1 oz) taco seasoning — use your favorite brand, or make your own with chili powder, cumin, garlic powder, and paprika. I’ve used both and honestly can’t tell the difference.
- 1 cup salsa — choose your heat level. I go with medium for a balanced kick, but mild works great for kids. Drain off any excess liquid before adding so your dip doesn’t get watery.
For the Toppings
- 1 cup shredded lettuce — iceberg or romaine, finely chopped. It adds that fresh crunch that balances the creamy base.
- 1/2 cup shredded cheddar cheese — sharp or mild, both work. Mexican blend is also excellent here. Shred your own if you can — it melts better and tastes fresher.
- 1/4 cup black olives, sliced — optional but adds a nice briny pop. I’ve skipped them before and the dip was still amazing.
- 1/4 cup diced tomatoes — remove the seeds first so they don’t make the dip soggy. Roma tomatoes work best because they’re less watery.
- 1/4 cup green onions, sliced — for color and a mild onion kick. Chives work too if that’s what you have.
For the Spider Web Design
- 1/2 cup sour cream — this goes into a piping bag or zip-top bag for the web pattern. Keep it cold so it holds its shape better.
- A few black olives, sliced into spider shapes — two slices per spider, one for the body and one cut into legs. Totally optional but kids go crazy for them.
Ingredient Tip: For the smoothest cream cheese layer, let your cream cheese sit out for at least 30 minutes before mixing. If you’re in a hurry, microwave it for 10-15 seconds — just don’t overdo it or you’ll get lumpy dip.
Substitution Guidance: Use dairy-free cream cheese and sour cream for a lactose-friendly version. For a gluten-free option, just check your taco seasoning label — most are naturally gluten-free, but some brands add fillers.
Equipment Needed
You don’t need anything fancy for this recipe. Here’s what you’ll need:
- A 9-inch pie plate or shallow serving dish — anything round works best for the spider web design. I’ve used a cast iron skillet before and it looked amazing.
- Electric hand mixer or stand mixer — for getting that cream cheese layer silky smooth. A whisk works too, but your arm will thank you for using a mixer.
- Piping bag or zip-top bag — for the sour cream web pattern. A small zip-top bag with the corner snipped off works perfectly and costs nothing.
- A toothpick or skewer — this is the secret weapon for creating the web pattern. A bamboo skewer works even better because it’s longer.
- Spatula — for spreading the cream cheese mixture evenly. An offset spatula is ideal, but a regular one works fine.
- Cutting board and knife — for prepping your toppings. Nothing fancy needed here.
I’ve made this dip using nothing but a bowl, a spoon, and a butter knife, and it turned out great. The only tool I’d say is truly essential is that toothpick — without it, you can’t make the spider web pattern. Everything else is flexible.
Preparation Method
Let me walk you through this step by step. I promise it’s easier than it looks.
Step 1: Soften the Cream Cheese
Take your cream cheese out of the fridge about 30 minutes before you start. You want it soft enough that you can press your finger into it and leave an indent. If you’re short on time, unwrap it and microwave on low power for 10-15 seconds. Just don’t melt it — warm cream cheese won’t hold its shape.
Step 2: Make the Cream Cheese Base
In a medium mixing bowl, combine the softened cream cheese, 1/2 cup sour cream, and the entire packet of taco seasoning. Beat with an electric mixer on medium speed until everything is smooth and fully combined. Scrape down the sides of the bowl halfway through. The mixture should be thick but spreadable — if it seems too stiff, add a tablespoon of milk or water.
Step 3: Spread the Base
Transfer the cream cheese mixture to your serving dish. Use a spatula to spread it into an even layer, making sure it reaches the edges. The surface should be as flat as possible — this makes the spider web pattern look cleaner. Take your time here; a smooth base is worth the extra minute.
Step 4: Add the Salsa Layer
Spoon the salsa evenly over the cream cheese layer. Use the back of your spoon to spread it gently, being careful not to mix it into the cream cheese. You want distinct layers. If your salsa is watery, drain off the excess liquid first — nobody wants a soggy dip.
Step 5: Layer the Toppings
Sprinkle the shredded lettuce evenly over the salsa. Follow with the shredded cheese, then the diced tomatoes, sliced olives, and green onions. Try to distribute everything evenly so every scoop gets a little bit of everything. Don’t press the toppings down — leave them loose and fluffy.
Step 6: Create the Spider Web Pattern
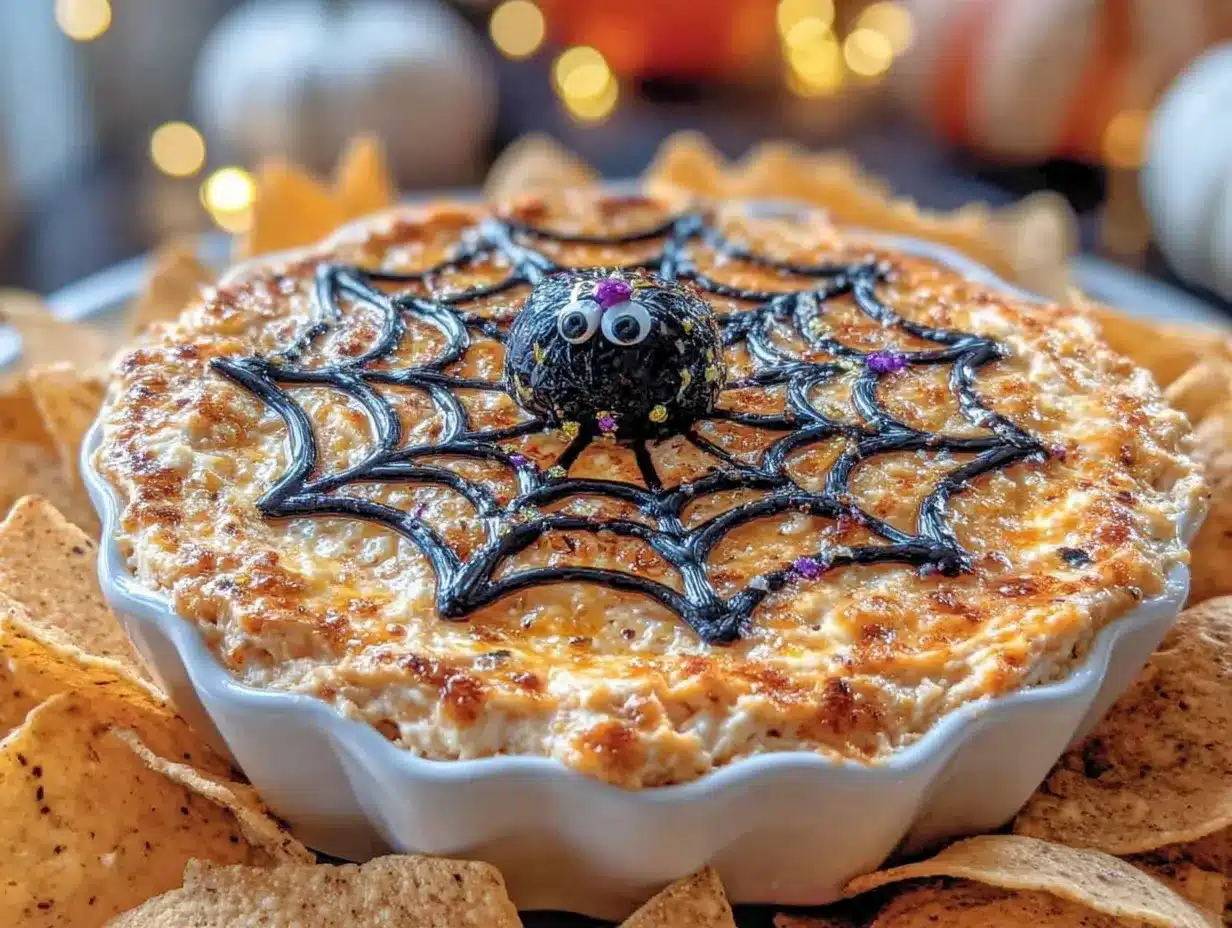
This is where the magic happens. Fill a piping bag or small zip-top bag with the remaining 1/2 cup of sour cream. Snip off a tiny corner of the bag — you want a thin line, not a thick ribbon. Pipe concentric circles starting from the center of the dip, working your way outward. Space them about an inch apart. Then, using a toothpick or skewer, drag lines from the center outward through all the circles, like you’re drawing spokes on a wheel. Space these about an inch apart too. The toothpick will pull the sour cream into those beautiful web-like arcs. Wipe the toothpick clean between each line for the cleanest look.
Step 7: Add the Spiders (Optional but Fun)
For the spiders, take two black olive slices per spider. Use one slice for the body and cut the other into thin strips for legs. Arrange them on the web — I like to place one spider right in the center and a couple more crawling along the edges. Kids absolutely lose it over this detail.
Step 8: Chill and Serve
Cover the dip with plastic wrap and refrigerate for at least 30 minutes before serving. This helps the layers set and makes the flavors meld together. When you’re ready to serve, bring it out about 10 minutes beforehand — it’s best slightly chilled, not ice cold.
Sensory Cue: When you drag that toothpick through the sour cream circles, you’ll feel a slight resistance as it pulls through the toppings. The web pattern should look clean and distinct — if it looks messy, your toothpick might be too thick, or you might be pressing too hard.
Personal Tip: I always make the spider web pattern right before serving, not ahead of time. The sour cream stays brighter and the pattern looks sharper. If you make it too far in advance, the sour cream can start to blend into the toppings and lose that crisp web effect.
Cooking Tips & Techniques
After making this dip about a dozen times, I’ve picked up a few tricks that make a real difference. Let me share what I’ve learned the hard way.
Don’t Overmix the Cream Cheese Base. I made this mistake the first time — I kept beating the cream cheese mixture until it was super fluffy. Turns out, that makes it too airy and it doesn’t hold up well under the toppings. Mix just until everything is combined and smooth. You want it dense enough to support the layers above it.
Drain Your Salsa. This is probably the most important tip I can give you. Salsa is watery, and if you dump it straight onto the cream cheese layer, it’ll turn into a runny mess. I pour my salsa into a fine-mesh strainer and let it drain for a few minutes while I prep the other ingredients. Your dip will stay firm and scoopable instead of turning into soup.
Keep the Sour Cream Cold for Piping. The colder your sour cream is, the thicker it’ll be, and the cleaner your web lines will look. I stick the piping bag in the fridge for 10 minutes before I pipe the circles. It makes a noticeable difference.
Wipe Your Toothpick Between Lines. I cannot stress this enough. Each time you drag a line through the sour cream circles, the toothpick picks up some sour cream and topping bits. If you don’t wipe it clean, the next line will be messy and blurry. Keep a paper towel nearby and wipe after every single line. It takes two seconds and makes your web look professional.
Work from the Outside In. When piping the sour cream circles, start at the outer edge and work your way toward the center. This way, if you mess up the spacing, it’s less noticeable in the middle. Plus, it’s easier to keep your circles even when you’re working from the outside.
Timing is Everything. I’ve learned to assemble the dip up to the toppings step a few hours ahead, then add the spider web pattern right before serving. The web stays crisp and bright, and the dip stays cold. If you’re bringing this to a party, assemble it at home, keep it in the fridge, and add the web pattern when you arrive. Your host will be impressed.
My Biggest Failure: The first time I made this, I used low-fat cream cheese and nonfat sour cream. The base was too thin, the web pattern dissolved within minutes, and the whole thing turned into a soupy disaster. Full-fat ingredients really do make a difference here. Trust me on this one.
Variations & Adaptations
One of the best things about this dip is how easy it is to change up. Here are some variations I’ve tried and loved.
Spicy Southwest Version. Add a can of drained black beans and a can of corn to the topping layer. Use pepper jack cheese instead of cheddar, and add a drizzle of hot sauce to the cream cheese base. This version has more texture and a serious kick. I brought this to a Halloween potluck and it was gone in fifteen minutes.
Loaded Meat Lover’s Dip. Brown a pound of ground beef or turkey with taco seasoning, let it cool, and sprinkle it over the salsa layer before adding the other toppings. You can also add crumbled cooked chorizo for extra flavor. This version is heartier and works great as a main dish for a casual Halloween dinner.
Vegetarian Black Bean & Corn Version. Skip the meat entirely and load up on black beans, corn, diced bell peppers, and jalapeños. The beans add protein and fiber, and the corn gives a nice pop of sweetness. This is my go-to for parties where I’m not sure about everyone’s dietary preferences.
Guacamole Layer Addition. Spread a layer of guacamole between the cream cheese base and the salsa. It adds creaminess and a fresh avocado flavor that pairs beautifully with the taco seasoning. Just make sure your guacamole is thick enough to hold its shape — watery guac will make everything slide around.
Dairy-Free Adaptation. Use dairy-free cream cheese and sour cream alternatives. I’ve tried Kite Hill and Violife brands, and both work well. The texture might be slightly softer, so chill the dip longer before serving. Everything else stays the same.
Personal Variation: I once made a “mummy” version by piping the sour cream in horizontal stripes across the whole dip instead of a web pattern, then adding two olive eyes at one end. It looked like a mummy wrapped in bandages. My nephew still talks about that dip two years later.
Serving & Storage Suggestions
This dip is best served cold, straight from the fridge. I like to take it out about 10 minutes before serving so it softens slightly — it’s easier to scoop that way. Serve it with sturdy tortilla chips that won’t break when you dig in. I recommend scoop-style chips or thick restaurant-style chips. They hold up better than thin ones.
What to Serve With It: Besides chips, this dip goes great with fresh veggies like bell pepper strips, cucumber rounds, and carrot sticks. It’s also amazing spread on warm flour tortillas or stuffed into mini taco shells. If you’re serving a crowd, set it out alongside other party snacks like crispy beer battered pickle chips with spicy chipotle ranch dip or savory loaded pulled pork totchos for a full appetizer spread.
Storage Instructions: Cover the dip tightly with plastic wrap or transfer it to an airtight container. It’ll keep in the refrigerator for up to 3 days. The lettuce might get a little sad after the first day, but the flavors actually get better as they meld together. I’ve eaten this on day two and honestly liked it even more.
Freezing: I don’t recommend freezing this dip. The cream cheese and sour cream will separate when thawed, and the toppings will turn into a watery mess. Make it fresh or store it in the fridge — that’s your best bet.
Reheating: This is a cold dip, so no reheating needed. If you’ve stored it and it’s too cold straight from the fridge, let it sit at room temperature for 15-20 minutes before serving. That’s all it needs.
Flavor Development: Here’s something interesting — the dip actually tastes better the next day. The taco seasoning has time to fully infuse the cream cheese, and all the flavors settle into each other. If you’re making this for a party, I’d actually recommend assembling it the night before (minus the spider web pattern) and adding the web right before serving. Your guests will thank you.
Nutritional Information & Benefits
Here’s an approximate nutritional breakdown per serving (based on 12 servings):
| Nutrient | Amount Per Serving |
|---|---|
| Calories | 185 |
| Total Fat | 14g |
| Saturated Fat | 8g |
| Cholesterol | 40mg |
| Sodium | 420mg |
| Total Carbohydrates | 9g |
| Dietary Fiber | 1g |
| Sugars | 4g |
| Protein | 5g |
Health Benefits: This dip isn’t health food, but it does have some redeeming qualities. The cream cheese provides calcium and protein. The salsa adds lycopene from the tomatoes, which is great for heart health. And the lettuce gives you a little bit of fiber and vitamins A and K. Not bad for a party appetizer!
Dietary Considerations: This recipe is naturally vegetarian and can be made gluten-free by checking your taco seasoning label. For a lower-calorie version, use reduced-fat cream cheese and sour cream, and load up on extra veggies. For a dairy-free version, use plant-based alternatives as mentioned above.
Potential Allergens: This recipe contains dairy (cream cheese, sour cream, cheddar cheese). It does not contain nuts, eggs, or soy in its standard form. Always check your ingredient labels if you’re serving someone with allergies.
Personal Wellness Perspective: I’m not one to pretend party dips are health food. But I do think there’s something to be said for making choices that feel good. This dip uses real ingredients — no processed cheese sauces, no artificial flavors. It’s indulgent, yes, but it’s also made from things you can actually recognize. And for a Halloween party? That’s good enough for me.
Conclusion
This Easy Spider Web Taco Dip has become my secret weapon for Halloween parties, and I honestly think it’ll become yours too. It’s quick enough to throw together on a busy weeknight, impressive enough to steal the show at a party, and simple enough that even a beginner cook can nail it on the first try.
What I love most about this recipe is how it makes you look like you put in way more effort than you actually did. That spider web pattern? It takes thirty seconds and a toothpick. But every single time I set this dip on the table, people act like I’ve performed some kind of culinary magic trick. And honestly? I let them think that.
I’d love to hear how yours turns out. Did you add spiders? Did you try a different variation? Did your kids fight over who got the center scoop? Drop a comment below and let me know — I read every single one, and your ideas might just end up in my next version of this dip.
Until next time, happy Halloween, and may your chips always be sturdy enough for the scoop.
Frequently Asked Questions
Can I make this dip ahead of time?
Yes! Assemble the dip up to the toppings step, cover it, and refrigerate for up to 24 hours. Add the spider web pattern right before serving for the cleanest look.
How do I keep the spider web pattern from blurring?
Keep your sour cream cold, pipe the pattern right before serving, and wipe your toothpick clean between each line. Chilling the dip after adding the web also helps it hold.
Can I use Greek yogurt instead of sour cream?
Absolutely. Greek yogurt works well in the cream cheese base and for the spider web pattern. Just make sure it’s thick — strain it if it seems watery.
What chips work best for this dip?
Sturdy scoop-style tortilla chips are your best bet. Thin chips will break under the weight of the toppings. I also love serving it with bell pepper strips and cucumber rounds for a lower-carb option.
How long does this dip last in the fridge?
Covered tightly, it’ll keep for up to 3 days. The lettuce might wilt after the first day, but the flavors actually improve. Just give it a stir before serving if the layers have settled.
Pin This Recipe!
Easy Spider Web Taco Dip: Best Halloween Party Appetizer

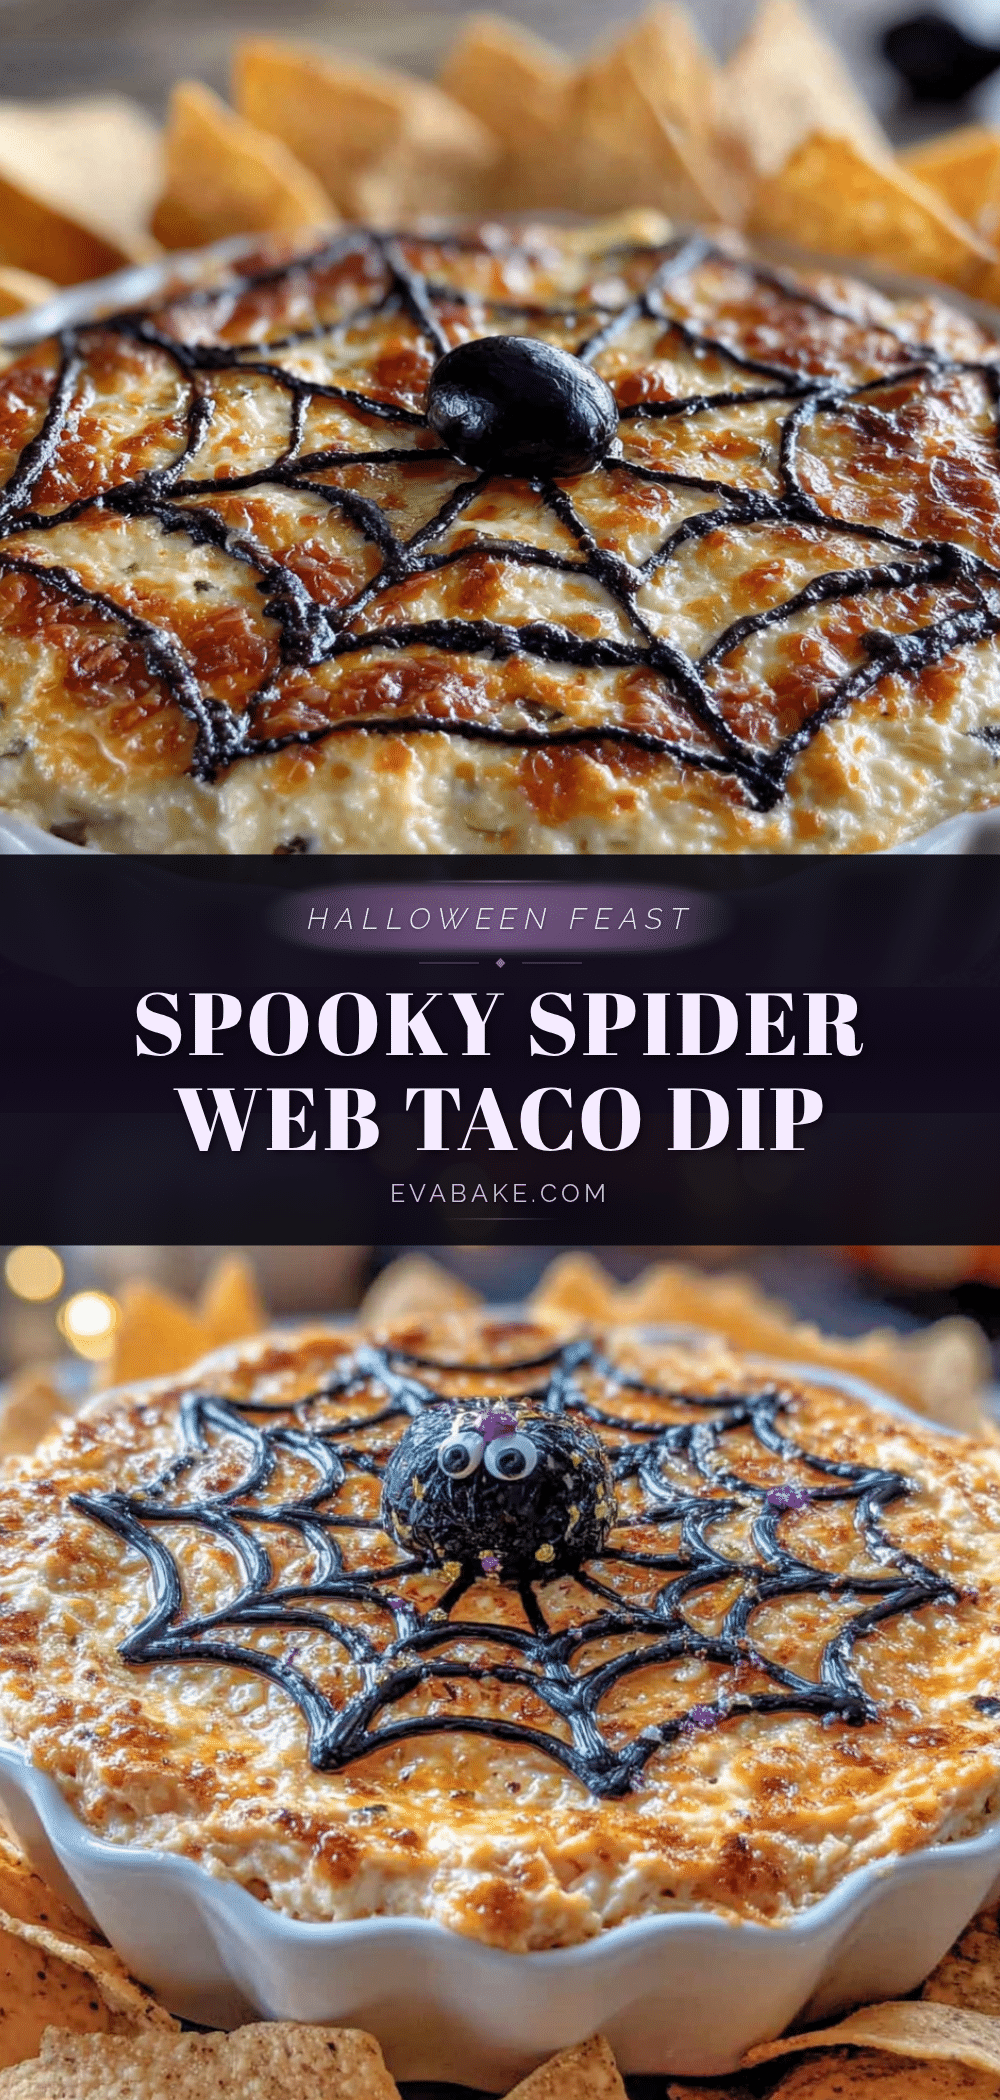
This Easy Spider Web Taco Dip is a quick, festive Halloween appetizer made with simple ingredients like cream cheese, sour cream, salsa, and taco seasoning. The spider web pattern, created with a toothpick, transforms a classic taco dip into a show-stopping party dish that disappears in minutes.
- Prep Time: 15 minutes
- Cook Time: 0 minutes
- Total Time: 45 minutes (includes 30 minutes chilling)
- Yield: 12 servings 1x
- Category: Appetizer
- Cuisine: Mexican-American
Ingredients
- 1 block (8 oz) cream cheese, softened to room temperature
- 1/2 cup sour cream
- 1 packet (1 oz) taco seasoning
- 1 cup salsa, drained
- 1 cup shredded lettuce (iceberg or romaine)
- 1/2 cup shredded cheddar cheese
- 1/4 cup black olives, sliced
- 1/4 cup diced tomatoes, seeds removed
- 1/4 cup green onions, sliced
- 1/2 cup sour cream (for spider web design)
- A few black olives, sliced into spider shapes (optional)
Instructions
- Soften the cream cheese: Take cream cheese out of the fridge about 30 minutes before starting, or microwave on low for 10-15 seconds until soft but not melted.
- Make the cream cheese base: In a medium mixing bowl, combine softened cream cheese, 1/2 cup sour cream, and taco seasoning. Beat with an electric mixer on medium speed until smooth and fully combined. If too stiff, add a tablespoon of milk or water.
- Spread the base: Transfer the cream cheese mixture to a 9-inch pie plate or shallow serving dish. Use a spatula to spread into an even layer, reaching the edges. Ensure the surface is as flat as possible.
- Add the salsa layer: Spoon the drained salsa evenly over the cream cheese layer. Use the back of a spoon to spread gently without mixing into the cream cheese.
- Layer the toppings: Sprinkle shredded lettuce evenly over the salsa. Follow with shredded cheese, diced tomatoes, sliced olives, and green onions. Distribute evenly without pressing down.
- Create the spider web pattern: Fill a piping bag or small zip-top bag with the remaining 1/2 cup sour cream. Snip off a tiny corner. Pipe concentric circles starting from the center, spacing them about an inch apart. Using a toothpick or skewer, drag lines from the center outward through all the circles, like spokes on a wheel, spacing them about an inch apart. Wipe the toothpick clean between each line.
- Add the spiders (optional): For each spider, use two black olive slices—one for the body and one cut into thin strips for legs. Arrange on the web, such as one in the center and a few along the edges.
- Chill and serve: Cover with plastic wrap and refrigerate for at least 30 minutes before serving. Bring out about 10 minutes beforehand; serve slightly chilled.
Notes
For the smoothest cream cheese layer, let cream cheese sit out for at least 30 minutes. Drain salsa to prevent watery dip. Keep sour cream cold for piping. Wipe toothpick clean between each line for cleanest web pattern. Assemble up to toppings step ahead, add spider web pattern right before serving. Full-fat ingredients work best.
Nutrition
- Serving Size: 1 serving (based on
- Calories: 185
- Sugar: 4
- Sodium: 420
- Fat: 14
- Saturated Fat: 8
- Carbohydrates: 9
- Fiber: 1
- Protein: 5
Keywords: Halloween appetizer, spider web dip, taco dip, easy party dip, Halloween party food, cream cheese dip, no-bake appetizer