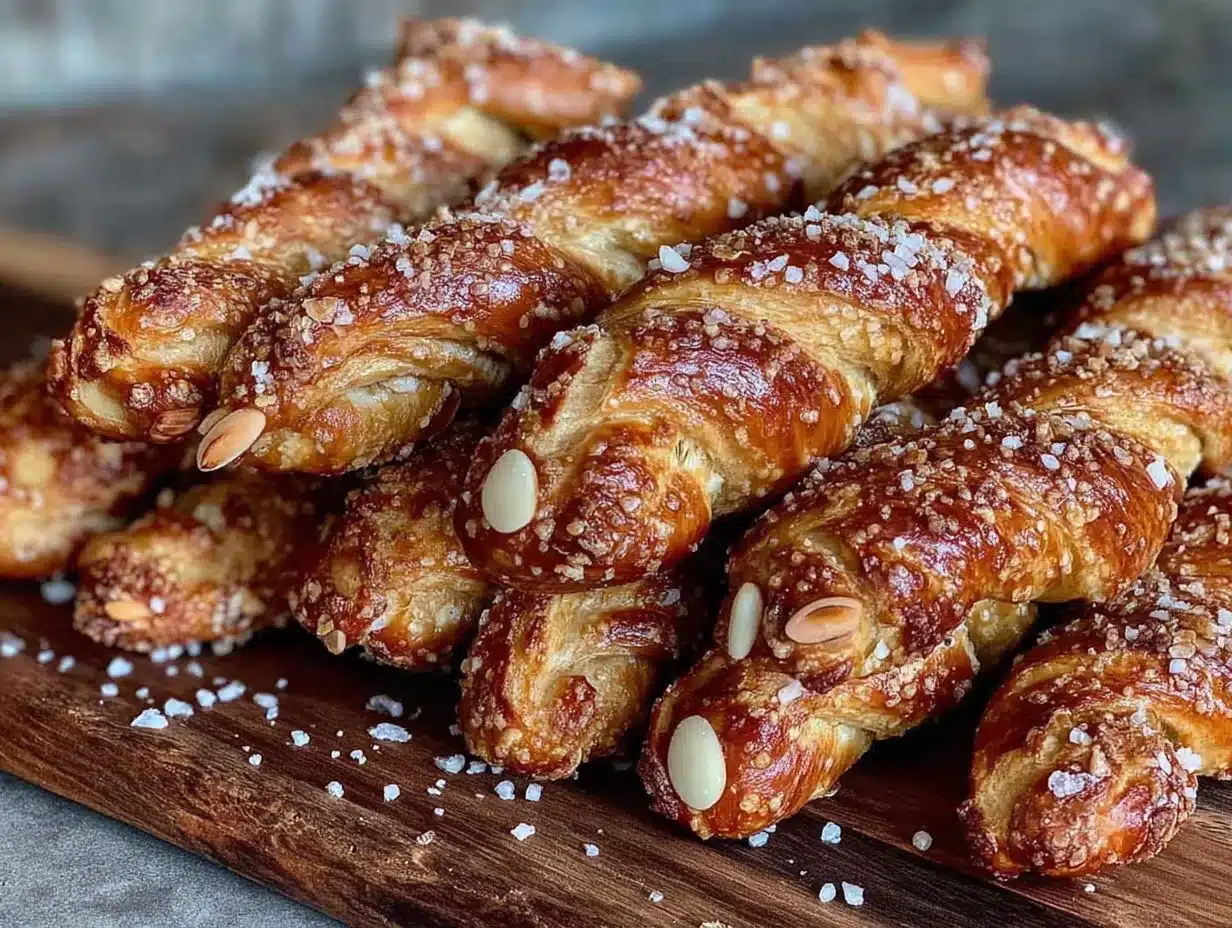
My nephew Leo asked why I couldn’t just use regular pretzel sticks instead of shaping dough into fingers. I started to explain why that wouldn’t work—then stopped. Honestly, I had no good reason. I was so locked into the idea of making everything from scratch for Halloween that I’d forgotten the whole point: having fun and making something creepy. So I grabbed a bag of pretzel sticks, some almond slivers for fingernails, and a little red gel for that “blood” effect. The result was way better than anything I’d carefully planned. Leo stood there, arms crossed, trying not to smile as I admitted he was right. These witch finger pretzels are now our Halloween tradition, and I’m not ashamed to say a nine-year-old out-cooked me that day.
There’s something about Halloween snacks that just hits different, right? You want them to look gross but taste amazing. These witch finger pretzels nail that balance perfectly. They’re salty, crunchy, and just the right amount of creepy. I mean, who doesn’t love a snack that makes people do a double-take before grabbing a handful? Maybe you’ve been there—spending hours on elaborate Halloween treats only to watch everyone reach for the store-bought chips instead. Not this year, friend. These come together in minutes and disappear just as fast.
The best part? You don’t need to be a pastry chef or even a confident baker. If you can dip a pretzel in chocolate and stick an almond on top, you’ve got this. And let me tell you, watching someone’s face when they realize that “finger” is just a pretzel? Priceless. I keep making these because they remind me that sometimes the best ideas come from letting go of control and listening to the kid in the room. Plus, they’re genuinely delicious—and that’s the part that matters most.
Why You’ll Love This Recipe
Let’s be real for a second. Halloween snacks can be a total pain. You’ve got costumes to finish, decorations to hang, and a million other things competing for your attention. These witch finger pretzels solve that problem without sacrificing the fun factor. Here’s why they work so well:
- Quick & Easy: Comes together in under 20 minutes, perfect for last-minute Halloween prep or when the kids suddenly announce they need treats for school tomorrow. No fancy techniques required.
- Simple Ingredients: You probably already have pretzel sticks, chocolate chips, and almonds in your pantry. The only specialty item is a little red gel icing, and you can find that at any grocery store this time of year.
- Perfect for Halloween Parties: Great for classroom treats, office potlucks, or just setting out before trick-or-treaters arrive. They look impressive without any actual effort.
- Crowd-Pleaser: Kids go wild for them, and adults can’t resist either. The salty-sweet combo is basically irresistible, and the creepy factor makes everyone smile.
- Unbelievably Delicious: The crunch of the pretzel, the richness of the chocolate, and the nutty almond fingernail create a texture and flavor combo that’s next-level snack territory.
What makes these different from other Halloween treats? It’s the simplicity, honestly. Most spooky snacks require baking, cooling, decorating, and a whole lot of patience. These come together in one bowl and a microwave. I’ve tested this with multiple types of chocolate—milk, dark, white—and they all work beautifully. The key is using good-quality melting chocolate or candy melts, which set firmly and don’t get sticky. Ghirardelli melting wafers are my go-to because they melt smoothly and harden with that satisfying snap.
This recipe isn’t just good—it’s the kind that makes you close your eyes after the first bite. It’s Halloween fun reimagined: simpler, faster, but with the same spooky satisfaction. Perfect for impressing guests without stress, or turning a quick snack into something memorable.
What Ingredients You Will Need
This recipe uses simple, everyday ingredients to deliver maximum Halloween creep factor without any fuss. Most of these are pantry staples, especially if you keep a well-stocked snack drawer. Here’s what you’ll need:
For the Witch Fingers
- Pretzel sticks (about 40-50 sticks) — Look for thick, sturdy pretzel sticks that won’t break easily when dipped. I prefer Snyder’s of Hanover brand for their consistent size and crunch.
- Chocolate melting wafers or candy melts (1 cup, about 170g) — Milk chocolate gives the most authentic “finger” color, but dark chocolate works great too. White chocolate makes them look like pale witch fingers if you want a different vibe.
- Whole almonds (about 40-50 pieces) — These become the fingernails. Look for raw or roasted, unsalted almonds. You want them to be relatively uniform in size for the best visual effect.
- Red gel icing or red food coloring (1 small tube) — This creates the “blood” at the base of the fingernail. The gel works better than liquid coloring because it stays where you put it.
Optional Decorations
- Green food coloring (if using white chocolate) — A drop or two turns white chocolate into a sickly green witch finger color.
- Powdered sugar (for dusting) — Makes them look even more eerie, like they’ve been sitting in a tomb.
- Edible glitter or luster dust (for a magical touch) — A little shimmer never hurt anyone, even witches.
For the chocolate, I recommend Ghirardelli or Wilton melting wafers. They melt smoothly in the microwave and set with a nice shine. If you’re using regular chocolate chips, add a teaspoon of coconut oil or shortening to help them melt smoothly and thin out enough for dipping. Trust me on this one—I learned the hard way that straight chocolate chips are too thick for clean dipping.
If you’re making these for a classroom or party where nut allergies are a concern, swap the almonds for sunflower seeds or small candy corn pieces. They won’t look quite as realistic, but they’ll still be creepy and delicious. For a completely nut-free version, you can skip the almond fingernails entirely and just score a line across the tip of the chocolate with a toothpick to create a nail shape.
Equipment Needed
You don’t need much for this recipe, which is part of its charm. Here’s the short list:
- Microwave-safe bowl (small to medium size) — For melting the chocolate. A glass measuring cup works great because it’s easy to dip into.
- Baking sheet (standard half-sheet size) — Lined with parchment paper or a silicone baking mat for easy cleanup.
- Spatula or spoon (for stirring the chocolate) — A small silicone spatula is ideal.
- Toothpicks (optional but helpful) — For applying the red gel icing precisely.
- Small piping bag or zip-top bag (for the red gel) — If you’re using liquid food coloring instead of gel, a piping bag with a tiny tip helps with precision.
If you don’t have parchment paper, wax paper works in a pinch. Just make sure it’s not the non-stick kind that has a coating—you want the chocolate to set firmly. I’ve also used aluminum foil in desperate times, and it works okay, but the chocolate can sometimes stick. A silicone baking mat is honestly my favorite because nothing sticks to it, and you can reuse it for years. They’re about $10 at most kitchen stores and worth every penny.
One tip I learned after my first batch: let the pretzels cool completely on the baking sheet before moving them. If you try to transfer them too early, the chocolate will smudge and you’ll end up with a sticky mess. Patience, young grasshopper. Let them set for at least 15 minutes at room temperature, or pop them in the fridge for 5 minutes if you’re in a hurry.
Preparation Method
Here’s where the magic happens. Follow these steps, and you’ll have a platter of creepy witch fingers in no time. I’ve broken it down so even the most kitchen-phobic Halloween host can pull this off.
- Set up your workstation — Line a baking sheet with parchment paper or a silicone mat. Have your pretzel sticks, almonds, and red gel icing ready. This goes fast once you start dipping, so you want everything within arm’s reach.
- Melt the chocolate — Place the chocolate melting wafers in a microwave-safe bowl. Microwave in 30-second intervals, stirring between each, until completely smooth. This usually takes about 1-2 minutes total. Be careful not to overheat—chocolate burns easily and turns grainy. If you’re adding green food coloring to white chocolate, stir it in now.
- Test the chocolate consistency — Dip a pretzel stick about two-thirds of the way into the melted chocolate. Lift it out and let the excess drip back into the bowl. The chocolate should coat the pretzel evenly without being too thick. If it’s too thick, add a teaspoon of coconut oil or shortening and stir well.
- Create the finger shape — Dip each pretzel stick into the chocolate, leaving about an inch undipped at the bottom (this becomes the “wrist” area). Let the excess drip off, then place it on the prepared baking sheet. Gently press an almond onto the chocolate-dipped tip to create the fingernail. The almond should be positioned with the pointed end facing outward, like a real fingernail.
- Add the “knuckle” details — While the chocolate is still wet, use a toothpick or the tip of a small knife to create small lines across the chocolate to mimic knuckles. Gently press into the chocolate to create indentations. Don’t press too hard or you’ll break the pretzel—I’ve done that more times than I’d like to admit.
- Create the “blood” effect — Once all pretzels are dipped and decorated, squeeze a tiny dot of red gel icing at the base of each almond fingernail. Use a toothpick to smear it slightly, creating a bloody, gruesome effect. Less is more here—you want it to look like a small cut, not a massacre.
- Let them set — Allow the pretzels to cool completely at room temperature until the chocolate is firm, about 15-20 minutes. If you’re impatient (like me), pop them in the refrigerator for 5-10 minutes. Just don’t leave them in too long, or condensation can form and make the chocolate sticky.
- Arrange and serve — Once set, carefully remove the witch fingers from the baking sheet. Arrange them on a platter in a way that looks like a hand reaching up from the grave. You can pile them in a bowl, arrange them like fingers on a serving board, or stick them upright in a cup of green-tinted popcorn for a truly disturbing display.
A few notes from my kitchen disasters: If your chocolate starts to thicken while you’re working, pop it back in the microwave for 10 seconds and stir. If an almond falls off, just press it back on while the chocolate is still wet—no harm done. And if you accidentally make a mess with the red gel, don’t stress. It actually adds to the creepy factor. Imperfection is your friend here.
Cooking Tips & Techniques
After making these witch finger pretzels for three Halloweens straight, I’ve picked up a few tricks that make the process smoother and the results spookier. Here’s what I wish I’d known from the start.
Temperature matters — Chocolate is finicky. If your kitchen is hot and humid, the chocolate won’t set properly. Work in a cool room if possible, and avoid making these on a rainy day. I learned this the hard way when I made a batch during an unseasonably warm October afternoon and ended up with sticky, smudgy fingers that looked more like melted mess than creepy treats.
Prep your almonds first — Sort through your almonds and pick out the ones that are roughly the same size. You want them to look uniform on the pretzels. If you have a mix of sizes, the big ones will look like monster fingernails and the small ones will look like baby witch fingers. Both are fine, but consistency makes them look more intentional.
Don’t skip the knuckle lines — This is what takes them from “chocolate-covered pretzels with almonds” to “actual witch fingers.” The knuckle indentations are what sell the illusion. Use a toothpick or the tip of a skewer for the best results. Make two or three lines per finger, spaced evenly.
Work in batches — Don’t try to dip all 50 pretzels at once. Work in batches of 10-15, dipping, decorating, and setting them before moving on. This keeps the chocolate from thickening and ensures each finger gets attention while the chocolate is still wet. Trust me, trying to rush through this is how you end up with crooked almonds and no knuckle lines.
Use a fork for dipping — If you’re having trouble getting an even coating, use a fork to hold the pretzel while you dip it. This gives you more control and keeps your fingers clean. Plus, you can tap the fork on the edge of the bowl to remove excess chocolate more effectively.
Make extras — These disappear fast. I always make at least double what I think I need because people can’t stop eating them. They’re the perfect snack for munching while handing out candy, and kids will grab handfuls before you can say “trick or treat.”
Variations & Adaptations
One of the best things about this recipe is how easy it is to customize. Here are some variations I’ve tried and loved:
Green Witch Fingers
Use white chocolate melts and add a few drops of green food coloring to create a sickly, swampy witch finger color. The green looks especially creepy against the red “blood” gel. My niece refused to eat the regular ones but couldn’t get enough of the green version—kids are weird like that.
Zombie Fingers
After the chocolate sets, drizzle a little more melted chocolate in a contrasting color over the top to look like rotting flesh. White chocolate over dark chocolate creates a particularly gruesome effect. Add a few drops of red gel on top for extra gore.
Vampire Fingers
Instead of almond fingernails, use red candy melts or red hots for a bloody nail effect. Press them into the chocolate while it’s still wet. These look less realistic but more cartoonishly spooky, which some people prefer.
Gluten-Free Version
Use gluten-free pretzel sticks. They’re available at most grocery stores now, and they work exactly the same way. Just check the label to make sure your chocolate is also gluten-free—most are, but it’s worth verifying.
Nut-Free Version
Skip the almonds entirely. Instead, use a toothpick to score a fingernail shape into the chocolate while it’s still wet. You can also use small candy corn pieces pressed into the chocolate for a sweet, nut-free alternative. Just press them in gently so they don’t break.
Spicy Witch Fingers
Add a pinch of cayenne pepper or chili powder to the melted chocolate for a spicy kick. The heat sneaks up on you after the sweet chocolate melts, which is a fun surprise. Start with just a pinch—you can always add more, but you can’t take it out.
Serving & Storage Suggestions
These witch finger pretzels are best served at room temperature, right after the chocolate has set. The contrast between the crunchy pretzel and the smooth chocolate is perfect. Arrange them on a black or dark-colored platter for maximum creepy effect—the dark background makes the “blood” red pop.
For a truly disturbing presentation, stick the fingers upright in a cup or small vase filled with green-tinted popcorn or black beans. They’ll look like a hand reaching up from the grave. You can also scatter them on a serving board with other Halloween treats like candy corn, pumpkin seeds, and ghost-shaped marshmallows.
Storage is simple: keep them in an airtight container at room temperature for up to a week. Don’t refrigerate them unless absolutely necessary—the chocolate can develop condensation when it comes back to room temperature, which makes it sticky and less appealing. If you do refrigerate them, let them sit at room temperature for 10 minutes before serving to let any moisture evaporate.
You can freeze these for up to three months. Layer them between sheets of parchment paper in an airtight container. Thaw at room temperature for about 15 minutes before serving. The chocolate might lose a bit of its shine, but they’ll still taste great.
One thing I’ve noticed: these actually get better after a day or two. The flavors meld together, and the chocolate sets even firmer. So if you’re planning a Halloween party, make them a day ahead. Your future self will thank you.
Nutritional Information & Benefits
Let’s be honest—these are a treat, not a health food. But here’s the breakdown if you’re curious. Per serving (about 3-4 witch fingers):
- Calories: Approximately 180-220 calories
- Fat: 10-12g (mostly from chocolate and almonds)
- Carbohydrates: 20-25g
- Protein: 3-4g
- Sugar: 12-15g
On the bright side, almonds are a good source of vitamin E, magnesium, and healthy fats. Dark chocolate (if you use it) contains antioxidants and can even have some heart health benefits in moderation. And pretzels are lower in fat than many other snack options—though they’re higher in sodium, so keep that in mind if you’re watching your salt intake.
These are naturally vegetarian and can be made gluten-free and nut-free with simple substitutions. They contain dairy if you use milk chocolate, but you can find dairy-free chocolate chips or melting wafers at most health food stores. Just read the labels carefully.
I personally love that these are portion-controlled by their very nature. Each witch finger is a single serving, so it’s easy to grab a few without overindulging. That said, I’ve never seen anyone eat just one. They’re too addictive.
Conclusion
These Halloween witch finger pretzels are proof that the best recipes often come from unexpected places. A nine-year-old’s suggestion, a moment of letting go of control, and a willingness to be wrong—that’s the origin story here. And honestly, that’s what makes them special. They’re not complicated. They’re not fussy. They’re just fun, delicious, and perfectly creepy for Halloween.
I hope you give these a try, whether you’re hosting a Halloween party, sending treats to school, or just looking for something spooky to snack on while watching horror movies. Don’t be afraid to customize them—add more blood, skip the almonds, use different colors. Make them your own. That’s the whole point of cooking, right?
If you make these, I’d love to hear about it. Drop a comment below and tell me how they turned out. Did your kids love them? Did they freak out your coworkers? Did you eat the whole batch before anyone else got a chance? No judgment here—I’ve definitely been there. Happy Halloween, and may your witch fingers be delightfully creepy!
Frequently Asked Questions
Can I make these witch finger pretzels ahead of time?
Absolutely! These are actually better made a day ahead. The chocolate sets firmly, and the flavors meld together. Store them in an airtight container at room temperature for up to a week. Just don’t refrigerate them unless you absolutely have to—condensation can make the chocolate sticky.
What if I don’t have almond slivers for the fingernails?
No problem! You can use whole almonds, candy corn, sunflower seeds, or even just score a fingernail shape into the chocolate with a toothpick. The almond slivers look most realistic, but any small, flat-ish nut or candy will work. For a nut-free version, skip the almond entirely and use a toothpick to create the nail shape.
How do I keep the chocolate from getting too thick while I’m working?
Work in small batches and keep the chocolate warm. If it starts to thicken, microwave it for 10 seconds and stir. You can also add a teaspoon of coconut oil or shortening to thin it out. Just don’t overheat it—chocolate burns easily and turns grainy.
Can I use white chocolate instead of milk chocolate?
Yes! White chocolate works great, especially if you add a drop of green food coloring for a sickly witch finger effect. White chocolate is a bit softer than milk chocolate, so it might not set as firmly, but it still works beautifully. Just be careful not to overheat it—white chocolate burns even more easily than milk chocolate.
How many witch fingers does this recipe make?
One batch using about 1 cup of chocolate melts makes approximately 40-50 witch fingers, depending on how thickly you coat them. I always make at least double because they disappear so fast. For a party of 10-15 people, I’d recommend making at least 60-80 fingers.
Pin This Recipe!
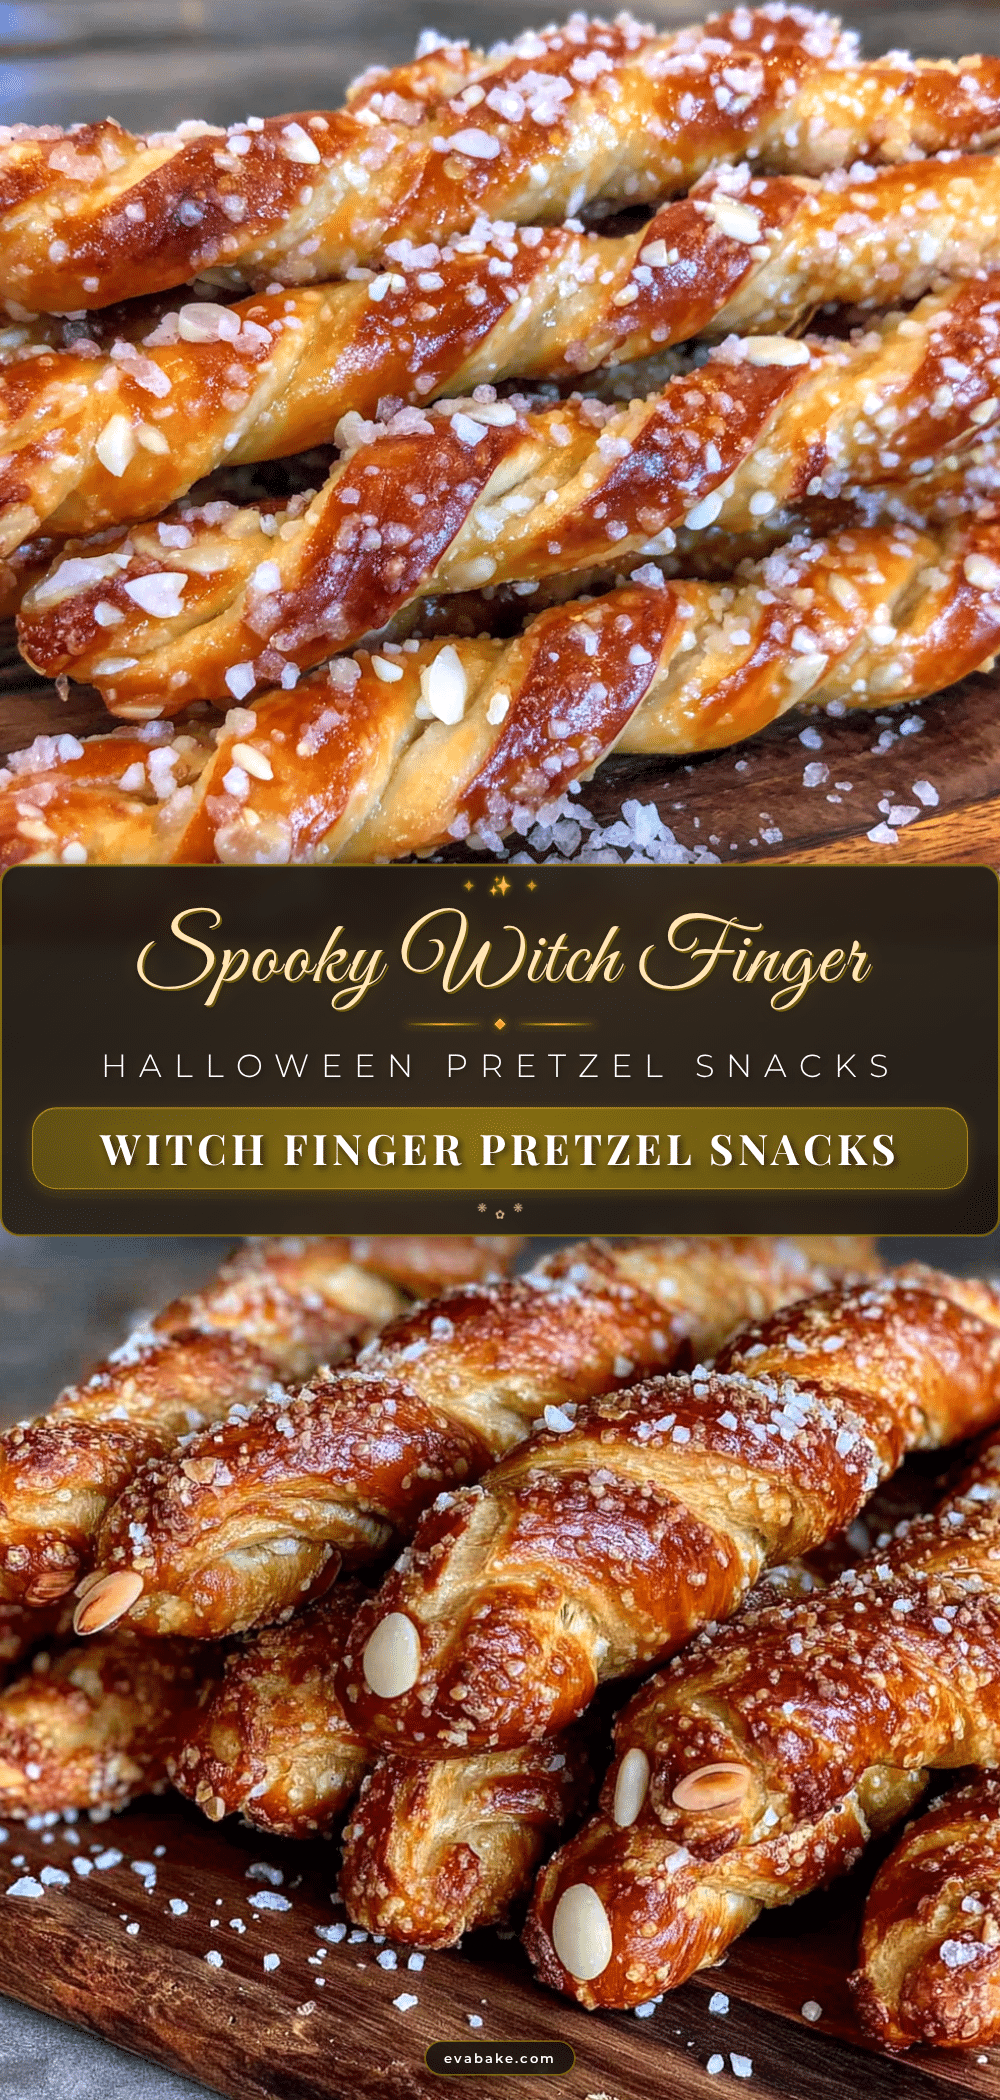
Halloween Witch Finger Pretzels: Easy Spooky Snack

These witch finger pretzels are salty, crunchy, and just the right amount of creepy. They come together in minutes and disappear just as fast, making them the perfect Halloween snack.
- Prep Time: 10 minutes
- Cook Time: 5 minutes
- Total Time: 15 minutes
- Yield: 40-50 witch fingers 1x
- Category: Snack
- Cuisine: American
Ingredients
- 40–50 pretzel sticks (thick, sturdy variety)
- 1 cup (170g) chocolate melting wafers or candy melts (milk, dark, or white)
- 40–50 whole almonds (raw or roasted, unsalted)
- 1 small tube red gel icing or red food coloring
- Optional: green food coloring (for white chocolate)
- Optional: powdered sugar (for dusting)
- Optional: edible glitter or luster dust
Instructions
- Line a baking sheet with parchment paper or a silicone mat. Have pretzel sticks, almonds, and red gel icing ready.
- Place chocolate melting wafers in a microwave-safe bowl. Microwave in 30-second intervals, stirring between each, until completely smooth (about 1-2 minutes total). If using white chocolate, stir in green food coloring now.
- Dip each pretzel stick about two-thirds of the way into the melted chocolate, leaving about an inch undipped at the bottom for the ‘wrist.’ Let excess drip off, then place on prepared baking sheet.
- Gently press an almond onto the chocolate-dipped tip to create the fingernail, with the pointed end facing outward.
- While chocolate is still wet, use a toothpick or small knife to create small lines across the chocolate to mimic knuckles. Press gently to create indentations.
- Squeeze a tiny dot of red gel icing at the base of each almond fingernail. Use a toothpick to smear it slightly for a bloody effect.
- Allow pretzels to cool completely at room temperature until chocolate is firm, about 15-20 minutes. For faster setting, refrigerate for 5-10 minutes.
- Once set, carefully remove from baking sheet. Arrange on a platter in a hand-like display or stick upright in a cup of green-tinted popcorn.
Notes
Work in a cool room to prevent chocolate from not setting properly. Sort almonds for uniform size. Don’t skip knuckle lines for realistic effect. Work in batches of 10-15 to keep chocolate from thickening. Make extras as they disappear fast. Store in airtight container at room temperature for up to a week. Can be frozen for up to 3 months.
Nutrition
- Serving Size: 3-4 witch fingers
- Calories: 180220
- Sugar: 1215
- Sodium: 200300
- Fat: 1012
- Saturated Fat: 57
- Carbohydrates: 2025
- Fiber: 12
- Protein: 34
Keywords: Halloween, witch fingers, pretzels, spooky snack, easy Halloween treat, chocolate covered pretzels