The church potluck was in four hours and I’d completely forgotten. My phone buzzed with a reminder from my neighbor, Carol, and I nearly dropped my coffee. Everyone else would be bringing their show-stoppers—the kind of dishes that get circled on recipe cards and whispered about for months. I had a can of pumpkin puree, a stick of butter, and a bag of flour in my pantry. Honestly, I almost called to say I was sick. But then I thought about my grandma’s pie, the one she’d make every Thanksgiving without a single measuring cup. I figured, why not? I could at least try to make a homemade pumpkin pie from scratch. Let me tell you, I was scrambling. I had flour on my cheek, the dog was barking at the door, and I was pretty sure I’d forgotten to add the sugar. I slid that pie into the oven with zero confidence. When I pulled it out, the kitchen smelled like autumn in a bottle. At the potluck, I set it down next to a three-tiered cake and a tray of fancy tarts. I thought mine looked a little plain. But then Carol took a bite, and she actually closed her eyes. By the end of the night, my pie plate was empty, and three people asked for the recipe. I stood there, a little sheepish, realizing that my frantic, last-minute gamble had somehow won. Maybe you’ve been there—the moment you throw something together under pressure and it becomes the thing everyone remembers. That’s this pie. It’s not fancy. It’s not complicated. But it’s the kind of homemade pumpkin pie from scratch that makes people feel at home.
Why You’ll Love This Recipe
This isn’t just another pumpkin pie recipe you find online. This is the one that will actually work for you on a busy Tuesday night or a holiday morning when the kids are tugging at your sleeves. I’ve tested this version more times than I can count, tweaking the butter temperature and the spice blend until it was just right. It’s been approved by my picky nephew, my gluten-free neighbor, and a table full of hungry construction workers at a family barbecue. Trust me, it’s been through the wringer.
- Quick & Easy: From start to oven in about 20 minutes of active work. The dough comes together in a food processor or by hand in under five minutes.
- Simple Ingredients: No weird extracts or hard-to-find spices. You probably have most of this in your pantry right now, which is a lifesaver when you’re on a budget.
- Perfect for Family Dinners: This pie is the ultimate crowd-pleaser. It’s sweet without being cloying, and the flaky crust holds up beautifully against a creamy filling.
- Crowd-Pleaser: I’ve watched kids who swear they hate pumpkin pie go back for seconds. The secret is in the balance of spices—it’s warm, not overwhelming.
- Unbelievably Delicious: The texture is what gets me every time. It’s silky smooth, not grainy, and that crust? It shatters when you bite into it.
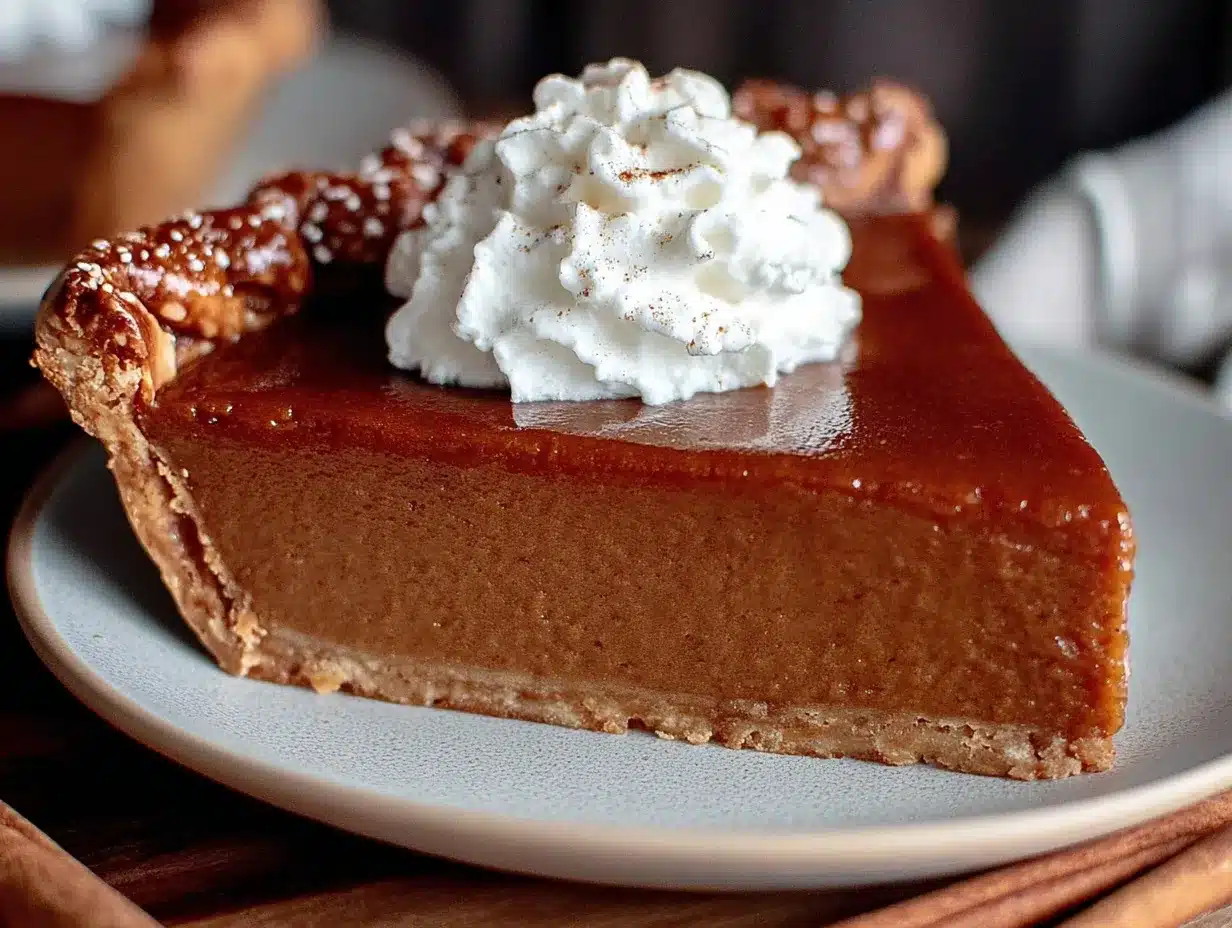
What makes this homemade pumpkin pie from scratch different from the rest is the technique for the crust. We’re using a combination of butter and a tiny bit of vinegar to keep it flaky, plus a simple par-bake that prevents the dreaded soggy bottom. The filling is whisked together in one bowl, no electric mixer needed. It’s the kind of recipe that makes you look like a pro without all the stress. Honestly, it’s comfort food at its finest—the kind that makes you close your eyes after the first bite and remember why you love fall cooking.
What Ingredients You Will Need
This recipe uses simple, wholesome ingredients to deliver that classic, bold pumpkin flavor and a buttery, flaky crust. Most of these are pantry staples, which makes this an easy win for any home cook.
For the Flaky Pie Crust
- 1 ¼ cups (150g) all-purpose flour – Spoon and level it for accuracy. I prefer King Arthur Flour for consistent results.
- ½ teaspoon salt – Just fine sea salt, nothing fancy.
- ½ cup (113g) unsalted butter, very cold and cut into small cubes – This is the key to flakiness. Pop it in the freezer for 10 minutes before you start.
- 3 to 4 tablespoons ice water – Ice cold water helps keep the butter solid.
- 1 teaspoon white vinegar – This is my secret weapon. It tenderizes the dough and makes it easier to roll out.
For the Pumpkin Filling
- 1 can (15 oz or 425g) pure pumpkin puree – Not pumpkin pie filling! I use Libby’s because it’s consistent and not too watery.
- ¾ cup (150g) granulated sugar – You can reduce this to ½ cup if you prefer a less sweet pie.
- 1 teaspoon ground cinnamon – The backbone of the flavor.
- ½ teaspoon ground ginger – Adds a little warmth.
- ¼ teaspoon ground cloves – Use sparingly; it’s potent.
- ¼ teaspoon ground nutmeg – Freshly grated is best, but pre-ground works fine.
- ½ teaspoon salt – Balances the sweetness.
- 2 large eggs – Room temperature helps them blend smoothly.
- 1 can (12 oz or 354ml) evaporated milk – I’ve used whole milk in a pinch, but evaporated milk gives a creamier texture. (adds richness)
Substitution Guidance: If you’re dairy-free, you can use a solid vegan butter stick for the crust and full-fat coconut milk for the evaporated milk. The texture will be slightly different, but still delicious. For a gluten-free crust, swap the all-purpose flour for a 1-to-1 gluten-free baking blend. I’ve done it, and it works great.
Equipment Needed
- 9-inch pie dish – A glass or ceramic dish works best for even baking. I use a standard Pyrex dish I got for $10.
- Rolling pin – If you don’t have one, a wine bottle works in a pinch. I’ve done it.
- Mixing bowls – You’ll need one for the dough and one for the filling.
- Whisk – For the filling. A fork works too, but a whisk is smoother.
- Parchment paper – For par-baking the crust. It saves you from a sticky mess.
- Pie weights or dried beans – To weigh down the crust. I keep a bag of old dried beans just for this purpose.
- Food processor (optional) – Makes the dough in 30 seconds, but your hands work perfectly fine.
Budget-Friendly Tip: Don’t run out and buy a fancy pie dish. A metal or glass one from the thrift store works just as well. My favorite pie dish came from a garage sale for 50 cents.
Preparation Method
Follow these steps carefully, and you’ll have a pie that looks like it came from a bakery. I’ve added a few notes from my own kitchen disasters so you can avoid them.
- Make the Crust: In a large bowl, whisk together the flour and salt. Add the cold, cubed butter. Using a pastry cutter or your fingertips, work the butter into the flour until it looks like coarse meal with some pea-sized butter pieces remaining. Drizzle the ice water and vinegar over the mixture. Stir with a fork until the dough just comes together. It should look shaggy, not smooth. Tip: If it’s too dry, add another tablespoon of water. If it’s too wet, add a sprinkle of flour.
- Chill the Dough: Turn the dough onto a piece of plastic wrap. Shape it into a disc, wrap it tightly, and refrigerate for at least 1 hour. This rest relaxes the gluten and keeps the butter cold. Personal note: I once skipped this step and my crust shrunk into a tiny bowl. Don’t rush it.
- Roll Out the Dough: On a lightly floured surface, roll the dough into a 12-inch circle, about ⅛-inch thick. Roll from the center outward, turning the dough occasionally to prevent sticking. Gently transfer the dough to your pie dish. Press it into the bottom and sides. Trim the overhang to about ½ inch, then fold it under and crimp the edges. Sensory cue: The dough should feel cool and firm, not sticky.
- Par-Bake the Crust: Preheat your oven to 375°F (190°C). Line the crust with parchment paper and fill it with pie weights or dried beans. Bake for 15 minutes. Remove the paper and weights, then bake for another 5-7 minutes until the bottom looks dry and lightly golden. Why this matters: This step prevents that dreaded soggy bottom. I learned this the hard way after years of watery pies.
- Make the Filling: While the crust bakes, whisk together the pumpkin puree, sugar, cinnamon, ginger, cloves, nutmeg, and salt in a large bowl. Add the eggs and whisk until smooth. Slowly pour in the evaporated milk and whisk until fully combined. The mixture should be smooth and a deep orange color. Warning: Don’t over-whisk or you’ll incorporate too much air, which can cause cracks.
- Bake the Pie: Reduce the oven temperature to 350°F (175°C). Pour the filling into the warm par-baked crust. Bake for 50-60 minutes, or until the edges are set and the center jiggles just slightly when you gently shake the pan. Test: A knife inserted 1 inch from the edge should come out clean. The center will set as it cools.
- Cool Completely: Transfer the pie to a wire rack and let it cool completely, about 2-3 hours. Do not refrigerate it while it’s still warm, or condensation will make the crust soggy. Patience is key here.
Cooking Tips & Techniques
Making a homemade pumpkin pie from scratch isn’t hard, but a few tricks can make the difference between good and great. Let me share some things I’ve learned the hard way.
Keep Everything Cold for the Crust: The number one mistake people make is using warm butter. If your butter melts before the dough hits the oven, you’ll end up with a tough, greasy crust. I stick my bowl, flour, and even the rolling pin in the fridge for 10 minutes before I start. It sounds obsessive, but it works.
Don’t Overwork the Dough: When you add the water, stir just until it comes together. Overmixing develops gluten, which makes the crust tough. I remember my first pie crust was like a hockey puck because I couldn’t stop kneading it. Less is more.
Watch the Filling Temperature: Pouring cold filling into a hot crust can cause thermal shock and cracks. I let my filling sit at room temperature while the crust par-bakes, so they’re both warm when they meet. This simple step has saved me from countless cracked pies.
Use a Pie Shield: The edges of the crust brown faster than the filling sets. If the edges start looking too dark, cover them with a pie shield or strips of aluminum foil. I usually do this after about 25 minutes of baking.
Multitasking Strategy: While the crust chills, make the filling. While the crust par-bakes, clean up your dishes. This way, you’re not scrambling when it’s time to assemble.
Variations & Adaptations
One of the best things about this homemade pumpkin pie from scratch is how easy it is to tweak. Here are a few ways I’ve adapted it over the years.
Dairy-Free Version: I made this for a friend who can’t have dairy. I used a solid vegan butter stick for the crust and full-fat coconut milk for the evaporated milk. The coconut flavor was subtle, and honestly, no one noticed the difference. Just make sure your vegan butter is very cold.
Spice It Up: If you like a bolder flavor, add a pinch of black pepper or a teaspoon of vanilla extract to the filling. I tried this once on a whim, and the pepper added this unexpected warmth that paired perfectly with the cinnamon.
Mini Pies: For parties or portion control, I press the dough into a muffin tin and par-bake for 10 minutes instead of 20. Then I fill them and bake for 20-25 minutes. They’re adorable and perfect for kids.
Gluten-Free Option: As I mentioned, a 1-to-1 gluten-free flour blend works beautifully. I’ve used Bob’s Red Mill with great results. The dough is a bit more fragile, so be gentle when rolling it out.
Maple Pumpkin Pie: Replace the granulated sugar with ½ cup of pure maple syrup. Reduce the evaporated milk by 2 tablespoons to account for the extra liquid. The result is a deeper, more complex sweetness that feels extra cozy for fall.
Serving & Storage Suggestions
This pie is best served at room temperature or slightly warm. I like to let it sit for about 30 minutes after it comes out of the fridge. A dollop of lightly sweetened whipped cream is my go-to, but a scoop of vanilla ice cream works wonders too. For a fun twist, drizzle a little caramel sauce over the top.
Complementary Dishes: This pie pairs beautifully with a cup of hot coffee or a mug of spiced apple cider. If you’re serving it as part of a meal, it’s perfect after a hearty dish like roasted chicken or a simple soup. The sweetness balances out savory flavors nicely.
Storage Instructions: Cover the pie loosely with plastic wrap or foil and store it in the refrigerator for up to 4 days. The flavors actually deepen after a day or two, so don’t be afraid to make it ahead. Honestly, I think it tastes better on day two.
Freezing Tips: You can freeze the baked pie whole or in slices. Wrap it tightly in plastic wrap, then a layer of foil, and freeze for up to 3 months. To thaw, place it in the refrigerator overnight. Reheat slices in a 300°F (150°C) oven for about 10 minutes to refresh the crust.
Reheating Method: If you prefer your pie warm, pop individual slices in the microwave for 15-20 seconds. For a crispier crust, use a toaster oven. Avoid reheating the whole pie, as the crust can become soggy.
Nutritional Information & Benefits
Here’s a rough estimate for one slice (based on 8 servings):
- Calories: 320
- Fat: 14g
- Carbohydrates: 45g
- Protein: 6g
- Fiber: 3g
- Sugar: 28g
Pumpkin is packed with vitamin A and fiber, which is great for your immune system and digestion. The cinnamon and ginger have anti-inflammatory properties, so you’re getting a little health boost with every bite. Of course, this is still a dessert, so enjoy it in moderation. But compared to many store-bought pies, this homemade version has less sugar and no preservatives. It’s a treat you can feel good about sharing with your family.
Dietary Considerations: This recipe contains gluten, dairy, and eggs. For allergen-friendly options, check the variations section above. It’s naturally nut-free, which is a win for school events.
Conclusion
This homemade pumpkin pie from scratch is more than just a dessert—it’s a memory in the making. It’s the pie you bring to a potluck when you’ve forgotten until the last minute. It’s the one your kids will ask for year after year. It’s simple, affordable, and genuinely delicious. I hope you give it a try and make it your own. Maybe add a little extra cinnamon, or swap in maple syrup. Play around with it. That’s the beauty of cooking from scratch.
I’d love to hear how it turns out for you. Drop a comment below and let me know if your family loved it as much as mine does. And if you tweaked it, share your variation—I’m always looking for new ideas. Happy baking, friend. You’ve got this.
Frequently Asked Questions
Can I use a store-bought crust instead of making one from scratch?
Absolutely. If you’re short on time, a good-quality refrigerated pie crust works fine. Just make sure to par-bake it as directed to avoid a soggy bottom. The filling will still taste amazing.
Why did my pumpkin pie crack on top?
Cracks usually happen when the pie is overbaked or the filling is too hot when it goes into the oven. Make sure you take the pie out when the center is still slightly jiggly. It will continue to set as it cools.
Can I make this pie ahead of time?
Yes! This pie actually tastes better the next day. Bake it, let it cool completely, and store it covered in the refrigerator. Serve it at room temperature for the best flavor.
How do I know when the pie is done?
The edges should be set and puffed slightly, while the center should jiggle like Jell-O when you gently shake the pan. A knife inserted about 1 inch from the edge should come out clean.
Can I use fresh pumpkin instead of canned?
You can, but you’ll need to roast and puree the pumpkin first, then drain off any excess liquid. Canned pumpkin is more consistent and saves time. If you use fresh, make sure it’s a sugar pumpkin, not a carving pumpkin.
Pin This Recipe!
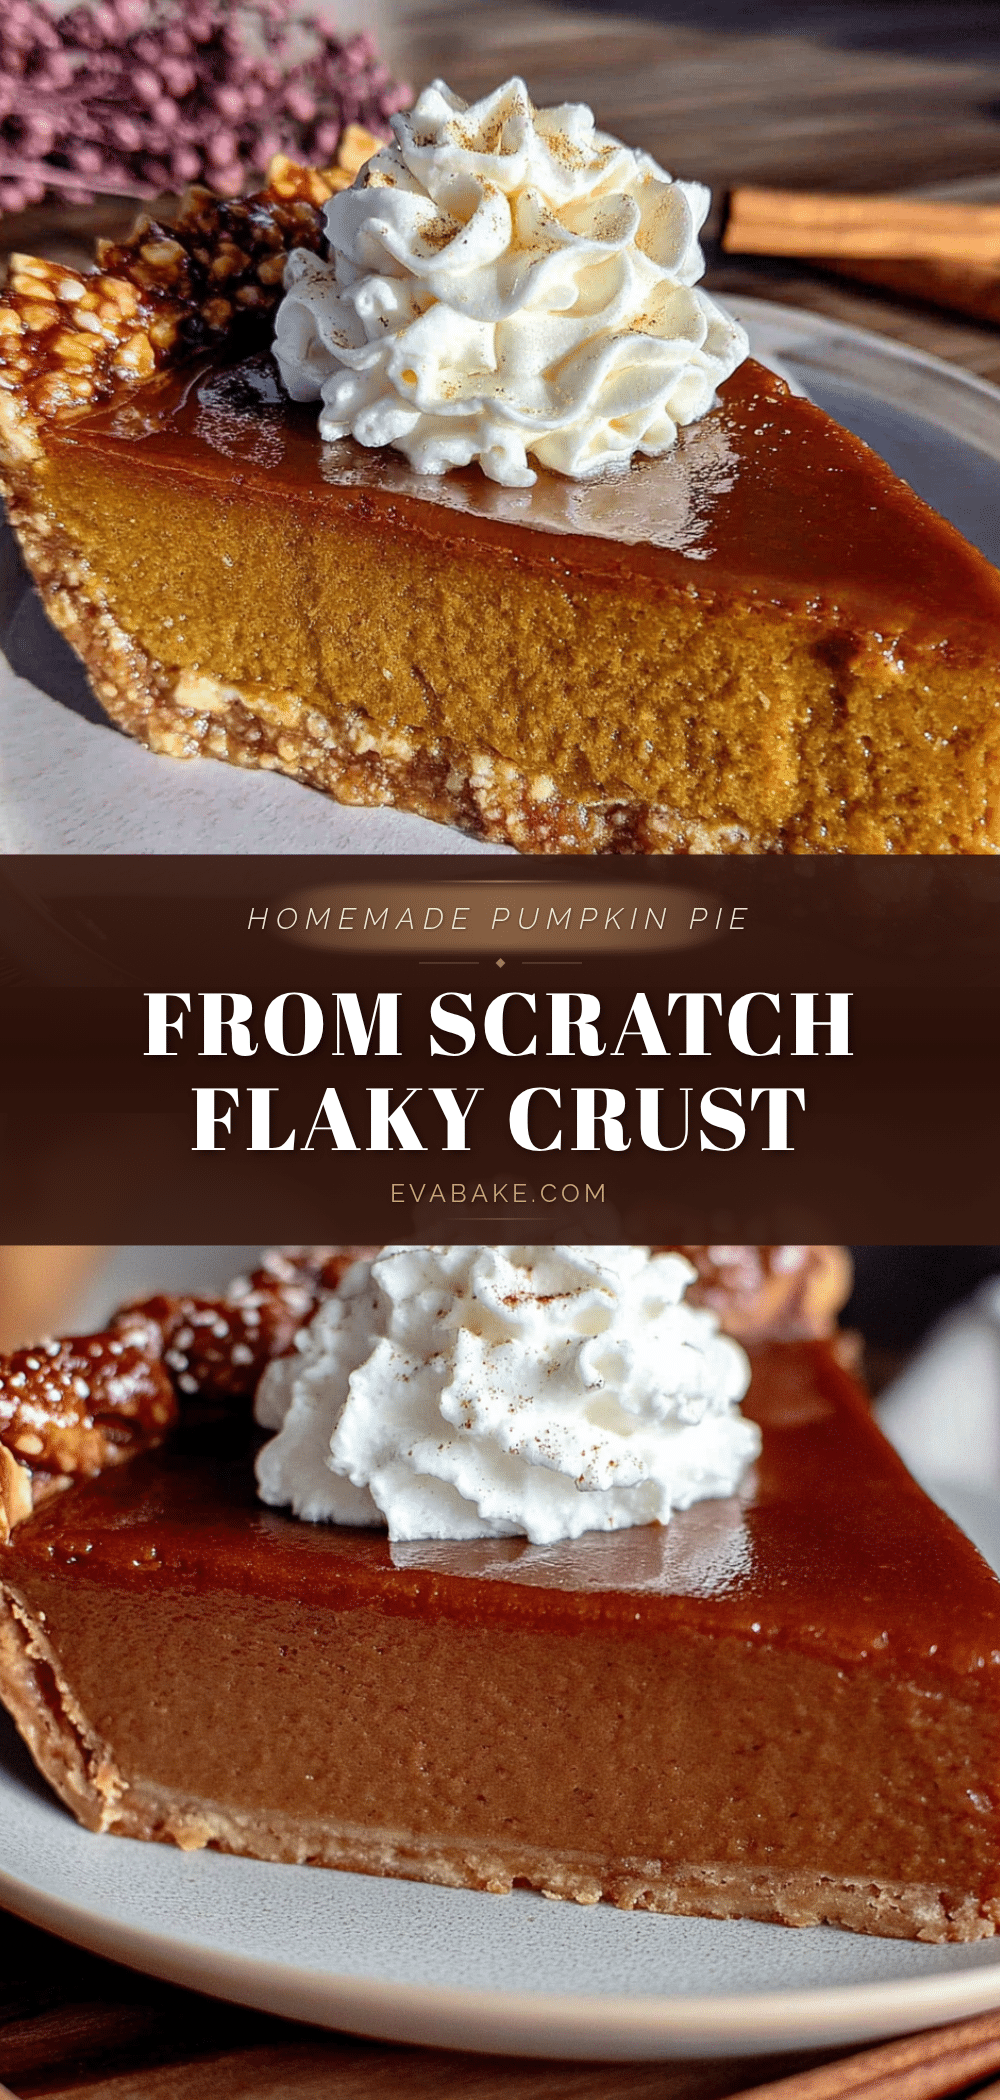
Homemade Pumpkin Pie from Scratch – Easy Family Favorite

This homemade pumpkin pie from scratch is a simple, crowd-pleasing dessert with a flaky crust and silky smooth filling. Perfect for busy weeknights or holiday gatherings, it’s made with pantry staples and comes together in about 20 minutes of active work.
- Prep Time: 20 minutes
- Cook Time: 1 hour 10 minutes
- Total Time: 1 hour 30 minutes
- Yield: 8 servings 1x
- Category: Dessert
- Cuisine: American
Ingredients
- 1 ¼ cups (150g) all-purpose flour
- ½ teaspoon salt
- ½ cup (113g) unsalted butter, very cold and cut into small cubes
- 3 to 4 tablespoons ice water
- 1 teaspoon white vinegar
- 1 can (15 oz or 425g) pure pumpkin puree
- ¾ cup (150g) granulated sugar
- 1 teaspoon ground cinnamon
- ½ teaspoon ground ginger
- ¼ teaspoon ground cloves
- ¼ teaspoon ground nutmeg
- ½ teaspoon salt
- 2 large eggs
- 1 can (12 oz or 354ml) evaporated milk
Instructions
- Make the Crust: In a large bowl, whisk together the flour and salt. Add the cold, cubed butter. Using a pastry cutter or your fingertips, work the butter into the flour until it looks like coarse meal with some pea-sized butter pieces remaining. Drizzle the ice water and vinegar over the mixture. Stir with a fork until the dough just comes together. It should look shaggy, not smooth.
- Chill the Dough: Turn the dough onto a piece of plastic wrap. Shape it into a disc, wrap it tightly, and refrigerate for at least 1 hour.
- Roll Out the Dough: On a lightly floured surface, roll the dough into a 12-inch circle, about ⅛-inch thick. Gently transfer the dough to a 9-inch pie dish. Press it into the bottom and sides. Trim the overhang to about ½ inch, then fold it under and crimp the edges.
- Par-Bake the Crust: Preheat your oven to 375°F (190°C). Line the crust with parchment paper and fill it with pie weights or dried beans. Bake for 15 minutes. Remove the paper and weights, then bake for another 5-7 minutes until the bottom looks dry and lightly golden.
- Make the Filling: While the crust bakes, whisk together the pumpkin puree, sugar, cinnamon, ginger, cloves, nutmeg, and salt in a large bowl. Add the eggs and whisk until smooth. Slowly pour in the evaporated milk and whisk until fully combined.
- Bake the Pie: Reduce the oven temperature to 350°F (175°C). Pour the filling into the warm par-baked crust. Bake for 50-60 minutes, or until the edges are set and the center jiggles just slightly when you gently shake the pan.
- Cool Completely: Transfer the pie to a wire rack and let it cool completely, about 2-3 hours. Do not refrigerate while still warm.
Notes
Keep all ingredients cold for the crust. Do not overwork the dough. Let the filling sit at room temperature while the crust par-bakes to prevent cracks. Use a pie shield or foil to protect the crust edges if browning too quickly. The pie tastes even better the next day.
Nutrition
- Serving Size: 1 slice
- Calories: 320
- Sugar: 28
- Sodium: 380
- Fat: 14
- Saturated Fat: 8
- Carbohydrates: 45
- Fiber: 3
- Protein: 6
Keywords: homemade pumpkin pie, pumpkin pie from scratch, easy pumpkin pie, fall dessert, Thanksgiving pie, flaky pie crust, pumpkin dessert