I wasn’t expecting to get baking advice from my accountant, of all people. But there I was, sitting in his cramped office on a rainy Tuesday, trying to make sense of my quarterly tax numbers, when he suddenly started describing the perfect small-batch chocolate chip cookie. He noticed my eyes glazing over during the spreadsheet talk and said, “You know, the secret to a cookie that stays soft for days is using melted butter and a touch of cornstarch.” I blinked, honestly surprised. This was the same man who wore bow ties and talked about depreciation schedules. But he pulled out his phone, showed me a photo of a perfectly golden cookie his daughter had baked the night before, and scribbled the recipe on the back of an envelope. Let me tell you, I nearly forgot to ask about my tax refund.
That envelope sat on my kitchen counter for a week before I finally tried it. The recipe made exactly six cookies, which seemed almost silly at first. But then I thought about it, and honestly, a full batch of cookies is dangerous in a house with three kids. You know that feeling when you bake a dozen and a half, and suddenly half of them are gone before dinner? This recipe solves that problem completely. It gives you just enough for a sweet treat without leaving you with a mountain of temptation.
I made a mess that first time, of course. I forgot to set a timer and pulled the cookies out a minute too late, but they were still incredible. The edges were crispy, the centers were chewy, and my youngest actually said, “Mom, these are the best ones you’ve ever made.” From my accountant. Who would have guessed? I keep making them because they remind me that good recipes can come from the most unexpected places, and honestly, sometimes the best things in life arrive when you’re not looking for them. Maybe you’ve been there, looking for a simple, reliable cookie recipe that actually works without a ton of fuss.
Why You’ll Love This Recipe
Let’s be real here, finding a cookie recipe that pleases everyone in the family without costing a fortune is like finding a needle in a haystack. This one hits all the right notes, and I’ve tested it enough times to know it works every single time.
- Quick & Easy: From start to finish, you’re looking at about 20 minutes. No chilling required, no fancy techniques. Just mix, scoop, bake, and enjoy. Perfect for those after-school cravings or a late-night dessert emergency.
- Simple Ingredients: You probably have everything in your pantry right now. Butter, sugar, an egg, flour, chocolate chips. Nothing weird or expensive. This is budget-friendly baking at its finest.
- Perfect for Small Families: This recipe makes exactly six cookies, which is ideal for a family of four or five. Everyone gets one, maybe two if you’re feeling generous. No waste, no stale cookies sitting around for days.
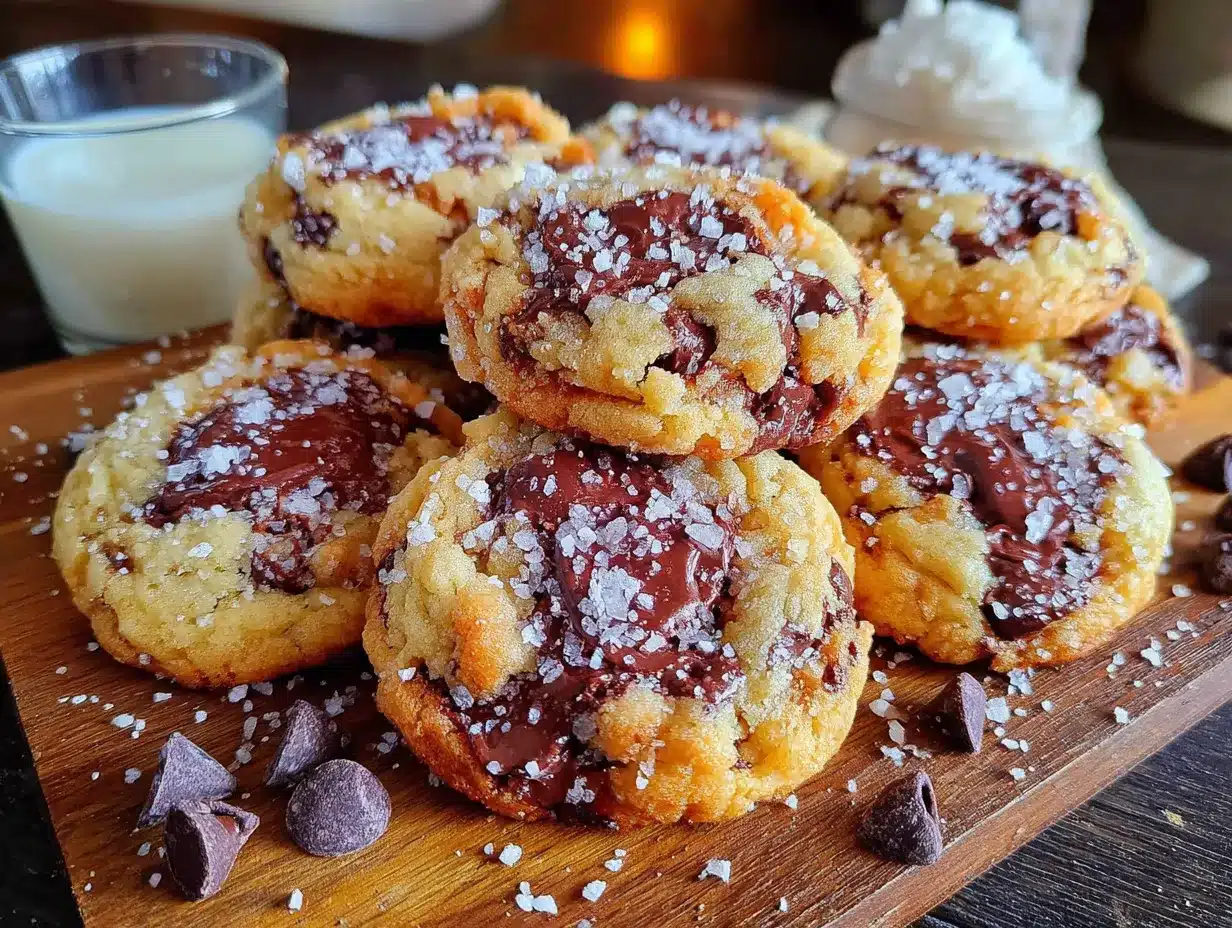
- Crowd-Pleaser: I’ve served these at playdates, after dinner, and even packed them in lunchboxes. Kids love them, adults sneak them, and nobody ever complains. The texture is spot on, crispy edges with a soft, chewy center.
- Unbelievably Delicious: The combination of melted butter and a touch of cornstarch creates a cookie that stays soft for days. Honestly, if they last that long. The flavor is classic, but somehow better than the standard recipe.
What makes this recipe different from the rest is the technique. Most small-batch recipes use all-purpose flour and hope for the best, but this one uses melted butter for extra chewiness and a little cornstarch for tenderness. It’s not just another version, it’s the best version I’ve found for a quick, reliable cookie that tastes like you spent hours on it.
This recipe is the kind that makes you close your eyes after the first bite. It’s comfort food reimagined, simpler, faster, but with the same soul-soothing satisfaction. Perfect for impressing your kids without stress, or turning an ordinary Tuesday into something a little bit special.
What Ingredients You Will Need
This recipe uses simple, wholesome ingredients to deliver that classic chocolate chip cookie flavor without any fuss. Everything here is a pantry staple, which means you can whip these up anytime the craving hits.
For the Cookie Dough
- 4 tablespoons unsalted butter, melted and slightly cooled (melted butter is key for chewy cookies, I use Land O’Lakes most of the time)
- 1/4 cup granulated sugar (adds sweetness and helps with spreading)
- 1/4 cup packed light brown sugar (gives moisture and that deep caramel flavor)
- 1 large egg yolk (the yolk adds richness and tenderness, save the white for scrambled eggs)
- 1/2 teaspoon vanilla extract (pure vanilla makes a difference, but imitation works in a pinch)
- 3/4 cup all-purpose flour (spoon and level it, don’t scoop directly from the bag)
- 1 tablespoon cornstarch (this is the secret ingredient for soft cookies, trust me)
- 1/4 teaspoon baking soda (helps them spread just enough)
- 1/4 teaspoon salt (balances the sweetness, don’t skip it)
- 1/2 cup semi-sweet chocolate chips (I prefer Ghirardelli, but any brand works, use milk chocolate if your kids prefer it)
Optional Add-Ins
- 1/4 cup chopped nuts (walnuts or pecans add crunch, but leave them out for picky eaters)
- Flaky sea salt for sprinkling (a pinch on top before baking takes these to another level)
When it comes to chocolate chips, I’ve tried all kinds. Semi-sweet is my go-to because it’s not too sweet and balances the dough nicely. If your kids are sensitive to bitterness, milk chocolate chips work great too. Just keep in mind that milk chocolate is sweeter, so you might want to reduce the sugar by a tablespoon.
For the butter, make sure it’s melted but not hot. Let it cool for a couple of minutes after melting, otherwise it can cook the egg yolk. I learned that the hard way, let me tell you.
If you’re out of cornstarch, you can substitute with an extra tablespoon of flour, but the texture won’t be quite as soft. The cornstarch really does make a difference, so I recommend picking some up if you don’t have it. It’s cheap and lasts forever.
Equipment Needed
You don’t need much for this recipe, which is part of its charm. Here’s what you’ll need to get those cookies on the table.
- Mixing bowl (a medium-sized bowl works perfectly, I use a glass one)
- Whisk or wooden spoon (a whisk works great for combining wet ingredients, a spoon for the dough)
- Measuring cups and spoons (accurate measurements are important here since it’s a small batch)
- Baking sheet (a half-sheet pan is ideal, but any rimmed baking sheet will do)
- Parchment paper or silicone baking mat (prevents sticking and makes cleanup a breeze)
- Cookie scoop or tablespoon (for evenly sized cookies, a #40 scoop is perfect)
- Cooling rack (helps cookies cool evenly without getting soggy bottoms)
If you don’t have a cookie scoop, a regular tablespoon works just fine. Just make sure you’re scooping evenly so the cookies bake at the same rate. I’ve used a regular spoon for years before I finally invested in a scoop, and honestly, it’s worth the few dollars.
For the baking sheet, avoid using dark non-stick pans if you can. They absorb more heat and can cause the bottoms to brown too quickly. A light-colored aluminum sheet is your best bet for even baking. You can find them at any grocery store for under ten bucks.
Preparation Method
Let’s get to the good part. Follow these steps, and you’ll have warm, gooey cookies in no time. I’ve broken it down so even beginner bakers can nail it on the first try.
- Preheat your oven to 350°F (175°C). Line a baking sheet with parchment paper or a silicone mat. This ensures the cookies don’t stick and makes cleanup a breeze. While the oven heats up, you can prep the dough.
- Melt the butter. Place 4 tablespoons of unsalted butter in a microwave-safe bowl and heat in 20-second intervals until fully melted. Let it cool for 2-3 minutes. You don’t want it hot, just warm. If it’s too hot, it can scramble the egg yolk, and nobody wants that.
- Combine the wet ingredients. In a medium mixing bowl, whisk together the melted butter, 1/4 cup granulated sugar, and 1/4 cup packed light brown sugar. Whisk until smooth and well combined, about 30 seconds. The mixture should look like wet sand. Add the egg yolk and 1/2 teaspoon vanilla extract, then whisk again until the mixture is thick and glossy. This should take about a minute.
- Mix the dry ingredients. In a small separate bowl, whisk together 3/4 cup all-purpose flour, 1 tablespoon cornstarch, 1/4 teaspoon baking soda, and 1/4 teaspoon salt. Whisking them together ensures the leavening agents are evenly distributed. If you skip this step, you might end up with a cookie that’s flat in one spot and puffy in another.
- Combine wet and dry mixtures. Pour the dry ingredients into the wet mixture. Use a wooden spoon or spatula to stir until just combined. Be careful not to overmix here. You want to see a few streaks of flour remaining. Overmixing develops gluten, which can make your cookies tough instead of tender.
- Fold in the chocolate chips. Add 1/2 cup semi-sweet chocolate chips to the dough. Fold them in gently with your spatula until they’re evenly distributed. If you’re adding nuts, fold them in now. The dough will be thick and slightly sticky, that’s exactly what you want.
- Scoop the dough. Using a cookie scoop or a tablespoon, scoop out six equal portions of dough. Place them on the prepared baking sheet, spacing them about 2 inches apart. They will spread, so give them room. If you want perfectly round cookies, you can roll each portion into a ball between your palms.
- Optional: Add a finishing touch. If you’re using flaky sea salt, sprinkle a tiny pinch on top of each dough ball. This enhances the chocolate flavor and adds a lovely crunch. My kids actually love this step, they think it makes them look fancy.
- Bake. Place the baking sheet in the preheated oven and bake for 10-12 minutes. At the 10-minute mark, check the cookies. They should be golden brown around the edges but still pale and slightly puffy in the center. This is the sweet spot. If you like softer cookies, pull them out at 10 minutes. For crispier cookies, go to 12 minutes.
- Cool on the baking sheet. This is crucial. Let the cookies rest on the baking sheet for 5 minutes before transferring them to a cooling rack. During this time, they continue to cook from the residual heat. If you move them too soon, they’ll fall apart. After 5 minutes, use a spatula to transfer them to a wire rack to cool completely, or serve them warm for that gooey experience.
One thing I always tell people, the cookies will look underdone when you pull them out. Don’t panic. That soft center will set as they cool, giving you that perfect chewy texture. I’ve pulled cookies out looking almost raw in the middle, and after 5 minutes on the sheet, they were absolutely perfect.
Cooking Tips & Techniques
Over the years, I’ve made plenty of cookie mistakes, and I’m happy to share them so you don’t have to repeat them. Here are the tips that have saved my batches more times than I can count.
Use melted butter, not softened. Most cookie recipes call for softened butter, but melted butter is the secret to chewier cookies. When you melt the butter, you incorporate more liquid into the dough, which creates a denser, chewier texture. Just let it cool slightly before adding the egg yolk, or you’ll end up with scrambled eggs in your cookie dough. Trust me, I’ve been there.
Don’t skip the cornstarch. I know it seems like an extra step, but cornstarch tenderizes the gluten in the flour, resulting in a softer, more tender cookie. Without it, your cookies will be flatter and crunchier. If you don’t have cornstarch, you can use an equal amount of arrowroot powder or just add an extra tablespoon of flour, but the texture won’t be quite the same.
Measure your flour correctly. This is probably the most common mistake I see. Scooping flour directly from the bag packs it down, giving you more flour than the recipe calls for. The correct way is to spoon the flour into your measuring cup and level it off with a knife. Too much flour makes cookies dry and cakey instead of chewy.
Chill the dough if you have time. While this recipe doesn’t require chilling, letting the dough rest in the fridge for 30 minutes can improve the flavor and texture. The butter solidifies again, which means the cookies spread less and have a thicker, more even texture. If you’re in a hurry, skip it. But if you have the time, it’s worth doing.
Rotate the baking sheet halfway through. Ovens can have hot spots, especially older ones. About halfway through the baking time, rotate the sheet 180 degrees to ensure even browning. This is a small step that makes a big difference in consistency.
Let them cool properly. I know it’s tempting to grab a cookie right out of the oven, but they need that 5-minute rest on the baking sheet. This allows the structure to set so they don’t crumble in your hands. Patience pays off here, I promise.
Variations & Adaptations
One of the best things about this recipe is how easy it is to adapt. Whether you’re dealing with dietary restrictions or just want to switch things up, here are some variations I’ve tried and loved.
Gluten-Free Option: Substitute the all-purpose flour with a 1:1 gluten-free baking flour blend. I’ve used Bob’s Red Mill with great results. The texture will be slightly different, a bit more tender and crumbly, but still delicious. Add an extra tablespoon of flour if the dough seems too sticky.
Dairy-Free Version: Use vegan butter or coconut oil instead of regular butter. If using coconut oil, make sure it’s solid but softened, not melted. The cookies will have a subtle coconut flavor, which pairs surprisingly well with chocolate. Use dairy-free chocolate chips to make it completely dairy-free.
Double Chocolate Chip: Replace 2 tablespoons of the flour with unsweetened cocoa powder. This gives you a rich, chocolatey cookie that’s even more indulgent. Add an extra tablespoon of sugar to balance the bitterness of the cocoa. My kids go crazy for this version.
Add Some Crunch: Fold in 1/4 cup of chopped walnuts or pecans along with the chocolate chips. The nuts add texture and a savory note that complements the sweetness. Just make sure to chop them finely so they distribute evenly.
Make Them Minty: Add 1/4 teaspoon of peppermint extract along with the vanilla. Use mint chocolate chips if you can find them, or just add regular chocolate chips. This is a fun holiday variation that always gets compliments.
Lower Sugar Version: Reduce the granulated sugar to 2 tablespoons and the brown sugar to 2 tablespoons. The cookies will be less sweet, but still satisfying. You can also use a sugar substitute like monk fruit or stevia, but the texture might be slightly different.
Serving & Storage Suggestions
These cookies are best served warm, straight from the oven, when the chocolate is still gooey and the edges are crispy. But they’re also fantastic at room temperature, especially the next day when the flavors have had time to meld.
Serving Temperature: Serve them warm with a glass of cold milk, that’s the classic combo for a reason. For an extra treat, warm them in the microwave for 10 seconds before serving. You can also serve them with a scoop of vanilla ice cream for a quick dessert that feels fancy.
Presentation: Arrange the cookies on a small plate or a pretty platter. If you’re serving them to guests, a light dusting of powdered sugar or a drizzle of melted chocolate can make them look bakery-worthy. But honestly, they’re beautiful on their own.
Storage: Place any leftover cookies in an airtight container at room temperature. They’ll stay fresh for up to 5 days, though I doubt they’ll last that long. To keep them soft, add a slice of bread to the container. The bread absorbs excess moisture and releases it to the cookies, keeping them tender. Change the bread every couple of days.
Freezing: You can freeze the baked cookies for up to 3 months. Let them cool completely, then place them in a freezer-safe bag or container. To thaw, leave them at room temperature for about 30 minutes. You can also freeze the raw dough. Scoop the dough into balls, place them on a baking sheet, and freeze until solid. Then transfer the dough balls to a freezer bag. Bake from frozen, adding 2-3 minutes to the baking time.
Flavor Development: These cookies actually taste better the next day. The flavors meld together, and the texture becomes even more tender. So if you can resist eating them all on day one, you’re in for a treat on day two.
Nutritional Information & Benefits
While these cookies are definitely a treat, they’re made with simple, recognizable ingredients. Here’s a rough estimate of the nutritional content per cookie, based on the recipe as written.
| Nutrient | Amount Per Cookie |
|---|---|
| Calories | 210 |
| Total Fat | 11g |
| Saturated Fat | 6g |
| Cholesterol | 35mg |
| Sodium | 150mg |
| Total Carbohydrates | 28g |
| Dietary Fiber | 1g |
| Sugars | 17g |
| Protein | 2g |
The dark chocolate chips in this recipe provide a small amount of antioxidants, and the butter gives you a little vitamin A. But let’s be honest, these are cookies. They’re meant to be enjoyed in moderation as part of a balanced diet. I like to think of them as a small moment of joy, not a nutritional staple.
If you’re watching your sugar intake, you can reduce the sugar as mentioned in the variations section. For a lower-fat option, you can substitute half the butter with unsweetened applesauce, though the texture will be more cake-like.
These cookies are not gluten-free or dairy-free as written, but the variations section above provides options for both. They do contain eggs and wheat, so keep that in mind for anyone with allergies.
Conclusion
So there you have it, a small-batch chocolate chip cookie recipe that came from the most unexpected source, my accountant. It’s proof that good ideas can show up anywhere, even during a tax meeting. These cookies are simple, affordable, and absolutely delicious. They’re perfect for a family treat, a after-school snack, or just because you deserve something sweet.
What I love most about this recipe is how reliable it is. It works every time, with minimal effort and maximum payoff. It’s the kind of recipe you’ll come back to again and again, tweaking it to make it your own. Maybe you’ll add nuts, or use dark chocolate, or sprinkle them with sea salt. The possibilities are endless.
I really hope you give these cookies a try. They’ve become a staple in my kitchen, and I think they’ll become one in yours too. When you make them, I’d love to hear how they turned out. Leave a comment below and let me know if your family loved them as much as mine does. And if you have any questions, don’t hesitate to ask. Happy baking, friends!
Frequently Asked Questions
Can I double this recipe?
Absolutely. Simply double all the ingredients to make 12 cookies. The baking time and temperature remain the same. Just make sure you have a large enough mixing bowl and use two baking sheets or bake in batches.
Why did my cookies turn out flat?
Flat cookies usually mean the butter was too warm or you used too much sugar. Make sure your melted butter has cooled slightly before mixing. Also, check that your baking soda is fresh. Expired baking soda won’t give the cookies enough lift.
Can I use margarine instead of butter?
You can, but the cookies won’t be as flavorful or chewy. Margarine has a higher water content, which can make cookies spread more and become greasy. Butter is always the better choice for texture and taste.
How do I make these cookies vegan?
Use vegan butter or coconut oil instead of regular butter. Replace the egg yolk with 1 tablespoon of ground flaxseed mixed with 2.5 tablespoons of water. Let the flax mixture sit for 5 minutes to thicken before adding it to the wet ingredients. Use dairy-free chocolate chips.
Can I use whole wheat flour instead of all-purpose?
Yes, but the cookies will be denser and have a nuttier flavor. Substitute half the all-purpose flour with whole wheat flour for a lighter texture. Using 100% whole wheat flour will result in a heavier, drier cookie, so I recommend starting with a 50/50 blend.
Pin This Recipe!
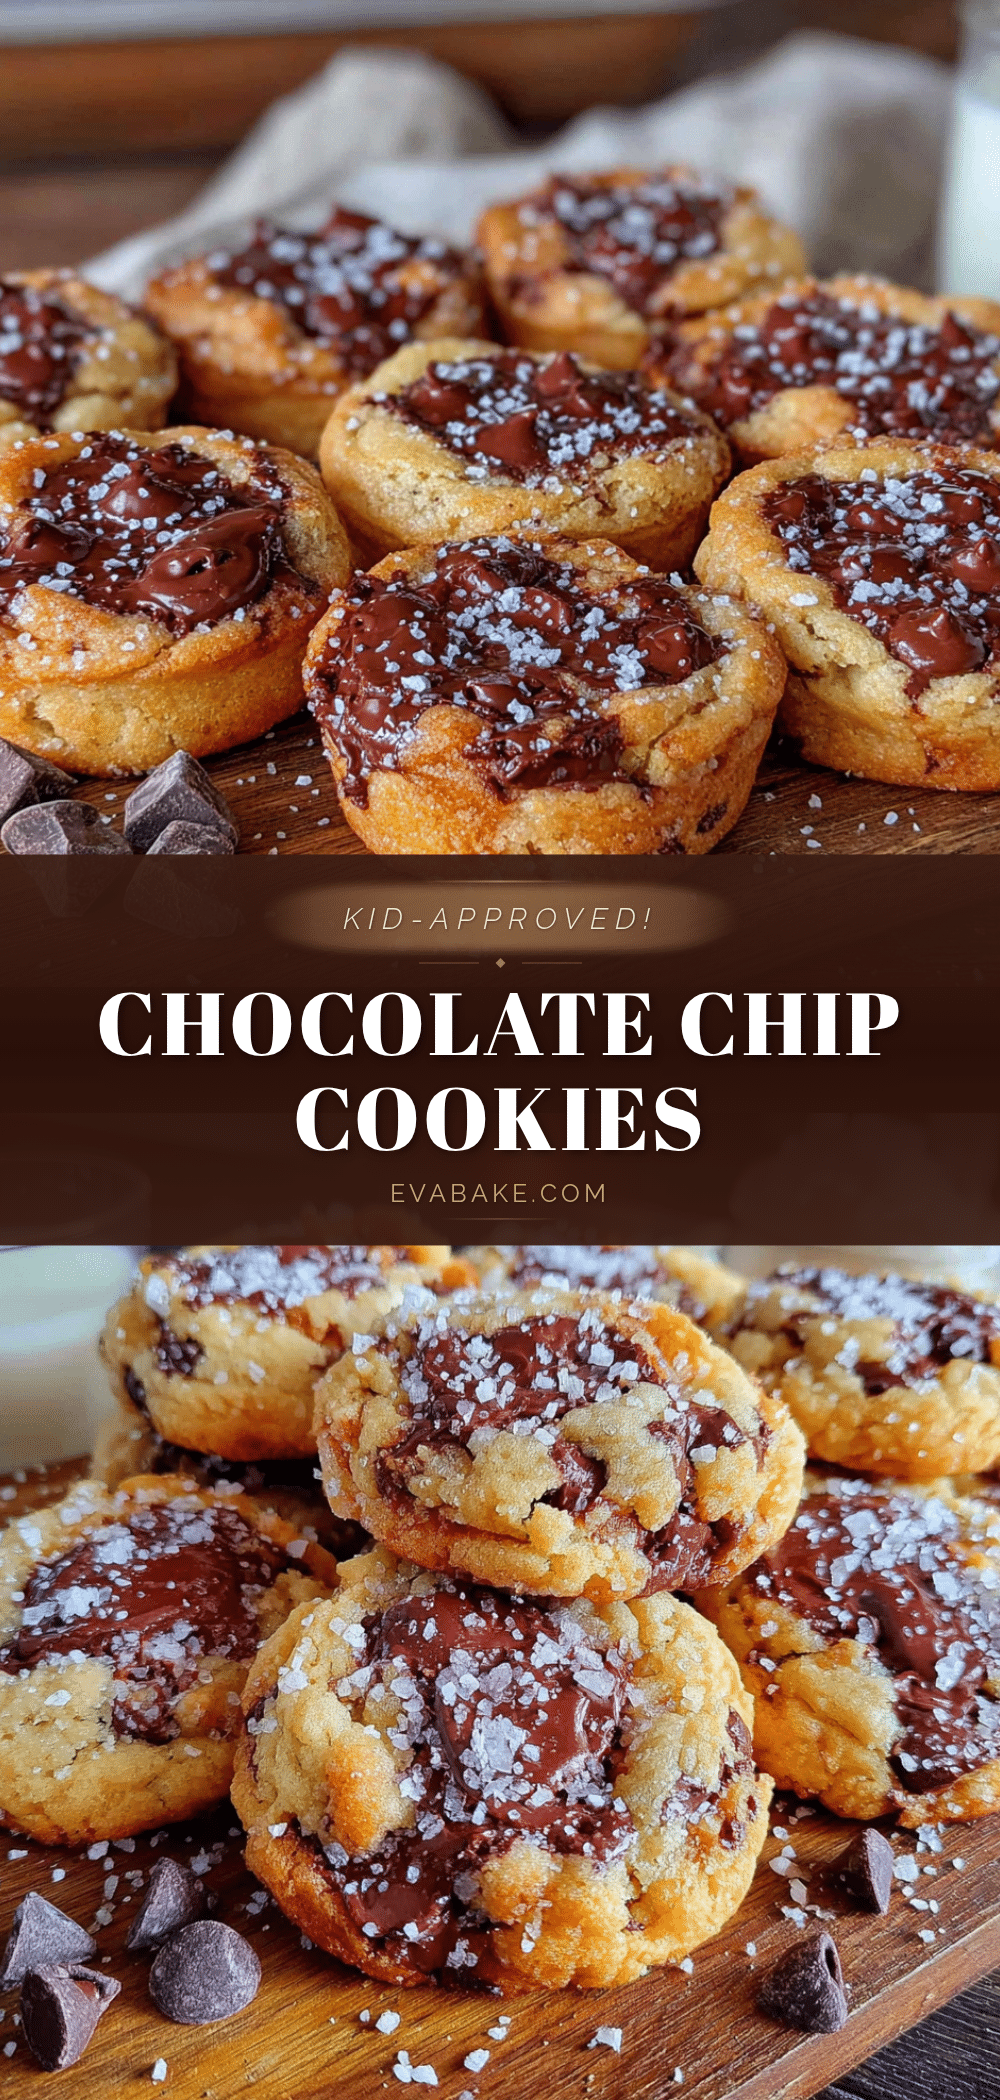
Kid-Approved Small-Batch Chocolate Chip Cookies: Easy Best Recipe

This small-batch chocolate chip cookie recipe makes exactly six cookies with crispy edges and chewy centers. Using melted butter and a touch of cornstarch, these cookies stay soft for days and are perfect for small families or when you need a quick, reliable treat.
- Prep Time: 10 minutes
- Cook Time: 12 minutes
- Total Time: 22 minutes
- Yield: 6 cookies 1x
- Category: Dessert
- Cuisine: American
Ingredients
- 4 tablespoons unsalted butter, melted and slightly cooled
- 1/4 cup granulated sugar
- 1/4 cup packed light brown sugar
- 1 large egg yolk
- 1/2 teaspoon vanilla extract
- 3/4 cup all-purpose flour
- 1 tablespoon cornstarch
- 1/4 teaspoon baking soda
- 1/4 teaspoon salt
- 1/2 cup semi-sweet chocolate chips
- 1/4 cup chopped nuts (optional)
- Flaky sea salt for sprinkling (optional)
Instructions
- Preheat your oven to 350°F (175°C). Line a baking sheet with parchment paper or a silicone mat.
- Melt the butter in a microwave-safe bowl in 20-second intervals until fully melted. Let it cool for 2-3 minutes.
- In a medium mixing bowl, whisk together the melted butter, granulated sugar, and brown sugar until smooth and well combined, about 30 seconds. Add the egg yolk and vanilla extract, then whisk again until thick and glossy, about 1 minute.
- In a small separate bowl, whisk together the flour, cornstarch, baking soda, and salt.
- Pour the dry ingredients into the wet mixture. Stir with a wooden spoon or spatula until just combined, with a few streaks of flour remaining.
- Fold in the chocolate chips (and nuts if using) until evenly distributed.
- Scoop out six equal portions of dough using a cookie scoop or tablespoon. Place them on the prepared baking sheet, spacing them about 2 inches apart. Optionally, roll each portion into a ball.
- If using flaky sea salt, sprinkle a tiny pinch on top of each dough ball.
- Bake for 10-12 minutes, until golden brown around the edges but still pale and slightly puffy in the center. For softer cookies, bake 10 minutes; for crispier, bake 12 minutes.
- Let the cookies rest on the baking sheet for 5 minutes, then transfer to a wire rack to cool completely or serve warm.
Notes
Melted butter is key for chewy cookies. Let it cool slightly before adding the egg yolk to avoid scrambling. Cornstarch tenderizes the gluten for softer cookies. Measure flour by spooning and leveling. For best results, let cookies cool on the baking sheet for 5 minutes before transferring. Cookies taste even better the next day.
Nutrition
- Serving Size: 1 cookie
- Calories: 210
- Sugar: 17
- Sodium: 150
- Fat: 11
- Saturated Fat: 6
- Carbohydrates: 28
- Fiber: 1
- Protein: 2
Keywords: small-batch chocolate chip cookies, easy cookie recipe, kid-approved cookies, chewy chocolate chip cookies, quick cookies