My sister called me last Tuesday, frantic because her toddler had decided that breakfast was now a negotiation. She needed something portable, something she could eat with one hand while wrestling a diaper bag, and something that did not require turning on a single appliance. I told her about these no-bake peanut butter banana protein energy balls, and honestly, I expected her to roll her eyes. She is not a health-nut type. She likes her food to taste like food, not like a science experiment.
But she made them anyway. And then she texted me at 10 PM with a photo of an empty container and the words, “I ate six of these today and I’m not sorry.” That is the kind of energy this recipe brings. Not just nutritional energy, but the real-life, “I survived another Tuesday” kind of energy.
I have been making these energy balls for years, tweaking the ratio of peanut butter to banana, testing different protein powders (some were terrible, let me tell you), and figuring out the exact texture that keeps them from falling apart in your bag. The trick is not overcomplicating it. You mash a banana, stir in peanut butter and oats, add a scoop of protein powder, and roll them into little balls. That is it. No food processor required, no melting chocolate, no standing over a stove. Five minutes, start to finish.
They taste like a peanut butter banana sandwich but with staying power. The protein keeps you full, the oats give you slow-burning energy, and the banana adds natural sweetness without needing any refined sugar. My sister now keeps a batch in her fridge at all times. She calls them her “emergency snacks.” I call them the reason she stopped skipping breakfast.
These no-bake peanut butter banana protein energy balls have become my go-to for busy mornings, afternoon slumps, and pre-workout fuel. They are forgiving, adaptable, and genuinely delicious. If you have ever thought energy balls were dry or bland, these will change your mind.
Why You’ll Love This Recipe
I have tested this recipe more times than I care to admit. I have used chunky peanut butter and smooth, old-fashioned oats and quick oats, vanilla protein powder and unflavored. I even tried it with almond butter once, and while it was good, it was not the same. The peanut butter and banana combo is just too perfect to mess with.
- Quick & Easy: Five minutes of mixing and rolling. No baking, no waiting. You can literally make these while your coffee brews.
- Simple Ingredients: You probably have everything in your kitchen right now. Oats, peanut butter, a ripe banana, and protein powder. That is the base. Nothing weird.
- Perfect for Busy Days: Throw a few in your bag before work, pack them in lunchboxes, or keep them in the fridge for when hunger strikes. They travel beautifully.
- Crowd-Pleaser: My kids, my sister, my workout buddy, and even my picky dad have all given these the thumbs up. They do not taste “healthy” in the punishing way.
- Unbelievably Satisfying: The texture is soft and chewy, not dry or crumbly. The banana keeps them moist, and the peanut butter gives them that rich, nutty flavor that makes you forget they are actually good for you.
What sets this recipe apart is the balance. I have tried versions that were too dense, too sweet, or too dry. This one hits the sweet spot. The banana provides enough moisture that you do not need to add extra liquid, and the protein powder blends in seamlessly without leaving a chalky aftertaste. It is the kind of snack that makes you feel good about eating it, not just virtuous.
These energy balls have saved me on more occasions than I can count. Late afternoons when my energy crashes, mornings when I oversleep, evenings when I need something before a workout but do not want a full meal. They are the definition of a reliable recipe.
What Ingredients You Will Need
This recipe uses straightforward, pantry-friendly ingredients that come together to create something genuinely satisfying. No obscure superfoods, no expensive specialty items. Just real food that works.
- 1 cup old-fashioned rolled oats – These provide the structure and chew. Quick oats work in a pinch, but old-fashioned oats give a better texture that holds up over time. I use Bob’s Red Mill, but any brand works.
- 1/2 cup creamy peanut butter – Natural peanut butter works best here, the kind that separates and you have to stir. Avoid the sugary, hydrogenated stuff. The oil in natural peanut butter helps bind the balls without making them greasy. If you only have chunky, go for it, just expect some texture.
- 1 large ripe banana, mashed – The riper the better. A banana with brown spots is ideal because it is sweeter and mashes more easily. This is the ingredient that replaces any need for added sugar or honey.
- 1 scoop vanilla or unflavored protein powder – I use a whey-based protein powder, but plant-based works too. Vanilla adds a subtle sweetness, but unflavored keeps the banana flavor front and center. If your protein powder is very sweet, you might want to reduce the banana slightly.
- 2 tablespoons honey or maple syrup – Optional, depending on how sweet you want them. I usually skip this if my banana is very ripe, but add it when I want a sweeter treat. Maple syrup gives a slightly different flavor that works well with the peanut butter.
- 1/4 cup mini chocolate chips – Also optional, but highly recommended. They add little pockets of melty chocolate that make these feel like a dessert. Dark chocolate chips keep things a bit healthier.
- Pinch of sea salt – This is non-negotiable for me. Salt balances the sweetness and makes the peanut butter flavor pop. Just a tiny pinch is enough.
- 1 tablespoon chia seeds or flaxseed meal – These add extra fiber and omega-3s. They also help absorb moisture and keep the balls from getting too sticky. Totally optional, but I love the texture they add.
For the best results, make sure your banana is truly ripe. A green or barely yellow banana will not mash properly and will leave chunks that throw off the texture. Your peanut butter should be at room temperature so it mixes in smoothly. If it has been in the fridge, let it sit out for a few minutes first.
If you are gluten-sensitive, use certified gluten-free oats. Most oats are naturally gluten-free but can be contaminated during processing. Bob’s Red Mill makes a good gluten-free option.
Equipment Needed
One of the best things about this recipe is how little equipment it requires. You do not need a food processor, a stand mixer, or any fancy gadgets. Just a few basic kitchen tools.
- Large mixing bowl – Any medium-to-large bowl works. You need enough room to stir everything together without ingredients flying everywhere.
- Fork or potato masher – For mashing the banana. A fork works perfectly fine, but a potato masher makes it faster and gives you a smoother consistency.
- Rubber spatula or wooden spoon – For mixing everything together. A rubber spatula is my preference because it scrapes the sides cleanly.
- Measuring cups and spoons – For accuracy. I know some people eyeball it, but measuring ensures consistent results every time.
- Small cookie scoop or tablespoon – For portioning the mixture into even balls. A cookie scoop makes the process faster and gives you uniform sizes, which means they all chill at the same rate.
- Parchment paper or baking sheet – To hold the balls while they set. You can also use a plate or a tray lined with wax paper.
- Airtight container – For storing the finished energy balls in the fridge or freezer.
I have made these without a cookie scoop by just using my hands, and it works fine. The mixture can be a little sticky, so lightly wetting your hands helps. If you make energy balls regularly, a cookie scoop is worth the investment. It makes the process so much faster and less messy.
Preparation Method
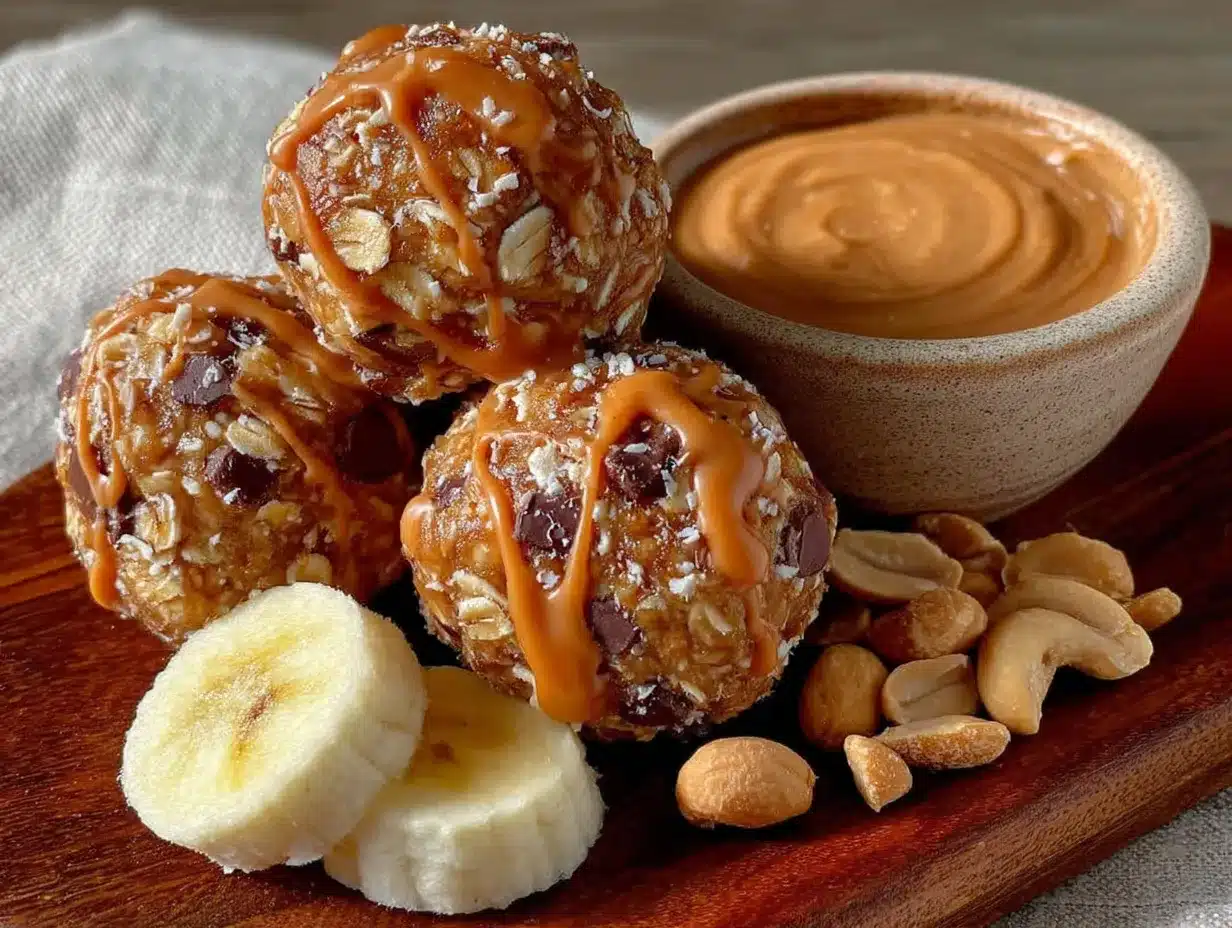
This is the kind of recipe you can make with your eyes half-closed on a groggy morning. Seriously. It is that simple. But let me walk you through it step by step so you get the texture just right.
- Mash the banana. Peel your ripe banana and put it in a large mixing bowl. Use a fork or potato masher to mash it until it is mostly smooth with just a few tiny lumps. You want a paste-like consistency, not chunks. A very ripe banana will mash almost effortlessly. If your banana is stubborn, let it sit on the counter for a day or two.
- Add the peanut butter and sweetener. Scoop in your peanut butter and, if using, your honey or maple syrup. Stir them into the mashed banana until everything is well combined. The mixture will look a bit like a thick, lumpy sauce. That is normal. Make sure there are no streaks of peanut butter hiding at the bottom of the bowl.
- Mix in the dry ingredients. Add the rolled oats, protein powder, chia seeds or flaxseed meal if using, and the pinch of sea salt. Stir everything together with your rubber spatula or wooden spoon until no dry patches remain. The mixture should be thick and slightly sticky, holding together when you press it. If it feels too dry, add a teaspoon of water or milk. If it feels too wet, add another tablespoon of oats.
- Fold in the chocolate chips. Gently stir in the mini chocolate chips until they are distributed evenly throughout the mixture. Try not to overmix at this stage, you want the chips to stay intact, not melt into the batter.
- Chill the mixture (optional but helpful). If your mixture feels too sticky to handle, pop the bowl in the fridge for 10 to 15 minutes. This firms up the peanut butter and makes rolling much easier. I usually skip this step if I am in a hurry, but it is a lifesaver on humid days.
- Roll into balls. Using a small cookie scoop or a tablespoon, portion out the mixture and roll it between your palms into smooth balls. If the mixture sticks to your hands, lightly wet your palms with water or rub a tiny bit of oil on them. Aim for balls about 1 to 1.5 inches in diameter. You should get around 12 to 15 balls from this recipe.
- Place on a lined tray. Set the rolled balls on a baking sheet or plate lined with parchment paper. Leave a little space between them so they do not stick together.
- Chill to set. Refrigerate the energy balls for at least 30 minutes before eating. This allows them to firm up and hold their shape. If you are impatient, you can eat one right away, it will just be softer and a bit messier.
- Transfer to storage. Once chilled, move the energy balls to an airtight container. They will keep in the fridge for up to a week, or in the freezer for up to three months.
A quick note about texture: if your mixture seems too crumbly and will not hold together, your banana might not have been ripe enough, or your peanut butter might be too dry. Add a tiny splash of milk or an extra drizzle of honey to bring it together. If it is too sticky, add a tablespoon of oats or a bit more protein powder.
I learned this the hard way when I used a slightly green banana once and ended up with a bowl of crumbles instead of a cohesive mixture. It still tasted good, but it was not as satisfying to eat. Ripe bananas are the secret weapon here.
Cooking Tips & Techniques
Over the years, I have made plenty of mistakes with energy balls. I have had batches that were too dry, too sticky, or just plain boring. Here is what I have learned so you do not have to repeat my errors.
Use room temperature ingredients. Cold peanut butter straight from the fridge is stiff and hard to mix. Let it sit out for 10 minutes before you start. Same goes for your banana, though bananas are usually fine at room temperature anyway.
Do not overmix. Once you add the oats, stir just until everything is combined. Overmixing can make the texture gummy, especially if you are using a protein powder that absorbs a lot of liquid. Stir gently and stop when you no longer see dry flour or oats.
Taste before rolling. This is my favorite tip. Before you commit to rolling all the balls, taste a tiny bit of the mixture. Does it need more salt? A touch more sweetness? A few extra chocolate chips? Adjust now, not after you have rolled 15 balls.
Wet hands are your friend. If the mixture sticks to your palms, wet your hands with a little water. Do not use oil unless you want greasy energy balls. Water works perfectly and does not affect the flavor.
Chill for texture. I know it is tempting to eat them immediately, but chilling for 30 minutes makes a huge difference. The flavors meld together, the texture firms up, and they become much more satisfying to bite into. Cold energy balls also hold up better in a lunchbox or bag.
Batch prep is easy. Double or triple the recipe without any issues. The mixture scales perfectly. I often make a double batch on Sunday and have snacks ready for the entire week. They disappear fast in my house.
One mistake I made early on was using a protein powder that was heavily sweetened with artificial sweeteners. The aftertaste was terrible and it threw off the entire batch. Stick with a protein powder you actually enjoy the flavor of, because it is a major component here. Vanilla is usually the safest bet.
Variations & Adaptations
This recipe is incredibly flexible. I have made so many versions over the years, and honestly, they have all been good. Here are some of my favorites.
Chocolate Peanut Butter Version. Swap the vanilla protein powder for chocolate protein powder and add an extra tablespoon of cocoa powder. The chocolate and peanut butter combo is legendary. You might need a tiny bit more liquid since cocoa powder absorbs moisture, so add a teaspoon of milk if the mixture seems dry.
Vegan Option. Use a plant-based protein powder and replace the honey with maple syrup or agave. Make sure your chocolate chips are dairy-free. Everything else is already vegan-friendly. These taste just as good as the original.
Nut-Free Alternative. Swap the peanut butter for sunflower seed butter or tahini. Sunflower seed butter works beautifully, though it has a slightly different flavor profile. Tahini gives a more savory, earthy taste that pairs surprisingly well with banana. If using sunflower seed butter, be aware that it can react with baking soda if you ever bake these, but since this is a no-bake recipe, you are fine.
Add-Ins and Mix-Ins. Feel free to get creative. Shredded coconut, chopped nuts, dried fruit, or even a spoonful of cocoa nibs all work well. I have added a tablespoon of hemp seeds for extra protein and loved the nutty flavor they brought. Just keep the total volume of add-ins to about a quarter cup so the mixture does not become too dry.
Lower Sugar Version. Skip the honey or maple syrup entirely and rely on the banana for sweetness. Use an unsweetened protein powder and dark chocolate chips with at least 70% cocoa. The banana provides plenty of natural sweetness, especially if it is very ripe.
Pumpkin Spice Variation. In the fall, I swap the chocolate chips for white chocolate chips and add a teaspoon of pumpkin pie spice. It tastes like autumn in a bite-sized snack. You could also add a tablespoon of pumpkin puree, but reduce the banana slightly to keep the texture right.
I once made a batch with chopped dried apricots and a pinch of cardamom, and it was unexpectedly incredible. Do not be afraid to experiment. The base recipe is forgiving enough to handle most additions.
Serving & Storage Suggestions
These energy balls are best served cold, straight from the fridge. The texture is firm but chewy, and the flavors are more pronounced when they are chilled. I like to grab one or two as a mid-morning snack or a pre-workout boost.
For serving, arrange them on a small plate or in a bowl. They make a great addition to a summer grazing board alongside fresh fruit, nuts, and cheese. They also pair beautifully with a cup of coffee or a cold glass of milk. Kids love them as an after-school snack, and they are perfect for packing in lunchboxes.
Refrigerator Storage: Place the energy balls in an airtight container lined with parchment paper. They will keep for up to one week in the fridge. I recommend placing a piece of parchment between layers if you stack them, so they do not stick together.
Freezer Storage: These freeze exceptionally well. Arrange the balls on a baking sheet and freeze until solid, about one hour. Then transfer them to a freezer-safe bag or container. They will keep for up to three months. You can eat them straight from the freezer, they will be firmer but still delicious. Or let them thaw in the fridge for about 30 minutes before eating.
Room Temperature: If you are taking them on the go, they will hold up at room temperature for a few hours, but they will soften. I do not recommend leaving them out for more than four hours, especially in warm weather, because of the banana content.
One thing I love about these energy balls is that the flavors actually improve after a day in the fridge. The oats soften slightly, the peanut butter and banana meld together, and everything becomes more cohesive. They are good on day one, but even better on day two.
Nutritional Information & Benefits
These no-bake peanut butter banana protein energy balls are packed with nutrition, but they taste like a treat. That is the magic of this recipe.
Per serving (based on 12 balls, using the recipe as written with honey and chocolate chips):
- Calories: approximately 180-200 per ball
- Protein: 8-10 grams
- Carbohydrates: 22-25 grams
- Fiber: 4-5 grams
- Sugar: 10-12 grams (mostly natural from banana and minimal added honey)
- Fat: 9-11 grams (healthy fats from peanut butter and chia seeds)
The banana provides potassium, which helps with muscle function and recovery. Peanut butter offers healthy monounsaturated fats and protein that keeps you full. Oats are rich in beta-glucan, a type of soluble fiber that supports heart health and steady energy levels. Chia seeds add omega-3 fatty acids and extra fiber. Protein powder obviously boosts the protein content, making these a great post-workout snack or a satisfying breakfast option.
These energy balls are naturally gluten-free if you use certified gluten-free oats. They are also dairy-free if you choose dairy-free chocolate chips and a plant-based protein powder. The recipe is vegetarian as written.
Potential allergens include peanuts and oats. If you have a peanut allergy, use sunflower seed butter or another nut-free alternative. Always check your protein powder and chocolate chips for cross-contamination warnings if you have severe allergies.
I personally love that these energy balls give me sustained energy without a sugar crash. They are perfect for those 3 PM slumps when I need something to get me through the rest of the afternoon without reaching for a candy bar.
Frequently Asked Questions
Can I use quick oats instead of rolled oats?
Yes, quick oats work fine. They will give the energy balls a slightly softer, less chewy texture because they are more finely processed. The balls may also be slightly less sturdy. If you only have quick oats, go ahead and use them, just know the texture will be a bit different.
My mixture is too dry and crumbly. What did I do wrong?
This usually happens when the banana is not ripe enough or the peanut butter is too thick. Add a splash of milk, a drizzle of honey, or an extra tablespoon of peanut butter to bring it together. If your banana was on the smaller side, you might need a bit more moisture. Do not be afraid to adjust as you go.
How long do these energy balls last?
They will stay fresh in the refrigerator for up to one week in an airtight container. In the freezer, they will keep for up to three months. I recommend labeling the container with the date so you do not forget when you made them. They rarely last that long in my house, though.
Can I make these without protein powder?
Absolutely. If you want to skip the protein powder, replace it with an equal amount of rolled oats or a combination of oats and ground flaxseed. The protein content will be lower, but they will still be delicious and satisfying. You might need to adjust the moisture slightly, so add a teaspoon of water or milk if the mixture seems dry.
Can I use almond butter or another nut butter?
Yes, you can substitute almond butter, cashew butter, or sunflower seed butter for the peanut butter. Keep in mind that different nut butters have different consistencies and fat contents. Almond butter is usually thicker and less oily, so you might need to add a tiny bit more moisture. Sunflower seed butter works beautifully but has a distinct flavor. Experiment and find your favorite.
Conclusion
These no-bake peanut butter banana protein energy balls have become a staple in my kitchen for good reason. They are fast, forgiving, and genuinely delicious. No complicated techniques, no obscure ingredients, no waiting around. Just five minutes of your time and you have a week’s worth of healthy snacks ready to go.
I love that this recipe is a blank canvas. You can keep it simple with just the basics, or dress it up with chocolate chips, coconut, or spices. It works for breakfast, snacks, post-workout fuel, and even dessert. My sister still texts me photos of her latest batch, usually with a caption about how she hid them from her toddler. That is the highest compliment a recipe can get.
If you try these, I would love to hear how they turned out. Did you add something unexpected? Did your kids love them? Did you eat six in one sitting like my sister? Drop a comment below and let me know. And if you are looking for more easy, healthy snacks, check out our pumpkin spice protein balls for a seasonal twist, or our peanut butter banana sushi rolls for another fun way to use this flavor combo.
Go ahead, make a batch. Your future self will thank you.
Pin This Recipe!
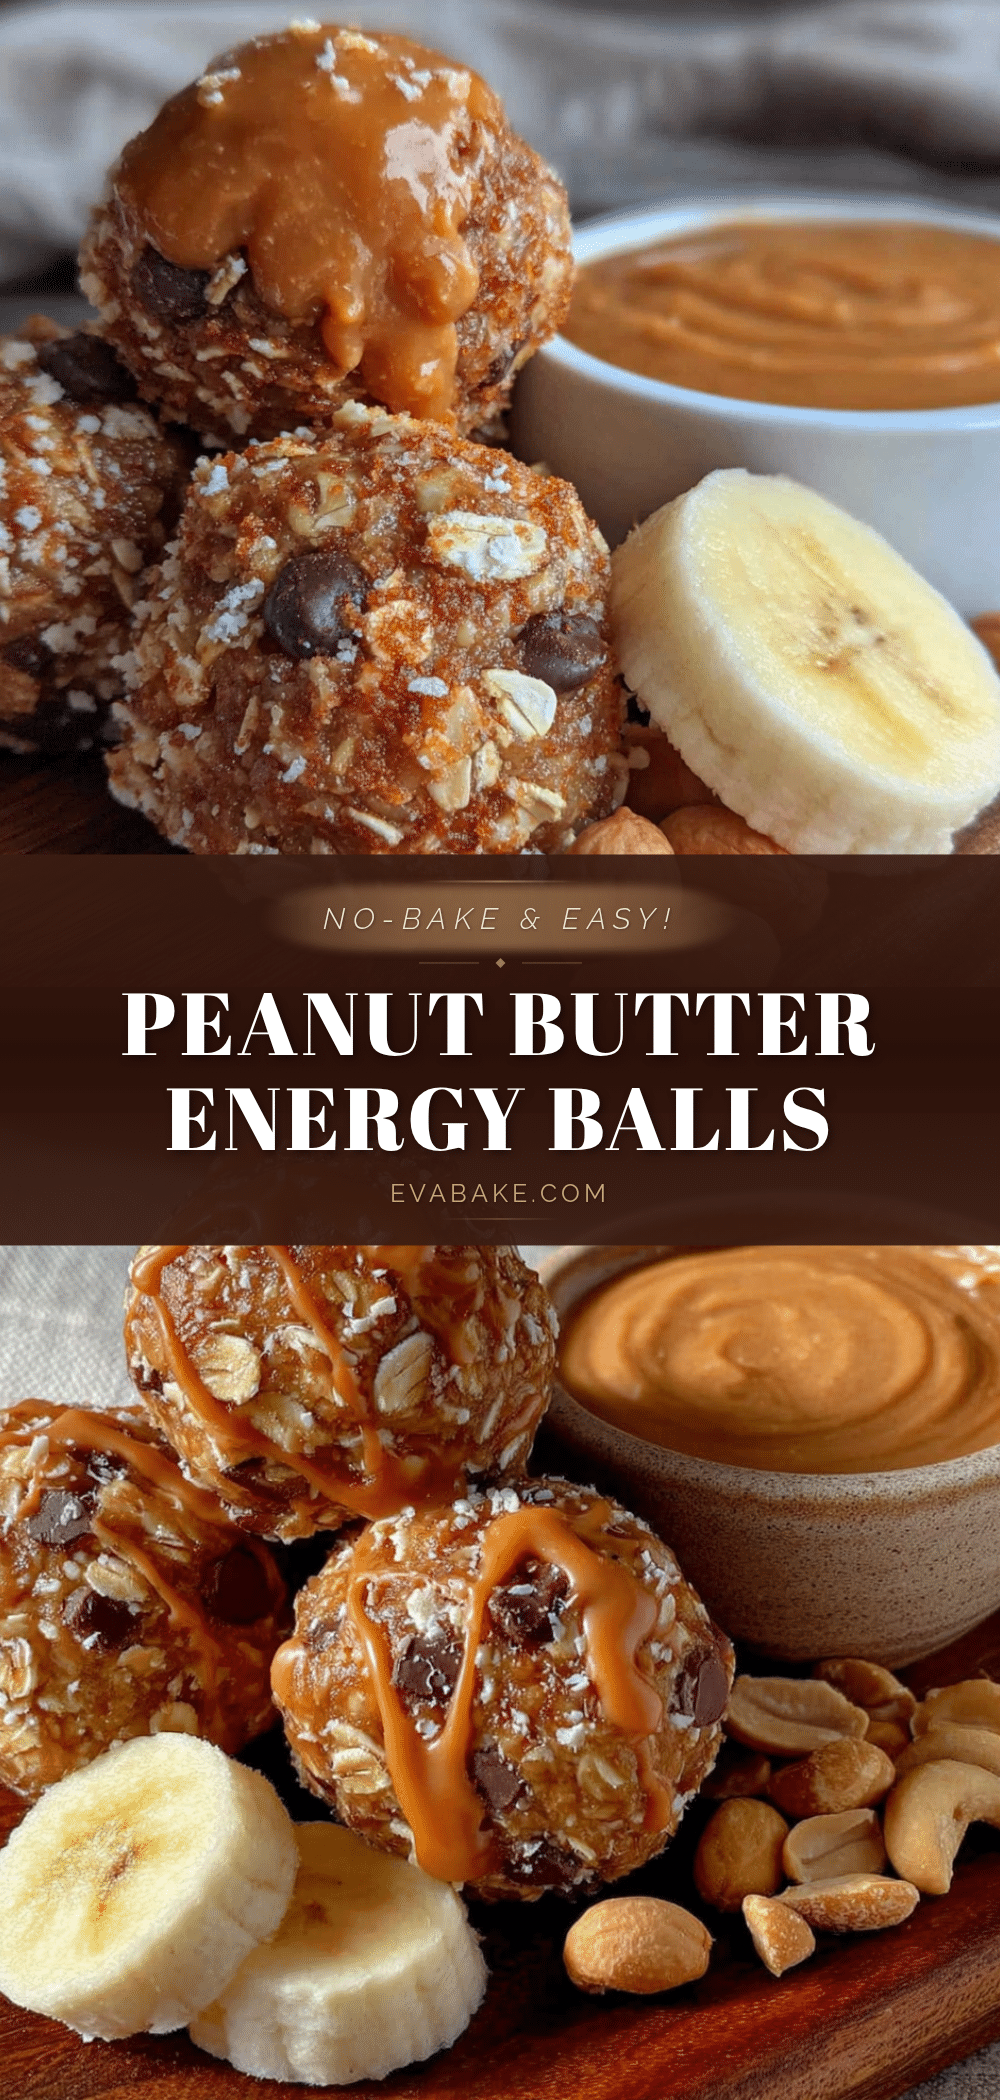
No-Bake Peanut Butter Banana Energy Balls: Easy 5-Minute Recipe
These no-bake peanut butter banana protein energy balls are quick, easy, and made with simple ingredients. Perfect for busy mornings, afternoon slumps, or pre-workout fuel, they taste like a peanut butter banana sandwich but with staying power.
- Prep Time: 5 minutes
- Cook Time: 0 minutes
- Total Time: 35 minutes (includes 30 minutes chilling)
- Yield: 12-15 balls 1x
- Category: Snack
- Cuisine: American
Ingredients
- 1 cup old-fashioned rolled oats
- 1/2 cup creamy peanut butter
- 1 large ripe banana, mashed
- 1 scoop vanilla or unflavored protein powder
- 2 tablespoons honey or maple syrup (optional)
- 1/4 cup mini chocolate chips (optional)
- Pinch of sea salt
- 1 tablespoon chia seeds or flaxseed meal (optional)
Instructions
- Mash the banana in a large mixing bowl until mostly smooth with a few tiny lumps.
- Add the peanut butter and sweetener (if using) and stir until well combined.
- Mix in the rolled oats, protein powder, chia seeds or flaxseed meal (if using), and sea salt until no dry patches remain. If too dry, add a teaspoon of water or milk; if too wet, add another tablespoon of oats.
- Fold in the mini chocolate chips (if using) until evenly distributed.
- If the mixture is too sticky, chill in the fridge for 10-15 minutes.
- Using a small cookie scoop or tablespoon, portion the mixture and roll into 1-1.5 inch balls. Wet hands lightly if sticky.
- Place the balls on a parchment-lined tray and refrigerate for at least 30 minutes to set.
- Transfer to an airtight container and store in the fridge for up to a week or freeze for up to three months.
Notes
Use a very ripe banana for natural sweetness and moisture. If mixture is too crumbly, add a splash of milk or extra honey. If too sticky, add more oats or protein powder. Chilling helps firm up the balls for easier handling.
Nutrition
- Serving Size: 1 ball
- Calories: 180200
- Sugar: 1012
- Sodium: 80100
- Fat: 911
- Saturated Fat: 23
- Carbohydrates: 2225
- Fiber: 45
- Protein: 810
Keywords: no-bake energy balls, peanut butter banana protein balls, healthy snack, gluten-free snack, easy energy balls


