The football sat there on the cutting board, perfectly laced and ready for kickoff. My brother-in-law, who never compliments food, picked up a cracker, scooped, and just stared at it for a second. “Wait, this is actually good,” he said, reaching for another before he’d even finished the first. That’s when I knew I’d finally cracked it. The perfect loaded football-shaped cheese ball isn’t just about looking cute on a platter—though honestly, it does look pretty fantastic. It’s about that moment when someone takes a bite and their eyebrows go up, and they start scanning the room for more crackers before they’ve even swallowed.
I’d been trying to make a cheese ball that didn’t feel like an afterthought for years. You know the ones—they’re dense, they’re bland, and they sit on the table untouched while everyone goes for the chips. I wanted something that would actually disappear before halftime. Something that made people text me the next day asking for the recipe. This loaded version with crispy bacon, sharp cheddar, and a surprise crunch from toasted pecans? It’s the one that finally did it. The shape is just the cherry on top—or the laces on the football, I guess.
Why You’ll Love This Recipe
Let me be real with you for a second. I’ve tested this cheese ball more times than I care to count. I’ve made it too soft (disaster), too firm (brick-like), and once I forgot the Worcestershire sauce entirely, and it tasted like sad cream cheese. But this version? This is the one I’d serve to anyone, including my picky mother-in-law who “doesn’t really like cheese balls.” She ate half of one by herself. True story.
- Quick & Easy: You only need about 20 minutes of active prep time, plus a few hours to chill. That’s it. No complicated techniques or fancy equipment required.
- Simple Ingredients: Everything comes from a regular grocery store. You probably have half of these ingredients in your fridge and pantry right now.
- Perfect for Game Day: This football-shaped cheese ball is basically made for Super Bowl parties, tailgates, and any gathering where you want to impress without stressing.
- Crowd-Pleaser: I’ve served this at parties with people who claim they’re “not cheese people,” and it still disappears. The bacon and pecans win over even the skeptics.
- Unbelievably Delicious: The combination of creamy cheese, smoky bacon, crunchy nuts, and tangy green onions is next-level. It’s not just a cheese ball—it’s an experience.
What makes this recipe different from all those other cheese ball recipes floating around? It’s the texture. I use a trick of blending the cream cheese until it’s actually fluffy before adding the other ingredients. That little step makes the final cheese ball light and scoopable instead of dense and heavy. Plus, the ratio of mix-ins to cheese is carefully balanced so every bite has bacon, pecan, and green onion in it. No boring bites here.
This is the kind of appetizer that makes you close your eyes after the first bite. It’s comfort food that happens to look like a football—which somehow makes it taste even better. Perfect for impressing guests without breaking a sweat, or turning a simple snack into something people will actually remember.
What Ingredients You Will Need
This recipe uses simple, everyday ingredients that come together to create something surprisingly special. Most of these are pantry staples or things you’d grab on a regular grocery run. Here’s what you’ll need and why each one matters.
For the Cheese Ball Base
- 16 ounces cream cheese, softened – Full-fat is best here for texture and flavor. Low-fat cream cheese makes the ball too firm and less creamy. I usually grab Philadelphia brand, but any block-style cream cheese works fine. Let it sit on the counter for at least an hour before you start.
- 2 cups sharp cheddar cheese, shredded – Please, for the love of all things cheesy, shred it yourself from a block. The pre-shredded stuff has anti-caking agents that make the texture grainy. I use extra-sharp cheddar for maximum flavor punch.
- 8 slices bacon, cooked and crumbled – Thick-cut bacon gives you bigger, more satisfying pieces. Cook it until it’s actually crispy, not floppy. Drain it well on paper towels so it stays crunchy in the cheese ball.
- 1/2 cup pecans, toasted and chopped – Toasting brings out their nutty flavor and keeps them crunchy. Chop them into small pieces, not dust. You can use walnuts if that’s what you have, but pecans have a sweetness that pairs perfectly with the smoky bacon.
- 1/4 cup green onions, thinly sliced – Both the white and green parts work here. The green tops add color, and the white parts give a mild onion kick. Pat them dry with a paper towel so they don’t add extra moisture.
- 1 teaspoon Worcestershire sauce – This is the secret weapon. It adds umami depth that makes the cheese taste cheesier. Don’t skip it. (I learned that the hard way.)
- 1/2 teaspoon garlic powder – Not fresh garlic, which can be too sharp. Garlic powder blends in smoothly and adds that savory background note.
- 1/4 teaspoon smoked paprika – Regular paprika works too, but smoked paprika gives a subtle campfire flavor that plays nicely with the bacon. (adds a warm, smoky undertone)
- Salt and black pepper to taste – Go easy on the salt because the bacon and cheddar are already salty. A few cracks of fresh black pepper is usually enough.
For the Football Decoration
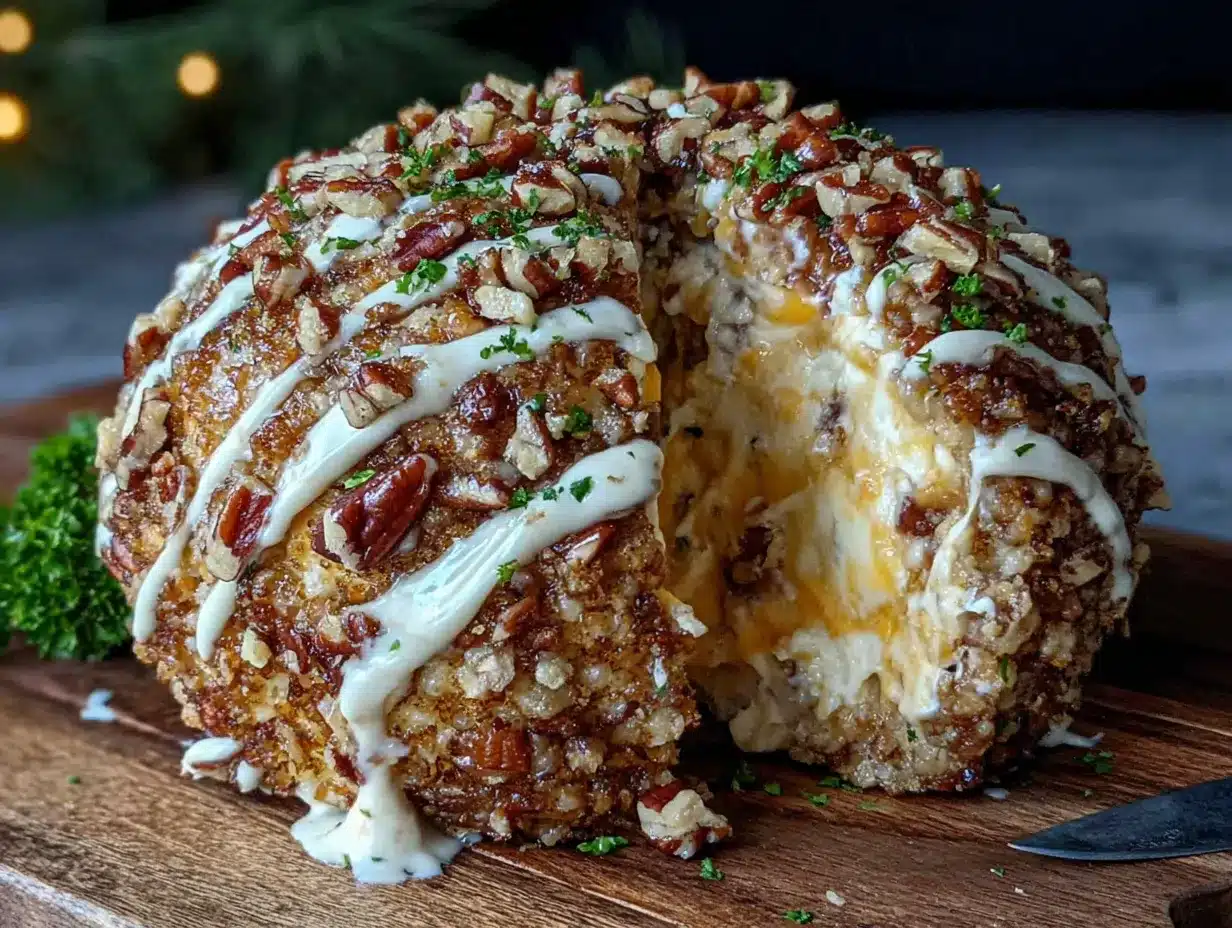
- 1/3 cup pecans, finely chopped – These will coat the outside of the cheese ball to create the brown “football” texture. Chop them finer than the ones going inside. You want them to stick evenly.
- 2 tablespoons cream cheese, softened – For making the white laces. You could use store-bought string cheese too, but cream cheese is easier to pipe and looks more realistic.
- Optional: Fresh parsley or chives for grass – Just for presentation on the serving board. Totally optional, but it makes the football look like it’s sitting on a field.
Equipment Needed
You don’t need anything fancy for this recipe, which is one of the reasons I love it. Here’s what you’ll need:
- Large mixing bowl – Any size works, but bigger is better for mixing without flinging cheese everywhere.
- Electric hand mixer or stand mixer – You can do this by hand with a wooden spoon, but it takes some serious arm work. A mixer makes the cream cheese fluffy in about 2 minutes. I use my trusty KitchenAid hand mixer that’s been with me through at least 50 cheese balls.
- Rubber spatula – For scraping the bowl and getting every last bit of cheesy goodness.
- Plastic wrap – Essential for shaping and chilling the cheese ball. The cheap store brand works fine.
- Piping bag or small zip-top bag – For piping the laces. A zip-top bag with the corner snipped off works perfectly if you don’t have a piping bag.
- Baking sheet – Just for holding the shaped cheese ball while it chills. Or you can use a plate.
- Cutting board and knife – For chopping pecans and slicing green onions.
- Small skillet – For toasting the pecans. A dry skillet over medium heat works best.
Preparation Method
Alright, let’s make this football cheese ball happen. I’ve broken everything down into clear steps with all the little details that make the difference between a good cheese ball and a “please bring this to every party” cheese ball.
Step 1: Prep Your Ingredients
Take your cream cheese out of the fridge at least 1 hour before you start. It needs to be truly soft—like, if you press it with your finger, it should leave a dent without resistance. Cold cream cheese makes lumpy cheese balls. While you’re waiting, cook your bacon until crispy, let it cool, then crumble it into small pieces. Toast your pecans in a dry skillet over medium heat for 3-4 minutes, stirring frequently, until they smell nutty and are lightly golden. Let them cool completely. Chop the green onions and pat them dry.
Step 2: Beat the Cream Cheese
Put the softened cream cheese in your large mixing bowl. Beat it with an electric mixer on medium speed for about 2 minutes, until it’s light, fluffy, and completely smooth. Scrape down the sides of the bowl halfway through. This step is non-negotiable—it’s what gives your cheese ball that dreamy, scoopable texture. If you skip it, you’ll end up with a dense brick. Trust me, I’ve made that mistake.
Step 3: Add the Flavor Bombs
Add the shredded cheddar cheese, crumbled bacon, toasted pecans, green onions, Worcestershire sauce, garlic powder, smoked paprika, and a pinch of black pepper to the bowl. Mix on low speed just until everything is combined. Don’t overmix—you want to see little pockets of bacon and pecan, not a uniform paste. Scrape the bottom of the bowl with your spatula to make sure nothing is hiding down there.
Step 4: Taste and Adjust
Here’s the part that separates home cooks from recipe developers. Taste the mixture. I know it’s raw cream cheese, but just a tiny bit on your finger. Does it need more salt? More pepper? A splash more Worcestershire? This is your last chance to adjust before it goes in the fridge. I usually end up adding a few more cracks of black pepper and another dash of Worcestershire. Trust your taste buds.
Step 5: Shape and Chill
Scoop the cheese mixture onto a large piece of plastic wrap. Use the plastic wrap to form it into a rough ball shape, then start shaping it into a football. Don’t worry about perfection—just get it into an oval-ish shape with slightly pointed ends. Wrap it tightly in the plastic wrap and refrigerate for at least 4 hours, or overnight. The chilling time is crucial. If you try to shape it too soon, it’ll be too soft to hold the football form. I usually make this the night before game day.
Step 6: Create the Football Coating
After the cheese ball is firm and chilled, unwrap it and set it on a clean piece of plastic wrap. Take your finely chopped pecans (the ones for the coating) and press them evenly onto the surface of the cheese ball. Work quickly—your hands will warm up the cheese, and you want to keep it cold. Use the plastic wrap to help press the pecans in without touching the cheese too much. The pecans should cover the entire ball except for where the laces will go.
Step 7: Pipe the Laces
Put the 2 tablespoons of softened cream cheese into a small piping bag or a zip-top bag with a tiny corner snipped off. Pipe two straight lines down the center of the football, about an inch apart. Then pipe small cross-lines between them to create the laces. Don’t stress about making them perfect—real football laces aren’t perfectly uniform either. If you mess up, just scrape off the cream cheese and try again. The cold cheese ball makes a good canvas.
Step 8: Final Chill and Serve
Pop the decorated cheese ball back in the fridge for another 30 minutes to let the laces set. When you’re ready to serve, transfer it to a serving board or platter. If you want to get fancy, arrange some fresh parsley or chives around the base to look like grass. Serve with an assortment of crackers, pretzels, crostini, and veggie sticks. Watch it disappear.
Cooking Tips & Techniques
After making this recipe more times than I’d like to admit (including some spectacular failures), I’ve collected a few tips that will save you from my mistakes.
The biggest mistake people make is not letting the cream cheese soften enough. I get it—you’re in a rush, you’re hungry, you want cheese now. But cold cream cheese doesn’t blend smoothly, and you’ll end up with lumps. If you forgot to take it out of the fridge, cut it into small cubes and let them sit for 30 minutes. Or microwave it in 10-second bursts, but be careful—cream cheese can go from soft to melted soup really fast.
Another common issue is the cheese ball being too soft to hold its shape. This usually happens when the bacon fat or green onion moisture gets incorporated. Make sure your bacon is drained really well on paper towels. Pat your green onions dry. If your mixture feels too soft even after chilling, add a few more tablespoons of shredded cheddar to firm it up.
For the best texture, toast your pecans even if the recipe says not to. Raw pecans get soft and weird in the cheese ball. Toasted pecans stay crunchy and taste nuttier. Same goes for the coating pecans—toast them, let them cool, then chop them finely.
Timing strategy: I always make the cheese mixture the day before. It gives the flavors time to meld together, and the cheese ball firms up perfectly overnight. Then I just need to coat it, add the laces, and serve on game day. It takes maybe 10 minutes of work the day of the party.
If you’re making this for a party, set it out about 20 minutes before guests arrive. A cheese ball that’s straight from the fridge is too firm to scoop easily. Letting it sit at room temperature for a bit makes it spreadable and scoopable. Just don’t leave it out for more than 2 hours total for food safety.
Variations & Adaptations
One of the best things about this recipe is how flexible it is. Here are some variations I’ve tried and loved:
Spicy Football Cheese Ball: Add 2 tablespoons of pickled jalapeños (finely chopped and patted dry) and 1/4 teaspoon of cayenne pepper to the mixture. The heat cuts through the richness beautifully. I made this version for a playoff party, and it was gone before the first quarter ended. If you love spicy appetizers, you might also enjoy these smoky bacon jalapeño cream cheese stuffed sliders for another kick.
Blue Cheese & Walnut Football: Swap half the cheddar for crumbled blue cheese and use toasted walnuts instead of pecans. This version is more sophisticated and pairs beautifully with sliced pears or apple slices. It’s my go-to for holiday parties where I want to impress the adults.
Vegetarian Version: Skip the bacon and add 1/2 cup of finely chopped sun-dried tomatoes (the oil-packed kind, drained and patted dry) and 1/4 cup of chopped fresh chives. The sun-dried tomatoes give that same savory, umami punch that bacon provides. You won’t miss the meat, I promise.
Dairy-Free Adaptation: Use dairy-free cream cheese and shredded vegan cheddar. The texture won’t be exactly the same, but it still works. Add an extra tablespoon of nutritional yeast to boost the cheesy flavor. I’ve tested this for a friend with dairy allergies, and it was a hit.
Different Nut Coating: Not a fan of pecans? Try finely chopped almonds, walnuts, or even crushed pretzels for the coating. The pretzel version gives a salty crunch that’s addictive. Just crush them into small pieces, not powder.
Serving & Storage Suggestions
This football cheese ball is best served chilled but not ice-cold. Take it out of the fridge about 20 minutes before your guests arrive so it has time to soften slightly. Serve it on a large wooden board or platter surrounded by an assortment of dippers.
My favorite serving combination: Classic buttery crackers (like Ritz or Club crackers), crunchy pretzel sticks, toasted baguette slices, crisp celery sticks, and red bell pepper strips. The variety of textures keeps things interesting. I also like to add a small bowl of extra chopped pecans on the side for people who want more crunch.
For presentation: Arrange the dippers around the cheese ball in a circular pattern, and scatter some fresh herbs around the base. If you’re feeling extra festive, add some mini football flags or team-colored napkins nearby. This cheese ball is the star of the show, so give it center stage.
Storage: Leftover cheese ball (if there is any) can be wrapped tightly in plastic wrap and stored in the refrigerator for up to 5 days. The texture will stay good, but the pecan coating might soften slightly. To refresh it, you can press some freshly toasted pecans onto the outside before serving again.
Freezing: You can freeze the undecorated cheese ball for up to 1 month. Wrap it tightly in plastic wrap, then foil, and freeze. Thaw it overnight in the refrigerator, then add the pecan coating and laces before serving. The texture will be slightly different after freezing, but it’s still delicious.
Flavor development: Honestly, this cheese ball tastes even better on day two. The flavors meld together overnight, and the garlic and Worcestershire become more pronounced. If you can resist eating it right away, make it a day ahead for the best flavor.
Nutritional Information & Benefits
Let’s be real—this is a party appetizer, not a health food. But it does have some redeeming qualities. Here’s the approximate nutritional breakdown per serving (based on 12 servings):
- Calories: 320
- Protein: 12g
- Fat: 28g
- Carbohydrates: 5g
- Fiber: 1g
- Sugar: 2g
Health highlights: Cream cheese and cheddar provide calcium and protein. Pecans are packed with healthy fats, fiber, and antioxidants. Bacon adds protein and flavor (and let’s be honest, happiness). Green onions offer vitamins K and C. Is this a superfood? No. But it’s a treat that’s worth every bite.
Dietary considerations: This recipe is naturally low-carb and gluten-free. It’s not suitable for vegans or those with dairy allergies (though there is a dairy-free adaptation above). It contains nuts (pecans). If you’re serving someone with a nut allergy, use crushed pretzels or seeds for the coating instead.
My personal take: I believe in balance. This cheese ball is rich, indulgent, and absolutely worth the calories. Pair it with veggie sticks and don’t stress about it. Food is meant to be enjoyed, especially on game day when you’re surrounded by friends and family.
Conclusion
This perfect loaded football-shaped cheese ball is more than just a cute appetizer—it’s the one that people actually remember. It’s the recipe that gets texted around after the party, the one that shows up at every gathering because someone requested it. And honestly? It deserves that reputation.
The combination of creamy cheese, smoky bacon, crunchy pecans, and tangy green onions is genuinely addictive. And the football shape? It’s just fun. It makes people smile, it sparks conversation, and it somehow makes the cheese taste even better. (Is that possible? I think so.)
I love this recipe because it’s forgiving. You can adjust the mix-ins, change the nuts, make it spicier or milder, and it still works. It’s a recipe that invites customization. So go ahead—make it your own. Add more bacon. Use extra-sharp cheddar. Throw in some jalapeños. This cheese ball can handle it.
I’d love to hear how yours turns out! Drop a comment below and tell me what variations you tried, or tag me in your photos on social media. Did you add something unexpected? Did your guests fight over the last bite? Share your game day cheese ball stories—I read every single one. And if you’re looking for more crowd-pleasing appetizers, check out these savory mummy jalapeño popper hot dogs or this flavorful sheet pan nachos with carnitas for your next party spread. Now go make that cheese ball and be the hero of game day!
Frequently Asked Questions
Can I make this cheese ball ahead of time?
Absolutely! In fact, I recommend it. You can make the cheese mixture, shape it into a football, and refrigerate it up to 3 days in advance. Just add the pecan coating and cream cheese laces on the day you plan to serve it. The flavors actually get better as they meld together overnight.
How do I get the football shape to hold?
The key is chilling. After you shape the cheese ball using plastic wrap, refrigerate it for at least 4 hours (overnight is better). The cold cream cheese firms up and holds its shape. If your kitchen is warm, work quickly and use the plastic wrap to mold it without touching the cheese too much with your warm hands.
Can I use pre-shredded cheese?
You can, but I really don’t recommend it. Pre-shredded cheese is coated with anti-caking agents like cellulose or potato starch, which prevent it from melting and blending smoothly. Your cheese ball will have a slightly grainy texture. Shredding a block of cheddar takes 2 extra minutes and makes a noticeable difference.
What can I serve with this cheese ball besides crackers?
So many options! Pretzel sticks, baguette slices, crostini, celery sticks, carrot sticks, bell pepper strips, cucumber rounds, apple slices, pear slices, and even sturdy potato chips all work great. For a low-carb option, use cucumber rounds and bell pepper strips. For a fun twist, serve with mini soft pretzels.
How long can this cheese ball sit out at room temperature?
For food safety, don’t leave the cheese ball out at room temperature for more than 2 hours. If you’re serving it at a party that lasts longer, put it back in the fridge for 15-20 minutes to firm up, then bring it back out. The good news is that this cheese ball is so popular, it usually doesn’t last that long anyway!
Pin This Recipe!
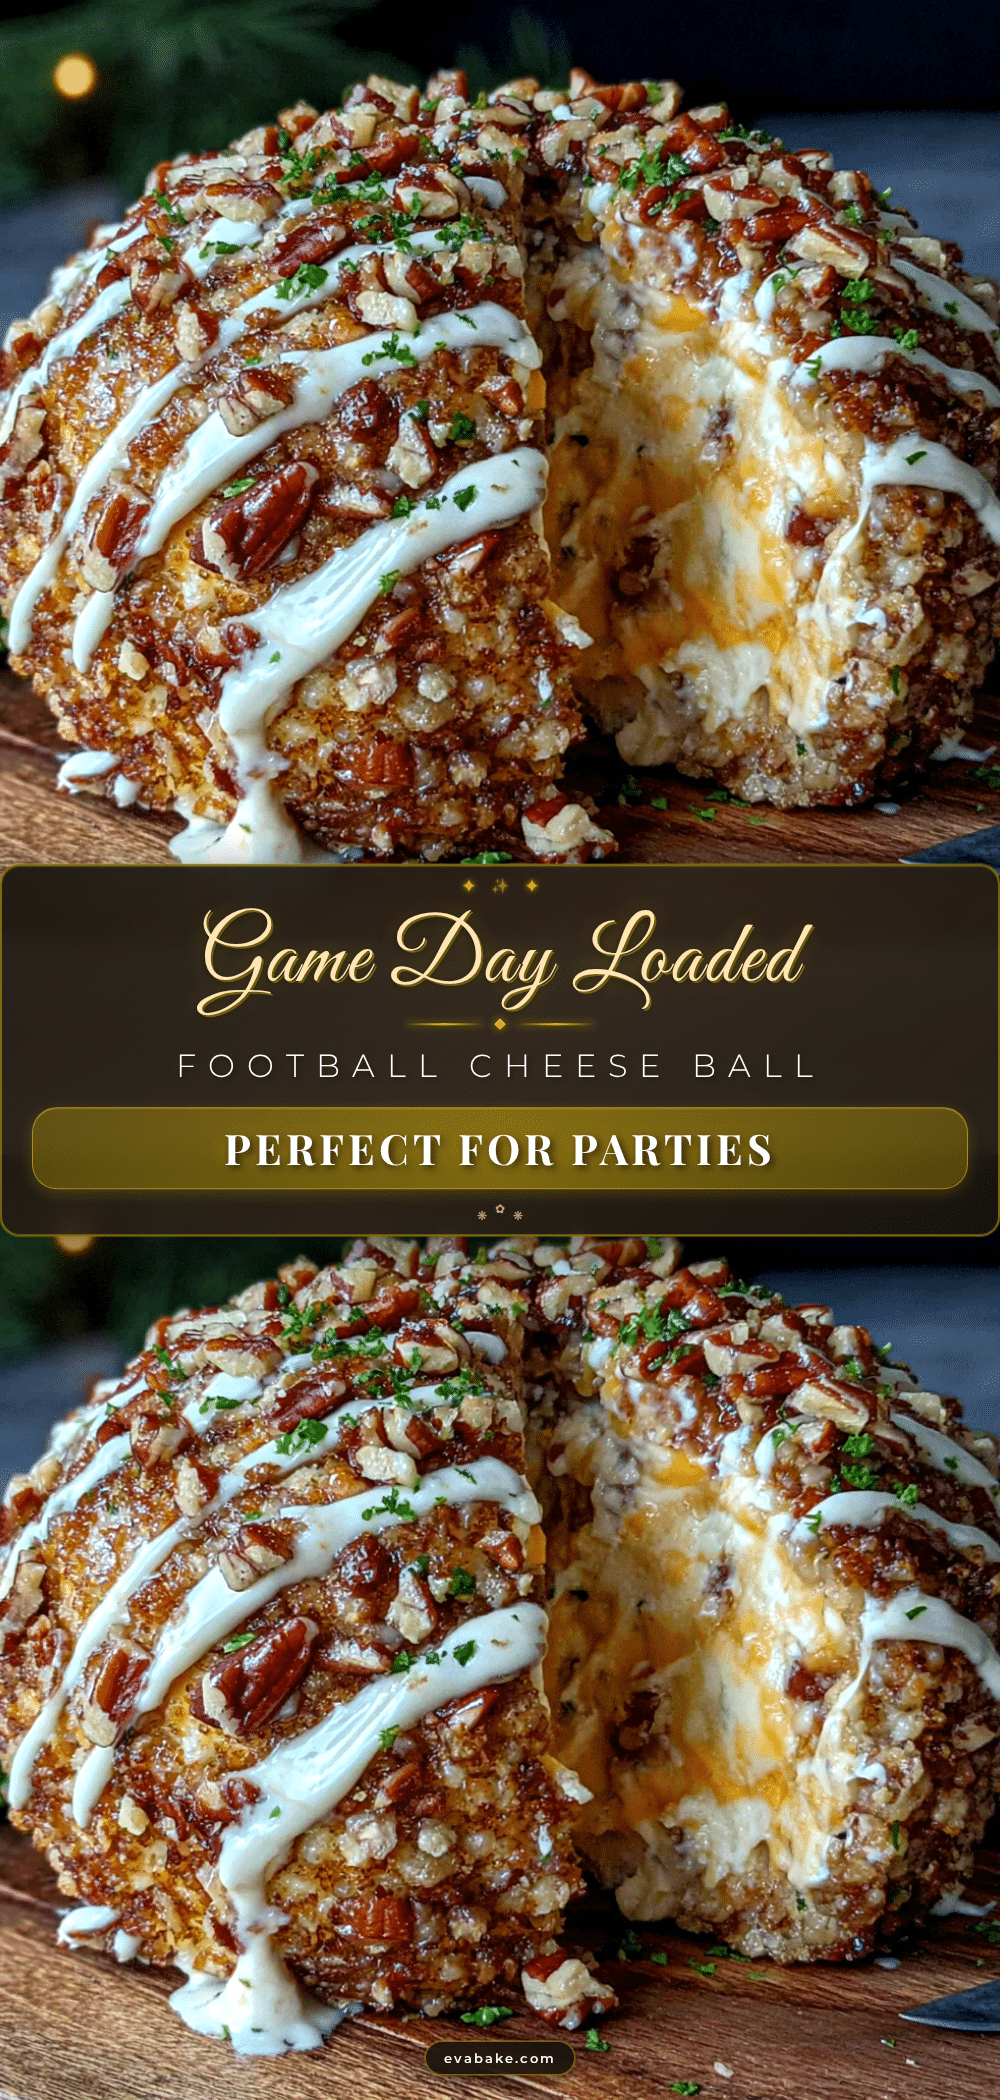
Perfect Loaded Football Cheese Ball: Easy Game Day Appetizer

This loaded football-shaped cheese ball with crispy bacon, sharp cheddar, and toasted pecans is the ultimate game day appetizer. It’s creamy, flavorful, and guaranteed to disappear before halftime.
- Prep Time: 20 minutes
- Cook Time: 10 minutes
- Total Time: 4 hours 30 minutes (includes chilling)
- Yield: 12 servings 1x
- Category: Appetizer
- Cuisine: American
Ingredients
- 16 ounces cream cheese, softened
- 2 cups sharp cheddar cheese, shredded
- 8 slices bacon, cooked and crumbled
- 1/2 cup pecans, toasted and chopped
- 1/4 cup green onions, thinly sliced
- 1 teaspoon Worcestershire sauce
- 1/2 teaspoon garlic powder
- 1/4 teaspoon smoked paprika
- Salt and black pepper to taste
- 1/3 cup pecans, finely chopped (for coating)
- 2 tablespoons cream cheese, softened (for laces)
- Optional: Fresh parsley or chives for grass
Instructions
- Take cream cheese out of fridge at least 1 hour before starting to soften. Cook bacon until crispy, let cool, then crumble. Toast pecans in a dry skillet over medium heat for 3-4 minutes until fragrant and lightly golden; let cool completely. Slice green onions and pat dry.
- In a large mixing bowl, beat softened cream cheese with an electric mixer on medium speed for about 2 minutes until light, fluffy, and smooth. Scrape down sides halfway through.
- Add shredded cheddar, crumbled bacon, toasted chopped pecans, green onions, Worcestershire sauce, garlic powder, smoked paprika, and a pinch of black pepper. Mix on low speed just until combined. Do not overmix.
- Taste the mixture and adjust seasoning if needed (more salt, pepper, or Worcestershire).
- Scoop mixture onto a large piece of plastic wrap. Use the wrap to shape into a rough ball, then form into a football shape (oval with slightly pointed ends). Wrap tightly and refrigerate for at least 4 hours or overnight.
- After chilling, unwrap the cheese ball and set on a clean piece of plastic wrap. Press finely chopped pecans evenly onto the surface, covering all but where laces will go. Use the plastic wrap to help press pecans in without touching the cheese too much.
- Place 2 tablespoons softened cream cheese in a small piping bag or zip-top bag with a tiny corner snipped off. Pipe two straight lines down the center of the football about 1 inch apart, then pipe small cross-lines between them to create laces.
- Refrigerate decorated cheese ball for another 30 minutes to set laces. Serve on a board with crackers, pretzels, crostini, and veggie sticks. Optionally, arrange fresh parsley or chives around the base for grass.
Notes
For best texture, let cream cheese soften fully. Toast pecans for crunch. Make ahead: prepare cheese mixture and shape into football up to 3 days in advance; add coating and laces on serving day. Let cheese ball sit at room temperature for 20 minutes before serving for easier scooping. Store leftovers wrapped in plastic wrap in fridge for up to 5 days. Freeze undecorated cheese ball for up to 1 month.
Nutrition
- Serving Size: 1 serving (based on
- Calories: 320
- Sugar: 2
- Sodium: 480
- Fat: 28
- Saturated Fat: 12
- Carbohydrates: 5
- Fiber: 1
- Protein: 12
Keywords: football cheese ball, game day appetizer, loaded cheese ball, bacon cheddar cheese ball, football shaped cheese ball, easy appetizer, party food