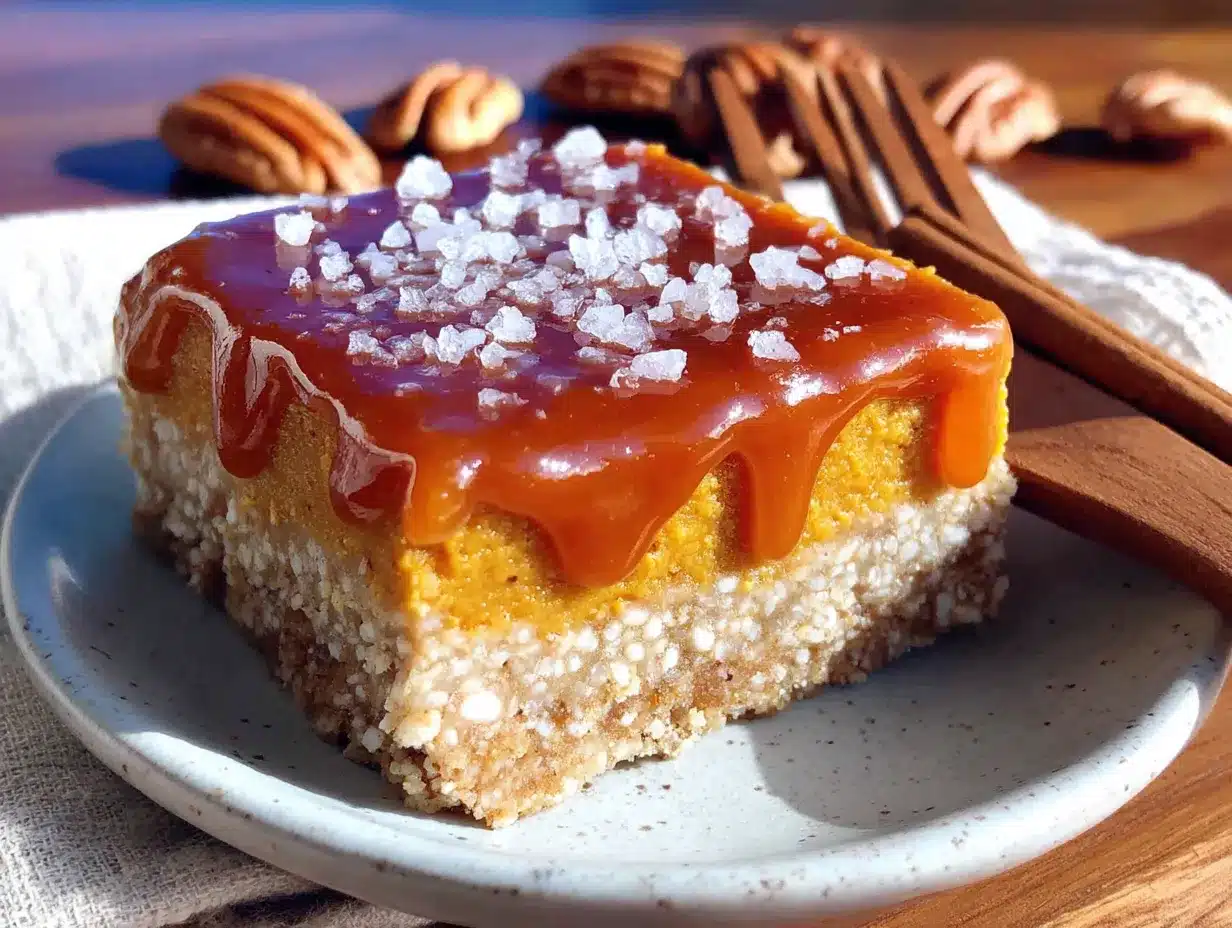
These Salted Caramel Pumpkin Pie Bars are everything you want in a fall dessert. They take all the cozy, spiced flavors of a classic pumpkin pie and layer them over a buttery shortbread crust, then get finished with a rich, homemade salted caramel that pools into every crevice. It’s the kind of dessert that disappears fast at gatherings—and nobody guesses it came together in about the same time as a single pie.
- Easier Than Pie : No rolling dough, no blind baking, no fussing with a wobbly filling. Just press, pour, and bake.
- Make-Ahead Friendly : These bars taste even better the next day, making them perfect for holiday prep.
- Perfect Balance of Flavors : The buttery crust, creamy pumpkin custard, and salted caramel create layers of sweet and salty in every bite.
- Always Impressive : That glossy caramel drizzle on top makes them look like you spent hours in the kitchen.
- Crowd-Pleasing Texture : A crisp base, a silky filling, and a gooey topping—what’s not to love?
I’ve tested this recipe more times than I care to count, tweaking the caramel temperature and the pumpkin spice ratio until it hit that sweet spot. The result is a bar that’s sturdy enough to hold its shape when sliced but still has that melt-in-your-mouth pumpkin pie feeling. It’s comfort food, reimagined as a bar that fits right in your hand.
What Ingredients You Will Need
This recipe uses simple, pantry-friendly ingredients to deliver big flavor. Most of these are likely already in your kitchen, especially if you’ve been in a fall baking mood. Here is what you will need:
For the Shortbread Crust
- 1 ½ cups all-purpose flour (spooned and leveled)
- ½ cup powdered sugar
- ¾ cup cold unsalted butter, cut into small cubes
- ¼ teaspoon salt (use fine sea salt)
For the Pumpkin Filling
- 1 can (15 oz) pure pumpkin puree (not pumpkin pie filling—I prefer Libby’s for consistent texture)
- ¾ cup granulated sugar
- 2 large eggs, room temperature
- ¾ cup heavy cream (or full-fat evaporated milk for a slightly lighter option)
- 1 ½ teaspoons pumpkin pie spice (store-bought or homemade—see note below)
- ½ teaspoon ground cinnamon (adds extra warmth)
- ¼ teaspoon salt
- 1 teaspoon vanilla extract
For the Salted Caramel Sauce
- 1 cup granulated sugar
- 6 tablespoons salted butter, cut into pieces, room temperature
- ½ cup heavy cream, room temperature (cold cream will cause the caramel to seize)
- 1 teaspoon flaky sea salt (like Maldon), plus more for sprinkling on top
- 1 teaspoon vanilla extract
Ingredient Note: For the pumpkin pie spice, you can easily make your own by mixing 1 teaspoon cinnamon, ½ teaspoon ginger, ¼ teaspoon nutmeg, ¼ teaspoon allspice, and a pinch of cloves. I do this all the time when I run out of the store-bought stuff, and honestly, it tastes brighter and more aromatic.
Substitution Tip: If you want a gluten-free version, swap the all-purpose flour in the crust with a good 1:1 gluten-free baking flour blend. The crust will be slightly more delicate but still delicious. For a dairy-free option, use cold vegan butter in the crust and full-fat coconut cream in the filling and caramel—just know the caramel will have a subtle coconut note.
Equipment Needed
You don’t need a fancy kitchen to pull these off, but a few specific tools make the process smoother:
- 9×13-inch baking pan — metal or glass both work, but metal gives a crisper crust
- Parchment paper — essential for easy lifting and clean slicing
- Food processor or pastry cutter — for cutting butter into the crust flour (your hands work too, just work fast to keep the butter cold)
- Medium saucepan — for the caramel, preferably light-colored so you can see the color change
- Candy thermometer — optional but highly recommended for perfect caramel every time
- Whisk — for smoothing the filling without lumps
- Sharp knife — for clean cuts through the crust and filling
I used a cheap metal 9×13 pan for years and it worked fine. If you don’t have a food processor, just grate the cold butter into the flour mixture using a box grater, then rub it in with your fingertips. It takes an extra minute but works beautifully.
Preparation Method
Step 1: Make the Shortbread Crust
Preheat your oven to 350°F (175°C). Line your 9×13-inch baking pan with parchment paper, leaving a couple inches of overhang on the long sides—this is your handle for lifting the bars out later.
In a food processor, pulse the flour, powdered sugar, and salt together. Add the cold butter cubes and pulse until the mixture looks like coarse sand with a few pea-sized butter pieces still visible. If you’re doing this by hand, cut the butter into the flour using a pastry cutter or your fingertips until you get that same texture.
Press the mixture evenly into the bottom of the prepared pan. I use the bottom of a flat measuring cup to really pack it down—this prevents the crust from crumbling when you slice the bars later. Bake for 18-20 minutes, until the edges are just starting to turn golden. The center will still look pale and that is exactly what you want. Set aside to cool slightly while you make the filling.
Step 2: Prepare the Pumpkin Filling
In a large bowl, whisk together the pumpkin puree, granulated sugar, eggs, heavy cream, pumpkin pie spice, cinnamon, salt, and vanilla extract. Whisk until completely smooth and uniform—no streaks of egg white or pockets of spice. The mixture should be thick but pourable, like a thin milkshake.
Pour the filling over the warm crust and spread it gently to the edges. Tap the pan on the counter a few times to release any air bubbles that might be hiding in the filling.
Step 3: Bake the Bars
Bake at 350°F (175°C) for 35-40 minutes. The filling should be set around the edges but still have a slight jiggle in the very center—similar to a cheesecake. It will continue to set as it cools. If you insert a knife near the center, it should come out mostly clean with just a little moisture.
Let the bars cool completely in the pan on a wire rack. This takes about 2 hours at room temperature. Once cool, transfer the pan to the refrigerator and chill for at least 3 hours, or overnight. This step is non-negotiable if you want clean slices—the filling needs time to fully firm up.
Step 4: Make the Salted Caramel
While the bars are chilling, make the caramel. In a medium saucepan over medium heat, spread the sugar in an even layer. Let it melt undisturbed for about 3-4 minutes—watch it carefully. Once the edges start to turn golden, gently swirl the pan (don’t stir) to encourage even melting.
When the sugar reaches a deep amber color—think the color of a copper penny—remove the pan from heat immediately. Add the butter pieces and whisk vigorously. The mixture will bubble up aggressively, so keep your face clear. Once the butter is fully incorporated, slowly drizzle in the heavy cream while whisking constantly. The caramel will steam and bubble again, so go slow.
Whisk in the flaky sea salt and vanilla extract. Pour the caramel into a heatproof jar or bowl and let it cool to room temperature. It will thicken as it cools. If you’re making this ahead, store it in the fridge and gently reheat it before using.
Step 5: Assemble and Slice
Once the bars are fully chilled and firm, lift them out of the pan using the parchment overhang. Place on a cutting board. Using a sharp knife, slice into 24 squares—6 rows by 4 rows. Wipe the knife clean between cuts for the neatest edges.
Drizzle the cooled salted caramel over the top of each bar, then sprinkle a few extra flakes of sea salt over the caramel. Let the caramel set for about 10 minutes before serving, or serve immediately if you don’t mind a little messy deliciousness.
Cooking Tips & Techniques
I burned my first batch of caramel so badly I had to open every window in the house. Here is what I learned so you don’t have to repeat my mistakes:
Watch the caramel like a hawk. Sugar can go from perfectly amber to burnt in less than 30 seconds. Once it starts turning color, do not walk away. Swirl the pan gently instead of stirring, because stirring can cause the sugar to crystallize and turn grainy.
Room temperature ingredients matter in the caramel. If your cream or butter is cold when you add it to the hot sugar, the caramel will seize up into a hard, lumpy mess. Let them sit out for at least 30 minutes before you start. I learned this the hard way and ended up with a saucepan full of sugar rocks.
Don’t skip chilling the bars. I know it’s tempting to cut into them while they’re still warm, but the filling needs that cold rest to set properly. Warm pumpkin filling is soft and will squish out when you try to slice it. Patience here pays off in clean, beautiful layers.
For extra clean slices, use a hot knife. Run your knife under hot water, dry it off, then slice. The heat glides through the crust and filling without dragging. Wipe and reheat between each cut.
Blind baking the crust. Unlike some bar recipes, this shortbread crust doesn’t need pie weights or foil. Just press it firmly and bake. The powdered sugar in the crust keeps it tender, and the butter content helps it hold together without shrinking.
Variations & Adaptations
One of the best things about this recipe is how flexible it is. Here are some ways to make it your own:
Chocolate Lover’s Version: Melt ½ cup of dark chocolate chips and drizzle it over the bars alongside the caramel. The chocolate and pumpkin combo is surprisingly good—think pumpkin chocolate chip bread, but in bar form.
Spiced Pecan Topping: Before baking, sprinkle ½ cup of chopped pecans over the pumpkin filling. They toast in the oven and add a crunchy contrast to the creamy filling. I did this for Thanksgiving one year and it was the first thing to disappear from the dessert table.
Gingerbread Crust: Swap the plain shortbread crust for a gingerbread version by adding 1 tablespoon molasses, ½ teaspoon ground ginger, and ¼ teaspoon ground cloves to the crust mixture. It pairs beautifully with the pumpkin and caramel.
Vegan Option: Use cold vegan butter in the crust, replace the eggs with ½ cup silken tofu blended smooth, and use full-fat coconut cream in both the filling and caramel. The texture is slightly less firm but still delicious.
Mini Bar Bites: Press the crust into a mini muffin tin (lined with parchment strips for easy removal), fill with pumpkin mixture, and bake for about 15 minutes. Top with a tiny drizzle of caramel for adorable bite-sized treats perfect for parties.
Serving & Storage Suggestions
These bars are best served chilled or at room temperature. If you’ve stored them in the fridge, let them sit out for about 15 minutes before serving—it takes the chill off and lets the caramel soften slightly.
Presentation Tip: Arrange the bars on a platter and drizzle extra caramel in a zigzag pattern over the top. A final sprinkle of flaky sea salt and a few fresh rosemary sprigs around the platter make them look stunning for holiday gatherings.
What to Serve With Them: A dollop of lightly sweetened whipped cream or a scoop of vanilla bean ice cream is the perfect companion. For a cozy fall drink pairing, try a chai latte or spiced apple cider. If you’re feeling fancy, a drizzle of the caramel over the ice cream too—why not?
Storage: Store the bars in an airtight container in the refrigerator for up to 5 days. Layer them with parchment paper between each row to prevent sticking. The caramel may soften slightly over time, but the flavor only gets better.
Freezing: These freeze beautifully. Freeze the bars (without the caramel drizzle) on a baking sheet until solid, then wrap each bar individually in plastic wrap and place in a freezer bag. They keep for up to 3 months. When ready to serve, thaw in the fridge overnight, then drizzle with fresh caramel.
If you’re looking for another fall dessert that’s equally make-ahead friendly, you might enjoy these cozy pumpkin cream cheese swirl muffins for a breakfast-appropriate treat. And if you’re hosting a gathering, these perfect summer grazing board ideas can easily be adapted for fall with apples, pears, and sharp cheddar.
Nutritional Information & Benefits
Here is the estimated nutritional breakdown for one bar (based on 24 servings):
| Nutrient | Amount per Bar |
|---|---|
| Calories | 245 |
| Total Fat | 14g |
| Saturated Fat | 9g |
| Cholesterol | 55mg |
| Sodium | 180mg |
| Total Carbohydrates | 29g |
| Dietary Fiber | 1g |
| Sugars | 21g |
| Protein | 3g |
Pumpkin is packed with vitamin A (from beta-carotene), fiber, and antioxidants. It’s also naturally low in calories and fat, which makes me feel slightly better about the butter and caramel situation. The eggs add protein, and the butter provides a little vitamin A and D. Is this a health food? No. But it’s a dessert made with real ingredients, and that counts for something.
Dietary Notes: This recipe contains gluten, dairy, and eggs. For gluten-free and dairy-free adaptations, see the Variations section above.
Conclusion
These Salted Caramel Pumpkin Pie Bars have become my go-to fall dessert for a reason. They deliver all the nostalgic flavor of pumpkin pie without the stress of rolling dough or worrying about a cracked filling. The shortbread crust is forgiving, the pumpkin layer is silky and spiced just right, and that salted caramel on top—honestly, it’s the part people talk about most.
I love how versatile they are, too. You can dress them up for a holiday party with extra caramel and sea salt, or keep them simple for a Tuesday night treat with coffee. They travel well, they freeze beautifully, and they always get compliments.
If you make these, I’d love to hear how they turned out. Leave a comment below and let me know if you tried any variations—I’m always looking for new ideas. And if you’re in the mood for another easy fall dessert that disappears fast, these tender brown butter pumpkin chocolate chip blondies are another favorite in my kitchen.
Happy baking, friends. Fall is short—make it count with something sweet.
Frequently Asked Questions
Can I use canned pumpkin pie filling instead of pure pumpkin puree?
No, I wouldn’t recommend it. Pumpkin pie filling already has sugar and spices added, so using it here would throw off the sweetness and spice balance entirely. Stick with pure pumpkin puree and add your own sugar and spices—you’ll have much more control over the final flavor.
Why did my caramel turn out grainy?
Grainy caramel usually happens when sugar crystals form during the melting process. To avoid this, make sure your saucepan and utensils are completely clean—any tiny particle can cause crystallization. Also, resist the urge to stir the sugar while it melts. Just swirl the pan gently. If your caramel does seize, you can try adding a splash of warm water and whisking it back together over low heat.
Can I make these bars ahead of time for a party?
Absolutely. In fact, they are better made a day ahead. The filling sets more firmly overnight, and the flavors have time to meld together. Make the bars completely (including the caramel drizzle) and store them in the refrigerator. Add the final flaky salt sprinkle just before serving so it stays crunchy.
How do I get clean slices without the crust crumbling?
The key is patience. Make sure the bars are fully chilled—at least 3 hours in the fridge, or overnight. Use a sharp knife and wipe it clean between each cut. For the cleanest slices, run your knife under hot water, dry it, then slice. The heat helps the blade glide through the crust and filling without dragging.
Can I use store-bought caramel sauce instead of making my own?
You can, but the texture and flavor won’t be quite the same. Homemade salted caramel has a deeper, more complex flavor and a thicker consistency that clings to the bars beautifully. If you’re short on time, look for a high-quality jarred caramel sauce (not ice cream topping) and stir in a pinch of flaky sea salt before drizzling.
Pin This Recipe!
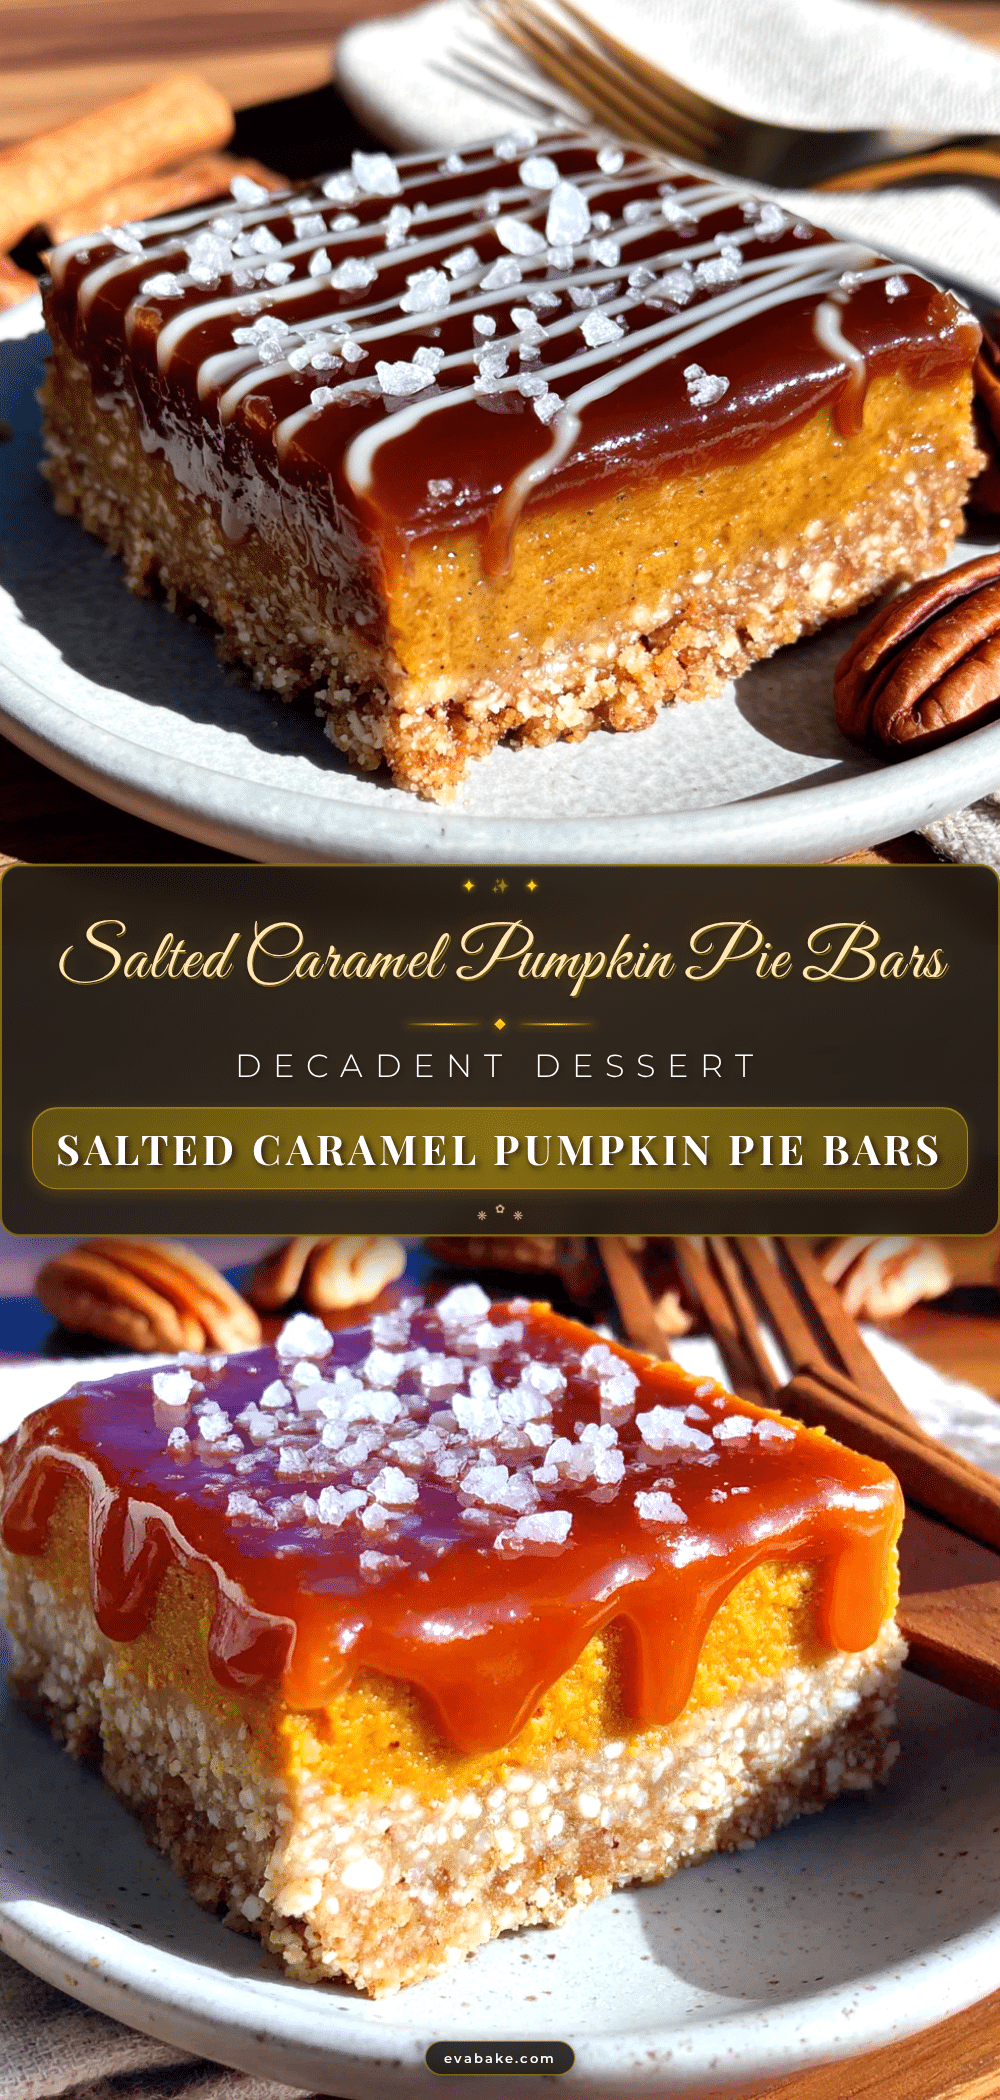
Perfect Salted Caramel Pumpkin Pie Bars Recipe
These Salted Caramel Pumpkin Pie Bars take all the cozy, spiced flavors of a classic pumpkin pie and layer them over a buttery shortbread crust, then get finished with a rich, homemade salted caramel. They’re easier than pie, make-ahead friendly, and perfect for fall gatherings.
- Prep Time: 30 minutes
- Cook Time: 55 minutes
- Total Time: 4 hours 25 minutes (includes chilling)
- Yield: 24 servings 1x
- Category: Dessert
- Cuisine: American
Ingredients
- 1 ½ cups all-purpose flour (spooned and leveled)
- ½ cup powdered sugar
- ¾ cup cold unsalted butter, cut into small cubes
- ¼ teaspoon fine sea salt
- 1 can (15 oz) pure pumpkin puree (not pumpkin pie filling)
- ¾ cup granulated sugar
- 2 large eggs, room temperature
- ¾ cup heavy cream (or full-fat evaporated milk)
- 1 ½ teaspoons pumpkin pie spice
- ½ teaspoon ground cinnamon
- ¼ teaspoon salt
- 1 teaspoon vanilla extract
- 1 cup granulated sugar (for caramel)
- 6 tablespoons salted butter, cut into pieces, room temperature
- ½ cup heavy cream, room temperature
- 1 teaspoon flaky sea salt (like Maldon), plus more for sprinkling
- 1 teaspoon vanilla extract (for caramel)
Instructions
- Preheat oven to 350°F (175°C). Line a 9×13-inch baking pan with parchment paper, leaving overhang on the long sides.
- Make the shortbread crust: In a food processor, pulse flour, powdered sugar, and salt. Add cold butter cubes and pulse until mixture resembles coarse sand with a few pea-sized butter pieces. Press evenly into the prepared pan. Bake for 18-20 minutes until edges are just golden. Set aside to cool slightly.
- Prepare the pumpkin filling: In a large bowl, whisk together pumpkin puree, granulated sugar, eggs, heavy cream, pumpkin pie spice, cinnamon, salt, and vanilla extract until smooth. Pour over warm crust and spread evenly. Tap pan on counter to release air bubbles.
- Bake at 350°F (175°C) for 35-40 minutes until edges are set but center still has a slight jiggle. Cool completely in pan on a wire rack (about 2 hours), then refrigerate for at least 3 hours or overnight.
- Make the salted caramel: In a medium saucepan over medium heat, spread sugar in an even layer. Let melt undisturbed for 3-4 minutes until edges turn golden. Swirl pan gently until deep amber color. Remove from heat, add butter and whisk vigorously. Slowly drizzle in heavy cream while whisking constantly. Whisk in flaky sea salt and vanilla extract. Cool to room temperature.
- Assemble: Lift chilled bars from pan using parchment. Slice into 24 squares (6 rows by 4 rows). Drizzle cooled caramel over each bar and sprinkle with extra flaky sea salt. Let set for 10 minutes before serving.
Notes
For clean slices, chill bars thoroughly and use a hot knife. Watch caramel carefully as sugar can burn quickly. Room temperature cream and butter are essential for smooth caramel. Bars can be made a day ahead and stored in the refrigerator. Freeze without caramel for up to 3 months.
Nutrition
- Serving Size: 1 bar
- Calories: 245
- Sugar: 21
- Sodium: 180
- Fat: 14
- Saturated Fat: 9
- Carbohydrates: 29
- Fiber: 1
- Protein: 3
Keywords: pumpkin pie bars, salted caramel, fall dessert, pumpkin bars, shortbread crust, easy pumpkin dessert


