“You have to make spider web cookies for the party,” my neighbor texted me, followed by three spider emojis and a string of exclamation points that felt a little aggressive for a Tuesday morning. And that was it—the entire creative brief for my weekend baking project. No pressure or anything.
I stared at my phone, then at my pantry, then back at my phone. I had sugar cookies down, sure. But spider webs? On cookies? With royal icing? The kind that actually looks like a web and not like a toddler dropped a spoonful of frosting? That felt like a whole different level of baking.
So I did what any reasonable person would do. I spent the next three hours watching videos, testing icing consistencies, and ruining what I thought was a perfectly good batch of sugar cookies. The first few attempts looked more like abstract art than arachnid architecture—honestly, they looked like someone had sneezed white icing onto a cookie and called it a day. But somewhere around batch number three, something clicked. The icing flowed just right. The web pattern actually appeared. And I let out a little squeak of joy that I’m not proud of but also won’t deny.
These spooky spider web royal icing sugar cookies became my Halloween party contribution that year, and they disappeared faster than the candy bowl at midnight. There’s something deeply satisfying about making something that looks complicated but secretly isn’t—and watching people’s faces light up when they realize you made it yourself.
Why You’ll Love This Recipe
Look, I’ve tested a lot of cookie recipes over the years. Some turned out great. Some ended up in the trash. These spooky spider web royal icing sugar cookies are the ones I keep coming back to, and here’s why they’ll become your Halloween staple too:
- Impressive Without the Stress : These cookies look like they came from a fancy bakery, but the technique is surprisingly forgiving. Once you get the icing consistency right (and I’ll show you exactly how), the web pattern practically draws itself.
- Simple Ingredients : No weird specialty items here. Butter, sugar, flour, eggs, and powdered sugar—stuff you probably already have. The only “special” thing is a little black gel food coloring, and you can find that at any grocery store.
- Perfect for Halloween Gatherings : Whether you’re hosting a costume party, sending treats to school, or just want something fun to snack on while watching scary movies, these cookies fit the bill. They’re festive without being over-the-top.
- Crowd-Pleaser : Kids love the spooky design, adults appreciate the classic sugar cookie taste, and everyone fights over the ones with the best web pattern. I’ve seen it happen.
- Unbelievably Delicious : The cookie itself is soft in the center with slightly crispy edges—the kind of sugar cookie that actually tastes like something, not just a vehicle for frosting. And the royal icing sets up with a nice snap that contrasts perfectly with the tender cookie underneath.
This isn’t just another decorated cookie recipe. It’s the one I developed after multiple rounds of testing different butter-to-flour ratios, chilling times, and icing consistencies. I wanted a cookie that held its shape during baking, stayed soft for days, and provided the perfect canvas for that spider web design. After more batches than I care to admit, this is the version that works every single time.
What Ingredients You Will Need
This recipe uses simple, wholesome ingredients to create cookies that taste as good as they look. Most of these are pantry staples, which means you can decide to make these on a whim without a special grocery trip. Here’s what you’ll need:
For the Sugar Cookies:
- 2 ¾ cups all-purpose flour (spooned and leveled) — I use King Arthur Flour for consistent results, but any brand works. Just don’t scoop directly with the measuring cup or you’ll pack in too much flour and get dense cookies.
- 1 cup unsalted butter, softened to room temperature — This is important. Cold butter won’t cream properly, and melted butter changes the texture. Leave it on the counter for about an hour before starting.
- 1 cup granulated sugar — Regular white sugar gives these cookies their classic sweetness and helps with that slightly crispy edge.
- 1 large egg, room temperature — Cold egg can seize up your butter mixture. If you forgot to take it out ahead of time, place it in a bowl of warm water for 5 minutes.
- 1 ½ teaspoons vanilla extract — Pure vanilla makes a difference here. I’ve used imitation in a pinch, and honestly, you can taste the difference.
- ½ teaspoon baking powder — For just a little lift without spreading too much.
- ¼ teaspoon salt — Balances the sweetness and enhances flavor. Don’t skip it.
For the Royal Icing:
- 4 cups powdered sugar, sifted — Sifting is non-negotiable here. Lumps in your powdered sugar mean lumps in your icing, and that’s no fun when you’re trying to draw delicate webs.
- 3 tablespoons meringue powder — This is what gives royal icing its structure and that nice hard finish. I prefer Wilton brand, but any brand works.
- 5-6 tablespoons water — You’ll add this gradually to get the right consistency. Start with less and add more as needed.
- ½ teaspoon vanilla extract — Optional, but I like a little flavor in my icing too.
- Black gel food coloring — Gel is key here. Liquid food coloring will thin out your icing and mess with the consistency. I use Americolor Super Black for that true, dark web color.
For the Spider Web Design:
- White royal icing (the base batch you just made)
- Black royal icing (about ½ cup of the white icing tinted with black gel coloring)
- A piping bag or squeeze bottle — I actually prefer squeeze bottles for the web pattern because they give more control, but piping bags work great too.
- A toothpick or scribe tool — This is the secret weapon for creating those web lines. A toothpick works perfectly fine.
Equipment Needed
You don’t need a professional bakery setup for these spooky spider web royal icing sugar cookies, but having the right tools makes the process much smoother. Here’s what I recommend:
- Stand mixer or hand mixer — A stand mixer with the paddle attachment is ideal for creaming butter and sugar, but a hand mixer works perfectly well too. I’ve made these cookies with both, and the results are identical as long as you cream properly.
- Rolling pin — I use a standard wooden rolling pin, but any type works. If you’re serious about even cookies, consider getting one with adjustable thickness rings.
- Round cookie cutter — A 2.5 to 3-inch round cutter is perfect for these. You want enough surface area for the web design to show up nicely.
- Baking sheets — Light-colored, rimmed baking sheets are best. Dark sheets can cause cookies to brown too quickly on the bottom.
- Parchment paper or silicone baking mats — Either works. I prefer parchment because it’s easy to lift cookies off and cleanup is a breeze.
- Piping bags or squeeze bottles — For the royal icing. I use disposable piping bags with a small round tip (#2 or #3) for the black icing, and squeeze bottles for the white base coat.
- Toothpicks — For dragging the web pattern. Regular wooden toothpicks are perfect.
- Cooling rack — Essential for letting cookies cool completely before icing.
- Wax paper or parchment strips — To place under cookies while icing for easy cleanup.
If you don’t have piping bags, you can use a zip-top bag with a tiny corner snipped off. It’s not as elegant, but it works in a pinch. I’ve done it more times than I’d like to admit.
Preparation Method
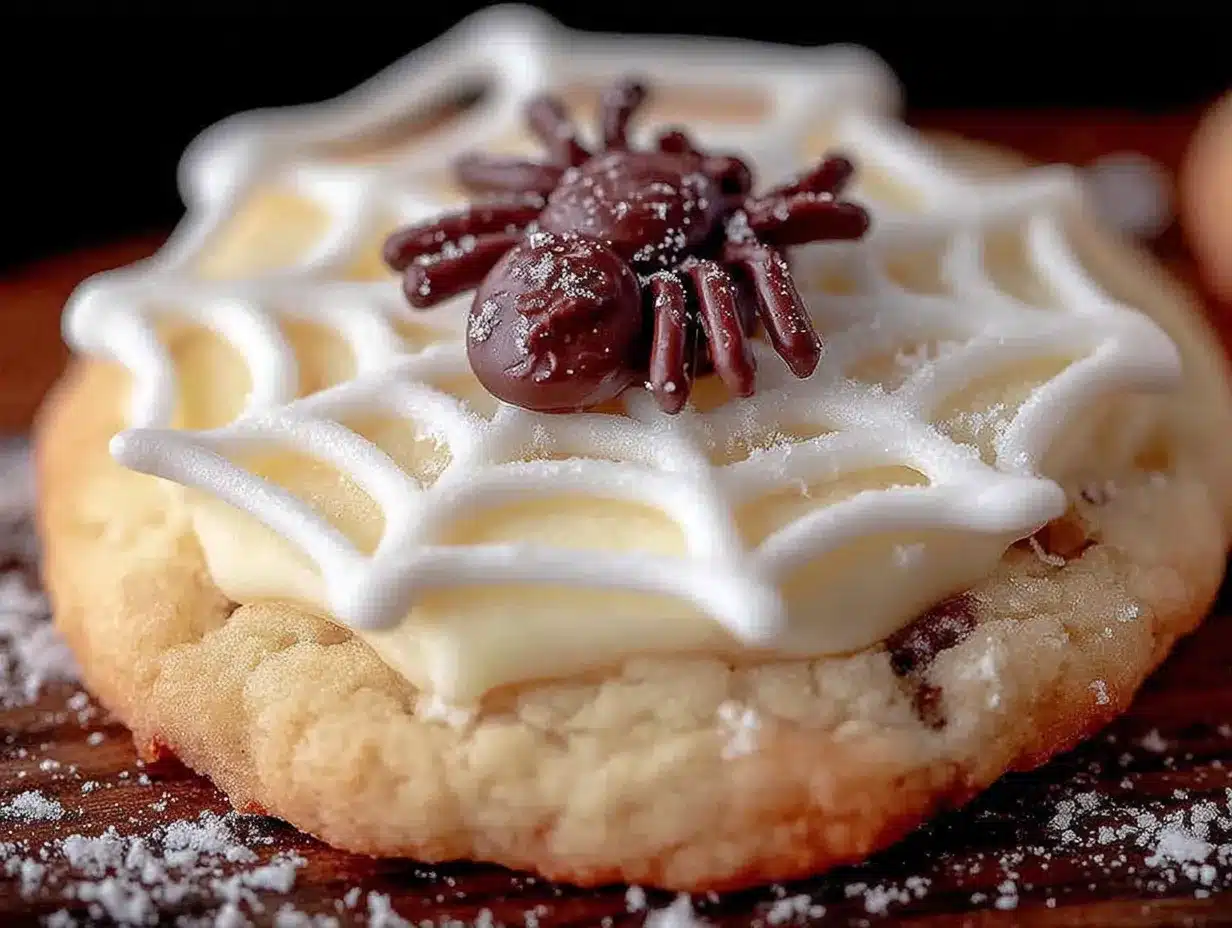
Alright, let’s get to the good part. Here’s how to make these spooky spider web royal icing sugar cookies step by step. I’ll include all the little details I wish someone had told me the first time I tried this.
Make the Sugar Cookie Dough
- Cream the butter and sugar — In your stand mixer fitted with the paddle attachment (or using a hand mixer), beat the softened butter and granulated sugar together on medium speed until light and fluffy, about 3-4 minutes. You’ll see the mixture turn pale and increase in volume. Scrape down the sides and bottom of the bowl halfway through. This step is crucial—proper creaming incorporates air that gives cookies their tender texture.
- Add the egg and vanilla — Beat in the egg and vanilla extract on medium speed until fully combined, about 1 minute. The mixture should look smooth and creamy. If it looks curdled or separated, your butter might have been too soft or your egg too cold. Don’t panic—it usually comes together once you add the dry ingredients.
- Mix the dry ingredients — In a separate bowl, whisk together the flour, baking powder, and salt. Whisking ensures the baking powder and salt are evenly distributed throughout the flour.
- Combine wet and dry — With the mixer on low speed, gradually add the flour mixture to the butter mixture, about ½ cup at a time. Mix just until the flour disappears—overmixing at this stage develops gluten and makes tough cookies. The dough will be soft but not sticky. If it feels too sticky to handle, add another tablespoon of flour.
- Chill the dough — Divide the dough in half, shape each half into a disk about 1-inch thick, wrap tightly in plastic wrap, and refrigerate for at least 2 hours (or up to 3 days). This step is non-negotiable. Chilled dough spreads less, holds its shape better, and is much easier to roll out. Trust me—I’ve skipped this step before and ended up with cookies that looked more like blobs than circles.
Roll, Cut, and Bake
- Preheat and prepare — When you’re ready to bake, preheat your oven to 350°F (175°C). Line your baking sheets with parchment paper or silicone mats.
- Roll out the dough — On a lightly floured surface, roll one disk of dough to about ¼-inch thickness. I like to roll between two sheets of parchment paper dusted with flour—it prevents sticking without adding too much extra flour to the dough. Check the thickness occasionally by holding your thumb against the side of the dough; ¼ inch is about the thickness of two stacked quarters.
- Cut the cookies — Use your round cookie cutter to cut out shapes. Dip the cutter in flour between cuts to prevent sticking. Place cookies about 2 inches apart on the prepared baking sheets. Gather the scraps, gently press them together, and re-roll once to cut more cookies. Avoid re-rolling more than once, or the dough gets tough.
- Chill again (yes, again) — Place the cut cookies on the baking sheets in the refrigerator for 15-20 minutes before baking. This prevents spreading and helps cookies maintain their shape. I know it seems like a pain, but it makes a noticeable difference.
- Bake — Bake for 9-11 minutes, or until the edges are just barely golden. The centers should still look pale and slightly underdone. They’ll continue to set as they cool. For softer cookies, bake on the shorter end; for crisper cookies, go longer. Let cookies cool on the baking sheet for 5 minutes, then transfer to a wire rack to cool completely. Do not even think about icing them until they’re 100% cool—warm cookies will melt your royal icing into a sticky mess.
Prepare the Royal Icing
- Mix the base icing — In a stand mixer fitted with the whisk attachment (or using a hand mixer), combine the sifted powdered sugar and meringue powder. Add 5 tablespoons of water and the vanilla extract, then mix on low speed until combined. Increase to medium speed and beat for 4-5 minutes, until the icing is thick, glossy, and holds stiff peaks. If it’s too thick, add water ½ teaspoon at a time. If too thin, add more powdered sugar.
- Divide the icing — Transfer about ¾ of the icing to a bowl for your white base coat. This will be the “flood” consistency icing that covers the cookies. To the remaining ¼, add black gel food coloring until you reach your desired darkness. Start with a small amount—gel coloring is concentrated—and add more until you’re happy with the color. This black icing should be slightly thicker than the white, about the consistency of toothpaste.
- Adjust consistency for flooding — For the white icing, add water ½ teaspoon at a time until it reaches “10-second consistency.” This means when you lift a spoonful of icing and let it drip back into the bowl, the surface smooths out in about 10 seconds. This is the perfect consistency for flooding—it spreads easily but doesn’t run off the edges of the cookie.
Decorate the Cookies with Spider Webs
- Flood the cookies — Transfer the white icing to a squeeze bottle or piping bag with a small round tip. Pipe a border around the edge of each cooled cookie, then fill in the center with more icing. Use a toothpick to spread the icing evenly into the corners and pop any air bubbles. Let the flooded cookies sit undisturbed for at least 2 hours, or until the icing is completely dry to the touch. This is important—if the base isn’t dry, the web pattern won’t work.
- Pipe the web base — Once the white icing is dry, use your black icing (in a piping bag with a #2 tip) to pipe a small dot in the center of each cookie. Then pipe 4-6 straight lines radiating outward from the center dot to the edges of the cookie, like spokes on a wheel. Space them evenly if you can, but don’t stress about perfection—spider webs in nature aren’t perfectly symmetrical either.
- Create the web pattern — Here’s the magic part. Starting from the center, pipe curved lines that connect each spoke to the next, working your way outward. Each curve should arc toward the center. Think of it like drawing a series of parentheses between each pair of spokes, getting larger as you move outward. Pipe 3-4 of these curved connecting lines for a full web effect.
- Drag the web (optional but recommended) — For an even more dramatic web, immediately after piping the curved lines, use a toothpick to gently drag through the black icing from the center outward through each curved section. This creates a feathered, stretched effect that looks incredibly intricate. Wipe the toothpick clean between each drag.
- Let the icing set — Allow the decorated cookies to dry completely, about 4-6 hours or overnight. Royal icing needs time to harden fully. Once dry, the cookies can be stacked or stored.
Cooking Tips & Techniques
I’ve made these spooky spider web royal icing sugar cookies more times than I can count, and I’ve learned a few things the hard way. Here are my best tips to save you from the same mistakes:
Get the icing consistency right. This is the single most important factor for successful spider webs. If your black icing is too thin, it’ll bleed into the white base and you’ll get a gray mess instead of a crisp web. If it’s too thick, it won’t flow smoothly from the piping tip. Aim for a consistency that holds its shape when piped but still flows easily. Test on a piece of wax paper first—you should be able to pipe a continuous line without the icing breaking or spreading too much.
Don’t rush the drying time. I know it’s tempting to start piping webs as soon as the flood icing looks dry, but trust me on this. If the base isn’t fully set, the black icing will sink in and create a muddy effect. I once ruined an entire batch because I got impatient and started decorating after only an hour. They looked terrible. Give it the full 2 hours minimum, and overnight is even better.
Practice on wax paper first. Before you touch a single cookie, practice piping webs on a piece of wax paper. This lets you get a feel for the pressure needed, the spacing of the spokes, and the curve of the connecting lines. You can scrape up the practice icing and reuse it if you’re quick about it.
Keep your work surface level. I learned this one after a batch of cookies slid to one side and all my carefully piped webs pooled into weird shapes. Make sure your cooling rack or baking sheet is perfectly level while the icing dries.
Use a toothpick for precision. The toothpick drag technique I mentioned earlier is a game-changer. It creates those delicate, feathery web lines that look so professional. Just remember to wipe the toothpick clean between each drag to avoid dragging black icing back through the white sections.
Chill the dough thoroughly. I cannot stress this enough. Chilled dough is easier to handle, cuts cleaner, and bakes with sharper edges. If at any point the dough feels soft or sticky, pop it back in the fridge for 15 minutes. Your future self will thank you.
Variations & Adaptations
One of the best things about these spooky spider web royal icing sugar cookies is how easy they are to customize. Here are some variations I’ve tried and loved:
Gluten-Free Version — Substitute the all-purpose flour with a 1:1 gluten-free baking flour blend. I’ve had good results with Bob’s Red Mill Gluten-Free 1-to-1 Baking Flour. The texture is slightly more delicate, so handle the dough gently and chill it thoroughly. The taste is surprisingly close to the original.
Different Web Colors — Who says spider webs have to be black on white? Try purple webs on orange cookies for a witchy vibe, or green webs on black cookies for a more sinister look. I made a batch with neon green webs on black cookies for a Halloween party once, and they were a huge hit. Just make sure your base color and web color have enough contrast to show up clearly.
Add Sprinkles — Before the flood icing dries completely, sprinkle on some edible glitter, silver dragees, or tiny spider-shaped sprinkles. I found some adorable little plastic spider rings at the dollar store that I placed on top of the wet icing—they looked amazing and the kids went crazy for them.
Chocolate Cookie Base — For a richer flavor, substitute ⅓ cup of the all-purpose flour with cocoa powder. This gives you a chocolate sugar cookie that pairs beautifully with the white royal icing. The contrast is stunning—white webs on a dark chocolate background. If you’re a fan of our spiderweb Halloween cookie cake, you’ll love this variation.
Flavor Variations — Add ½ teaspoon of almond extract along with the vanilla for a subtle nutty flavor that complements the sweetness. Or try 1 teaspoon of lemon zest for a bright, citrusy twist. My personal favorite is adding ½ teaspoon of cinnamon to the dough for a warm, spicy note that feels perfect for fall.
Serving & Storage Suggestions
These spooky spider web royal icing sugar cookies are best served at room temperature, which is convenient because that’s exactly how they’ll be after the icing sets. Arrange them on a platter with some mummy-wrapped hot dogs for a fun Halloween spread. They also look amazing on a Halloween party charcuterie board alongside other festive treats.
For storage, place the cookies in an airtight container at room temperature, separating layers with wax paper or parchment. They’ll stay fresh for up to 1 week—though in my experience, they never last that long. Do not refrigerate them, as the moisture in the fridge can make the royal icing sticky and soft.
These cookies freeze beautifully. Place the fully decorated and dried cookies in a single layer in a freezer-safe container, with wax paper between layers. They’ll keep for up to 3 months. To thaw, simply remove them from the freezer and let them come to room temperature in the container (to prevent condensation from forming on the icing). They taste just as good as fresh.
One thing I love about these cookies is that the flavors actually develop and meld together after a day or two. The cookie softens slightly, the royal icing sets completely, and the whole thing becomes more cohesive. So don’t be afraid to make them a day or two ahead of your event—they’ll be even better.
Nutritional Information & Benefits
Let’s be real—these are sugar cookies with royal icing. They’re a treat, not a health food. But here’s the estimated nutritional breakdown for one cookie (based on a 2.5-inch round cookie):
- Calories: Approximately 180-200
- Total Fat: 8g
- Saturated Fat: 5g
- Carbohydrates: 28g
- Sugar: 18g
- Protein: 2g
These cookies contain dairy (butter), eggs, and gluten (flour). For those with allergies, the gluten-free version mentioned above works well, and you can substitute the butter with a plant-based alternative. The royal icing uses meringue powder, which is pasteurized egg whites—if you need an egg-free version, you can use aquafaba (the liquid from canned chickpeas) as a substitute, though I haven’t tested this myself.
On the bright side, the butter provides a small amount of vitamin A, and the eggs contribute protein and B vitamins. But honestly? These cookies are about joy, not nutrition. They’re for sharing with friends, making memories, and celebrating the spooky season. Sometimes that’s the most important thing.
Conclusion
These spooky spider web royal icing sugar cookies have become my go-to Halloween treat for good reason. They look impressive enough to steal the show at any party, but they’re actually achievable for bakers of any skill level. The recipe is forgiving, the technique is learnable, and the results are genuinely satisfying.
What I love most about this recipe is how it turns something that looks complicated into something simple. The first time I made these, I felt like I’d discovered a secret—like I was getting away with something. People assume they’re difficult because they look so intricate, but you and I both know the truth now.
I’d love to hear how yours turn out. Did you try a different color combination? Add sprinkles? Make a batch with your kids? Drop a comment below and let me know—I read every single one, and your ideas might inspire someone else’s baking adventure. And if you’re looking for more Halloween baking inspiration, check out our perfect Halloween sugar cookies or these witch’s finger cookies for more spooky fun.
Happy baking, and have a wonderfully spooky Halloween!
Frequently Asked Questions
Can I make the dough ahead of time?
Absolutely! The sugar cookie dough can be refrigerated for up to 3 days or frozen for up to 3 months. Just wrap it tightly in plastic wrap and then foil. When you’re ready to bake, thaw frozen dough in the refrigerator overnight, then roll and cut as directed.
My royal icing is too runny. How do I fix it?
If your icing is too thin, add more sifted powdered sugar, 1 tablespoon at a time, and mix well until it thickens. If it’s too thick, add water ½ teaspoon at a time. The key is making small adjustments and testing the consistency frequently.
Why did my cookies spread during baking?
Cookies spread when the dough is too warm or the butter is too soft. Make sure your dough is thoroughly chilled before baking—the second chill after cutting is crucial. Also, check that your oven temperature is accurate; an oven that’s too cool can cause spreading.
Can I use liquid food coloring instead of gel?
I don’t recommend it. Liquid food coloring will thin out your royal icing and change the consistency, making it harder to pipe precise webs. Gel coloring is concentrated and won’t affect the texture. It’s worth the extra trip to the store.
How far in advance can I decorate these cookies?
You can decorate them up to a week ahead of time. Once the royal icing is fully dry (after about 6-8 hours), the cookies can be stored in an airtight container at room temperature. They actually taste better after a day or two as the flavors meld together.
Pin This Recipe!
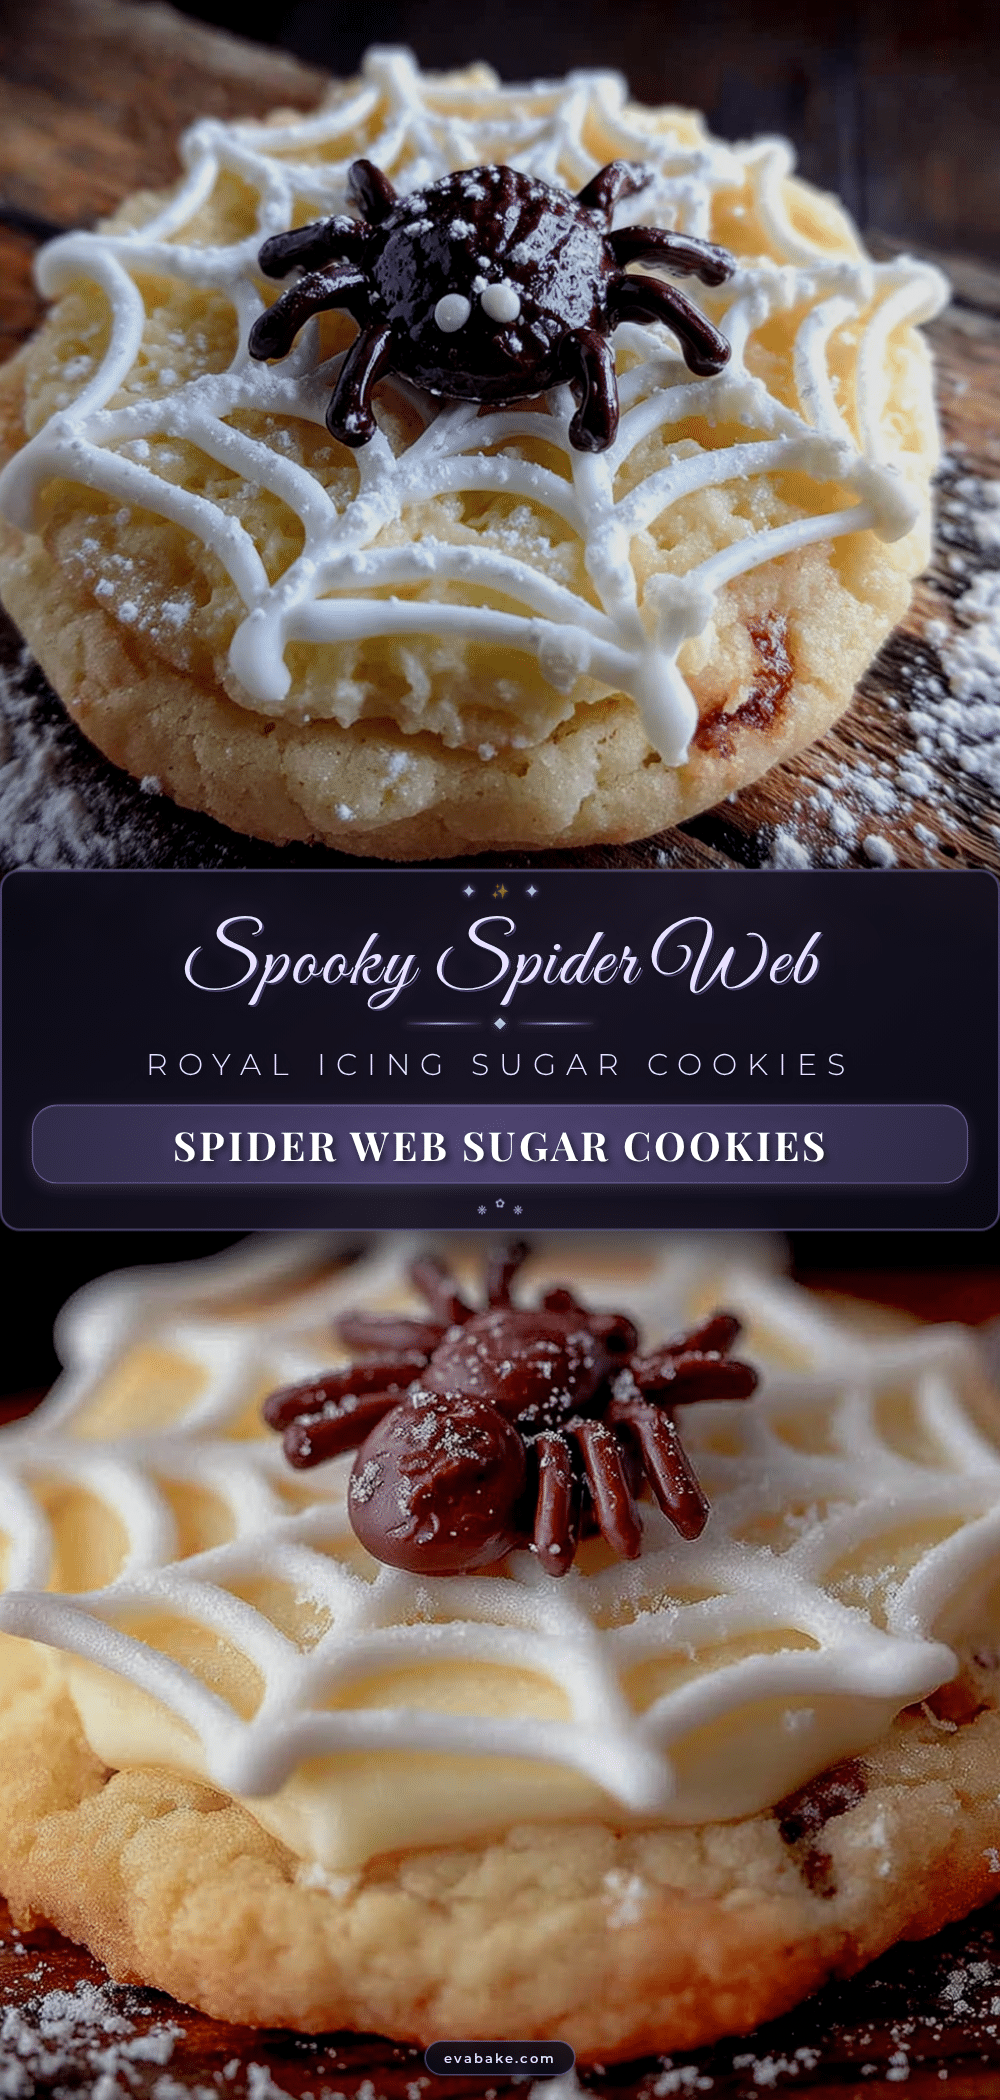
Spooky Spider Web Royal Icing Sugar Cookies (Easy Recipe)

These spooky spider web royal icing sugar cookies look like they came from a fancy bakery, but the technique is surprisingly forgiving. With a soft center and slightly crispy edges, they are the perfect Halloween treat.
- Prep Time: 30 minutes
- Cook Time: 10 minutes
- Total Time: 2 hours 40 minutes (plus chilling and drying time)
- Yield: 24 servings 1x
- Category: Dessert
- Cuisine: American
Ingredients
- 2 ¾ cups all-purpose flour (spooned and leveled)
- 1 cup unsalted butter, softened to room temperature
- 1 cup granulated sugar
- 1 large egg, room temperature
- 1 ½ teaspoons vanilla extract
- ½ teaspoon baking powder
- ¼ teaspoon salt
- 4 cups powdered sugar, sifted
- 3 tablespoons meringue powder
- 5–6 tablespoons water
- ½ teaspoon vanilla extract (optional)
- Black gel food coloring
Instructions
- Cream the butter and sugar: In a stand mixer fitted with the paddle attachment, beat the softened butter and granulated sugar together on medium speed until light and fluffy, about 3-4 minutes. Scrape down the sides and bottom of the bowl halfway through.
- Add the egg and vanilla: Beat in the egg and vanilla extract on medium speed until fully combined, about 1 minute.
- Mix the dry ingredients: In a separate bowl, whisk together the flour, baking powder, and salt.
- Combine wet and dry: With the mixer on low speed, gradually add the flour mixture to the butter mixture, about ½ cup at a time. Mix just until the flour disappears.
- Chill the dough: Divide the dough in half, shape each half into a disk about 1-inch thick, wrap tightly in plastic wrap, and refrigerate for at least 2 hours (or up to 3 days).
- Preheat and prepare: When ready to bake, preheat oven to 350°F (175°C). Line baking sheets with parchment paper or silicone mats.
- Roll out the dough: On a lightly floured surface, roll one disk of dough to about ¼-inch thickness.
- Cut the cookies: Use a round cookie cutter to cut out shapes. Place cookies about 2 inches apart on prepared baking sheets. Gather scraps, gently press together, and re-roll once to cut more cookies.
- Chill again: Place cut cookies on baking sheets in the refrigerator for 15-20 minutes before baking.
- Bake: Bake for 9-11 minutes, or until edges are just barely golden. Let cool on baking sheet for 5 minutes, then transfer to a wire rack to cool completely.
- Prepare the royal icing: In a stand mixer fitted with the whisk attachment, combine sifted powdered sugar and meringue powder. Add 5 tablespoons water and vanilla extract, mix on low until combined, then beat on medium for 4-5 minutes until thick, glossy, and holds stiff peaks.
- Divide the icing: Transfer about ¾ of the icing to a bowl for white base coat. To the remaining ¼, add black gel food coloring until desired darkness.
- Adjust consistency for flooding: For white icing, add water ½ teaspoon at a time until it reaches ’10-second consistency’ (surface smooths out in about 10 seconds when lifted and dripped).
- Flood the cookies: Transfer white icing to a squeeze bottle or piping bag. Pipe a border around each cooled cookie, then fill in the center. Use a toothpick to spread evenly and pop air bubbles. Let sit undisturbed for at least 2 hours until completely dry.
- Pipe the web base: Once white icing is dry, use black icing in a piping bag with a #2 tip to pipe a small dot in the center of each cookie. Then pipe 4-6 straight lines radiating outward from the center to the edges.
- Create the web pattern: Starting from the center, pipe curved lines connecting each spoke to the next, working outward. Pipe 3-4 curved connecting lines for a full web effect.
- Drag the web (optional): Immediately after piping curved lines, use a toothpick to gently drag through black icing from center outward through each curved section. Wipe toothpick clean between each drag.
- Let the icing set: Allow decorated cookies to dry completely, about 4-6 hours or overnight.
Notes
Get the icing consistency right: black icing should hold its shape but flow easily. Don’t rush drying time; base must be fully set before piping webs. Practice on wax paper first. Keep work surface level while icing dries. Use a toothpick for precision dragging. Chill dough thoroughly for best results.
Nutrition
- Serving Size: 1 cookie
- Calories: 190
- Sugar: 18
- Sodium: 75
- Fat: 8
- Saturated Fat: 5
- Carbohydrates: 28
- Protein: 2
Keywords: spider web cookies, royal icing sugar cookies, Halloween cookies, easy Halloween dessert, decorated sugar cookies


