I need something that looks genuinely creepy but tastes like actual dinner. Not candy. Not a dessert pretending to be a body part. Bread. Specifically, bread that looks like a witch’s hand dug its way out of the garden bed and onto my baking sheet.
Honestly, the idea hit me while I was staring at a bag of bread flour and trying to avoid yet another round of store-bought Halloween candy. My kids love anything gory, but I refuse to serve them sugar on an empty stomach before trick-or-treating. So I started thinking about what would make them laugh and actually eat protein. Fingers. Long, knobby, almond-nailed witch fingers made from chewy, garlicky breadsticks.
The marinara blood dip came second, but it might be the real star. Warm, thick, slightly chunky tomato sauce that clings to every breadstick knuckle. You dip the finger in, pull it out, and there’s red sauce dripping off the tip. It’s disgusting in the best possible way.
I’ve made these for three Halloweens in a row now. The first batch looked more like deformed slugs than witch fingers. But after some trial and error with dough hydration and almond placement, I got them right. Creepy, delicious, and surprisingly easy to pull together on a weeknight. You don’t need special equipment or a pastry degree. Just flour, yeast, some whole almonds, and a willingness to make your family uncomfortable at the dinner table.
These Spooky Witch Finger Breadsticks with Marinara Blood Dip have become our official pre-trick-or-treat tradition. They fill bellies, get photographed for social media, and somehow taste even better when you’re dipping a severed finger into a bowl of blood.
Why You’ll Love This Recipe
I’ve tested this dough at least a dozen times to get the texture right. Not too soft, not too tough. Breadsticks that hold their shape while baking but stay tender inside. That’s the sweet spot for finger-shaped bread.
- Quick & Easy: From mixing bowl to oven in about 45 minutes active time. The dough rises fast because we’re not going for artisan complexity here.
- Simple Ingredients: Flour, yeast, olive oil, garlic powder, salt, and water. Plus whole almonds for the fingernails. That’s it.
- Perfect for Halloween Parties: These show up on a platter and people lose their minds. Adults laugh, kids squeal, everyone eats.
- Crowd-Pleaser: My pickiest eater devours these. Something about the finger shape makes them more fun than regular breadsticks.
- Unbelievably Delicious: The garlic and olive oil give them a savory depth that pairs perfectly with marinara. You’ll forget you’re eating something shaped like a witch’s hand.
What makes this recipe different from every other Halloween breadstick out there is the texture. I use a higher hydration dough that bakes up chewy on the outside and soft on the inside, just like good breadsticks should be. The almond nails stay put during baking, and the knuckle indentations actually hold their shape. No weird puffing or smoothing out in the oven.
This is the kind of recipe that makes you feel like a Halloween hero without spending hours in the kitchen. It’s comforting, silly, and genuinely tasty. The first time you pull a tray of witch fingers out of the oven and see those almond nails staring back at you, you’ll understand why this has become our family tradition.
What Ingredients You Will Need
This recipe uses straightforward pantry ingredients to create something that looks complicated but isn’t. The magic is in the shaping, not the shopping list.
For the Breadsticks
- 2 ¼ teaspoons active dry yeast (one standard packet) — this gives us a reliable rise without fuss
- 1 cup warm water (around 110°F, not hot enough to kill the yeast) — tap water works fine, just let it run until it feels warm on your wrist
- 1 tablespoon granulated sugar — feeds the yeast and adds a tiny bit of sweetness to balance the garlic
- 3 cups all-purpose flour, plus more for dusting — bread flour works too, but all-purpose gives a softer, more tender breadstick
- 2 tablespoons olive oil — adds richness and helps the dough stay pliable
- 1 ½ teaspoons garlic powder — don’t skip this, it’s what makes these taste like actual breadsticks and not just bread
- 1 teaspoon salt — fine sea salt or table salt both work
- 1 large egg, beaten — for brushing on top to get that golden, slightly shiny finish
- 30-36 whole almonds, skin on — these become the fingernails. The skins help them look more realistic and creepy
For the Marinara Blood Dip
- 1 can (15 ounces) crushed tomatoes — I prefer San Marzano style for sweetness, but any good brand works
- 2 tablespoons olive oil
- 3 cloves garlic, minced — fresh garlic makes a difference here
- 1 teaspoon dried oregano
- ½ teaspoon red pepper flakes — optional, but I like a little heat in my blood
- Salt and black pepper to taste
- 1 teaspoon sugar — balances the acidity of the tomatoes
- 2 tablespoons tomato paste — deepens the color and flavor
I recommend using whole almonds with the skin on for the fingernails. The brown skins give them an authentically creepy, dirty-fingernail look that blanched almonds just can’t match. If you only have slivered almonds, you can use two per finger, but whole almonds look more convincing.
For the marinara, I’ve tried jarred sauces and they work in a pinch, but homemade takes this from “cute Halloween snack” to “actually impressive dinner.” The tomato paste is the secret to getting that deep, blood-red color that looks so dramatic against the golden breadsticks.
Equipment Needed
You don’t need much for this recipe, which is part of why I love it. No stand mixer required, though you can use one if you prefer.
- Large mixing bowl — any bowl big enough for the dough to double in size
- Baking sheet — one standard half-sheet pan fits all the fingers. Line it with parchment paper for easy cleanup
- Parchment paper — non-negotiable here. The breadsticks can stick if you skip it
- Small saucepan — for the marinara dip. A medium skillet works too
- Pastry brush — for the egg wash. A silicone one is easiest to clean
- Sharp knife or bench scraper — for cutting the dough into finger-sized pieces
- Clean kitchen towel — for covering the dough while it rises
If you don’t have a pastry brush, you can use a folded paper towel to dab the egg wash on. It’s messier but works fine. And if you don’t have a bench scraper, a regular butter knife does the job for portioning the dough.
I use a standard half-sheet pan for these. If your pan is smaller, you might need to bake in two batches. Just keep the second batch covered with a towel while the first batch bakes.
Preparation Method
Let’s make some witch fingers. This process is more fun than it has any right to be.
- Activate the yeast: In your large mixing bowl, combine the warm water, sugar, and active dry yeast. Give it a quick stir and let it sit for 5-10 minutes until it gets frothy and smells like bread. If it doesn’t foam up, your water might have been too hot or your yeast is old. Start over if needed.
- Mix the dough: Add the flour, olive oil, garlic powder, and salt to the yeast mixture. Stir with a wooden spoon until a shaggy dough forms. It will look dry and clumpy at first, keep going. Once it comes together, turn it out onto a lightly floured surface.
- Knead the dough: Knead for about 5-7 minutes until the dough is smooth and elastic. It should bounce back when you poke it. If it’s too sticky, add flour a tablespoon at a time. Too dry? Add a splash of warm water. You’re looking for a dough that feels soft and a little tacky but doesn’t leave residue on your hands.
- First rise: Place the dough in a clean, lightly oiled bowl. Cover with a kitchen towel and let it rise in a warm spot for about 30 minutes, or until doubled in size. I put mine in the microwave (turned off) with a cup of hot water next to it for a cozy environment.
- Preheat the oven: While the dough rises, preheat your oven to 375°F (190°C). Line your baking sheet with parchment paper.
- Shape the fingers: Punch down the risen dough and turn it out onto a lightly floured surface. Divide the dough into 12 equal pieces. Take one piece and roll it into a long, thin log, about 4-5 inches long. It should be thicker at the bottom (where the finger meets the hand) and slightly tapered at the top (where the fingernail goes).
- Add the details: Place the shaped finger on the prepared baking sheet. Use a sharp knife to make light indentations across the finger to create knuckles. Don’t cut all the way through, just press lightly. You want creases, not cuts. Then press a whole almond firmly into the tapered end to create the fingernail. Make sure it’s pressed in well so it doesn’t fall off during baking.
- Repeat: Continue shaping all 12 fingers. Place them about 1 inch apart on the baking sheet. They will puff up a bit but won’t spread much.
- Egg wash: Brush each finger with the beaten egg. This gives them that golden, slightly glossy look. Try not to get egg on the almonds, it can make them look less realistic.
- Optional gore: For extra creepiness, you can press a small piece of red bell pepper or a drop of marinara at the base of the fingernail to look like blood. I do this sometimes for shock value.
- Bake: Bake for 15-18 minutes, until the breadsticks are golden brown and sound hollow when tapped on the bottom. The almonds will darken slightly, which makes them look even more like real nails.
- Make the marinara blood dip while they bake: In a small saucepan, heat the olive oil over medium heat. Add the minced garlic and cook for 30 seconds until fragrant. Stir in the crushed tomatoes, tomato paste, oregano, red pepper flakes, sugar, salt, and pepper. Bring to a simmer, then reduce heat to low and cook for 10-15 minutes, stirring occasionally. The sauce should thicken slightly and turn a deep, rich red.
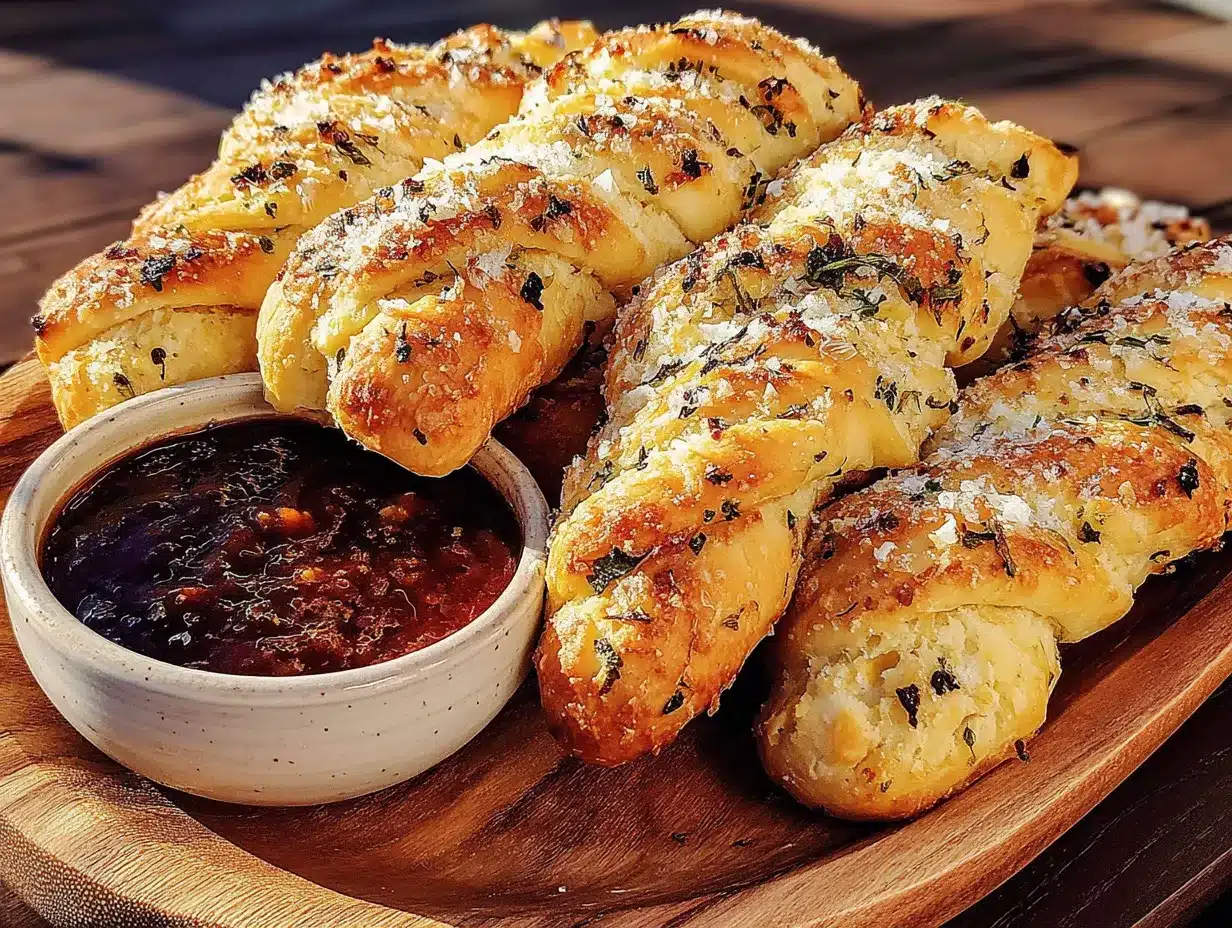
- Cool and serve: Let the breadsticks cool on the baking sheet for 5 minutes. They’re best served warm. Arrange them on a platter like a severed hand with the bowl of marinara in the center. Watch your guests react.
Cooking Tips & Techniques
I’ve made enough mistakes with these breadsticks to fill a horror movie. Here’s what I learned so you don’t have to suffer through the same failures.
Don’t overwork the dough. The first time I made these, I kneaded like I was punishing the dough. The breadsticks came out tough and chewy in a bad way. Knead just until smooth and elastic, then stop. Your hands will thank you.
Keep the almond nails moist. Almonds can dry out and fall off during baking if they aren’t pressed in firmly enough. I press them in and then give them a little twist to really lodge them into the dough. If you’re worried, you can brush a tiny bit of water under the almond before pressing it in.
Watch the baking time. Every oven runs differently. My old oven would brown these in 14 minutes flat. My current one takes 17 minutes. Start checking at the 13-minute mark and look for that golden color. Overbaked breadsticks get hard and lose their creepy finger-like flexibility.
Multitasking is your friend. While the dough rises, prep your marinara ingredients. While the breadsticks bake, clean up your workspace. This recipe comes together fast if you stay ahead of the timing.
Don’t skip the egg wash. I tried these without it once to save time. They came out pale and sad-looking. The egg wash gives them that bakery-style sheen that makes them look appetizing despite being shaped like witch fingers.
Make extra dough for practice fingers. If you’re nervous about shaping, make a small test finger first. Bake it alone and see how it holds up. You can always eat the evidence.
Variations & Adaptations
These breadsticks are surprisingly flexible. Here are some ways I’ve adapted them over the years.
Gluten-Free Version: Substitute a good 1:1 gluten-free flour blend for the all-purpose flour. The dough will be stickier and harder to shape, but it works. Add an extra tablespoon of olive oil to help with moisture. Bake time may be slightly shorter, so check early.
Vegan Adaptation: Skip the egg wash and brush the breadsticks with olive oil or melted vegan butter instead. They won’t be as shiny, but they’ll still brown nicely. The almond nails work perfectly for vegan diets.
Herb-Infused Fingers: Add 1 tablespoon of dried rosemary or thyme to the dough for a savory twist. I did this once for a grown-up Halloween party and everyone raved about the “herbaceous severed digits.”
Cheese-Stuffed Fingers: Before shaping each finger, press a small cube of mozzarella into the center of the dough piece. Roll it up so the cheese is hidden inside. When you bite in, you get a stretchy cheese pull that looks like tendons. Gross and amazing.
Spicy Blood Dip: Add an extra teaspoon of red pepper flakes and a chopped chipotle pepper in adobo to the marinara. The smoky heat makes the “blood” feel more dangerous.
Garlic Butter Finish: Brush the baked breadsticks with melted garlic butter as soon as they come out of the oven. It makes them extra rich and gives them a glossy, slightly greasy look that’s very witchy.
My personal favorite variation is the cheese-stuffed version. I made it for a Halloween movie night and my brother-in-law, who claims he doesn’t like Halloween food, ate seven of them. The cheese pull sold him.
Serving & Storage Suggestions
These breadsticks are best served warm, right after baking. The texture is perfect, the almond nails are still firmly attached, and the marinara dip is hot and ready for dunking.
Presentation: Arrange the fingers on a large wooden board or black platter in a fan shape, like a hand reaching out of the ground. Place the bowl of marinara in the center or off to one side. I like to scatter a few extra almonds around for texture and to hint at what’s inside the breadsticks.
What to serve with them: These pair beautifully with a simple green salad for a full meal. For a Halloween party spread, serve them alongside crispy jalapeño popper crescent ring or savory bacon jalapeño cream cheese sliders for a full savory spread. If you’re feeling extra festive, easy caprese tortellini skewers add a pop of color and balance the richness.
Beverage pairings: A bold red wine like Zinfandel or a dark beer like a stout pairs beautifully with the garlicky breadsticks and tangy marinara. For kids, a glass of milk or apple cider works great.
Storage: Leftover breadsticks (if you have any) can be stored in an airtight container at room temperature for up to 2 days. They lose their crispness but still taste good. To reheat, pop them in a 350°F oven for 5 minutes. The microwave makes them soggy, so avoid it if you can.
Freezing: You can freeze the unbaked, shaped breadsticks on a baking sheet until solid, then transfer them to a freezer bag. Bake from frozen, adding 3-5 minutes to the baking time. The almond nails may shift slightly during freezing, so check them before baking.
The flavors actually develop a bit overnight. Day-old breadsticks have a deeper garlic taste that’s quite pleasant, though the texture softens. I’ve been known to eat them cold straight from the container the next morning. No judgment.
Nutritional Information & Benefits
Let’s be honest, these are breadsticks with a butter and egg wash. They’re not health food. But they’re not terrible for you either, especially compared to the candy that usually fills Halloween bellies.
Per serving (2 breadsticks with marinara dip, approximate):
- Calories: 320
- Protein: 9g
- Carbohydrates: 45g
- Fat: 12g
- Fiber: 4g
- Sugar: 6g
Health benefits of key ingredients:
- Almonds provide healthy fats, vitamin E, and magnesium. They’re good for your skin and heart, which feels ironic when you’re eating them as witch fingernails.
- Olive oil is rich in antioxidants and anti-inflammatory compounds. It’s the good fat that makes these breadsticks feel indulgent without being greasy.
- Tomatoes in the marinara are packed with lycopene, a powerful antioxidant that’s been linked to heart health. The cooking process actually makes the lycopene more available to your body.
- Garlic has antibacterial properties and may support immune function. Perfect for cold and flu season, which conveniently overlaps with Halloween.
Dietary considerations: This recipe contains gluten and eggs. For a gluten-free version, see the variations section. The marinara dip is naturally vegan and gluten-free. The breadsticks are dairy-free as written (unless you add the cheese-stuffed variation).
I’m not a nutritionist, just a home cook who likes to know what’s in her food. These breadsticks are a treat, but they’re a treat made from real ingredients that you can feel decent about feeding your family.
Conclusion
These Spooky Witch Finger Breadsticks with Marinara Blood Dip have become my favorite Halloween tradition, and I think they’ll become yours too. They’re fun to make, hilarious to serve, and genuinely delicious to eat. The dough is forgiving, the shaping is silly, and the payoff at the table is enormous.
I love that this recipe lets me feed my family something real before they go out and fill their faces with candy. It’s a warm, savory moment that grounds the chaos of Halloween night. Plus, watching my kids try to eat a breadstick shaped like a witch finger without laughing is pure entertainment.
Don’t be afraid to get creative with these. Add more knuckles, make them extra gnarled, or paint the “nails” with a little beet juice for a blood-red manicure. The more personality you give each finger, the better the reaction.
If you make these, please come back and let me know how they turned out. Tag me in your photos. Tell me if your kids screamed or laughed or both. I want to hear about your Halloween breadstick adventures. And if you have a better name for the marinara dip, I’m all ears. “Blood Dip” feels a little on the nose, but honestly, that’s exactly what it looks like.
Happy Halloween, and may your breadsticks be creepy, your dip be bloody, and your family be thoroughly weirded out by your cooking.
Frequently Asked Questions
Can I make these breadsticks ahead of time?
Yes. You can shape the breadsticks, place them on the baking sheet, cover with plastic wrap, and refrigerate for up to 8 hours before baking. Let them sit at room temperature for 15 minutes while the oven preheats, then bake as directed. The marinara dip can be made up to 3 days ahead and reheated.
Why did my almond nails fall off during baking?
This usually happens when the almond isn’t pressed in firmly enough. Make sure you really lodge it into the dough, almost burying the bottom third of the almond. You can also brush a tiny bit of water under the almond before pressing it in to help it adhere. If they still fall off, try pressing them in again immediately after the breadsticks come out of the oven while they’re still warm and pliable.
Can I use instant yeast instead of active dry yeast?
Absolutely. Use the same amount (2 ¼ teaspoons) and skip the activation step. Mix it directly with the flour and other dry ingredients, then add the warm water. The dough may rise a bit faster, so keep an eye on it.
My breadsticks puffed up too much and lost their finger shape. What did I do wrong?
This usually means the dough was too wet or you let it rise too long. Try using a little less water next time, or shape the fingers slightly thinner than you think they need to be. They will puff up in the oven, so you want them to look almost too skinny when they go in. Also, make sure your knuckle indentations are deep enough to survive the rise.
Can I use a different dip instead of marinara?
Of course. These breadsticks are delicious with ranch dressing, garlic butter, or even a cheese sauce. For Halloween, you could make a green dip (avocado or pesto) to look like witch slime, or a white dip (sour cream with herbs) to look like bone marrow. The marinara is classic, but don’t be afraid to experiment.
Pin This Recipe!
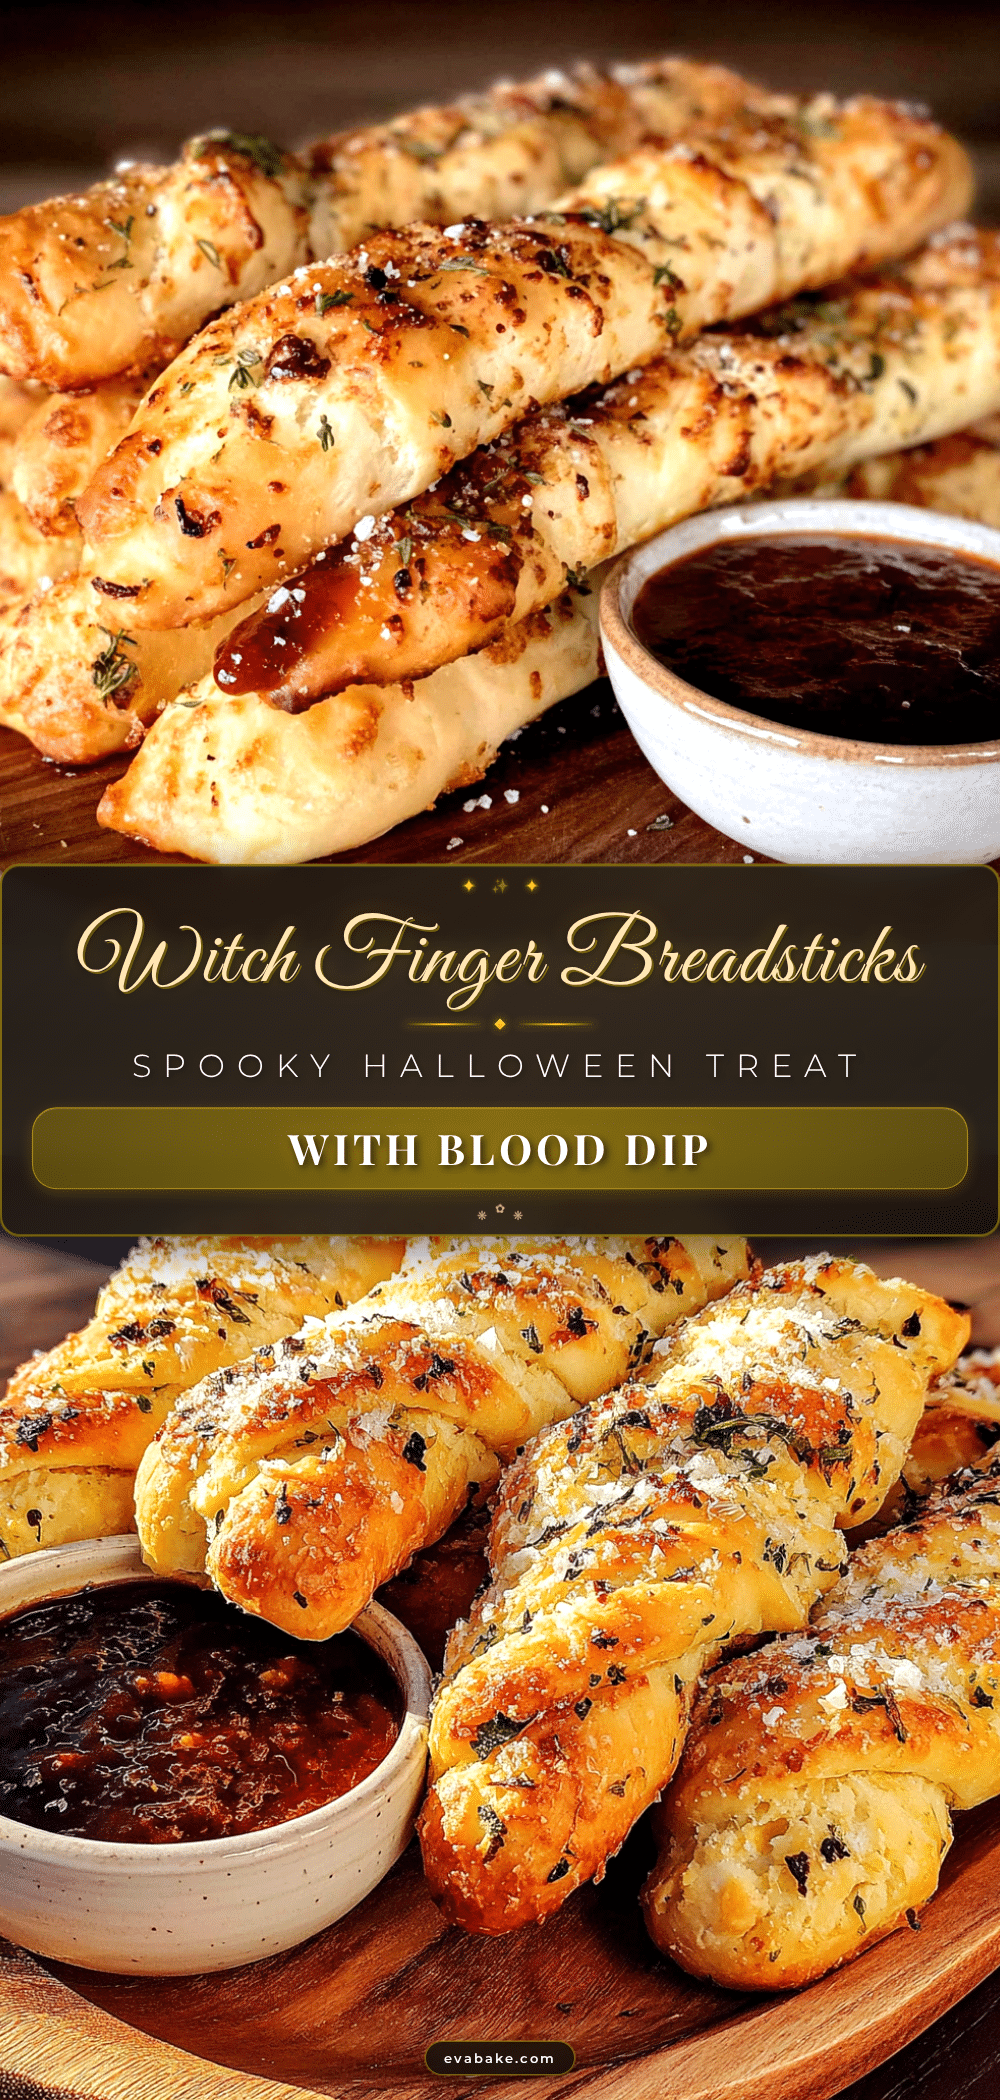
Spooky Witch Finger Breadsticks with Easy Marinara Blood Dip
These creepy yet delicious breadsticks are shaped like witch fingers with almond nails and served with a warm marinara ‘blood’ dip. Perfect for Halloween parties or a fun pre-trick-or-treat dinner.
- Prep Time: 45 minutes
- Cook Time: 18 minutes
- Total Time: 1 hour 3 minutes
- Yield: 12 breadsticks (6 servings) 1x
- Category: Appetizer
- Cuisine: American
Ingredients
- 2 ¼ teaspoons active dry yeast (one standard packet)
- 1 cup warm water (around 110°F)
- 1 tablespoon granulated sugar
- 3 cups all-purpose flour, plus more for dusting
- 2 tablespoons olive oil
- 1 ½ teaspoons garlic powder
- 1 teaspoon salt
- 1 large egg, beaten
- 30–36 whole almonds, skin on
- 1 can (15 ounces) crushed tomatoes
- 2 tablespoons olive oil (for marinara)
- 3 cloves garlic, minced
- 1 teaspoon dried oregano
- ½ teaspoon red pepper flakes (optional)
- Salt and black pepper to taste
- 1 teaspoon sugar
- 2 tablespoons tomato paste
Instructions
- Activate the yeast: In a large mixing bowl, combine warm water, sugar, and active dry yeast. Stir and let sit for 5-10 minutes until frothy.
- Mix the dough: Add flour, olive oil, garlic powder, and salt to the yeast mixture. Stir until a shaggy dough forms, then turn out onto a lightly floured surface.
- Knead the dough: Knead for 5-7 minutes until smooth and elastic. Add flour if too sticky, or water if too dry.
- First rise: Place dough in a clean, oiled bowl, cover with a towel, and let rise in a warm spot for about 30 minutes until doubled.
- Preheat oven to 375°F (190°C). Line a baking sheet with parchment paper.
- Shape the fingers: Punch down dough and divide into 12 equal pieces. Roll each into a 4-5 inch log, thicker at the bottom and tapered at the top.
- Add details: Place fingers on the baking sheet. Use a sharp knife to make light knuckle indentations. Press a whole almond firmly into the tapered end for the fingernail.
- Repeat for all 12 fingers, placing them about 1 inch apart.
- Brush each finger with beaten egg, avoiding the almonds.
- Optional: Press a small piece of red bell pepper or drop of marinara at the base of the fingernail for extra gore.
- Bake for 15-18 minutes until golden brown and hollow-sounding when tapped.
- Make marinara while baking: In a small saucepan, heat olive oil over medium heat. Add garlic and cook 30 seconds. Stir in crushed tomatoes, tomato paste, oregano, red pepper flakes, sugar, salt, and pepper. Simmer on low for 10-15 minutes, stirring occasionally.
- Cool breadsticks on the baking sheet for 5 minutes. Serve warm with marinara dip.
Notes
For best results, press almonds firmly into the dough to prevent them from falling off during baking. The dough can be refrigerated for up to 8 hours after shaping. Marinara dip can be made up to 3 days ahead.
Nutrition
- Serving Size: 2 breadsticks with m
- Calories: 320
- Sugar: 6
- Sodium: 480
- Fat: 12
- Saturated Fat: 2
- Carbohydrates: 45
- Fiber: 4
- Protein: 9
Keywords: Halloween breadsticks, witch finger breadsticks, marinara dip, Halloween appetizer, creepy breadsticks, savory Halloween recipe