She watched me fumbling with a box of instant cookie mix in the grocery aisle, my cart overflowing with apples from the weekend orchard trip. Then she just shook her head, laughed softly, and said, “Put that down. You’re going about this all wrong.” Her name was Maria, the woman who ran the tiny farm stand two towns over, and she had this way of making everything sound like a simple secret. She didn’t give me a recipe card or a list of measurements. Instead, she told me about her grandmother’s fall baking ritual—how they’d boil down fresh cider until the whole house smelled like a warm hug, then stir it into a dough that barely made it to the oven before someone snuck a taste. I scribbled her rough instructions on a napkin, and honestly, I messed up the first batch pretty badly. The cookies spread into one giant, flat disc, and I almost gave up. But the second time, something clicked. The brown butter icing was a happy accident—I’d left the butter on the stove a minute too long, and that nutty, toasty smell saved everything. Now, these wholesome apple cider cookies are my go-to for that cozy, I-deserve-this moment. Maybe you’ve been there, staring at a pile of apples and wondering how to make them feel special without a whole pie ordeal. These cookies are the answer.
Why You’ll Love This Recipe
I’ve tested this recipe at least seven times—maybe more if you count the batches my kids “helped” with—and every single version taught me something new. These cookies are the result of all those happy accidents and deliberate tweaks, and I can honestly say they’re foolproof now. Here’s why they’ll become your new fall favorite:
- Quick & Easy: From start to finish, you’re looking at about 30 minutes. No chilling, no complicated steps—just mix, scoop, and bake.
- Simple Ingredients: You probably have most of these in your pantry right now. No obscure extracts or hard-to-find flours. Just real, wholesome stuff.
- Perfect for Fall Gatherings: These cookies are made for apple picking afternoons, Thanksgiving dessert tables, or a quiet Tuesday with a cup of tea.
- Crowd-Pleaser: I’ve brought these to potlucks and watched people go back for thirds. Kids love them, adults love them, and they disappear fast.
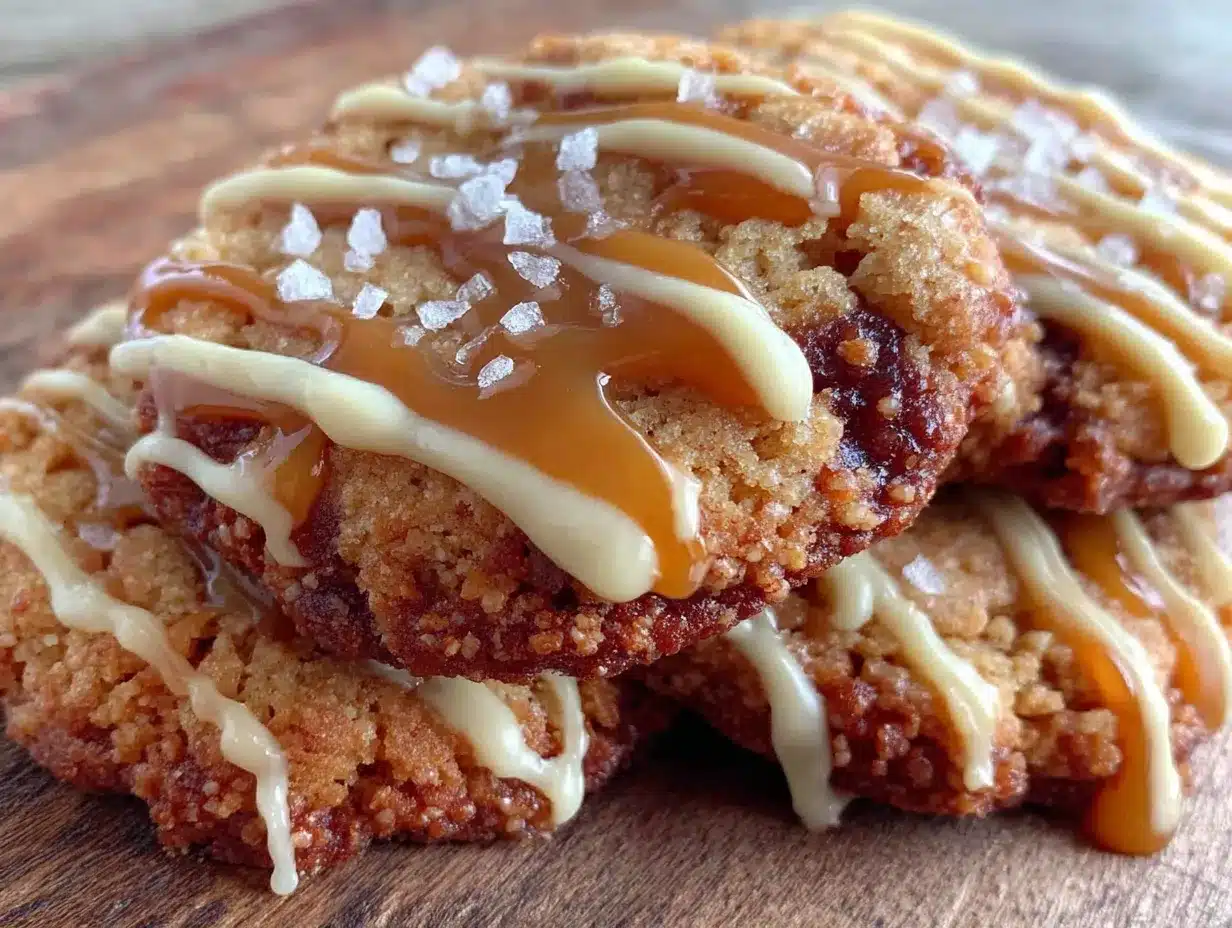
- Unbelievably Delicious: The brown butter icing takes these from “good cookie” to “close your eyes and savor it” territory. It’s nutty, sweet, and perfectly balanced.
What makes these different from every other apple cookie out there? It’s the reduced cider. Instead of just adding liquid apple cider to the dough, you boil it down until it’s thick and intensely fruity. That small step changes everything. You get a deep, concentrated apple flavor without making the dough too wet. Plus, the brown butter icing isn’t an afterthought—it’s the star that ties the whole cookie together. This isn’t just another version; it’s the one I’ve settled on after all those trials, and it’s the one that makes me smile every single time.
What Ingredients You Will Need
This recipe uses simple, wholesome ingredients to deliver bold flavor and satisfying texture without the fuss. Most of these are pantry staples, but a few key players make all the difference. Let’s break it down.
For the Cookies
- 1 cup (226g) unsalted butter, softened – I use Kerrygold for its rich flavor, but any good-quality butter works. Softened means left out for about 30 minutes, not melted.
- 3/4 cup (150g) coconut sugar – This gives the cookies a warm, caramel-like sweetness and keeps them refined sugar-free. You can substitute brown sugar if you prefer.
- 1/4 cup (50g) granulated sugar – Just a little for structure and spread. Feel free to use all coconut sugar if you want.
- 1 large egg, room temperature – Cold eggs can seize the butter, so let yours sit out for 15 minutes.
- 1 teaspoon vanilla extract – Pure vanilla makes a difference here. I’m partial to Nielsen-Massey.
- 1/2 cup (120ml) apple cider, reduced – This is the magic. You’ll boil it down from 1 cup until it’s syrupy and concentrated. More on that below.
- 2 cups (250g) whole wheat pastry flour – It’s lighter than regular whole wheat but still gives you that wholesome texture. All-purpose flour works too.
- 1 teaspoon baking soda – For lift and a soft crumb.
- 1/2 teaspoon baking powder – Helps them puff up just right.
- 1/2 teaspoon salt – Balances the sweetness. I use fine sea salt.
- 1 teaspoon ground cinnamon – Non-negotiable for that fall feel.
- 1/2 teaspoon ground nutmeg – Freshly grated is best, but pre-ground works.
- 1/4 teaspoon ground cloves – Just a pinch for warmth.
For the Brown Butter Icing
- 1/4 cup (56g) unsalted butter – You’ll brown this, so keep an eye on it.
- 1 1/2 cups (180g) powdered sugar – Sifted if it’s lumpy.
- 3 tablespoons milk – Whole milk or oat milk both work great.
- 1/2 teaspoon vanilla extract – Adds depth.
- Pinch of salt – Trust me on this one.
Ingredient Tip: For the best apple flavor, use fresh, unfiltered apple cider—not apple juice. The cloudy stuff has more apple solids and tastes richer. I get mine from a local orchard, but any good brand from the refrigerated section works.
Equipment Needed
You don’t need a fancy kitchen to pull these off. Here’s what I use every time:
- Mixing bowls – A medium and a large one. I prefer glass or stainless steel.
- Electric hand mixer or stand mixer – A hand mixer is fine, but a stand mixer with the paddle attachment makes creaming the butter and sugar effortless. If you’re mixing by hand, soften the butter really well.
- Small saucepan – For reducing the cider and browning the butter. A light-colored pan helps you see the color change.
- Baking sheets – Two standard half-sheet pans work perfectly. Line them with parchment paper or a silicone baking mat.
- Cookie scoop – A 1.5-tablespoon scoop gives you uniform cookies. I’ve used spoons in a pinch, but the scoop is worth it for even baking.
- Cooling rack – Lets the cookies cool properly so the icing sets. If you don’t have one, a clean kitchen towel works.
- Whisk – For the icing. A fork works too, but a whisk is smoother.
Budget-Friendly Tip: Don’t have a cookie scoop? Use two spoons to drop the dough. The cookies won’t be perfectly round, but they’ll taste just as good.
Preparation Method
Let’s get baking. I’ll walk you through every step so you feel confident, even if it’s your first time making cookies from scratch.
- Reduce the apple cider. Pour 1 cup (240ml) of apple cider into a small saucepan. Bring it to a boil over medium-high heat, then reduce the heat to medium-low and let it simmer. Stir occasionally. You want it to reduce to about 1/2 cup (120ml), which takes around 12-15 minutes. It should look syrupy and smell intensely appley. Set it aside to cool while you prepare the dough.
- Brown the butter for the icing. In the same saucepan (or a fresh one), melt 1/4 cup (56g) of unsalted butter over medium heat. Swirl the pan constantly. The butter will foam, then turn golden, and finally develop brown specks at the bottom. This happens fast—about 4-5 minutes. Once it smells nutty and toasty, remove it from the heat immediately. Pour it into a small bowl to stop the cooking. Let it cool for 10 minutes.
- Preheat your oven to 350°F (175°C). Line two baking sheets with parchment paper.
- Cream the butter and sugars. In a large mixing bowl, beat 1 cup (226g) softened unsalted butter, 3/4 cup (150g) coconut sugar, and 1/4 cup (50g) granulated sugar together until light and fluffy. This takes about 2-3 minutes with a hand mixer on medium speed. Scrape down the sides once.
- Add the wet ingredients. Beat in 1 large egg, 1 teaspoon vanilla extract, and the cooled reduced cider. Mix until just combined. The batter might look slightly curdled—that’s okay. It’s the cider doing its thing.
- Whisk the dry ingredients. In a separate medium bowl, whisk together 2 cups (250g) whole wheat pastry flour, 1 teaspoon baking soda, 1/2 teaspoon baking powder, 1/2 teaspoon salt, 1 teaspoon cinnamon, 1/2 teaspoon nutmeg, and 1/4 teaspoon cloves.
- Combine wet and dry. Gradually add the dry ingredients to the wet mixture, mixing on low speed until just incorporated. Don’t overmix—stop as soon as you don’t see any flour streaks. The dough will be soft and slightly sticky.
- Scoop the cookies. Use your cookie scoop to drop rounded tablespoons of dough onto the prepared baking sheets, spacing them about 2 inches apart. They spread a bit, so give them room.
- Bake. Bake for 10-12 minutes, or until the edges are lightly golden and the centers look set but still soft. They’ll firm up as they cool. Rotate the pans halfway through for even baking.
- Cool completely. Let the cookies cool on the baking sheets for 5 minutes, then transfer them to a cooling rack. They need to be completely cool before you add the icing—otherwise, it’ll slide right off.
- Make the icing. In a medium bowl, whisk together the cooled brown butter, 1 1/2 cups (180g) powdered sugar, 3 tablespoons milk, 1/2 teaspoon vanilla, and a pinch of salt. Whisk until smooth and glossy. If it’s too thick, add a splash more milk. If it’s too thin, add a little more powdered sugar.
- Ice the cookies. Drizzle the icing over the cooled cookies using a spoon or a piping bag. Let the icing set for about 15 minutes before serving.
Sensory Cue: When the cider reduces, you’ll notice it thickens and almost looks like maple syrup. That’s your signal it’s ready. And when you brown the butter, watch for those little brown flecks—they’re flavor bombs.
Cooking Tips & Techniques
I’ve made every mistake in the book so you don’t have to. Here’s what I’ve learned the hard way:
- Don’t skip reducing the cider. I tried using straight cider once, and the cookies turned out flat and soggy. Reducing concentrates the flavor and removes excess water, which is crucial for a soft, chewy texture.
- Watch the brown butter like a hawk. It goes from perfect to burnt in seconds. The first time I made it, I got distracted by my phone, and the butter turned black. Start over if that happens—burnt butter tastes bitter and ruins the icing.
- Measure flour correctly. Scooping directly from the bag packs it down and gives you too much. Instead, spoon the flour into your measuring cup and level it off with a knife. This simple trick prevents dry, crumbly cookies.
- Let the cookies cool completely. I know it’s tempting to ice them warm, but trust me—the icing will melt into a puddle. Patience pays off here.
- Use room temperature ingredients. Cold eggs and butter don’t cream properly, which affects the texture. Set them out 30 minutes before you start.
- Rotate your pans. Ovens have hot spots. Rotating the pans halfway through baking ensures even browning and prevents one batch from burning.
Personal Failure: I once forgot the baking soda entirely. The cookies came out like dense little hockey pucks. My kids still ate them, but they weren’t happy about it. Double-check your ingredients before you start mixing.
Variations & Adaptations
This recipe is forgiving, so feel free to play around. Here are some ways to make it your own:
- Gluten-Free Version: Swap the whole wheat pastry flour with a 1:1 gluten-free baking flour blend. I’ve used Bob’s Red Mill with great results. The texture will be slightly more tender, but still delicious.
- Dairy-Free Option: Use vegan butter for both the cookies and the icing. Miyoko’s is my go-to for browning. Replace the milk in the icing with oat or almond milk.
- Add Mix-Ins: Fold in 1/2 cup of chopped walnuts or pecans for crunch. Dried cranberries also work beautifully—add 1/3 cup along with the dry ingredients.
- Spice It Up: Love ginger? Add 1/2 teaspoon of ground ginger to the flour mixture. It pairs wonderfully with the apple and brown butter.
- Make Them Vegan: Use a flax egg (1 tablespoon ground flaxseed mixed with 3 tablespoons water, let sit for 5 minutes) in place of the egg. The cookies will be a bit less fluffy, but still tasty.
- Personal Variation: I tried adding a tablespoon of bourbon to the icing once, and it was incredible. The warmth of the bourbon complements the brown butter perfectly. Just reduce the milk by a tablespoon to keep the consistency right.
Serving & Storage Suggestions
These cookies are best served at room temperature, with the icing fully set. I love them with a hot cup of spiced chai or a simple black coffee. For a dessert spread, pair them with vanilla ice cream and a drizzle of caramel sauce—it’s next-level.
Storage: Keep the cookies in an airtight container at room temperature for up to 5 days. Place a sheet of parchment paper between layers to prevent sticking. The icing stays glossy and doesn’t get sticky, which is a win.
Freezing: You can freeze the baked, un-iced cookies for up to 3 months. Thaw them at room temperature, then make the icing fresh. Alternatively, freeze the cookie dough balls on a baking sheet, then transfer them to a freezer bag. Bake straight from frozen, adding 2-3 minutes to the baking time.
Reheating: Pop a cookie in the microwave for 10 seconds for that just-baked warmth. The icing will soften slightly but won’t melt off.
Flavor Development: Honestly, these cookies taste even better the next day. The apple flavor deepens overnight, and the spices meld together beautifully. If you can resist eating them all on day one, you’re in for a treat.
Nutritional Information & Benefits
Per cookie (based on 24 cookies): approximately 175 calories, 9g fat, 23g carbohydrates, 2g protein, 1g fiber, 12g sugar. These are estimates and will vary based on your exact ingredients.
These cookies use whole wheat pastry flour, which adds a bit more fiber than all-purpose flour. Coconut sugar has a lower glycemic index than regular sugar, so you get a slower energy release. The apples in the cider provide antioxidants, and the cinnamon and nutmeg have anti-inflammatory properties. Plus, the brown butter adds a dose of vitamin A. Are they a health food? No. But they’re a wholesome treat that fits into a balanced lifestyle without making you feel guilty. I love knowing I’m using real ingredients that actually nourish my body, even in a cookie.
Dietary Considerations: This recipe can be made gluten-free and dairy-free with the substitutions above. It’s nut-free as written, but check your ingredients if you have allergies. The cookies contain eggs and wheat.
Conclusion
These wholesome apple cider cookies with brown butter icing are the kind of recipe that makes you slow down and enjoy the moment. They’re not fussy or complicated—they’re just honest, delicious cookies that taste like fall in every bite. Whether you’re baking for a crowd or just treating yourself, I hope you make them your own. Add a little extra cinnamon, throw in some walnuts, or double the icing—there are no rules here. I’d love to hear how they turn out for you. Drop a comment below and tell me about your version, or share a photo on Pinterest and tag me. Happy baking, friend. You’ve got this.
Frequently Asked Questions
Can I use apple juice instead of apple cider?
You can, but the flavor won’t be as rich. Apple juice is thinner and less concentrated, so the reduction will be less flavorful. Stick with unfiltered apple cider for the best results.
Why did my cookies spread too much?
This usually happens if the dough was too warm or the butter was too soft. Make sure your butter is softened, not melted, and chill the dough for 15 minutes if your kitchen is hot. Also, check that your baking powder is fresh.
Can I skip the brown butter icing?
Sure, but you’ll miss out on the best part! If you want a simpler option, dust the cookies with powdered sugar or leave them plain. They’re still delicious on their own.
How do I store leftover icing?
Cover it tightly and store it in the fridge for up to a week. Let it come to room temperature and whisk it before using. You might need to add a splash of milk to loosen it up.
Can I make these cookies ahead of time?
Absolutely. Bake the cookies, cool them completely, and store them in an airtight container. Make the icing fresh on the day you serve them. Or freeze the dough balls for later—they bake beautifully straight from frozen.
Pin This Recipe!
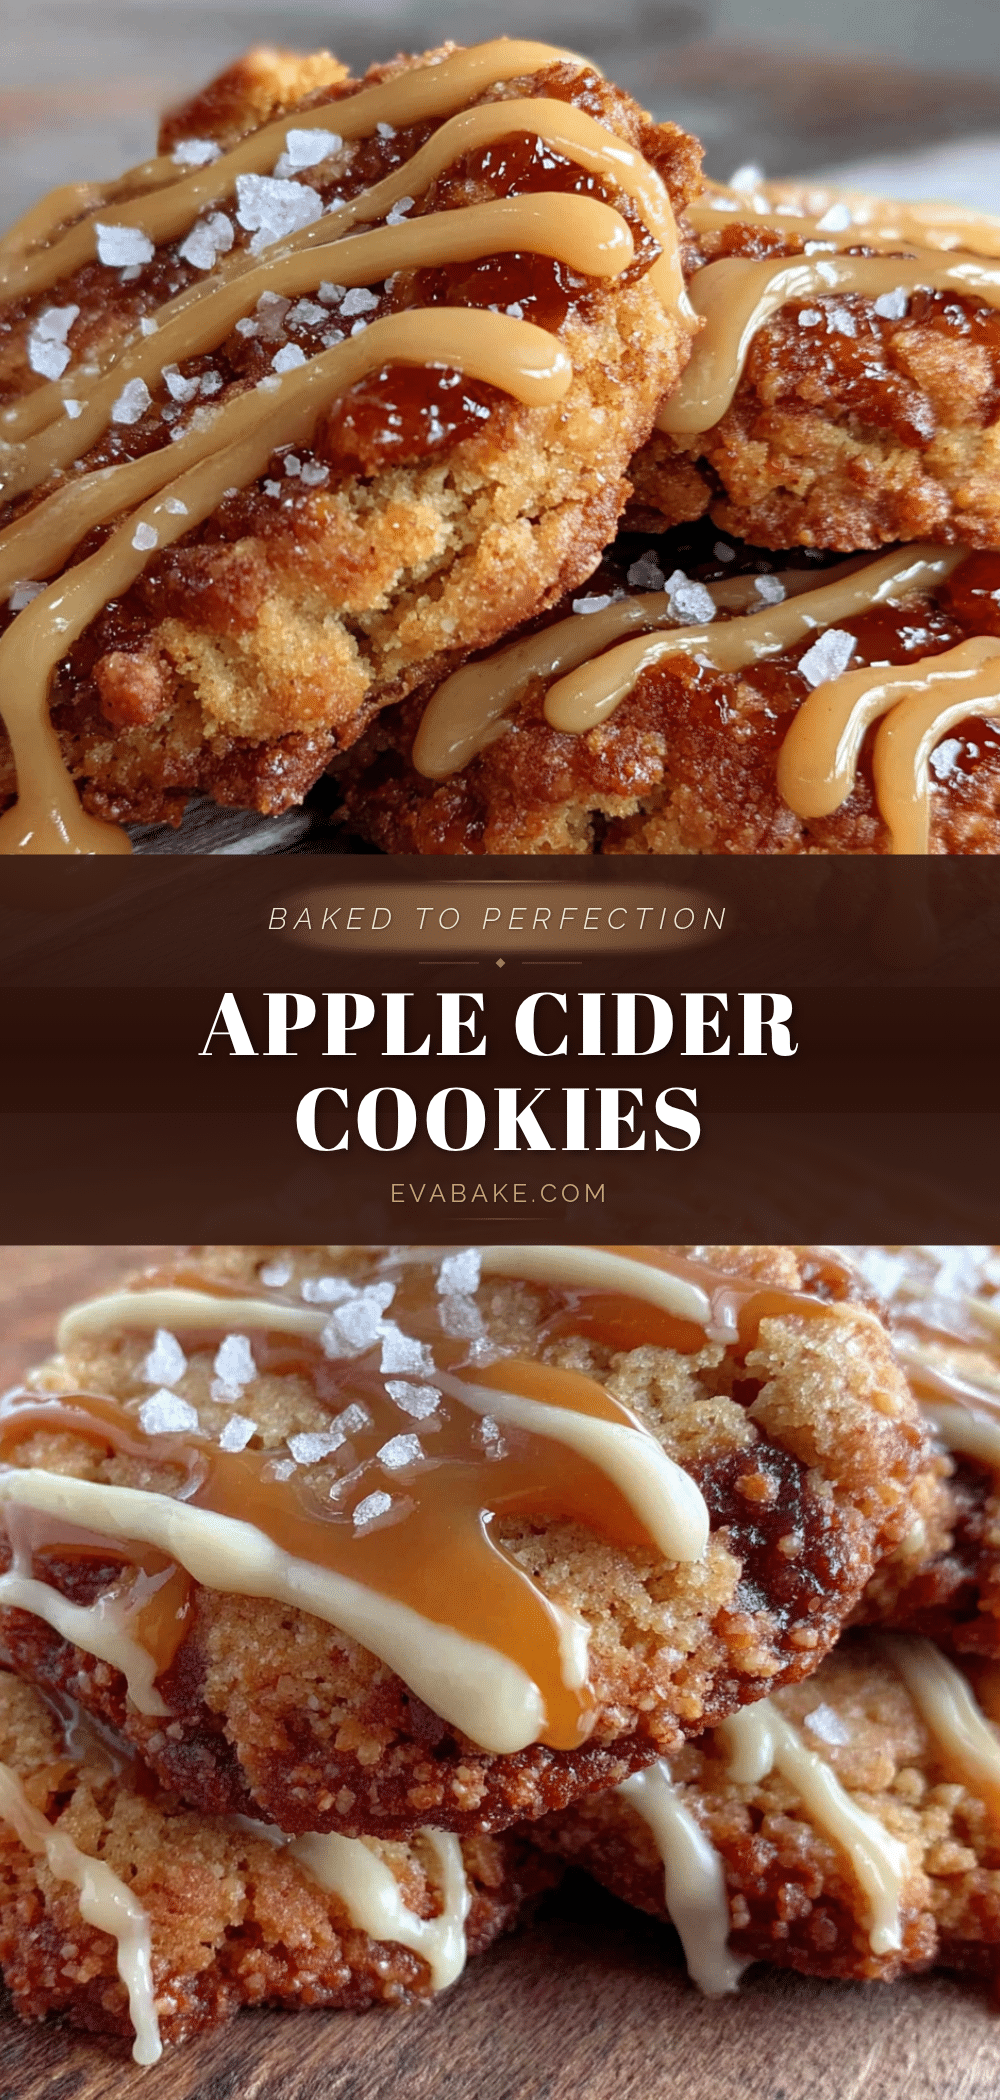
Wholesome Apple Cider Cookies with Easy Brown Butter Icing

These wholesome apple cider cookies are made with reduced apple cider for intense flavor and topped with a nutty brown butter icing. They’re quick, easy, and perfect for fall gatherings.
- Prep Time: 15 minutes
- Cook Time: 12 minutes
- Total Time: 30 minutes
- Yield: 24 servings 1x
- Category: Dessert
- Cuisine: American
Ingredients
- 1 cup (226g) unsalted butter, softened
- 3/4 cup (150g) coconut sugar
- 1/4 cup (50g) granulated sugar
- 1 large egg, room temperature
- 1 teaspoon vanilla extract
- 1/2 cup (120ml) apple cider, reduced (from 1 cup)
- 2 cups (250g) whole wheat pastry flour
- 1 teaspoon baking soda
- 1/2 teaspoon baking powder
- 1/2 teaspoon salt
- 1 teaspoon ground cinnamon
- 1/2 teaspoon ground nutmeg
- 1/4 teaspoon ground cloves
- 1/4 cup (56g) unsalted butter (for icing)
- 1 1/2 cups (180g) powdered sugar
- 3 tablespoons milk
- 1/2 teaspoon vanilla extract (for icing)
- Pinch of salt (for icing)
Instructions
- Reduce the apple cider: Pour 1 cup (240ml) of apple cider into a small saucepan. Bring to a boil over medium-high heat, then reduce heat to medium-low and simmer until reduced to about 1/2 cup (120ml), about 12-15 minutes. Set aside to cool.
- Brown the butter for the icing: In the same saucepan, melt 1/4 cup (56g) unsalted butter over medium heat, swirling constantly. Cook until the butter turns golden and develops brown specks, about 4-5 minutes. Remove from heat immediately and pour into a small bowl to cool for 10 minutes.
- Preheat oven to 350°F (175°C). Line two baking sheets with parchment paper.
- Cream the butter and sugars: In a large mixing bowl, beat 1 cup (226g) softened unsalted butter, 3/4 cup (150g) coconut sugar, and 1/4 cup (50g) granulated sugar together until light and fluffy, about 2-3 minutes. Scrape down the sides.
- Add the wet ingredients: Beat in 1 large egg, 1 teaspoon vanilla extract, and the cooled reduced cider until just combined.
- Whisk the dry ingredients: In a separate medium bowl, whisk together 2 cups (250g) whole wheat pastry flour, 1 teaspoon baking soda, 1/2 teaspoon baking powder, 1/2 teaspoon salt, 1 teaspoon cinnamon, 1/2 teaspoon nutmeg, and 1/4 teaspoon cloves.
- Combine wet and dry: Gradually add the dry ingredients to the wet mixture, mixing on low speed until just incorporated. Do not overmix.
- Scoop the cookies: Use a cookie scoop to drop rounded tablespoons of dough onto the prepared baking sheets, spacing them about 2 inches apart.
- Bake: Bake for 10-12 minutes, until edges are lightly golden and centers are set but soft. Rotate pans halfway through.
- Cool completely: Let cookies cool on baking sheets for 5 minutes, then transfer to a cooling rack. Cool completely before icing.
- Make the icing: In a medium bowl, whisk together the cooled brown butter, 1 1/2 cups (180g) powdered sugar, 3 tablespoons milk, 1/2 teaspoon vanilla, and a pinch of salt until smooth and glossy.
- Ice the cookies: Drizzle the icing over the cooled cookies. Let set for about 15 minutes before serving.
Notes
Don’t skip reducing the cider—it concentrates the flavor and prevents soggy cookies. Watch the brown butter carefully; it can burn quickly. Let cookies cool completely before icing to prevent the icing from melting. For best flavor, use fresh, unfiltered apple cider.
Nutrition
- Serving Size: 1 cookie
- Calories: 175
- Sugar: 12
- Sodium: 120
- Fat: 9
- Saturated Fat: 5
- Carbohydrates: 23
- Fiber: 1
- Protein: 2
Keywords: apple cider cookies, brown butter icing, fall cookies, whole wheat cookies, easy cookie recipe