That first little gasp. The kind you hear when a child peels back the lid of a lunchbox and finds something impossible—a tiny ghost, staring up at them with dark chocolate chip eyes. It’s a sound that still makes me grin, even years later, standing in my own kitchen with flour dusted across my favorite apron. I wasn’t trying to be clever the first time I made these. It was the night before my daughter’s kindergarten Halloween party, and I had completely forgotten about the classroom treat sign-up. You know that panic—the one where you stare blankly into your pantry, hoping for a miracle? I had a box of vanilla cake mix, a bag of chocolate chips, and a vague memory of some white frosting. That was it. No fancy decorating tools, no fondant, no food coloring that would inevitably stain little fingers. Just a simple idea, born from desperation and a late-night willingness to try anything.
I whipped up the cupcakes, piled on a generous swirl of white buttercream, and then—on a whim—dropped two chocolate chips into the soft frosting. The ghosts stared back at me, and I actually laughed out loud. They weren’t perfect. One was leaning slightly to the left, and another had an eye that was definitely too high, making it look perpetually surprised. But that was the charm. They looked like friendly little spirits, not scary ones. The next day, my daughter came home with an empty container and a story about how her friends thought the ghosts were “so cute they almost didn’t want to eat them.” Almost. The empty container told the real story.
These ghost cupcakes with chocolate chip eyes have since become our family’s go-to Halloween tradition. They are the recipe I pull out when I want the kids to help without a meltdown. They are the dessert I bring to a potluck when I want to look like I spent hours, when really, I spent about twenty minutes. Honestly, they’re proof that the best Halloween treats don’t need to be complicated. They just need a little bit of soul—and a couple of chocolate chips.
Why You’ll Love This Recipe
Let’s be real for a second. Halloween baking can be stressful. Between the intricate cookie designs, the sticky fondant, and the sheer amount of time some recipes demand, it’s easy to feel overwhelmed before you even preheat the oven. These easy ghost cupcakes are the antidote to all that. They are the Halloween recipe you can actually enjoy making.
- Incredibly Easy & Fast: From start to finish, you can have these ready in under 45 minutes. No chilling, no complicated piping techniques, and no special tools required. It’s the perfect last-minute Halloween treat.
- Minimal Ingredients, Maximum Cuteness: You probably already have everything you need in your pantry. A simple vanilla cupcake, your favorite buttercream, and a bag of chocolate chips. That’s it. The magic is in the assembly, not the grocery list.
- Perfect for Little Helpers: This is the ultimate kid-friendly baking project. There are no sharp tools or hot sugar syrups involved. Kids can easily spoon on the frosting and place the chocolate chip eyes. The mess is part of the fun.
- A Guaranteed Crowd-Pleaser: Whether it’s a classroom party, a spooky dinner, or just a fun weekend activity, these cupcakes disappear. Kids love the cute factor, and adults appreciate the nostalgic, simple flavor.
- Endlessly Customizable: Once you have the basic ghost shape down, you can create a whole spooky cast of characters. Add a tiny piped mouth, make them look scared, or give them different colored eyes. The possibilities are as fun as your imagination.
What makes these different from every other Halloween cupcake out there? It’s the texture of the frosting. I don’t use a stiff, crusting buttercream. I use a soft, fluffy, cloud-like American buttercream that allows the chocolate chips to sink in just slightly, creating a smooth, seamless look. It’s not just a decoration sitting on top; it becomes part of the ghost. That little detail makes all the difference. This recipe isn’t just good—it is the kind that makes you close your eyes after the first bite, remembering what Halloween felt like when you were a kid.
What Ingredients You Will Need
This recipe is built on simple, pantry-friendly ingredients. The beauty of these ghost cupcakes with chocolate chip eyes is that the focus is on the playful presentation, not a complex flavor profile. Here is everything you need to get started.
For the Cupcakes:
- 1 ½ cups (190g) all-purpose flour – Spoon and level your flour for the most tender crumb. Too much flour will make the cupcakes dense.
- 1 ½ teaspoons baking powder – This gives the cupcakes their lift. Make sure it’s fresh for the best rise.
- ¼ teaspoon salt – Salt balances the sweetness and enhances the vanilla flavor. Don’t skip it.
- ½ cup (113g) unsalted butter, softened to room temperature – I always use unsalted butter so I can control the salt level. Let it sit out for at least an hour before you start.
- 1 cup (200g) granulated sugar – White sugar creates a light, fluffy texture when creamed with the butter.
- 2 large eggs, room temperature – Cold eggs can cause the batter to curdle. If you’re in a hurry, place them in a bowl of warm water for 5 minutes.
- 2 teaspoons pure vanilla extract – Use the real stuff. It makes a noticeable difference in flavor compared to imitation vanilla.
- ½ cup (120ml) whole milk, room temperature – Whole milk adds richness, but you can substitute with 2% or a plant-based milk like oat milk if needed.
For the Ghost Frosting:
- 1 cup (226g) unsalted butter, softened to room temperature – This is the base of your buttercream. It needs to be soft but not melted.
- 3 ½ cups (420g) powdered sugar – Sift it if it’s lumpy. Nobody wants a lumpy ghost.
- 2-3 tablespoons heavy cream or whole milk – Start with two tablespoons and add a third if you need to loosen the frosting. Heavy cream makes it extra luxurious.
- 1 ½ teaspoons pure vanilla extract – Vanilla is the star flavor here. A tiny pinch of salt can also help cut the sweetness.
For the Eyes:
- 1 cup semi-sweet or dark chocolate chips – I prefer Ghirardelli or Guittard chocolate chips. They are large, flat on the bottom, and have a rich flavor that contrasts beautifully with the sweet frosting. You want chips that are wide and flat so they sit nicely in the frosting without tipping over.
Ingredient Tips & Substitutions: For a gluten-free version, use a good 1:1 gluten-free baking flour blend (like Bob’s Red Mill). For a dairy-free option, substitute the butter in both the cupcakes and frosting with a high-quality vegan butter stick (not spreadable margarine) and use oat milk. The texture will be slightly different, but the ghosts will still be delicious. If you want a less sweet frosting, you can reduce the powdered sugar to 3 cups, but the frosting will be softer and harder to pipe. I find the sweetness level is perfectly balanced by the semi-sweet chocolate chips.
Equipment Needed
You don’t need a professional bakery setup for these ghost cupcakes with chocolate chip eyes. Here is the simple equipment that will make the process smooth and fun.
- Standard 12-cup Muffin Pan: This is the most common size. If you only have a 6-cup pan, you will need to bake in batches.
- Paper Cupcake Liners: I like using white or black liners for Halloween. Avoid using foil liners, as the cupcakes tend to stick to them.
- Two Large Mixing Bowls: One for the dry ingredients and one for the wet ingredients.
- Electric Hand Mixer or Stand Mixer: A hand mixer works perfectly for this recipe. A stand mixer with the paddle attachment is also great, especially for the frosting.
- Piping Bags and a Round Tip (or a Ziploc Bag): I use a Wilton 1A round tip for the frosting. If you don’t have a piping bag, a simple Ziploc bag with the corner snipped off works just as well. I’ve done it many times.
- Cooling Rack: This is essential. If you let the cupcakes cool in the pan, the bottoms will get soggy. A wire rack allows air to circulate.
- Small Offset Spatula: Not strictly necessary, but it makes smoothing the frosting into a ghost shape much easier. A butter knife works in a pinch.
Budget-Friendly Tip: Don’t run out and buy a fancy piping set for this. A sturdy Ziploc freezer bag is your best friend. Just fill it with frosting, squeeze out the air, seal it, and snip off a ½-inch corner. You’ll get perfectly round ghosts without spending a dime on extra equipment.
Preparation Method
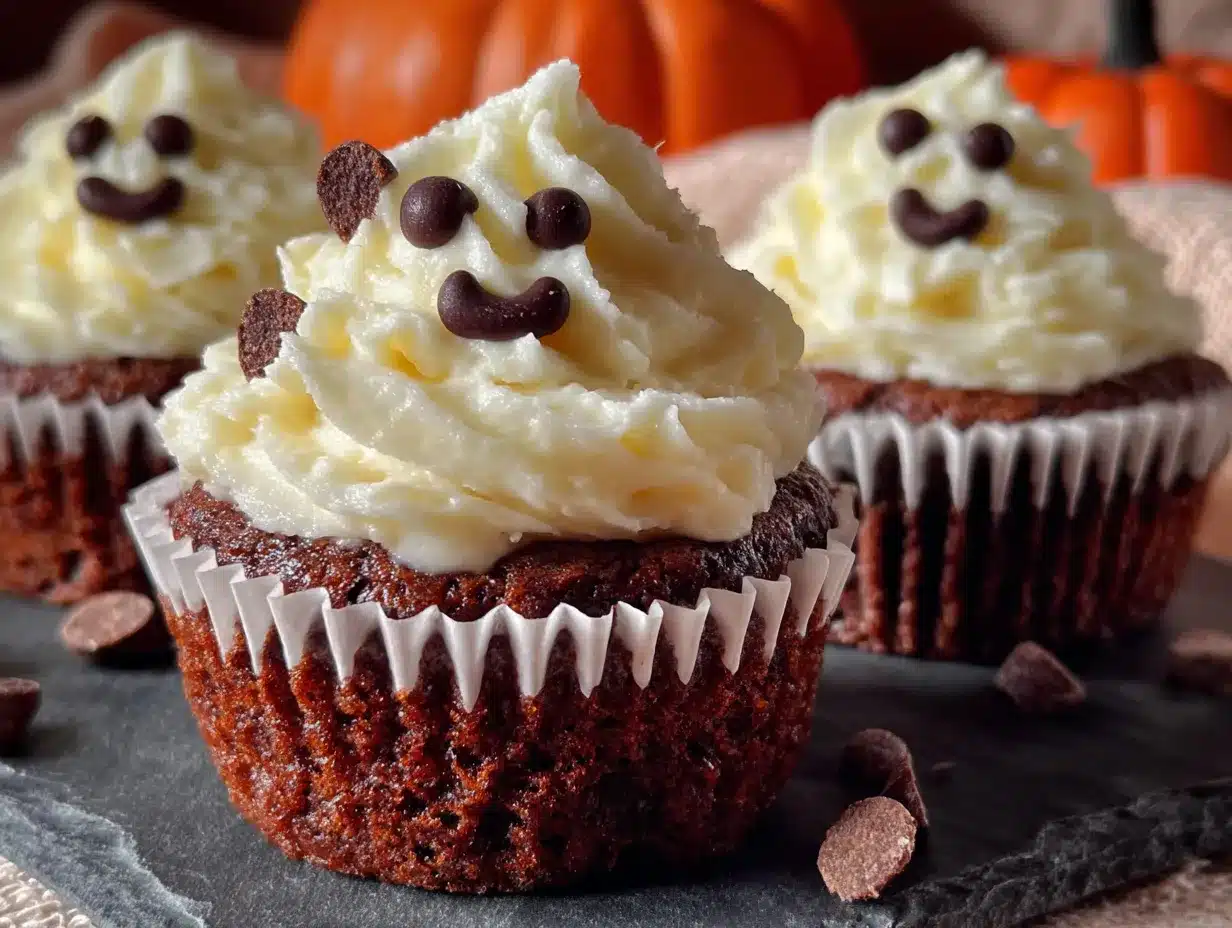
Let’s make some ghosts! Follow these steps carefully, and you will have the cutest Halloween treat on the block. This method is designed to be foolproof, even for beginner bakers.
- Preheat and Prep: Preheat your oven to 350°F (175°C). Line your 12-cup muffin pan with paper liners. This is a small step, but it sets you up for success.
- Mix the Dry Ingredients: In a medium bowl, whisk together the 1 ½ cups of all-purpose flour, 1 ½ teaspoons of baking powder, and ¼ teaspoon of salt. Whisking aerates the flour and ensures the baking powder is evenly distributed. Set this bowl aside.
- Cream the Butter and Sugar: In a large bowl, beat the ½ cup of softened unsalted butter and 1 cup of granulated sugar together with an electric mixer on medium speed. Beat for about 2-3 minutes, until the mixture is light, fluffy, and pale in color. You are incorporating air here, which is what makes the cupcakes tender. Don’t rush this step.
- Add Eggs and Vanilla: Add the 2 large eggs one at a time, beating well after each addition until the yolk is fully incorporated. Then, beat in the 2 teaspoons of vanilla extract. Scrape down the sides and bottom of the bowl with a spatula to make sure everything is evenly mixed.
- Alternate Dry and Wet Ingredients: With the mixer on low speed, add about one-third of the flour mixture to the butter mixture. Mix until just combined. Then, add half of the ½ cup of milk and mix until just combined. Repeat this process (flour, milk, flour), ending with the final third of the flour mixture. Mix only until you no longer see streaks of flour. Overmixing at this stage will result in tough, dense cupcakes.
- Fill the Liners: Divide the batter evenly among the 12 cupcake liners. I like to use a large cookie scoop for this—it makes the process clean and ensures each cupcake is the same size. Fill each liner about two-thirds full. This gives them room to rise without spilling over.
- Bake to Perfection: Bake for 18-22 minutes, or until a toothpick inserted into the center of a cupcake comes out clean or with a few moist crumbs. The tops should be lightly golden and spring back when you touch them. Let them cool in the pan for 5 minutes, then carefully transfer them to a wire rack to cool completely. This is critical. If the cupcakes are even slightly warm, your frosting will melt into a puddle. Wait until they are completely cool to the touch.
- Make the Ghost Frosting: While the cupcakes cool, make your buttercream. In a large bowl, beat the 1 cup of softened unsalted butter on medium speed for about 2 minutes, until it is smooth and creamy. Gradually add the 3 ½ cups of powdered sugar, one cup at a time, beating on low speed after each addition. The mixture will look dry and crumbly at first—don’t panic. Add the 2 tablespoons of heavy cream and the 1 ½ teaspoons of vanilla extract. Increase the speed to medium-high and beat for a full 3 minutes. The frosting will become light, fluffy, and incredibly smooth. If it’s too thick, add the third tablespoon of cream.
- Pipe the Ghosts: Transfer the frosting to your piping bag fitted with a round tip (or your Ziploc bag with the corner snipped). Hold the bag straight up and down, about ½ inch above the center of a cooled cupcake. Apply steady pressure and squeeze a generous mound of frosting in the center. As the mound grows, slowly lift the bag straight up, releasing pressure as you go. You want to create a tall, teardrop-like blob. It doesn’t have to be perfect. The charm of a ghost is its irregular, soft shape. If you get a little peak on top, that’s fine—it looks like a ghost’s head.
- Add the Eyes: This is the fun part. While the frosting is still soft, take two chocolate chips and gently press them into the top third of the frosting mound. Place them close together, but not touching. The frosting will naturally hold them in place. For a friendlier ghost, place the eyes closer to the center. For a slightly spookier look, place them closer to the edge of the frosting so the ghost looks like it’s peeking out.
- Set and Serve: Let the finished cupcakes sit at room temperature for about 10 minutes so the frosting can set slightly. This helps the chocolate chips stay put. Then, serve immediately or store as directed below.
Cooking Tips & Techniques
Over the years, I have made these ghost cupcakes with chocolate chip eyes at least a dozen times. I have learned a few things the hard way, so you don’t have to. Here are my best tips for perfect ghosts every single time.
The Room Temperature Rule is Real. I know it’s tempting to use cold butter straight from the fridge, but don’t. Cold butter won’t cream properly with the sugar, and your cupcakes will turn out dense. The same goes for the eggs and milk. If your batter looks curdled, it’s often because your ingredients were too cold. Let everything sit on the counter for an hour before you start. It makes a world of difference.
Don’t Overpipe the Frosting. The first time I made these, I tried to pipe a perfect, smooth dome. It looked more like a snowball than a ghost. The secret is to let the frosting be a little messy. Use a generous amount, but don’t try to create a perfect shape. A slightly lopsided, irregular blob looks much more like a friendly ghost. If you want a smoother look, you can dip the tip of the piping bag in a glass of warm water before you start, but it’s not necessary.
The Chocolate Chip Placement Trick. I once made the mistake of pressing the chocolate chips in too deep. They sank right into the frosting and disappeared. You only want to press them in until the base of the chip is flush with the frosting surface. The top of the chip should still be visible. Also, use the flat side of the chip as the “eye.” It looks more natural than using the pointy end.
Timing is Everything. Make the frosting while the cupcakes are cooling. This saves you time and ensures the frosting is ready to go the moment the cupcakes are cool. If you make the frosting too early and it sits out, it can soften. If it gets too soft, just pop it in the fridge for 10 minutes and give it a quick whip before piping.
Variations & Adaptations
One of the best things about this recipe is how easy it is to change up. Once you master the basic ghost cupcakes with chocolate chip eyes, you can create a whole spooky family. Here are some of my favorite variations.
- Spooky Ghosts: Instead of placing the eyes in the center, place them very close to the edge of the frosting so the ghost looks like it’s peeking around a corner. You can also add a tiny piped mouth using a bit of black frosting or a small chocolate chip cut in half.
- Chocolate Ghosts: Use a chocolate cake base instead of vanilla. The dark cake peeking out from under the white frosting creates a dramatic, spooky effect. I love using a simple fudge cake mix for this.
- Mummy Cupcakes: Instead of a smooth ghost shape, use a small offset spatula to swirl the frosting in a spiral pattern, starting from the center and working outward. Leave two small gaps for the eyes. It looks just like a mummy’s wrappings!
- Pumpkin Patch Ghosts: Bake the cupcakes in orange-colored liners. After frosting, sprinkle a tiny bit of orange sanding sugar around the base of the ghost. It looks like they are floating in a pumpkin patch.
- Gluten-Free Option: Substitute the all-purpose flour with a 1:1 gluten-free baking blend. I have tested this with King Arthur Measure for Measure flour, and it works beautifully. The texture is slightly more tender, but the ghosts are just as cute.
My personal favorite variation is the “Scared Ghost.” I place the eyes very close together and slightly lower on the frosting mound. Then, I use a tiny bit of black frosting to pipe a little “O” mouth. It looks like the ghost is terrified of something behind it. It always gets a laugh at Halloween parties.
Serving & Storage Suggestions
These ghost cupcakes with chocolate chip eyes are best enjoyed at room temperature, where the frosting is soft and creamy and the cake is tender. The chocolate chips will be slightly firm, providing a lovely little pop of texture against the smooth frosting.
For Serving: Arrange them on a festive platter or a Halloween-themed cake stand. They make a fantastic centerpiece for a Halloween party. I like to serve them with a side of pumpkin chocolate chip cookie bars for a full dessert spread. They also pair wonderfully with a warm pumpkin chai latte for a cozy afternoon treat.
For Storage: Store any leftover cupcakes in an airtight container at room temperature for up to 2 days. Do not refrigerate them if you can help it. The refrigerator dries out the cake and makes the frosting hard. If you must store them in the fridge (for example, if you made them a day ahead), let them sit at room temperature for about 30 minutes before serving to soften the frosting.
For Freezing: You can freeze the unfrosted cupcakes for up to 3 months. Wrap them tightly in plastic wrap and then place them in a freezer-safe bag. When you are ready to serve them, thaw them at room temperature, then make the frosting and decorate. I do not recommend freezing the frosted cupcakes, as the texture of the buttercream changes after thawing.
Flavor Development: Honestly, these cupcakes are best on the day they are made. The cake is at its peak of moisture, and the frosting is perfectly fluffy. However, they are still delicious the next day. The flavors actually meld together a bit more, creating a more cohesive bite.
Nutritional Information & Benefits
Let’s be honest—these are a treat, and they are meant to be enjoyed as one. But here is a rough estimate of the nutritional information for one cupcake (based on the recipe as written).
| Nutrient | Amount per Cupcake |
|---|---|
| Calories | ~380 kcal |
| Fat | 22g |
| Carbohydrates | 45g |
| Protein | 3g |
| Sugar | 32g |
Health Benefits: While these cupcakes are definitely a “sometimes food,” they do have a few redeeming qualities. The butter provides a small amount of Vitamin A, and the eggs contribute high-quality protein. The dark chocolate chips are the star here—they are rich in antioxidants and can help improve heart health in small amounts. Plus, using real butter and vanilla extract means you are avoiding the artificial flavors and preservatives found in many store-bought treats.
Dietary Considerations: This recipe contains gluten, dairy, and eggs. It can be made gluten-free and dairy-free with the substitutions noted above. It is not suitable for a vegan diet in its current form, but a vegan butter and egg replacer could be used with some testing.
My Personal Perspective: I believe in balance. These cupcakes are a celebration, and celebrations are meant to be enjoyed without guilt. A single cupcake with a glass of cold milk is a perfect little moment of joy. Life is too short to count calories on Halloween.
Conclusion
These ghost cupcakes with chocolate chip eyes are more than just a Halloween dessert. They are a memory waiting to happen. They are the treat you bring to the school party that makes every kid smile. They are the quiet afternoon project you do with your own children, laughing at the lopsided ghosts and the frosting smudges on their noses. They are proof that the best things in life are often the simplest.
I encourage you to make these your own. Don’t stress about perfection. Let your ghosts be a little wobbly. Give one of them three eyes. Make a whole family of ghosts with different expressions. The joy is in the making, not the flawlessness. And honestly, the imperfections are what make them so darn cute.
So, preheat that oven. Grab your chocolate chips. And create a little bit of Halloween magic in your own kitchen. I promise, the first time you see that little ghost face staring back at you, you will understand why this is my favorite recipe of the season. Happy Halloween, my friend. Now go make some ghosts!
P.S. I would love to see your creations! If you try this recipe, please leave a comment below and let me know how your ghosts turned out. Did you add a mouth? Did you make a scared ghost? Share your stories—they make my day.
Frequently Asked Questions
Can I use a boxed cake mix for these ghost cupcakes?
Absolutely! This recipe is designed to be flexible. If you are short on time, use your favorite vanilla or white cake mix and follow the box instructions. The decorating process is exactly the same. The ghosts will still be adorable.
Why did my chocolate chips sink into the frosting?
This usually happens if the frosting is too soft. Make sure your buttercream is well-chilled but still pipeable. If your kitchen is very warm, you can pop the piped ghosts into the fridge for 5 minutes before adding the chocolate chips. Also, press the chips in gently—just until they are flush with the surface.
Can I make these cupcakes ahead of time?
Yes! You can bake the cupcakes up to 2 days in advance and store them in an airtight container at room temperature. You can also make the frosting up to 3 days ahead and keep it in the fridge. When you are ready to serve, let the frosting come to room temperature, give it a quick whip with your mixer, and then pipe the ghosts. I do not recommend decorating them more than 6 hours before serving, as the frosting can soften.
How do I get my frosting to be so white?
The key to bright white buttercream is using a clear vanilla extract (or vanilla bean paste) instead of the dark brown extract. Also, beat the frosting for a full 3-4 minutes. This incorporates air and lightens the color. A tiny drop of purple food coloring can also cancel out any yellow tones, but it is not necessary for this recipe.
Can I use milk chocolate chips instead of semi-sweet?
You can, but I find milk chocolate chips are much sweeter and can make the overall cupcake overly sugary. Semi-sweet or dark chocolate chips provide a wonderful bitter contrast to the sweet frosting and cake. If you only have milk chocolate on hand, I recommend using a pinch of sea salt on top of the frosting to balance the sweetness.
Pin This Recipe!
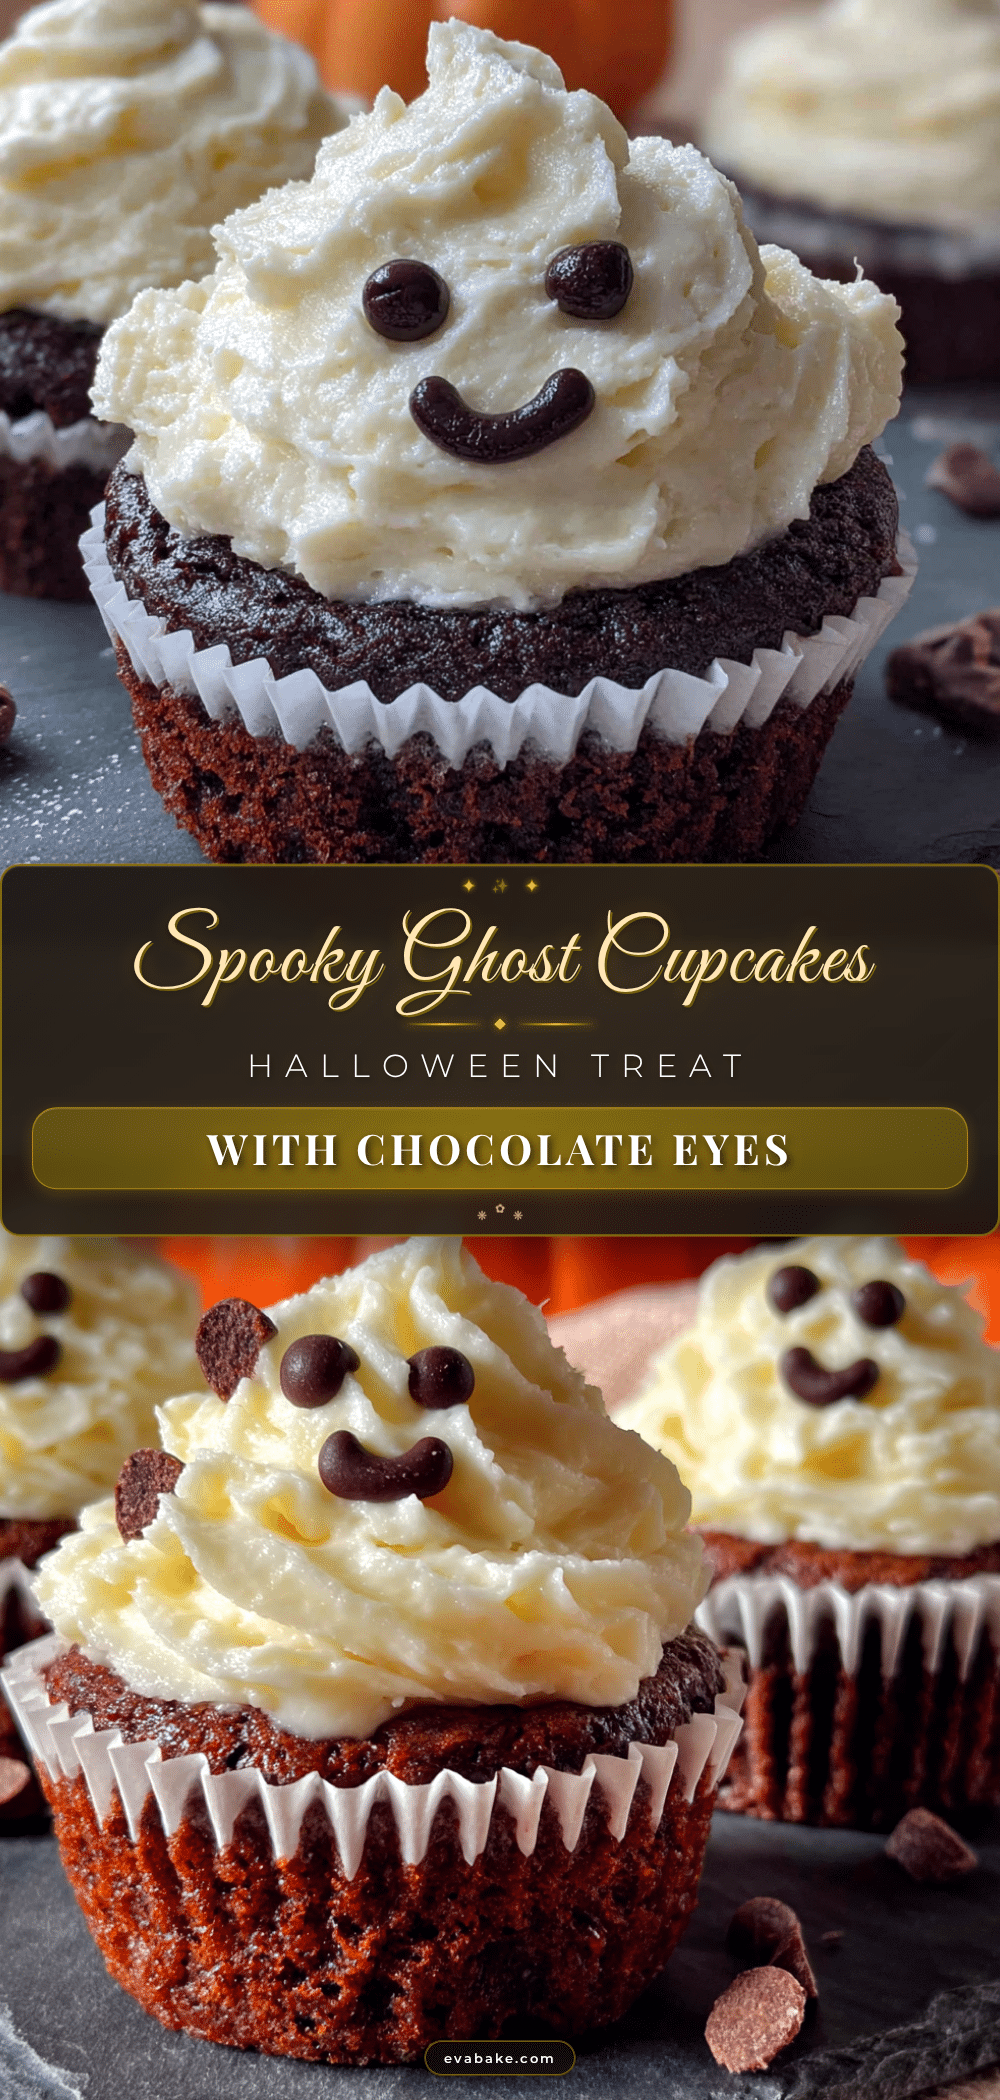
Best Ghost Cupcakes with Chocolate Chip Eyes – Easy Halloween Treat
These adorable ghost cupcakes with chocolate chip eyes are the perfect easy Halloween treat. Made with simple ingredients and ready in under 45 minutes, they are a fun, kid-friendly baking project that guarantees smiles.
- Prep Time: 20 minutes
- Cook Time: 20 minutes
- Total Time: 40 minutes
- Yield: 12 servings 1x
- Category: Dessert
- Cuisine: American
Ingredients
- 1 ½ cups (190g) all-purpose flour
- 1 ½ teaspoons baking powder
- ¼ teaspoon salt
- ½ cup (113g) unsalted butter, softened to room temperature
- 1 cup (200g) granulated sugar
- 2 large eggs, room temperature
- 2 teaspoons pure vanilla extract
- ½ cup (120ml) whole milk, room temperature
- 1 cup (226g) unsalted butter, softened to room temperature (for frosting)
- 3 ½ cups (420g) powdered sugar
- 2–3 tablespoons heavy cream or whole milk
- 1 ½ teaspoons pure vanilla extract (for frosting)
- 1 cup semi-sweet or dark chocolate chips
Instructions
- Preheat your oven to 350°F (175°C). Line a 12-cup muffin pan with paper liners.
- In a medium bowl, whisk together the flour, baking powder, and salt. Set aside.
- In a large bowl, beat the ½ cup softened butter and granulated sugar together with an electric mixer on medium speed for 2-3 minutes until light and fluffy.
- Add the eggs one at a time, beating well after each addition. Beat in the 2 teaspoons of vanilla extract. Scrape down the bowl.
- With the mixer on low speed, add one-third of the flour mixture, mixing until just combined. Add half of the milk, mixing until just combined. Repeat with another third of flour, the remaining milk, and the final third of flour. Mix only until no streaks of flour remain.
- Divide the batter evenly among the 12 cupcake liners, filling each about two-thirds full.
- Bake for 18-22 minutes, or until a toothpick inserted into the center comes out clean. Let cool in the pan for 5 minutes, then transfer to a wire rack to cool completely.
- While the cupcakes cool, make the frosting: In a large bowl, beat the 1 cup softened butter on medium speed for 2 minutes until smooth and creamy. Gradually add the powdered sugar, one cup at a time, beating on low speed after each addition. Add 2 tablespoons of heavy cream and the 1 ½ teaspoons of vanilla extract. Increase speed to medium-high and beat for 3 minutes until light and fluffy. If too thick, add the third tablespoon of cream.
- Transfer the frosting to a piping bag fitted with a round tip (or a Ziploc bag with the corner snipped). Pipe a generous mound of frosting onto each cooled cupcake, creating a tall, teardrop-like shape.
- While the frosting is still soft, gently press two chocolate chips into the top third of each frosting mound to create eyes. Press just until the base of the chip is flush with the frosting surface.
- Let the finished cupcakes sit at room temperature for about 10 minutes to set. Serve immediately or store as directed.
Notes
For best results, ensure all ingredients are at room temperature. Do not overmix the batter. The frosting should be soft but not runny; if it becomes too soft, chill for 10 minutes before piping. Press chocolate chips gently to avoid sinking. Store unfrosted cupcakes for up to 2 days; frost and serve within 6 hours for best texture.
Nutrition
- Serving Size: 1 cupcake
- Calories: 380
- Sugar: 32
- Sodium: 120
- Fat: 22
- Saturated Fat: 13
- Carbohydrates: 45
- Fiber: 1
- Protein: 3
Keywords: ghost cupcakes, Halloween cupcakes, easy Halloween treats, ghost cupcakes with chocolate chip eyes, kid-friendly Halloween dessert


