My friend Jenna did not believe in ghost meringue cookies. I don’t mean she doubted my ability to make them—she doubted the concept entirely. “You want me to bring a tray of raw egg whites to a Halloween party?” she asked, one eyebrow arched so high it nearly escaped her forehead. I had just spent twenty minutes explaining that meringue is baked, not raw, and that these little ghosts would be crisp, light, and eerily perfect for her annual costume bash. She folded her arms. “I’ll believe it when I taste it.”
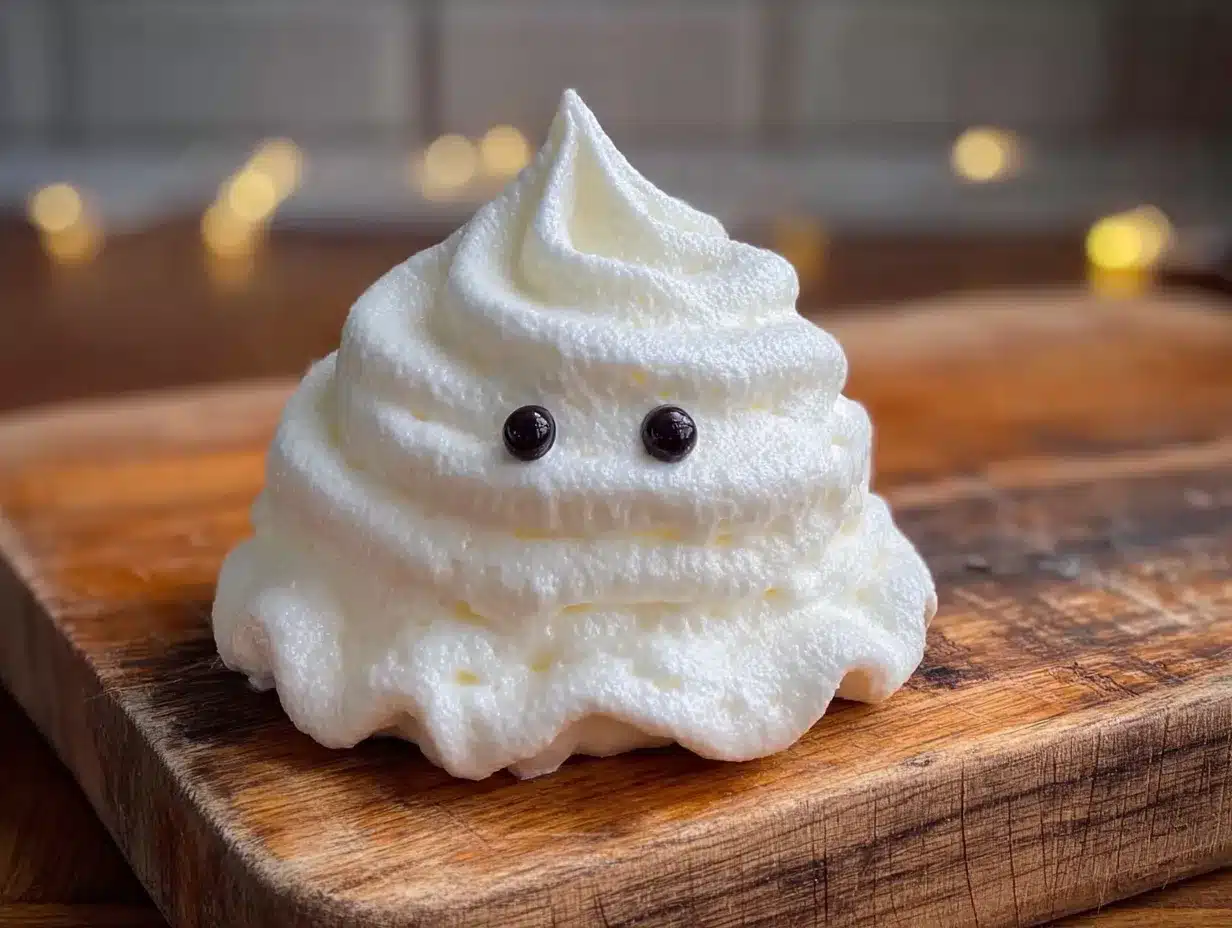
Honestly, I couldn’t blame her. There’s something suspicious about a cookie that starts as a bowl of cloudy liquid and ends up looking like a haunted cloud. But I’ve been making meringues long enough to trust the process—the way the sugar dissolves into the whites, the glossy peaks that hold their shape, the slow, low heat that turns them into something magical. For this batch, I piped them into wobbly ghost shapes, added tiny chocolate chip eyes, and baked them until they were dry and light as air.
Jenna showed up at the party with the tray, still skeptical. Forty minutes later, every ghost was gone, and she was texting me for the recipe. That’s the thing about these easy ghost meringue cookies—they look like a showstopper, but they’re almost embarrassingly simple. No complicated techniques, no fancy equipment. Just a few ingredients, a little patience, and a whole lot of Halloween spirit.
Why You’ll Love This Recipe
These ghost meringue cookies have become my go-to Halloween dessert for a handful of very good reasons. Let me break it down for you.
- No-Bake Magic: Wait—did I say no-bake? Technically, meringues do bake, but at such a low temperature that it’s more like drying them out. No high heat, no risk of burning, and you can basically set them and forget them.
- Simple Ingredients: You probably have everything in your kitchen right now. Eggs, sugar, vanilla, cream of tartar, and chocolate chips. That’s it. No trips to a specialty store for black food coloring or weird gelatin sheets.
- Perfect for Halloween Parties: These little ghosts are the kind of treat that makes people stop and smile. They’re cute without being fussy, spooky without being scary, and they fit right in next to a Halloween charcuterie board or a bowl of candy corn.
- Crowd-Pleaser: Kids love them because they look like ghosts. Adults love them because they’re not overly sweet and have that melt-in-your-mouth texture. Even my friend who “doesn’t do desserts” ate three.
- Unbelievably Delicious: There’s something about meringue that feels like a secret. It’s light, airy, and just sweet enough—like eating a vanilla cloud with a crunch.
What makes this recipe different from every other ghost cookie out there? It’s the texture. I’ve perfected the ratio of sugar to egg whites so you get that crisp exterior with a slightly chewy center. No hollow shells, no weeping meringue, no sticky mess. Just pure, ghostly perfection.
And honestly? There’s something deeply satisfying about making something this cute with your own two hands. It’s the kind of recipe that makes you feel like a kitchen wizard, even if you’ve never whipped egg whites before.
What Ingredients You Will Need
This recipe uses simple, everyday ingredients to create something that looks like it came from a fancy bakery. Here’s what you’ll need and why each one matters.
- 3 large egg whites (room temperature) — The foundation of any meringue. Room temperature whites whip up higher and hold more air than cold ones. Separate them carefully—any yolk in the bowl will ruin your peaks.
- ¾ cup granulated sugar (150 grams) — Not powdered sugar, not brown sugar. Granulated dissolves cleanly into the whites and gives meringue its structure. I’ve tried substitutions, and trust me, granulated is the way to go.
- ¼ teaspoon cream of tartar — This is your insurance policy. It stabilizes the egg whites, helps them hold their shape, and prevents them from collapsing. If you don’t have it, you can use a teaspoon of lemon juice or white vinegar instead.
- 1 teaspoon vanilla extract — Pure vanilla, not imitation. It adds warmth and depth to the flavor. You could also use vanilla bean paste for those little specks that look beautiful, but extract works perfectly.
- ¼ cup mini chocolate chips (about 40 grams) — For the eyes. I prefer mini chips because they look more proportional on a small ghost. Dark chocolate chips give a nice contrast against the white meringue.
- Optional: pink gel food coloring — For rosy cheeks. Totally optional, but it makes the ghosts look friendlier. Just a tiny dot on each one.
Ingredient Tips from My Kitchen: I always use organic eggs when I’m making meringue. The whites seem to whip up fluffier, and the flavor is cleaner. If you’re using farm-fresh eggs, let them sit in the fridge for a few days before separating—older whites actually whip better. For the sugar, I prefer a fine granulated sugar because it dissolves faster. If your sugar is coarse, give it an extra minute or two in the mixer.
Equipment Needed
You don’t need a professional pastry kitchen to make these ghosts, but having the right tools makes the process smoother.
- Stand mixer or hand mixer — A stand mixer with a whisk attachment is ideal, but a hand mixer works just fine. You’ll be whipping for about 8-10 minutes, so your arm might get tired with a hand mixer.
- Large glass or metal mixing bowl — Plastic bowls can retain grease, which prevents egg whites from whipping properly. Glass or metal is best.
- Piping bag with a round tip — A large round tip (like Ateco 805 or Wilton 1A) creates that classic ghost shape. No piping bag? A zip-top bag with the corner snipped off works in a pinch.
- Baking sheet lined with parchment paper — Parchment is non-negotiable here. Wax paper will stick, and silicone mats can sometimes cause meringues to spread.
- Kitchen scale — Not required, but highly recommended. Measuring sugar by weight is more accurate and gives you consistent results every time.
Budget-Friendly Alternatives: If you don’t have a piping bag, you can use a sturdy zip-top bag. Just fill it, seal it, and snip off a tiny corner. It won’t give you the same precision, but the ghosts will still look adorable. And if you don’t have cream of tartar, a splash of lemon juice works as a substitute.
Preparation Method
Let’s make some ghosts. This process is straightforward, but meringue has a few quirks you should know about. Follow these steps, and you’ll be golden.
- Preheat your oven to 200°F (93°C). Yes, that’s really it. Line a large baking sheet with parchment paper and set it aside.
- Clean your bowl and whisk attachment thoroughly. Any trace of grease or yolk will prevent your egg whites from whipping. Wipe them down with a little lemon juice on a paper towel if you’re nervous.
- Add the room temperature egg whites to the bowl. Start mixing on medium-low speed until they become frothy and bubbly—about 1 minute. You’ll see lots of tiny bubbles forming.
- Add the cream of tartar. Continue mixing on medium speed until soft peaks form. This means when you lift the whisk, the egg whites form a soft, droopy peak that flops over. This takes about 3-4 minutes.
- Start adding the sugar, one tablespoon at a time. This is important—don’t dump it all in at once. Add a spoonful, let it mix for 15 seconds, then add another. The mixture will start to look glossy and thick.
- Add the vanilla extract. Once all the sugar is in, add the vanilla and increase the speed to medium-high. Whip until stiff, glossy peaks form. You know it’s ready when you lift the whisk and the peak stands straight up without flopping. Rub a little bit between your fingers—if it feels gritty, keep mixing. If it’s smooth, you’re done. This usually takes 6-8 minutes total.
- Test the bowl. Turn the bowl upside down over your head. (Okay, maybe not over your head—but over the sink.) If the meringue stays put, it’s ready. If it slides, keep whipping.
- Transfer the meringue to a piping bag fitted with a round tip. Fill it about halfway—don’t overfill, or it’ll be hard to control.
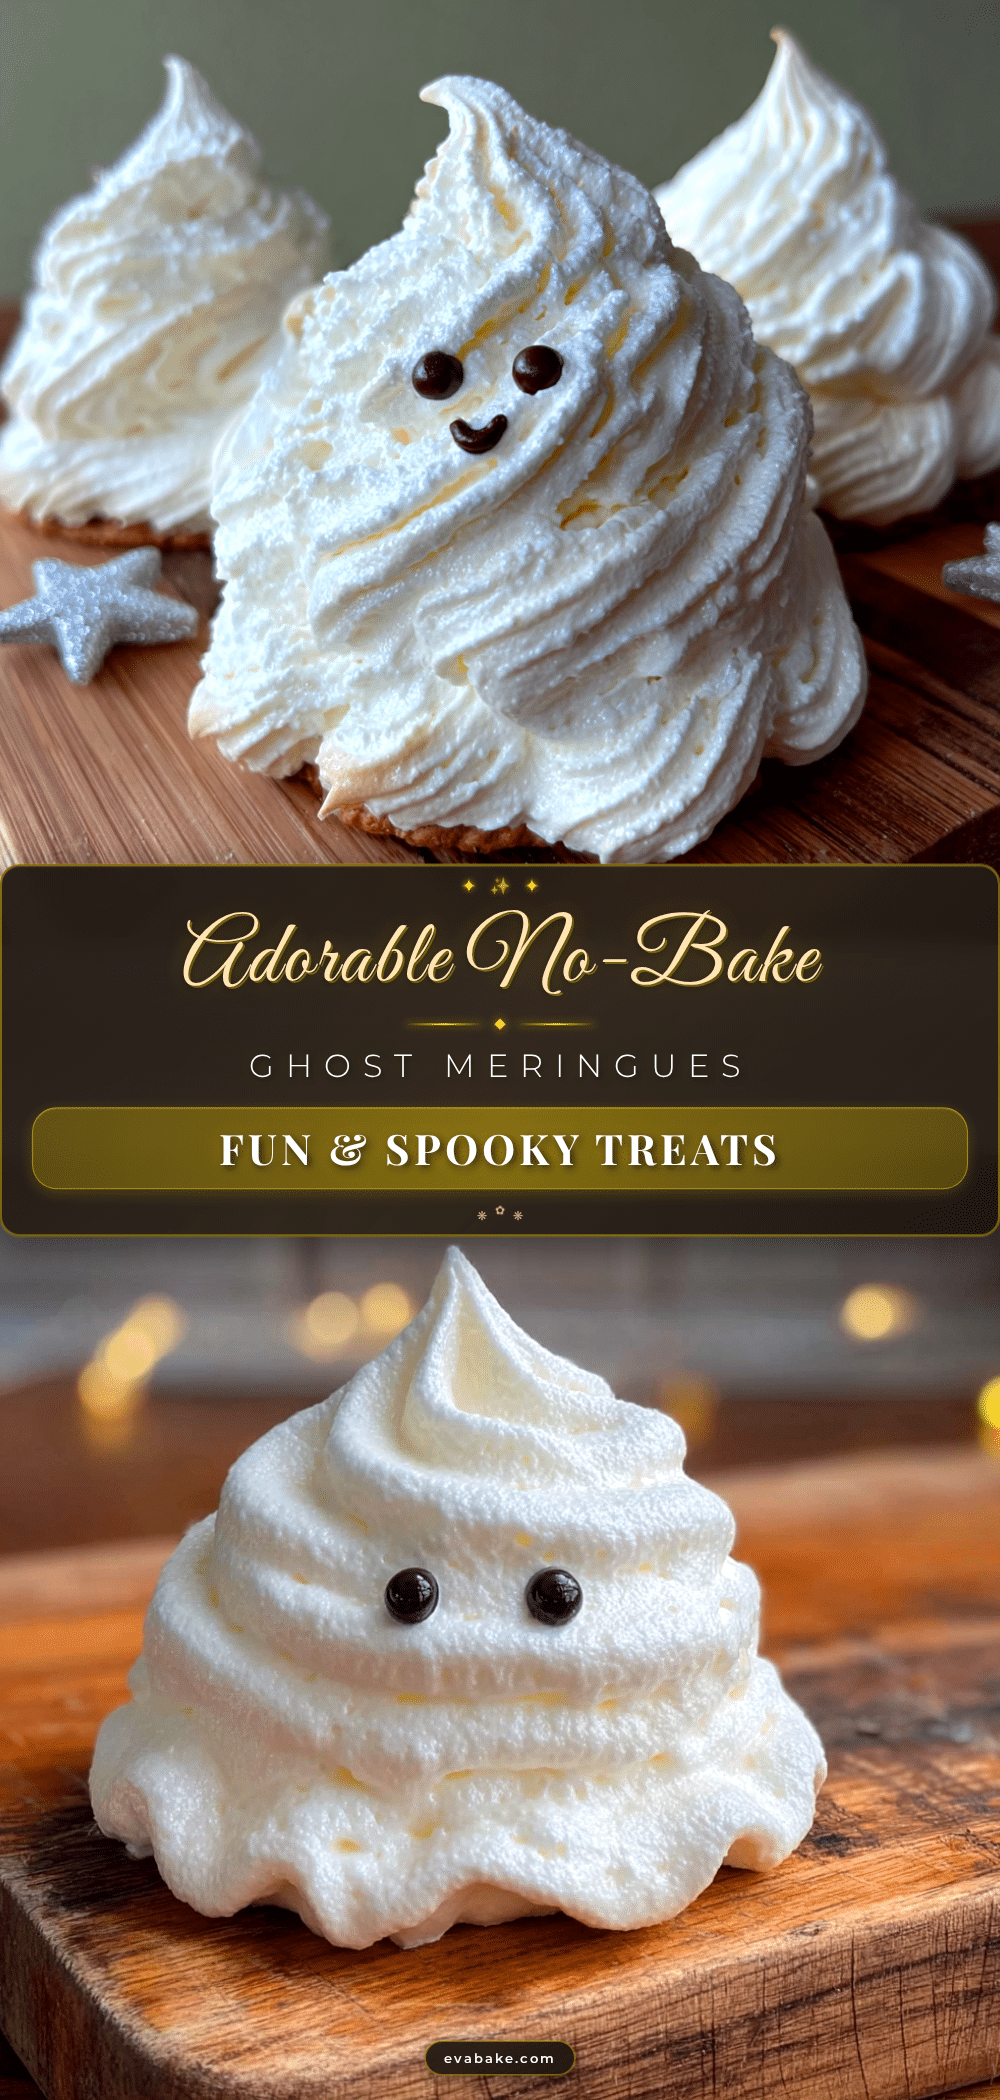
- Pipe ghost shapes onto the prepared baking sheet. Hold the piping bag straight up and down, about an inch above the parchment. Squeeze gently to create a round base, then lift the bag straight up as you squeeze, creating a tall, wobbly shape. Release pressure and pull away to create a little peak on top. Space them about 2 inches apart—they don’t spread much, but they need airflow.
- Add the eyes. Gently press two mini chocolate chips into each ghost for eyes. You can also add a tiny dot of pink food coloring for cheeks using a toothpick.
- Bake for 60-75 minutes. The meringues are done when they’re dry to the touch and easily lift off the parchment. They should be crisp on the outside but still slightly soft in the center. If they’re browning at all, your oven is too hot.
- Turn off the oven and leave the ghosts inside to cool completely. This is the secret to perfect meringues. Let them sit in the turned-off oven for at least an hour, or even overnight. This dries them out completely and gives them that perfect crunch.
Visual Cues: When you pipe the ghosts, they should look soft and pillowy, like little clouds. As they bake, they’ll firm up but won’t change color much. If you see any browning, your oven is too hot—crack the door open slightly. The chocolate chips should stay intact and not melt.
Cooking Tips & Techniques
I’ve made my share of meringue mistakes, so you don’t have to. Here’s what I’ve learned the hard way.
The Humidity Problem: Meringue is basically a sponge for moisture. If it’s a rainy or humid day, your meringues might turn out sticky or chewy instead of crisp. Make these on a dry day if possible. If you can’t wait, bake them a little longer and store them in an airtight container with a silica gel packet (yes, the ones from shoeboxes—they work).
The Overmixing Trap: You can overwhip meringue. It starts looking grainy and separated, and it’ll weep liquid as it sits. If you see that, you’ve gone too far. Unfortunately, there’s no saving it—you have to start over. That’s why I stop mixing as soon as I see stiff, glossy peaks.
The Sugar Dissolving Test: This is my favorite trick. Rub a tiny bit of meringue between your thumb and forefinger. If it feels smooth and silky, the sugar has dissolved. If it feels gritty, keep whipping. Gritty meringue leads to weeping and sticky spots.
Timing Strategy: These ghosts take time, but most of it is hands-off. I usually whip them up in the evening, pipe them, bake them for an hour, then leave them in the turned-off oven overnight. By morning, they’re perfect. It feels like magic.
Multitasking: While the meringue is whipping, you can prepare your piping bag, line your baking sheet, and measure out your chocolate chips. That way, once the meringue is ready, you can pipe immediately. Meringue doesn’t like to sit around—it starts deflating almost immediately.
Variations & Adaptations
These ghost meringues are endlessly customizable. Here are some of my favorite twists.
- Vegan Meringues: Use aquafaba (the liquid from a can of chickpeas) instead of egg whites. Whip it the same way—it takes a little longer, but it works beautifully. Use dairy-free chocolate chips for the eyes.
- Flavor Variations: Swap the vanilla for peppermint extract for a wintery ghost, or add a teaspoon of cocoa powder for chocolate ghosts. You can also add a drop of food coloring to the meringue before piping—green for Frankenstein ghosts, orange for pumpkin ghosts.
- Spooky Decorations: Instead of chocolate chips, use black sanding sugar for eyes, or pipe little mouths with melted chocolate. You can also dust the finished ghosts with edible glitter for a magical effect.
- Different Sizes: Pipe mini ghosts for cupcake toppers, or giant ghosts for a dramatic centerpiece. Just adjust the baking time—smaller ghosts need about 45 minutes, larger ones might need 90.
- My Personal Favorite: I once made a batch with a drop of rose water and topped them with crushed freeze-dried raspberries. They looked like haunted pink clouds and tasted incredible. Just be careful with the rose water—a little goes a long way.
Serving & Storage Suggestions
These ghosts are best served at room temperature, straight from the oven (or the cooling rack). They’re crisp on the outside and melt on your tongue—it’s a texture experience.
Presentation Ideas: Arrange them on a platter with candy corn Rice Krispie treats and mummy-wrapped hot dogs for a full Halloween spread. Or stick them on top of cupcakes for an instant upgrade. You can also thread them onto skewers for a ghostly kebab.
Storage: Store your ghost meringues in an airtight container at room temperature. Do NOT refrigerate them—the moisture will ruin their texture. They’ll stay crisp for up to two weeks if stored properly. If they soften, you can pop them back in a 200°F oven for 10 minutes to re-crisp them.
Freezer Tips: Meringues freeze surprisingly well. Place them in a single layer in an airtight container with parchment between layers. They’ll keep for up to three months. Thaw at room temperature for 15 minutes before serving.
Flavor Development: Freshly baked meringues are amazing, but they actually get better after a day or two. The texture becomes more evenly crisp, and the vanilla flavor mellows out beautifully. If you can resist eating them all, wait a day.
Nutritional Information & Benefits
Let’s be honest—these aren’t health food. But they’re lighter than most Halloween treats, and they have a few surprising benefits.
Estimated Nutritional Values (per ghost):
- Calories: 35
- Fat: 0.5g
- Carbohydrates: 7g
- Sugar: 7g
- Protein: 0.5g
Health Highlights: Egg whites are pure protein, which means these cookies have a tiny protein boost compared to traditional butter cookies. They’re also naturally gluten-free, dairy-free, and nut-free, making them a safe choice for many dietary restrictions. The sugar content is lower than most Halloween cookies because meringue is mostly air—you’re getting more volume for fewer calories.
Dietary Considerations: If you’re watching your sugar intake, you can substitute a portion of the sugar with a monk fruit sweetener blend. The texture won’t be exactly the same, but it’s a decent swap. For a lower-carb option, use a sugar-free sweetener designed for baking—just be aware that the texture might be slightly different.
My Perspective: I love that these ghosts let me enjoy a sweet treat without feeling weighed down. They’re light, airy, and satisfying in a way that a heavy brownie isn’t. Plus, they’re portion-controlled—one ghost is just enough to satisfy a craving.
Conclusion
These easy ghost meringue cookies have become a Halloween tradition in my house, and I think they deserve a spot in yours too. They’re simple enough for a beginner baker, impressive enough for a party, and so cute that they make everyone smile. Plus, they’re a great project to do with kids—piping the ghosts is surprisingly satisfying, and adding the eyes feels like bringing them to life.
I’d love to hear how your ghosts turn out. Did you add rosy cheeks? Make them into giant ghosts? Try a different flavor? Drop a comment below and let me know—I read every single one. And if you’re looking for more Halloween inspiration, don’t miss my spiderweb Halloween cookie cake or these Halloween sugar cookies with royal icing.
Happy Halloween, and happy baking! May your ghosts be crisp, your kitchen be filled with vanilla-scented air, and your party be the spookiest on the block.
Frequently Asked Questions
Can I make these ghost meringues without a piping bag?
Absolutely. Use a sturdy zip-top bag with a tiny corner snipped off. The ghosts won’t be as perfectly shaped, but they’ll still look adorable. You can also use a small spoon to drop dollops of meringue onto the baking sheet and shape them gently with the back of the spoon.
Why did my meringue turn out sticky or chewy?
Sticky meringue usually means one of three things: high humidity, underbaking, or sugar that didn’t fully dissolve. Make sure you whip the meringue until it’s smooth between your fingers, bake it long enough, and store it in an airtight container. If it’s humid, leave the ghosts in the turned-off oven overnight to dry out completely.
Can I use liquid egg whites from a carton?
I don’t recommend it. Carton egg whites often have stabilizers that prevent them from whipping properly. They also lack the structure of fresh egg whites. Stick with fresh eggs for the best results—you can always use the yolks for homemade tomato soup or another recipe.
How do I know when the meringue is whipped enough?
The meringue should be glossy, thick, and form stiff peaks that stand straight up when you lift the whisk. Rub a little between your fingers—if it’s smooth and not gritty, the sugar has dissolved. If it’s gritty, keep whipping. The whole process usually takes 8-10 minutes with a stand mixer on medium-high speed.
Can I freeze these ghost meringues?
Yes! Place them in a single layer in an airtight container with parchment paper between layers. They’ll keep in the freezer for up to three months. Thaw at room temperature for 15 minutes before serving. They might lose a tiny bit of their crunch, but they’ll still be delicious.
Pin This Recipe!
Easy Ghost Meringue Cookies: Best No-Bake Halloween Treat
These easy ghost meringue cookies are crisp, light, and eerily perfect for Halloween parties. Made with simple ingredients and no complicated techniques, they look like a showstopper but are almost embarrassingly simple to make.
- Prep Time: 15 minutes
- Cook Time: 60-75 minutes
- Total Time: 1 hour 30 minutes (plus cooling time)
- Yield: 24 servings 1x
- Category: Dessert
- Cuisine: American
Ingredients
- 3 large egg whites (room temperature)
- ¾ cup granulated sugar (150 grams)
- ¼ teaspoon cream of tartar
- 1 teaspoon vanilla extract
- ¼ cup mini chocolate chips (about 40 grams)
- Optional: pink gel food coloring
Instructions
- Preheat your oven to 200°F (93°C). Line a large baking sheet with parchment paper and set it aside.
- Clean your bowl and whisk attachment thoroughly to remove any grease or yolk.
- Add the room temperature egg whites to the bowl. Start mixing on medium-low speed until they become frothy and bubbly—about 1 minute.
- Add the cream of tartar. Continue mixing on medium speed until soft peaks form—about 3-4 minutes.
- Start adding the sugar, one tablespoon at a time, mixing for 15 seconds between each addition. The mixture will start to look glossy and thick.
- Add the vanilla extract. Increase the speed to medium-high and whip until stiff, glossy peaks form—about 6-8 minutes total. The meringue should feel smooth between your fingers.
- Transfer the meringue to a piping bag fitted with a round tip. Fill it about halfway.
- Pipe ghost shapes onto the prepared baking sheet. Hold the piping bag straight up and down, squeeze gently to create a round base, then lift the bag straight up as you squeeze to create a tall, wobbly shape. Release pressure and pull away to create a little peak on top. Space them about 2 inches apart.
- Gently press two mini chocolate chips into each ghost for eyes. Optionally, add a tiny dot of pink food coloring for cheeks using a toothpick.
- Bake for 60-75 minutes, until the meringues are dry to the touch and easily lift off the parchment.
- Turn off the oven and leave the ghosts inside to cool completely—at least 1 hour or overnight.
Notes
Make these on a dry day to avoid sticky meringue. If it’s humid, leave the ghosts in the turned-off oven overnight to dry out completely. Store in an airtight container at room temperature for up to two weeks. Do not refrigerate.
Nutrition
- Serving Size: 1 ghost
- Calories: 35
- Sugar: 7
- Sodium: 10
- Fat: 0.5
- Carbohydrates: 7
- Protein: 0.5
Keywords: ghost meringue cookies, Halloween cookies, meringue cookies, no-bake Halloween treat, easy ghost cookies


