Late October, the kitchen light hums low over a counter covered in chocolate pudding smears and crushed cookie dust. I had exactly twenty minutes before the first tiny ghost showed up at the door—not a trick-or-treater, but my niece, who had been promised we would make something “spooky and gross” together. The only thing I wanted was a dessert that didn’t require the oven, didn’t need a mixer, and wouldn’t leave me scrubbing pans at midnight. These easy graveyard dirt cups with crushed Oreos and gummy worms came together in the time it took her to put on her costume. (Honestly, that’s the kind of recipe you keep in your back pocket forever.)
I remember standing there, spoon in one hand, bag of Oreos in the other, thinking how ridiculous it was that something this simple could make a kid’s entire week. But that’s the thing about this easy Oreo dessert with worms—it doesn’t need to be complicated to be memorable. The layers of creamy chocolate pudding, the crunch of crushed cookies, the silly little worms poking out like they’re escaping their chocolate grave. It’s playful without trying too hard, and it tastes exactly like childhood should.
This isn’t a recipe that demands precision or fancy techniques. It’s the kind you can make with a five-year-old helper who eats more gummy worms than she places in the cups. And honestly? That’s the whole point. These graveyard dirt cups are messy, fun, and completely forgiving—just like the best Halloween memories tend to be.
Why You’ll Love This Recipe
I’ve tested this recipe more times than I care to count—through three Halloweens, two classroom parties, and one memorable afternoon where I accidentally used instant pudding that hadn’t set properly. (Let’s just say the worms were swimming.) What I learned is that this particular version hits every single note you want from an easy graveyard dirt cups recipe.
- No Baking Required: The oven stays off. No preheating, no checking, no worrying about burning anything. This comes together entirely on the countertop.
- Pantry-Friendly Ingredients: You probably have most of these items already. Chocolate pudding mix, milk, Oreos, and gummy worms. That’s it. No fancy grocery runs.
- Perfect for Halloween Parties: These individual cups are ideal for school celebrations, office potlucks, or the chaotic thirty minutes before trick-or-treating starts. They travel well and look impressive with minimal effort.
- Kid-Approved and Adult-Friendly: I’ve watched grown adults sneak these from the fridge at parties. The nostalgic combination of chocolate and crushed cookies hits everyone the same way.
- Customizable in Seconds: You can dress these up with pumpkin-shaped sprinkles, swap the pudding flavor, or add a layer of crushed graham crackers. The base recipe is bulletproof.
What makes these graveyard dirt cups different from other versions is the texture balance. I spent time figuring out the right ratio of pudding to crushed Oreos so you get that creamy-crunchy contrast in every single bite. Some recipes end up soupy or overly dry—this one lands right in the sweet spot. Plus, the gummy worms stay chewy without turning into sad, hard little rocks after a day in the fridge. (That’s a real problem, by the way. I learned the hard way.)
There’s something about watching someone take their first bite of these. The way their eyes go wide when they hit that layer of crushed cookies hiding underneath the pudding. It’s comfort food dressed up in its Halloween best—simple, silly, and absolutely satisfying.
What Ingredients You Will Need
This recipe uses straightforward ingredients that work together to create that nostalgic, creamy, crunchy texture you remember from childhood birthday parties. Nothing fancy here—just smart choices that deliver every time.
- Chocolate Instant Pudding Mix (two 3.9-ounce boxes): I use Jell-O brand for consistent results, but store brands work fine too. The instant version is non-negotiable here—cook-and-serve won’t set properly for this recipe. You need the kind that thickens in the fridge.
- Cold Whole Milk (3 cups): Whole milk gives you the richest, creamiest pudding texture. I’ve tested this with 2% and it works, but the result is noticeably thinner. Avoid skim milk entirely unless you enjoy watery dirt cups. (You don’t. Trust me.)
- Oreo Cookies (one standard 14.3-ounce package): Regular Oreos work best. Double Stuf creates too much cream filling and throws off the “dirt” texture. You want that dark, crumbly look that mimics actual soil. If you’re feeling ambitious, you can twist off the cream centers, but I never bother—the extra sweetness works well here.
- Gummy Worms (one 5-ounce bag): Look for the sour-coated variety if you want a tangy contrast to the sweet pudding. Regular gummy worms are great too. I prefer the long, thin ones because they look more dramatic poking out of the “dirt.” Trolli and Black Forest both make excellent options.
- Optional Garnishes: Pumpkin-shaped sprinkles, candy corn, or small ghost marshmallows for extra flair. I sometimes add a few crushed graham crackers on top for a sandy texture contrast.
Ingredient Selection Tips
When choosing your Oreos, check the expiration date—stale cookies won’t crush properly and end up tasting flat. For the gummy worms, avoid the giant-sized ones unless you’re making jumbo cups. Standard worms fit perfectly in 8-ounce cups. If you’re serving these to a crowd with dietary restrictions, you can use dairy-free milk and a vegan-friendly pudding mix, though the texture will be slightly softer. I’ve also successfully swapped the Oreos for gluten-free chocolate sandwich cookies—just check that your pudding mix is certified gluten-free if that matters for your crowd.
Substitution Guidance
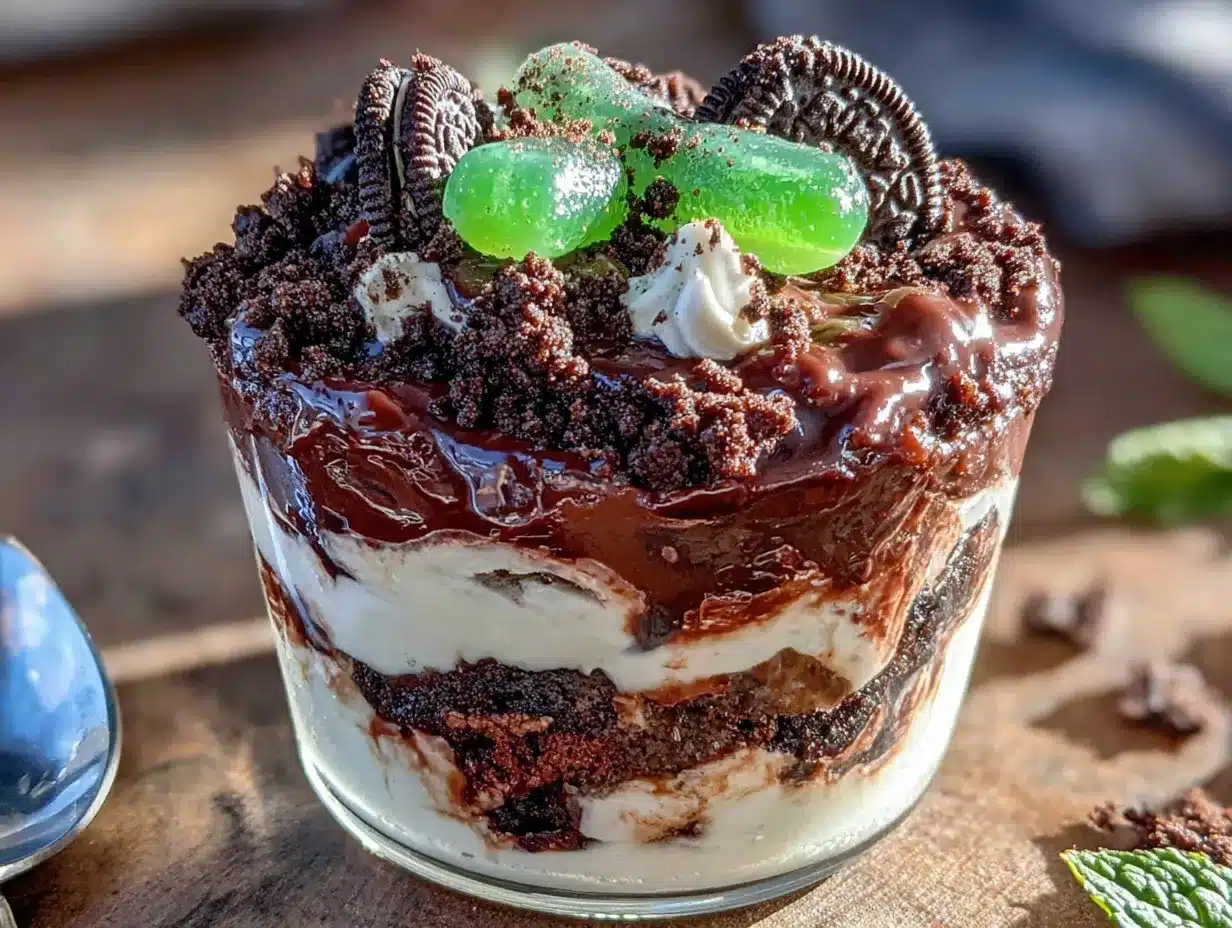
Don’t have Oreos? Chocolate wafer cookies or even crushed chocolate graham crackers work in a pinch. The visual effect changes slightly—you lose that distinct dark crumb—but the taste is still excellent. For the gummy worms, you can use gummy spiders, gummy bats, or even gummy bones if you find them. The theme stays intact as long as you have something creepy-crawly poking out of the dirt.
Equipment Needed
One of the best things about this recipe is how little equipment it requires. You don’t need a stand mixer, food processor, or any specialty tools. Here’s what you’ll actually use:
- Large Mixing Bowl: Any medium-to-large bowl works. Glass or stainless steel is ideal because it chills faster if you pop it in the fridge.
- Whisk: A standard wire whisk for mixing the pudding. A fork works in an emergency, but you’ll get lumps.
- Measuring Cups: For the milk. A liquid measuring cup with a spout makes pouring cleaner.
- Plastic Ziploc Bag (gallon size): For crushing the Oreos. This is my preferred method because it contains the mess and lets you control the crumb size. You can also use a food processor, but honestly, the bag method is faster and requires zero cleanup.
- Rolling Pin or Heavy Can: To crush the cookies inside the bag. A wine bottle works too—I’ve used one more times than I’d like to admit.
- Small Clear Cups (8-ounce size): Clear plastic cups let you see the layers, which is half the fun. I buy the 8-ounce party cups from the grocery store—they’re cheap and perfect for individual servings. You can also use small mason jars or even paper cups if that’s what you have.
- Small Spatula or Spoon: For layering the pudding and crushed cookies.
If you don’t have a rolling pin, a heavy-bottomed skillet or even your fist works for crushing the cookies. (Just make sure the bag is sealed tight—I learned that lesson the hard way with cookie dust all over my kitchen floor.) The equipment list is short because this recipe was designed to be approachable. You don’t need a fancy kitchen to make these graveyard dirt cups work.
Preparation Method
This comes together in about 20 minutes of active time, plus a couple hours in the fridge for the pudding to set. I’ve broken it down into clear steps so you can follow along without any guesswork.
- Crush the Oreos: Place the entire package of Oreos (cream filling included) into a large gallon-sized ziploc bag. Seal it tightly, pressing out as much air as possible. Using a rolling pin or heavy-bottomed can, crush the cookies until they resemble coarse sand. You want a mix of fine crumbs and slightly larger pieces—that variation creates the most realistic “dirt” texture. Set aside about 1/4 cup of the crushed Oreos for topping later. (Pro tip: crush them in batches if your bag seems too full. Overstuffing leads to tears—both emotional and literal.)
- Make the Pudding: In a large mixing bowl, combine both boxes of instant chocolate pudding mix with 3 cups of cold whole milk. Whisk vigorously for about 2 minutes until the mixture thickens slightly. It will still be fairly thin at this point—that’s normal. The pudding will set as it chills. Scrape down the sides of the bowl with a spatula to make sure everything incorporates evenly.
- Chill the Pudding: Place the bowl of pudding in the refrigerator for 5 minutes. This partial set is a game-changer—it makes layering much easier because the pudding isn’t runny. Don’t skip this step unless you enjoy muddy, messy layers that blend together.
- Prepare Your Cups: Arrange your 8-ounce clear cups on a baking sheet or tray. This makes moving them to the fridge much easier. You should have enough for about 8-10 cups, depending on how generously you fill them.
- Layer the First Round: Spoon about 2 tablespoons of crushed Oreos into the bottom of each cup. Press down gently with the back of the spoon to create a firm base layer. This prevents the pudding from seeping through and keeps your layers distinct.
- Add the Pudding Layer: Spoon or pour the partially set chocolate pudding over the Oreo layer, filling each cup about halfway. Leave room for the second layer of crushed cookies on top. Use a small spatula or the back of a spoon to spread the pudding evenly.
- Insert the Gummy Worms: Take 2-3 gummy worms per cup and gently press them into the pudding so they’re partially submerged. Leave the other half sticking out—this creates the illusion that worms are crawling out of the dirt. Angle them in different directions for a more chaotic, creepy effect.
- Top with More Crushed Oreos: Sprinkle a generous layer of the reserved crushed Oreos over the pudding, covering the surface completely. You want to hide the pudding entirely so it looks like a cup of dirt. The worms should still be visible poking through the top.
- Add Extra Garnishes (Optional): If you’re using pumpkin sprinkles, candy corn, or ghost marshmallows, place them on top of the Oreo layer now. I like to add a few extra crushed Oreos around the edges to make it look more realistic.
- Chill Until Set: Place the tray of assembled dirt cups in the refrigerator for at least 2 hours. This allows the pudding to fully set and the flavors to meld together. The cups are best when chilled overnight—the texture improves significantly.
When you’re ready to serve, pull the cups out of the fridge and give them a quick look. If the Oreo crumbs have darkened from absorbing moisture, you can sprinkle a fresh layer of crushed cookies on top right before serving. This little trick makes them look freshly made every time.
Cooking Tips & Techniques
After making these graveyard dirt cups more times than I can count, I’ve picked up a few tricks that make the process smoother and the results better. Here’s what I wish someone had told me the first time.
Don’t Overmix the Pudding: Instant pudding is forgiving, but overwhisking can make it grainy. Stop as soon as the powder dissolves and the mixture starts to thicken. Two minutes is plenty. I learned this after a particularly aggressive whisking session left me with lumpy pudding that never fully smoothed out.
Crush the Oreos in Batches: If you’re making a double batch, don’t try to crush all the cookies at once. The bag will burst—I’ve had Oreo dust on my ceiling, and it’s not a look. Work in two or three batches for better control and less mess.
Use a Piping Bag for the Pudding: This is my favorite pro move. Transfer the partially set pudding to a piping bag or even a ziploc bag with the corner snipped off. This lets you pipe the pudding into the cups cleanly without dripping down the sides. It keeps your layers looking sharp and professional.
Let the Worms “Settle”: After inserting the gummy worms, wait about 10 minutes before adding the top layer of Oreo crumbs. The worms will settle slightly into the pudding, which makes them look more natural—like they’re actually burrowing through dirt. It’s a small detail, but it makes a big difference visually.
Watch Your Ratios: The most common mistake I see is using too much pudding and not enough crushed Oreos. You want about a 60-40 ratio of pudding to cookie crumbs. Too much pudding and the cups feel one-dimensional. Too many Oreos and they’re dry and crumbly. Balance is everything here.
Plan Your Timing: These cups need at least 2 hours in the fridge, but they’re actually better after 4-6 hours. The pudding sets more firmly, and the Oreo crumbs soften slightly into the pudding, creating that perfect dirt-like texture. I typically make them the morning of a party or the night before.
Variations & Adaptations
One of the reasons I love this recipe is how easily it adapts to different tastes, dietary needs, and occasions. Here are some variations I’ve tried and loved.
Spooky Spiderweb Version
Before adding the top layer of crushed Oreos, drizzle a thin layer of melted white chocolate over the pudding in a spiral pattern. Use a toothpick to drag lines from the center outward, creating a spiderweb effect. Then add the Oreo crumbs around the edges, leaving the web visible in the center. This version is stunning for Halloween parties and takes about five extra minutes.
Dairy-Free Adaptation
Use almond milk, oat milk, or coconut milk in place of whole milk. The pudding will set slightly softer, so add an extra 15-20 minutes of chilling time. For the Oreos, check the packaging—standard Oreos are actually dairy-free, which makes this swap surprisingly easy. I’ve served this version to dairy-sensitive guests and they couldn’t tell the difference.
Peanut Butter Dirt Cups
Add a layer of peanut butter between the pudding and the crushed Oreos. Warm 1/2 cup of peanut butter in the microwave for 20 seconds, then drizzle it over the pudding before adding the cookie crumbs. The salty-sweet combination is incredible. Just make sure to check for peanut allergies if you’re serving these at a school event.
Pumpkin Patch Variation
Swap the gummy worms for candy pumpkins or candy corn. Use orange and green sprinkles on top. This version works perfectly for fall gatherings that aren’t specifically Halloween-themed. I made these for a Friendsgiving potluck and they disappeared faster than the actual pumpkin pie.
Gluten-Free Option
Use gluten-free chocolate sandwich cookies in place of standard Oreos. Most major brands now carry a gluten-free version that tastes nearly identical. Check your pudding mix label to confirm it’s gluten-free—most instant pudding is, but it’s worth verifying. The texture and appearance are indistinguishable from the original.
Serving & Storage Suggestions
These graveyard dirt cups are best served cold, straight from the refrigerator. The contrast between the chilled, creamy pudding and the crunchy Oreo topping is what makes every bite satisfying. I recommend serving them in clear cups so the layers are visible—that visual element is half the fun.
For presentation, arrange the cups on a platter or tray lined with fake spiderwebs or orange-and-black sprinkles. If you’re serving them at a party, consider adding a small plastic tombstone or skeleton hand to each cup for extra spooky flair. I found a pack of mini Halloween decorations at the dollar store that works perfectly for this.
These pair beautifully with other Halloween treats. I love serving them alongside my easy candy corn Rice Krispie treats for a dessert table that covers all the nostalgic bases. If you’re hosting a full Halloween party, the perfect Halloween party charcuterie board with candy corn and brie makes an excellent savory counterpart to these sweet cups.
Storage Instructions: Store assembled dirt cups in the refrigerator, covered with plastic wrap or a lid, for up to 4 days. The texture changes slightly over time—the Oreo crumbs will soften and the pudding will firm up—but they remain delicious. I actually prefer them on day two when the flavors have had time to meld.
Freezer Instructions: You can freeze these cups for up to 2 months. Wrap each cup individually in plastic wrap, then place them in a freezer-safe bag. To serve, thaw in the refrigerator overnight. Note that the gummy worms may become slightly firmer after freezing, but they soften as they thaw. I’ve done this for pre-Halloween prep and it works beautifully.
Reheating Note: These are served cold, so no reheating is needed. If you’ve frozen them, just give them enough time to thaw completely in the fridge before serving.
Nutritional Information & Benefits
Let’s be honest—these graveyard dirt cups are a treat, not a health food. But knowing what’s in them helps you enjoy them mindfully. Here’s the estimated nutritional breakdown per serving (based on 8 servings using whole milk and standard Oreos):
| Nutrient | Amount Per Serving |
|---|---|
| Calories | 345 |
| Total Fat | 14g |
| Saturated Fat | 6g |
| Cholesterol | 15mg |
| Sodium | 420mg |
| Total Carbohydrates | 52g |
| Dietary Fiber | 2g |
| Sugars | 38g |
| Protein | 6g |
On the bright side, the milk provides calcium and vitamin D, and the cocoa in the Oreos contains antioxidants. (I’m reaching here, I know.) The gummy worms offer a small amount of protein from the gelatin. But really—this is a dessert meant for celebration, not daily consumption. I serve these at Halloween parties and special occasions, and I encourage everyone to enjoy them without guilt.
For those with dietary concerns, the dairy-free and gluten-free variations mentioned above work well. The sugar content is significant, so if you’re watching your intake, consider using a sugar-free pudding mix and sugar-free gummy worms. The texture remains excellent, and the flavor is still satisfyingly sweet.
Frequently Asked Questions
Can I make these graveyard dirt cups ahead of time?
Absolutely. These are actually better when made a day ahead. The pudding sets more firmly and the flavors meld together beautifully. Assemble them up to 48 hours in advance and keep them covered in the refrigerator. Just add a fresh sprinkle of crushed Oreos right before serving if the top looks a bit dark.
Why is my pudding runny?
This usually happens for one of three reasons: you used cook-and-serve pudding instead of instant, you didn’t whisk long enough, or you didn’t let it chill long enough. Instant pudding needs at least 5 minutes of initial set time and 2 hours of full chill time. If it’s still runny after that, pop it back in the fridge for another hour. If it never sets, you may have accidentally grabbed the wrong pudding box.
Can I use homemade chocolate pudding instead?
You can, but the texture will be different. Homemade pudding is typically softer and richer than instant. If you go this route, cook it until it’s quite thick—it should hold its shape when spooned. Let it cool completely before layering. The flavor will be incredible, but the set won’t be as firm as the instant version.
How do I keep the Oreo crumbs from getting soggy?
The crumbs will naturally soften over time as they absorb moisture from the pudding. To maintain some crunch, reserve about 1/4 cup of crushed Oreos and sprinkle them on top just before serving. This gives you that satisfying crunch contrast even if the cups have been sitting in the fridge for a while.
Can I double this recipe for a crowd?
Easily. This recipe scales perfectly. Just use a larger bowl for the pudding and crush the Oreos in batches. For a party of 20, I typically triple the recipe and use 24-ounce cups. The only thing to watch is fridge space—make sure you have room to chill all the cups before you start assembling.
Conclusion
These easy graveyard dirt cups with crushed Oreos and gummy worms are everything a Halloween dessert should be—fun, simple, and completely irresistible. They don’t require any baking skills or fancy equipment. They don’t demand hours of your time. They just ask you to embrace the silly, slightly spooky joy of making something that looks like dirt but tastes like pure chocolatey happiness.
What I love most about this recipe is how it brings people together. I’ve watched kids giggle as they pull gummy worms out of the “dirt,” and I’ve seen adults sneak second servings when they think no one is looking. It’s the kind of dessert that makes you feel like a kid again, even if only for a few minutes.
So go ahead—make a mess, crush those cookies, and stick some worms in the pudding. Customize it with your favorite Halloween candies or keep it classic. Either way, you’re going to end up with something that makes people smile. And honestly, isn’t that the whole point of Halloween?
I’d love to hear how yours turn out. Drop a comment below or tag me in your photos—I’m always looking for new variations and creative twists. Happy Halloween, and happy eating!
Pin This Recipe!
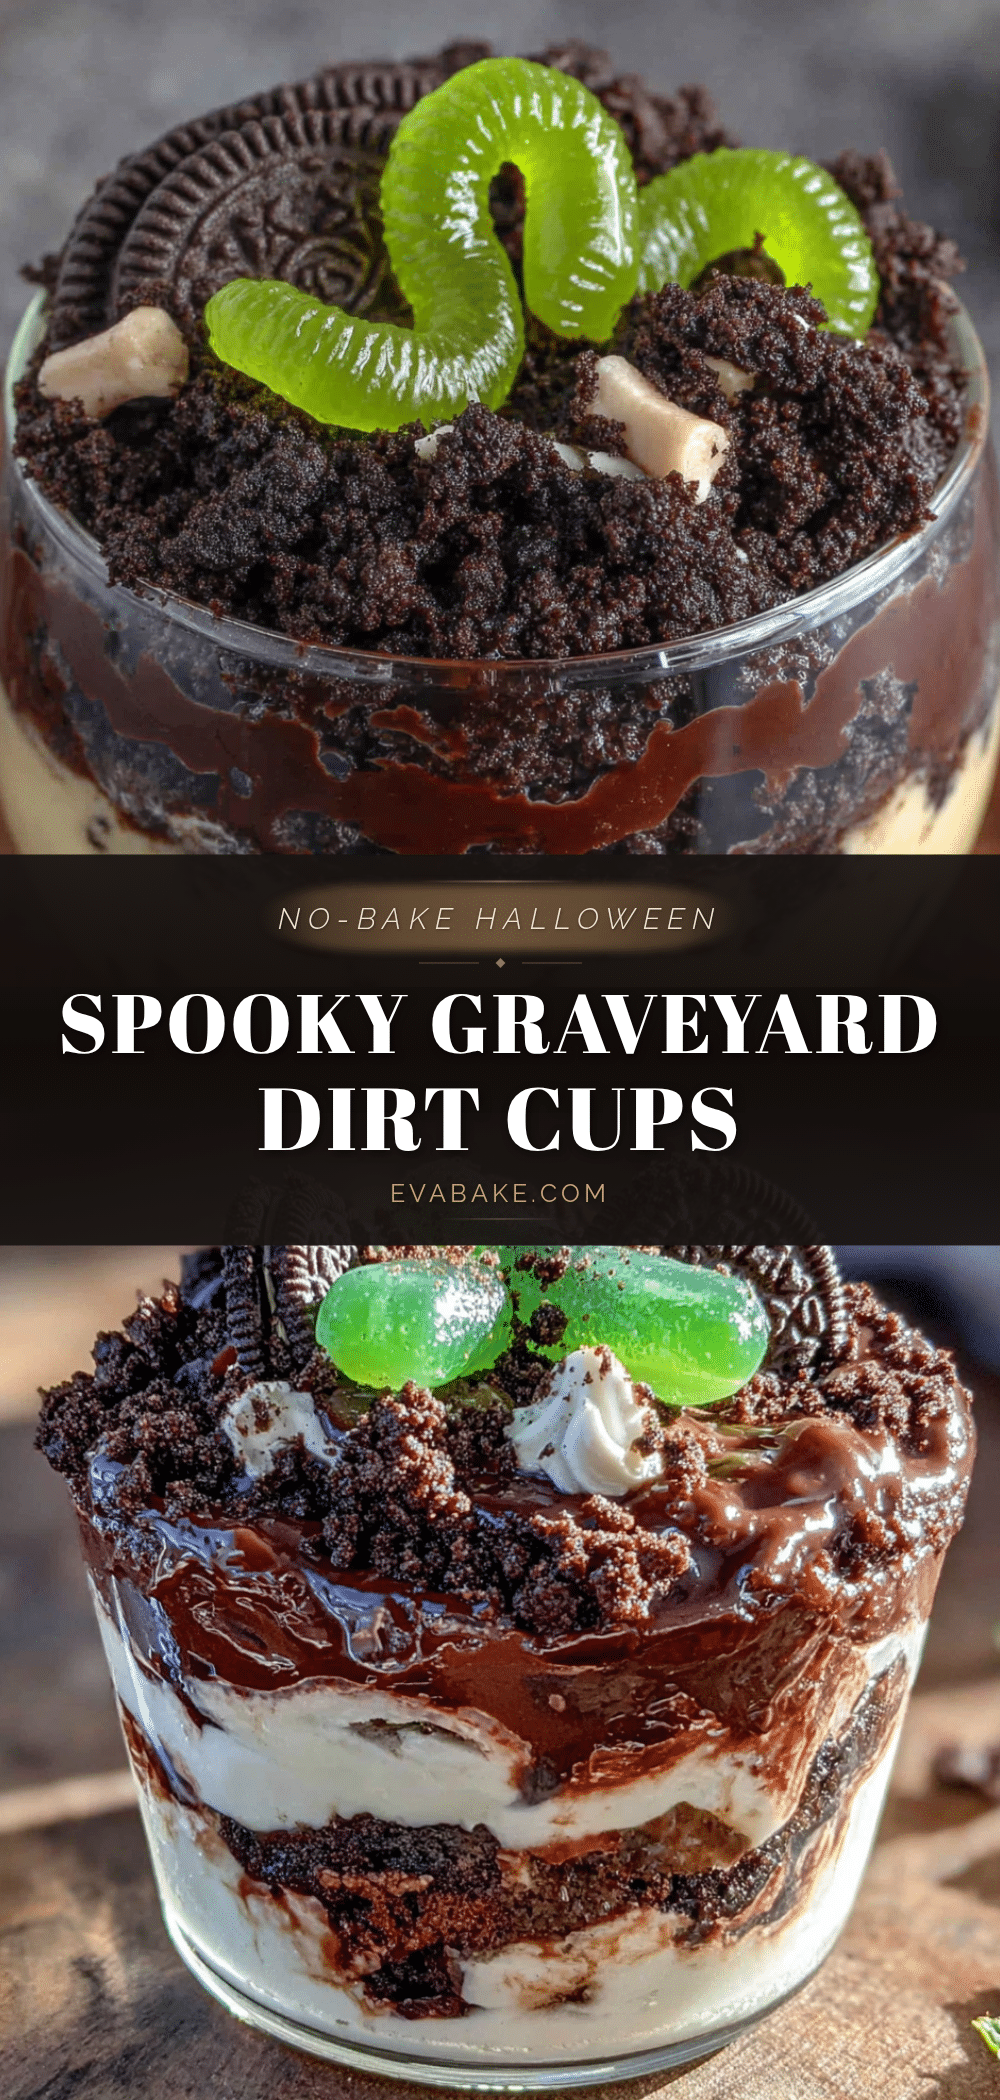
Easy Graveyard Dirt Cups: Best Oreo Dessert with Worms
These easy graveyard dirt cups with crushed Oreos and gummy worms come together in minutes without baking. Layers of creamy chocolate pudding, crunchy cookie crumbs, and silly gummy worms create a playful Halloween treat that kids and adults love.
- Prep Time: 20 minutes
- Cook Time: 0 minutes
- Total Time: 2 hours 20 minutes (includes chilling)
- Yield: 8-10 servings 1x
- Category: Dessert
- Cuisine: American
Ingredients
- 2 boxes (3.9 ounces each) chocolate instant pudding mix
- 3 cups cold whole milk
- 1 package (14.3 ounces) Oreo cookies
- 1 bag (5 ounces) gummy worms
- Optional: pumpkin-shaped sprinkles, candy corn, or small ghost marshmallows for garnish
Instructions
- Crush the Oreos: Place the entire package of Oreos (cream filling included) into a large gallon-sized ziploc bag. Seal tightly, pressing out as much air as possible. Using a rolling pin or heavy-bottomed can, crush the cookies until they resemble coarse sand. Set aside about 1/4 cup of the crushed Oreos for topping later.
- Make the Pudding: In a large mixing bowl, combine both boxes of instant chocolate pudding mix with 3 cups of cold whole milk. Whisk vigorously for about 2 minutes until the mixture thickens slightly. Scrape down the sides of the bowl with a spatula.
- Chill the Pudding: Place the bowl of pudding in the refrigerator for 5 minutes to partially set.
- Prepare Your Cups: Arrange 8-ounce clear cups on a baking sheet or tray. You should have enough for about 8-10 cups.
- Layer the First Round: Spoon about 2 tablespoons of crushed Oreos into the bottom of each cup. Press down gently with the back of the spoon to create a firm base layer.
- Add the Pudding Layer: Spoon or pour the partially set chocolate pudding over the Oreo layer, filling each cup about halfway.
- Insert the Gummy Worms: Take 2-3 gummy worms per cup and gently press them into the pudding so they are partially submerged, leaving the other half sticking out. Angle them in different directions.
- Top with More Crushed Oreos: Sprinkle a generous layer of the reserved crushed Oreos over the pudding, covering the surface completely. The worms should still be visible poking through the top.
- Add Extra Garnishes (Optional): If using pumpkin sprinkles, candy corn, or ghost marshmallows, place them on top of the Oreo layer now.
- Chill Until Set: Place the tray of assembled dirt cups in the refrigerator for at least 2 hours. The cups are best when chilled overnight.
Notes
For best results, use instant pudding (not cook-and-serve). Whole milk gives the richest texture. Crush Oreos in batches to avoid bag bursting. For a pro touch, pipe the pudding into cups using a piping bag or ziploc bag with corner snipped. Let worms settle for 10 minutes before adding top Oreo layer. These cups are better after 4-6 hours of chilling. Store covered in fridge up to 4 days. Can be frozen for up to 2 months.
Nutrition
- Serving Size: 1 cup
- Calories: 345
- Sugar: 38
- Sodium: 420
- Fat: 14
- Saturated Fat: 6
- Carbohydrates: 52
- Fiber: 2
- Protein: 6
Keywords: graveyard dirt cups, Oreo dessert, Halloween dessert, no-bake dessert, chocolate pudding, gummy worms, easy dessert, kid-friendly


