Late October, and the only thing I want is to sit on my kitchen floor with a tiny spoon and a bowl of something that tastes like fall but doesn’t require turning on the oven. The air has that damp chill that seeps through windows, and the afternoon light is already fading by four. I had bought a can of pumpkin puree with grand plans—maybe a loaf, maybe those coffee cake bars everyone was making. But standing there in socks, staring into the fridge, I just wanted something fast. Something that felt like a secret.
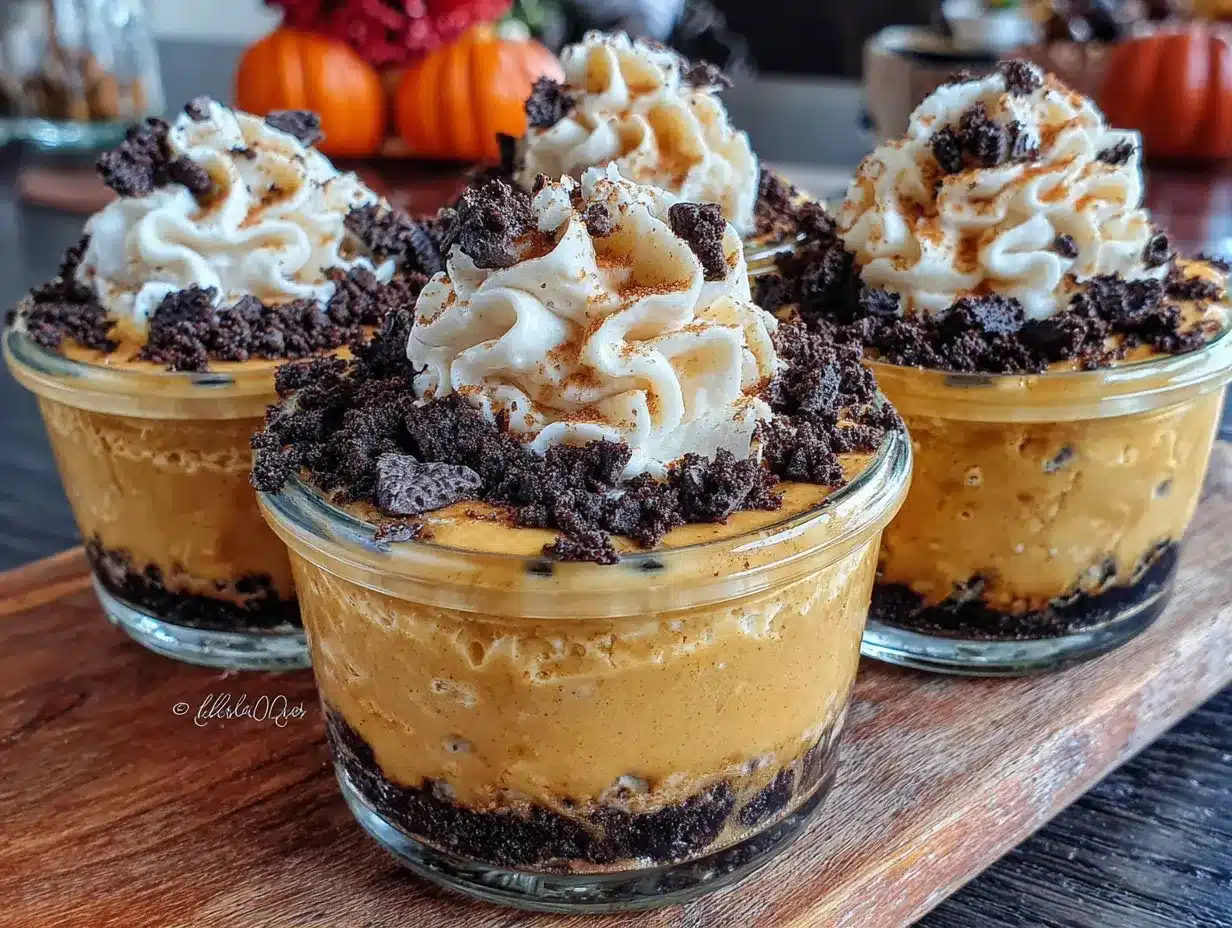
That’s how these mini pumpkin dirt cups happened. They weren’t planned. They weren’t photographed for a holiday spread. They were just—made. I crushed Oreos with the bottom of a measuring cup (very professional, I know), whisked pumpkin and cream cheese together until it looked like sunset in a bowl, and layered it all into little cups I’d saved from a takeout order. And honestly? They were perfect. No mixer to wash, no hot oven, no stress.
These little cups have become my quiet October ritual. The kind of dessert you make for yourself on a Tuesday, or for a Halloween party when you want something that looks adorable but took fifteen minutes. They’re not fancy. They’re better than fancy. They’re the kind of treat that reminds you cooking doesn’t have to be a production to be good. Sometimes it’s just you, a spoon, and a little cup of dirt.
Why You’ll Love This Recipe
I’ve made these mini pumpkin dirt cups at least a dozen times now, tweaking the filling ratio and testing different crust-to-cream proportions. Here’s why they keep ending up in my fridge—and why they’ll end up in yours too.
- No-Bake Magic: This is a zero-oven recipe. No heating, no waiting, no complicated steps. If you can stir and scoop, you can make these.
- Quick & Easy: From start to finish, you’re looking at about 15 minutes of active work. The hardest part is waiting for them to chill.
- Simple Ingredients: You probably already have cream cheese, pumpkin puree, and Oreos in your kitchen right now. No specialty baking ingredients required.
- Perfect for Halloween: These are my go-to for spooky season gatherings. They look like little pots of dirt with gummy worms peeking out—kids absolutely lose it over them.
- Crowd-Pleaser: I’ve brought these to potlucks and watched adults go back for seconds just as fast as the kids. The pumpkin-cream cheese filling is that good.
- Portion-Controlled: Individual cups mean no fighting over serving sizes. Everyone gets their own little pot of deliciousness.
What makes this recipe different from other pumpkin desserts is the texture. The Oreo crumbs stay slightly crunchy against the silky pumpkin mousse, and the cream cheese adds a tang that balances the sweet pumpkin spice. It’s not just another pumpkin dessert—it’s the one that makes you close your eyes after the first bite and think, okay, this is fall.
What Ingredients You Will Need
This recipe uses simple, everyday ingredients to create something that tastes surprisingly complex. The magic is in how they layer together—crunchy, creamy, spiced, and sweet.
- 1 package (8 oz) cream cheese, softened to room temperature. I recommend Philadelphia for the creamiest texture. Let it sit out for at least 30 minutes before starting—cold cream cheese will leave lumps in your filling.
- 1 cup pumpkin puree (not pumpkin pie filling). Libby’s is my go-to brand for consistent texture and flavor. Make sure you’re grabbing pure pumpkin, not the pre-sweetened pie mix.
- 1/2 cup powdered sugar. This dissolves seamlessly into the cream cheese for a smooth, silky filling. No graininess here.
- 1 teaspoon pumpkin pie spice. You can use store-bought or make your own with cinnamon, nutmeg, ginger, and cloves. I’ve done both—homemade is lovely, but store-bought works perfectly.
- 1/2 teaspoon vanilla extract. Pure vanilla adds warmth that complements the pumpkin. Avoid imitation vanilla if you can—it makes a difference in the final flavor.
- 1 cup heavy whipping cream, cold. This gets whipped into soft peaks to lighten the filling. Don’t substitute with half-and-half; you need the fat content for that mousse-like texture.
- 24 Oreo cookies (about 2 cups crushed). Regular Oreos work best—the double-stuff variety throws off the dirt-to-cream ratio. You’ll use these for both the bottom layer and the topping.
- 2 tablespoons unsalted butter, melted. This helps the Oreo crumbs hold together slightly, giving you a more structured “dirt” layer.
- Gummy worms, for decoration. Totally optional but highly recommended for the full dirt cup experience. I use the sour kind for a little tangy contrast.
- Optional: small mint leaves or edible flowers, for a grown-up presentation if you’re serving these at an adult gathering.
Equipment Needed
You don’t need fancy equipment for these dirt cups—that’s part of their charm. But a few tools will make the process smoother.
- Electric hand mixer or stand mixer: You’ll be whipping cream and beating cream cheese, and doing that by hand is a workout. A hand mixer is perfectly fine.
- Food processor or zip-top bag and rolling pin: For crushing Oreos into fine crumbs. The food processor gives you the most consistent texture, but a bag and rolling pin works in a pinch (and is oddly satisfying).
- Small cups or jars: I use 4-ounce glass jars or small paper cups. You need about 8-10 servings depending on cup size. Mason jars work beautifully for a rustic look.
- Mixing bowls: At least two—one for the cream cheese mixture and one for whipped cream.
- Spatula: For folding the whipped cream into the pumpkin mixture without deflating it.
- Measuring cups and spoons: For accuracy, especially with the spices.
Budget-friendly tip: If you don’t have a food processor, crush the Oreos in a zip-top bag with a rolling pin. It takes a few extra minutes but works just as well. And honestly, it’s kind of therapeutic after a long day.
Preparation Method
Let’s make these little cups of fall magic. The process is straightforward, but I’ve added notes from my own trial and error so you get the best results on your first try.
- Crush the Oreos: Place all 24 Oreos (cream filling included) in a food processor and pulse until you have fine crumbs. Alternatively, place them in a zip-top bag and crush with a rolling pin. You want a mix of fine powder and small pebbly bits—not completely dust, but not chunks either. Transfer to a bowl and stir in the melted butter until combined. Set aside.
- Whip the cream: In a chilled bowl, pour the cold heavy whipping cream. Beat with an electric mixer on medium-high speed until soft peaks form—about 2-3 minutes. You’re looking for peaks that hold their shape but still look soft and billowy. Don’t over-whip or you’ll end up with butter. Set aside in the fridge while you make the pumpkin mixture.
- Beat the cream cheese: In a separate large bowl, beat the softened cream cheese with an electric mixer until smooth and fluffy—about 2 minutes. Scrape down the sides of the bowl halfway through. This step is crucial for a lump-free filling.
- Add the pumpkin and sugar: Add the pumpkin puree, powdered sugar, pumpkin pie spice, and vanilla extract to the cream cheese. Beat on medium speed until everything is fully combined and smooth. The mixture will be thick and gorgeous—like autumn in a bowl. Taste it here. Adjust the spice level if you want more warmth.
- Fold in the whipped cream: Remove the whipped cream from the fridge. Add about one-third of it to the pumpkin mixture and stir gently to lighten the batter. Then add the remaining whipped cream and fold it in with a spatula. Use a gentle hand—you want to incorporate the cream without deflating it. The final mixture should be light, airy, and mousse-like.
- Layer the cups: Grab your cups or jars. Spoon about 1-2 tablespoons of Oreo crumbs into the bottom of each cup, pressing down lightly with the back of a spoon to create a compact base layer. This prevents the crumbs from floating up into the filling.
- Add the pumpkin mousse: Spoon or pipe the pumpkin cream cheese mixture over the Oreo layer. Fill each cup about three-quarters full. If you’re using a piping bag (or a zip-top bag with the corner snipped off), it’s easier to get clean layers.
- Top with dirt: Sprinkle a generous layer of Oreo crumbs over the pumpkin mousse. This is the “dirt” that makes these cups so fun. Use enough to completely cover the orange filling—about 1-2 tablespoons per cup.
- Chill: Place the cups in the refrigerator for at least 2 hours, but overnight is better. The chilling time allows the flavors to meld and the texture to set properly. Trust me on this—they’re good right away, but they’re amazing after a few hours.
- Add gummy worms: Just before serving, poke a gummy worm or two into the top of each cup so it looks like a worm crawling out of the dirt. If you’re serving these to adults, you can skip the worms and add a tiny mint leaf or edible flower instead.
Sensory cue: When you fold the whipped cream into the pumpkin mixture, you’re looking for a uniform color—a soft, pale orange that looks like a pumpkin latte. The texture should be thick enough to hold its shape on a spoon but light enough to melt on your tongue.
Cooking Tips & Techniques
After making these dirt cups more times than I care to count, I’ve collected a few hard-earned lessons. Here are the tips that’ll save you from my early mistakes.
Room temperature cream cheese is non-negotiable. I learned this the hard way when I tried to rush and used cold cream cheese. The filling came out lumpy, and no amount of beating could fix it. Let your cream cheese sit out for at least 30 minutes before starting. If you’re in a hurry, cut it into small cubes and let them sit for 15 minutes—that helps too.
Don’t skip the whipped cream. Some recipes skip the separate whipped cream step and just use Cool Whip. You can do that if you want, but homemade whipped cream gives you a lighter, more luxurious texture. The folding technique matters too—use a gentle hand and fold until just combined. Over-mixing deflates the air and makes the filling dense.
Crush the Oreos to the right consistency. If your crumbs are too fine, they’ll turn into a paste when you add the butter. If they’re too chunky, they won’t look like dirt. Aim for a mix of fine powder and small pebbles. I like to leave a few slightly bigger pieces for texture contrast.
Layer strategically. Press the bottom Oreo layer down firmly with the back of a spoon. This creates a barrier that prevents the moisture from the pumpkin mousse from seeping down and making the crumbs soggy. The top layer should be added right before serving if possible—it stays crunchier that way.
Chill time matters. I know it’s tempting to dig in right away, but the texture really benefits from at least 2 hours in the fridge. The flavors meld, the mousse sets up, and everything becomes cohesive. Overnight is even better—the Oreo crumbs soften slightly and the whole thing tastes like a pumpkin cheesecake in a cup.
Multitasking tip: While the cream cheese is softening on the counter, crush your Oreos and measure out your other ingredients. That way, once you start mixing, everything flows smoothly without stopping.
Variations & Adaptations
One of the best things about this recipe is how flexible it is. Here are some variations I’ve tried and loved.
Gluten-Free Version: Use gluten-free chocolate sandwich cookies instead of Oreos. The texture is slightly different, but it works beautifully. I’ve used Glutino brand with great results—just make sure to check that your pumpkin puree and other ingredients are certified gluten-free if needed.
Dairy-Free Version: Substitute the cream cheese with a dairy-free alternative (I like Kite Hill or Miyoko’s) and use coconut cream instead of heavy whipping cream. The texture will be slightly different—a bit less fluffy—but the flavor is still fantastic. Chill the coconut cream can overnight and scoop only the solid part for best results.
Pumpkin Spice Latte Version: Add 1 tablespoon of instant espresso powder dissolved in 1 teaspoon of hot water to the pumpkin mixture. The coffee flavor deepens the pumpkin spice and makes these taste like your favorite fall latte in dessert form. I made this version for a coffee-themed party and they disappeared in minutes.
Crunchy Topping Variation: Instead of all Oreo crumbs on top, mix in some crushed graham crackers or crushed pretzels for extra texture. The salty-sweet combo is incredible, especially if you’re using the gummy worms for a sweet-and-salty contrast.
Pumpkin Cheesecake Cups: Add 2 more ounces of cream cheese and reduce the whipped cream by half for a denser, cheesecake-like filling. This version holds its shape better if you’re piping it into cups for a fancier presentation.
Seasonal Adaptations: In the fall, I stick with pumpkin and pumpkin pie spice. But in spring, you could swap the pumpkin for sweet potato puree and use cinnamon and cardamom instead. In summer, try it with mango puree and a touch of lime zest—it’s a completely different dessert but follows the same method.
Serving & Storage Suggestions
These mini pumpkin dirt cups are best served cold, straight from the fridge. The contrast between the cool, creamy filling and the slightly crunchy Oreo topping is part of what makes them so satisfying.
Presentation ideas: For Halloween parties, serve them in small clear plastic cups so the layers are visible. Add a gummy worm poking out of the top and maybe a small plastic spider ring on the rim for extra spooky fun. For Thanksgiving or fall gatherings, use small mason jars with a sprig of rosemary or a cinnamon stick sticking out—it looks rustic and elegant.
What to serve alongside: These pair beautifully with a warm drink. I love serving them with a pumpkin chai latte or a simple hot apple cider. The warm spice of the drink complements the cool, creamy dessert perfectly. If you’re doing a full dessert spread, they work well alongside pumpkin chocolate chip cookie bars for contrast in texture.
Storage instructions: Store the assembled dirt cups in the refrigerator, covered, for up to 3 days. The Oreo topping will soften over time—that’s not a bad thing, it just becomes more like a cookie crust. If you want to keep the topping crunchy, store the Oreo crumbs separately and add them just before serving.
Freezer instructions: You can freeze the pumpkin mousse filling (without the Oreo layers) in an airtight container for up to 1 month. Thaw overnight in the refrigerator, then assemble the cups fresh. The texture holds up surprisingly well.
Make-ahead tip: This is a perfect make-ahead dessert. I often make the filling and crush the Oreos the day before, then assemble the cups a few hours before serving. The flavors actually improve after a day in the fridge—the pumpkin spice really settles in.
Nutritional Information & Benefits
While these are definitely a treat, there are a few nutritional bright spots worth mentioning.
Estimated nutritional values per serving (based on 8 servings): Calories: 320, Fat: 22g, Saturated Fat: 12g, Carbohydrates: 28g, Fiber: 2g, Sugar: 18g, Protein: 5g, Sodium: 220mg.
Pumpkin is a nutritional powerhouse. It’s packed with vitamin A (over 200% of your daily needs per cup), which supports eye health and immune function. It’s also a good source of fiber and antioxidants like beta-carotene. So yes, there’s real nutrition hiding in that creamy filling.
Cream cheese provides calcium and protein, though it’s also high in saturated fat. If you’re watching your intake, you can use reduced-fat cream cheese—the texture will be slightly less rich but still delicious.
Dietary considerations: This recipe is vegetarian. To make it gluten-free, use gluten-free sandwich cookies. To make it dairy-free, use the substitutions mentioned in the variations section. It’s naturally nut-free as written, but double-check your Oreos if you have severe allergies.
Potential allergens: Dairy (cream cheese, heavy cream), wheat/gluten (Oreos), and soy (in some cream cheese brands and Oreos). Always check labels if you’re serving someone with allergies.
Personal wellness perspective: I’m not here to pretend these are health food. They’re dessert, and that’s fine. But I do feel better about serving these to my family than a lot of store-bought alternatives because I know exactly what’s in them. Plus, the portion-controlled cups make it easy to enjoy without overdoing it.
Conclusion
These mini pumpkin dirt cups have become my go-to fall dessert for a reason. They’re quick enough for a weeknight craving, cute enough for a Halloween party, and delicious enough that people ask for the recipe every single time. The combination of crunchy Oreo “dirt,” silky pumpkin mousse, and that little gummy worm surprise is just pure fun in a cup.
What I love most about this recipe is how forgiving it is. You can tweak the spices, swap the cookies, adjust the sweetness—it all works. It’s the kind of recipe that invites experimentation, not perfection. And honestly? That’s my favorite kind of cooking.
I’d love to hear how yours turn out. Did you add extra spice? Use a different cookie? Skip the worms and go full elegant? Drop a comment below and let me know—I read every single one. And if you make these for a gathering, tag me in your photos. Nothing makes my day like seeing these little cups of dirt in your kitchen.
Now go crush some Oreos and make yourself a treat. You deserve it.
Frequently Asked Questions
Can I make these dairy-free?
Absolutely. Use dairy-free cream cheese (like Kite Hill or Miyoko’s) and substitute the heavy cream with full-fat coconut cream. Chill the coconut cream can overnight and scoop only the solid white part. The texture will be slightly less fluffy but still delicious. Just make sure your Oreos are dairy-free too—regular Oreos actually are, but double-check if you have concerns.
How far in advance can I make these?
You can assemble these up to 2 days in advance. The flavors actually improve after a day in the fridge as the pumpkin spice melds with the cream cheese. However, if you want the Oreo topping to stay crunchy, store it separately and add it just before serving. The gummy worms should always be added right before serving—they’ll get soggy if left in the fridge too long.
Can I use low-fat cream cheese?
You can, but the filling won’t be as rich or creamy. Low-fat cream cheese has a higher water content, which can make the mousse slightly grainy or less stable. If you’re watching calories, I’d recommend using full-fat cream cheese but reducing the portion size instead. The texture really does make a difference here.
Do I have to use gummy worms?
Not at all! The gummy worms are purely for the Halloween dirt cup aesthetic. For a non-Halloween version, skip the worms and top with a sprinkle of cinnamon, a dollop of whipped cream, or a small mint leaf. For Thanksgiving, I sometimes use candied pecans or a dusting of cocoa powder instead. They’re just as delicious either way.
Why did my filling turn out lumpy?
This usually happens when the cream cheese isn’t fully softened before mixing. Cold cream cheese doesn’t blend smoothly into the other ingredients. Next time, let your cream cheese sit at room temperature for at least 30 minutes before starting. If you’re in a rush, cut it into small cubes and let them sit for 15 minutes. Another tip: beat the cream cheese alone first until it’s completely smooth before adding the pumpkin and sugar.
Pin This Recipe!
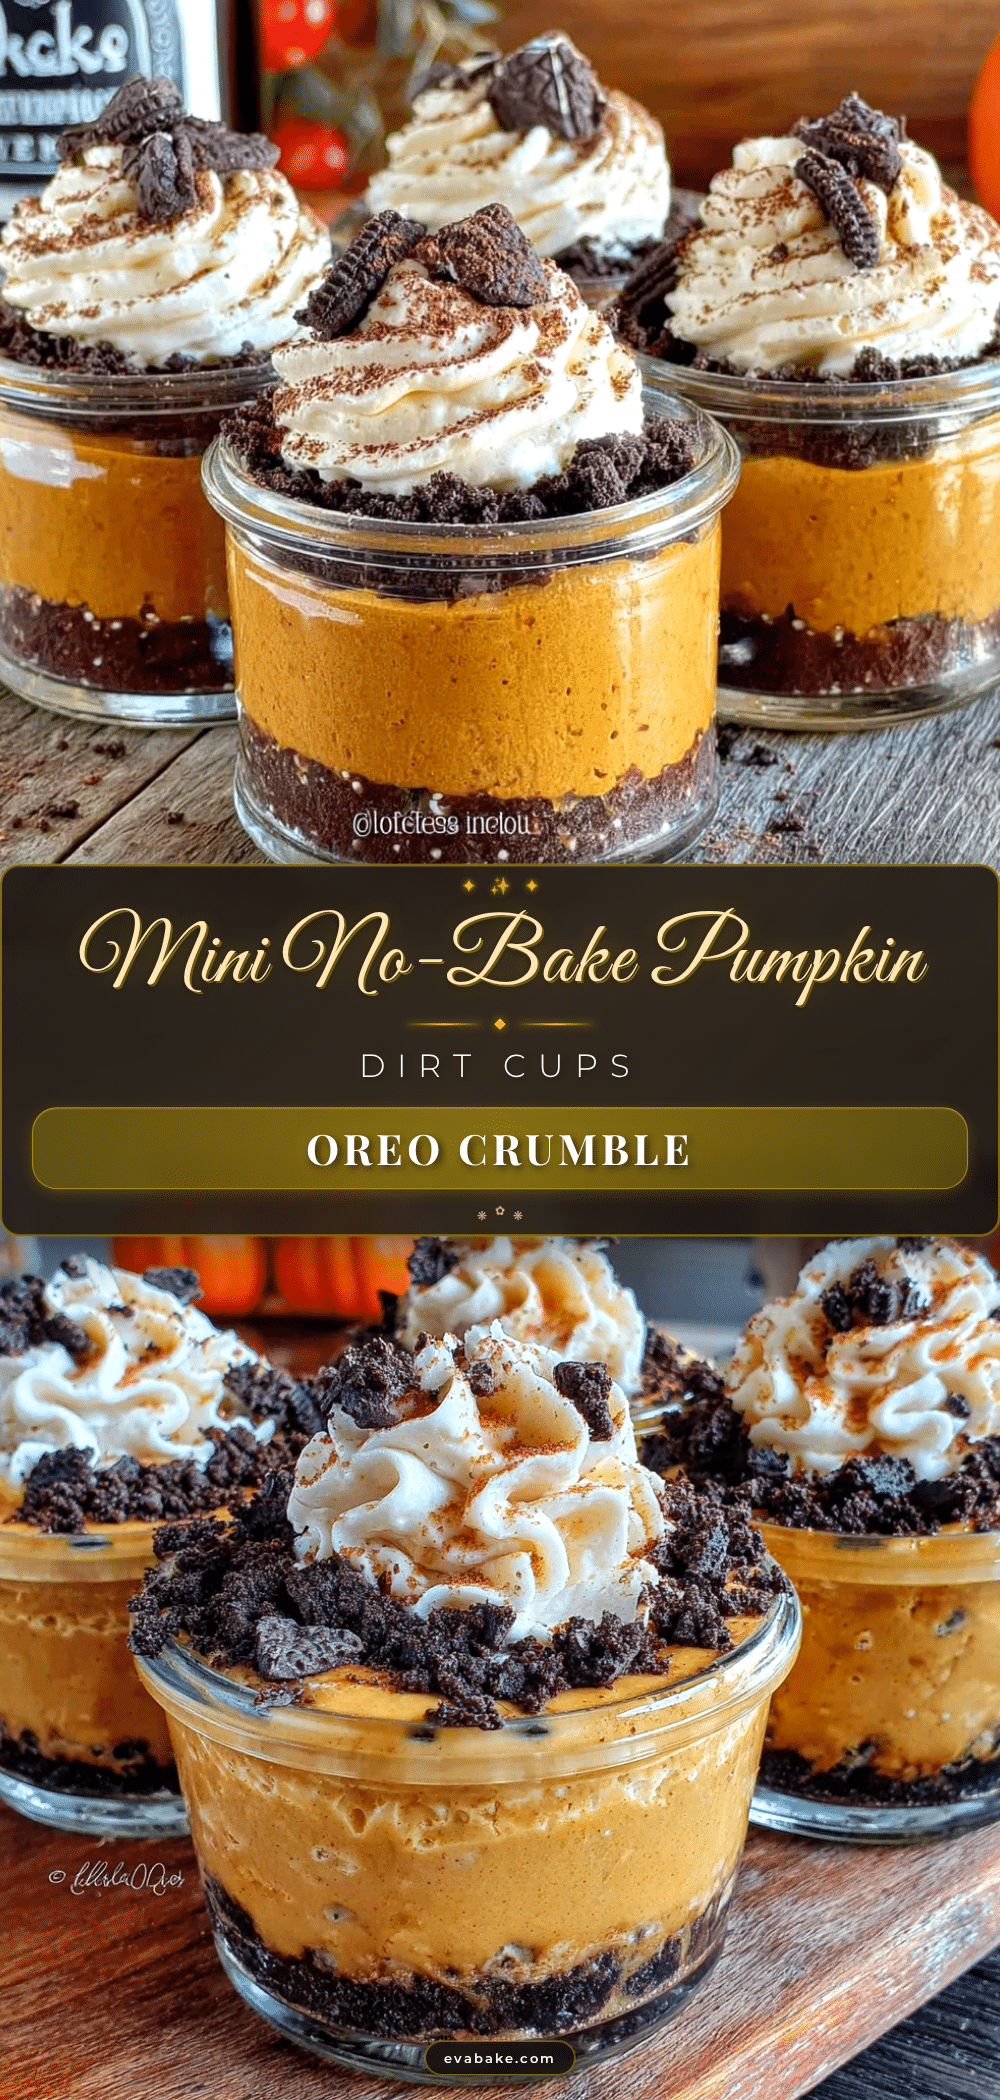
Easy Mini Pumpkin Dirt Cups with Oreo Crumbs
No-bake mini pumpkin dirt cups with a silky pumpkin cream cheese mousse, crunchy Oreo crumb layers, and optional gummy worms for a fun Halloween treat. Ready in 15 minutes with simple ingredients.
- Prep Time: 15 minutes
- Cook Time: 0 minutes
- Total Time: 2 hours 15 minutes (includes chilling)
- Yield: 8 servings 1x
- Category: Dessert
- Cuisine: American
Ingredients
- 1 package (8 oz) cream cheese, softened to room temperature
- 1 cup pumpkin puree (not pumpkin pie filling)
- 1/2 cup powdered sugar
- 1 teaspoon pumpkin pie spice
- 1/2 teaspoon vanilla extract
- 1 cup heavy whipping cream, cold
- 24 Oreo cookies (about 2 cups crushed)
- 2 tablespoons unsalted butter, melted
- Gummy worms, for decoration (optional)
- Small mint leaves or edible flowers, for garnish (optional)
Instructions
- Crush the Oreos: Place all 24 Oreos (cream filling included) in a food processor and pulse until you have fine crumbs. Alternatively, place them in a zip-top bag and crush with a rolling pin. Transfer to a bowl and stir in the melted butter until combined. Set aside.
- Whip the cream: In a chilled bowl, pour the cold heavy whipping cream. Beat with an electric mixer on medium-high speed until soft peaks form, about 2-3 minutes. Set aside in the fridge while you make the pumpkin mixture.
- Beat the cream cheese: In a separate large bowl, beat the softened cream cheese with an electric mixer until smooth and fluffy, about 2 minutes. Scrape down the sides of the bowl halfway through.
- Add the pumpkin and sugar: Add the pumpkin puree, powdered sugar, pumpkin pie spice, and vanilla extract to the cream cheese. Beat on medium speed until fully combined and smooth.
- Fold in the whipped cream: Remove the whipped cream from the fridge. Add about one-third of it to the pumpkin mixture and stir gently to lighten the batter. Then add the remaining whipped cream and fold it in with a spatula until just combined. The mixture should be light, airy, and mousse-like.
- Layer the cups: Spoon about 1-2 tablespoons of Oreo crumbs into the bottom of each cup, pressing down lightly with the back of a spoon to create a compact base layer.
- Add the pumpkin mousse: Spoon or pipe the pumpkin cream cheese mixture over the Oreo layer. Fill each cup about three-quarters full.
- Top with dirt: Sprinkle a generous layer of Oreo crumbs over the pumpkin mousse, about 1-2 tablespoons per cup, to completely cover the filling.
- Chill: Place the cups in the refrigerator for at least 2 hours, but overnight is better for the flavors to meld and the texture to set.
- Add gummy worms: Just before serving, poke a gummy worm or two into the top of each cup. For adult servings, skip the worms and add a tiny mint leaf or edible flower instead.
Notes
Room temperature cream cheese is essential for a smooth filling. For best results, chill assembled cups overnight. Store Oreo crumbs separately if you want the topping to stay crunchy. Gummy worms should be added just before serving to prevent sogginess.
Nutrition
- Serving Size: 1 cup
- Calories: 320
- Sugar: 18
- Sodium: 220
- Fat: 22
- Saturated Fat: 12
- Carbohydrates: 28
- Fiber: 2
- Protein: 5
Keywords: pumpkin dirt cups, no-bake pumpkin dessert, Halloween dessert, Oreo dirt cups, pumpkin mousse, easy fall dessert, mini dessert cups