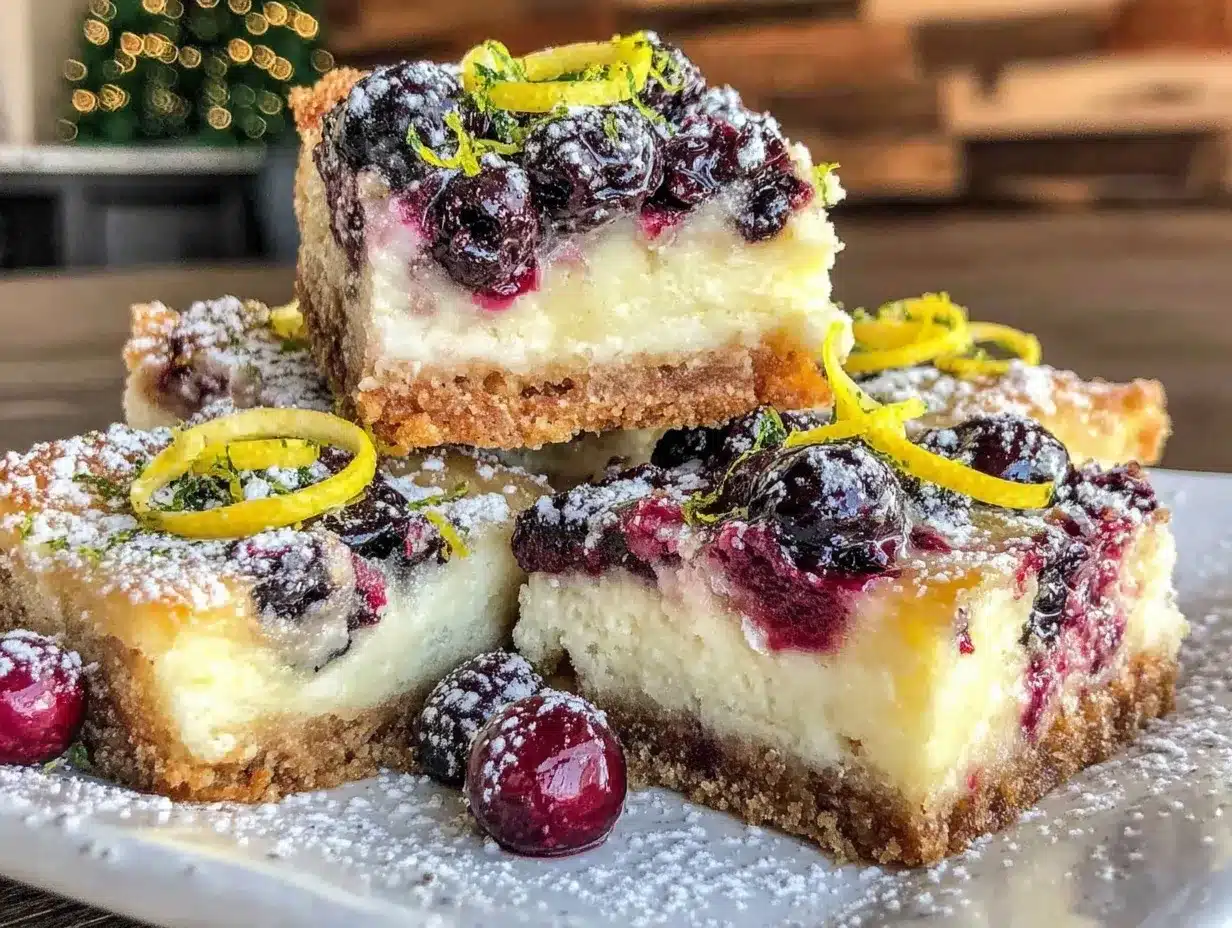
There’s this nagging thought that won’t quit: I want something tangy and sweet, but creamy and comforting all at once. The fridge is mostly bare except for a stubborn block of cream cheese and a jar of huckleberry jam—could they be the answer? Honestly, moments like this make me realize how much I rely on those unexpected flavor combos that somehow just work. The idea of a cheesecake bar swirling with bright lemon and deep, wild huckleberry notes feels like the perfect fix for that craving. It’s not just about dessert; it’s about that comfort wrapped in a little sophistication. When I finally mixed those flavors, the texture was shockingly smooth, almost like it melted in your mouth, and that tang from the lemon zest cut through the richness just right. I remember thinking, why haven’t I made these bars sooner? They’re easy, but they don’t feel simple. They linger in your memory, the kind of dessert that makes you pause and quietly savor each bite. It stuck with me not only because of the flavors but for how that creamy texture invited you back for more, without being too heavy or overly sweet. That’s the kind of treat I trust to bring to any gathering or to enjoy quietly with a cup of tea. It’s a little sweet secret I keep coming back to.
Why You’ll Love This Flavorful Huckleberry Lemon Cheesecake Bars Recipe
This recipe has been a staple in my kitchen for a while now, and honestly, it’s one of those rare finds that just checks all the boxes. After several trial runs, I can confidently say it’s the best version of cheesecake bars I’ve ever whipped up at home. Here’s why it’s worth your time:
- Quick & Easy: You’ll have these cheesecake bars ready in about 45 minutes, plus chilling time, which is perfect for those last-minute dessert cravings or casual weekend baking.
- Simple Ingredients: You don’t need to hunt down anything fancy. Most of this is pantry staples, with the only special touch being huckleberries, which you can swap with blueberries if needed.
- Perfect for Any Occasion: Whether it’s a summer picnic, a cozy family dinner, or a potluck, these bars bring a fresh, tangy burst that feels just right.
- Crowd-Pleaser: Friends and family alike rave about the balance of tart lemon and sweet huckleberry — it’s a flavor combo that wins over even the pickiest eaters.
- Unbelievably Delicious: The texture is creamy without being dense, and the lemon zest adds that zing that makes every bite exciting.
What sets this recipe apart is the way I blend the cream cheese until ultra-smooth before adding the rest of the ingredients, which means no lumps or cracks. Also, the lemon zest and juice are carefully balanced to avoid overpowering the subtle berry sweetness. Honestly, it’s a harmony that’s hard to beat — a little like a dessert version of your favorite summer memory. These bars aren’t just tasty; they’re a quiet celebration of flavors that stick with you.
What Ingredients You Will Need
This recipe uses simple, wholesome ingredients that come together to create bold flavor and that satisfyingly creamy texture without fuss. Most are pantry staples, and the huckleberries add a seasonal touch that really shines.
- For the Crust:
- 1 ½ cups graham cracker crumbs (about 10 full sheets) — I like using Honey Maid for a slightly sweeter crust
- ⅓ cup unsalted butter, melted (adds richness and helps bind the crust)
- 2 tablespoons granulated sugar (balances the buttery flavor)
- For the Cheesecake Filling:
- 16 oz (450 g) cream cheese, softened to room temperature — this is key for smooth texture
- ¾ cup granulated sugar
- 2 large eggs, room temperature
- 2 teaspoons fresh lemon zest (about 1 lemon) — fresh zest really brightens the flavor
- 3 tablespoons fresh lemon juice (about 1 lemon) — balancing acidity and sweetness
- 1 teaspoon pure vanilla extract (adds warmth and depth)
- ½ cup sour cream (for creaminess and subtle tang)
- For the Huckleberry Swirl:
- ½ cup huckleberry jam or preserves — if you can’t find huckleberries, use wild blueberry preserves
- Optional: fresh or frozen huckleberries for extra texture (about ¼ cup)
For substitutions, you can swap the sour cream for Greek yogurt if preferred. Use almond flour in place of graham cracker crumbs for a gluten-free crust. When it comes to huckleberries, I’ve found local or artisanal jams make a big flavor difference, but store-bought works just fine. In summer, I sometimes add fresh berries atop baked bars for an extra burst of freshness.
Equipment Needed
- 8×8 inch (20×20 cm) baking pan — I recommend a glass or metal pan for even heat distribution.
- Mixing bowls — multiple sizes help keep wet and dry ingredients separate.
- Electric mixer or stand mixer — essential for getting that creamy, smooth cheesecake texture.
- Measuring cups and spoons — for precise ingredient amounts.
- Rubber spatula — perfect for scraping down the bowl and folding in ingredients gently.
- Fine grater or zester — for zesting lemons without the bitter white pith.
- Toothpick or skewer — to test doneness in the cheesecake bars.
If you don’t have a stand mixer, a handheld mixer works just as well (though it might take a little longer). For the crust, a food processor is handy for quickly crushing graham crackers, but you can also place them in a sealed bag and crush with a rolling pin (yes, that’s the old-school trick I still swear by). Make sure your mixer bowl and utensils are clean and grease-free to avoid lumps in the filling.
Preparation Method
- Preheat your oven to 325°F (163°C). Grease your 8×8 inch pan or line it with parchment paper leaving some overhang for easy removal later. This step prevents sticking and gives you neat bars.
- Make the crust: Combine graham cracker crumbs, melted butter, and sugar in a medium bowl. Stir until the crumbs are evenly moistened and look like wet sand. Press the mixture firmly into the bottom of your pan using the back of a spoon or your fingers for an even layer. Pop it in the oven and bake for 8-10 minutes until it’s lightly golden and smells toasty. Let it cool slightly but keep the oven on.
- Prepare the cheesecake filling: In a large mixing bowl, beat the softened cream cheese with a mixer on medium speed until completely smooth and creamy (about 2-3 minutes). Scraping down the sides helps keep it lump-free. Add the sugar and continue beating until fully incorporated.
- One at a time, add the eggs: Beat them in slowly, just until combined after each addition. Overmixing can cause cracks later.
- Mix in the lemon zest, lemon juice, and vanilla extract. Give it a quick blend, then add the sour cream and fold it in gently with a spatula until the mixture looks silky and uniform.
- Pour half of the cheesecake filling over the baked crust, smoothing it evenly.
- Drop spoonfuls of huckleberry jam over the filling. Use a butter knife or skewer to swirl the jam gently into the cheesecake layer, creating pretty marbled patterns.
- Pour the remaining cheesecake filling on top, smoothing the surface. You can add a few more dollops of jam and swirl if you like a more pronounced berry effect.
- Bake for 40-45 minutes. The edges should be set but the center will still jiggle slightly when you gently shake the pan — that’s perfect. Overbaking dries it out.
- Cool completely on a wire rack for about an hour, then refrigerate for at least 4 hours or overnight. This chilling is what gives the bars their signature creamy and firm texture.
- Slice into bars with a warm knife: Run a hot, clean knife under water and dry it before slicing to get clean edges without crumbling.
Pro tip: If you notice cracks on top, don’t fret — chilling helps them soften, and the huckleberry swirl distracts nicely from any imperfections. Also, avoid opening the oven door frequently during baking to prevent temperature drops that could cause sinking.
Cooking Tips & Techniques
Getting that creamy texture and vibrant flavor in your huckleberry lemon cheesecake bars is all about technique. Here’s what I’ve learned over multiple batches:
- Soften cream cheese fully: Cold cream cheese will clump and leave lumps in your batter. Let it sit out for at least 30 minutes or microwave in short bursts (10 seconds) if you’re short on time.
- Beat carefully: Over-beating after adding eggs can introduce too much air, causing cracks. Mix just until combined.
- Lemon zest matters: Use a microplane or fine grater to avoid the bitter white pith beneath the zest. Fresh zest provides a bright, natural lemon punch.
- Swirling jam: Don’t over-mix the jam into the batter. Gentle swirling creates beautiful marbling and keeps bursts of berry flavor distinct.
- Baking time: Ovens vary — start checking at 40 minutes. The center should still have a slight wobble; it firms up while chilling.
- Chilling is key: Resist the urge to cut into the bars too soon. Proper refrigeration develops flavor and texture.
- Multitasking tip: Use your baking time to prep a fresh batch of refreshing watermelon feta salad for a bright contrast at serving.
From my kitchen mishaps, I learned that skipping the sour cream or substituting with heavy cream made the bars too dense and less creamy. Also, I once tried swirling in frozen berries without thawing — the excess moisture created soggy spots. Fresh or room temperature jam is definitely the way to go.
Variations & Adaptations
One of the best things about these cheesecake bars is how easy it is to customize them based on what you have or your dietary preferences:
- Berry swap: If huckleberries aren’t available, blueberries or blackberries work beautifully. You can even mix berries for a wild berry swirl.
- Gluten-free crust: Swap graham crackers for almond flour mixed with a little coconut sugar and butter for a nutty, gluten-free base.
- Dairy-free option: Use dairy-free cream cheese and coconut yogurt instead of sour cream. The texture will be slightly different but still creamy.
- Lemon glaze topping: For extra zing, drizzle a simple lemon glaze made with powdered sugar and lemon juice over cooled bars before serving.
- Herbal twist: Add a teaspoon of finely chopped fresh thyme or basil into the batter for a sophisticated herbal note.
Personally, I once tried a version with a graham cracker and pecan crust that added a lovely crunch and a toasty flavor that paired perfectly with the creamy filling. It’s a nice change when you want a little texture contrast. Also, for a summer BBQ, these bars go surprisingly well alongside smoky dishes like baby back ribs with smoky bourbon BBQ sauce.
Serving & Storage Suggestions
These cheesecake bars are best served chilled or slightly cool to appreciate the creamy texture and fresh flavors. I like to plate them with a few fresh berries or a light dusting of powdered sugar for a pretty touch.
They pair beautifully with a cup of hot tea or coffee, and during warmer months, a glass of sparkling lemonade complements the lemon notes nicely. For a festive touch, serve them alongside other bright dishes like the creamy grilled Mexican street corn salad to contrast smoky and sweet flavors.
To store, keep the bars tightly covered in the refrigerator for up to 4 days. For longer storage, wrap them well and freeze for up to 2 months. When reheating frozen bars, thaw overnight in the fridge and serve cold or at room temperature — reheating in the microwave isn’t recommended as it can alter the texture.
Over time, the flavors meld even more, making leftovers (if you have any!) taste richer and more harmonious the next day.
Nutritional Information & Benefits
Each serving of these flavorful huckleberry lemon cheesecake bars offers approximately 320 calories, with 18 grams of fat, 30 grams of carbohydrates, and 5 grams of protein. The cream cheese and sour cream provide a good dose of calcium and healthy fats.
Lemon juice adds vitamin C and antioxidants, while huckleberries are known for their rich antioxidant content, which supports overall health. Using fresh lemon zest boosts natural flavor without added sugars.
For those watching carbs or gluten, the almond flour crust variation reduces carbs significantly and is naturally gluten-free. Always consider allergies, especially to dairy or nuts, and adapt the recipe accordingly.
I find this dessert strikes a nice balance between indulgence and nutrition — sweet enough to feel like a treat but made with real ingredients that bring something beneficial to the table.
Conclusion
This flavorful huckleberry lemon cheesecake bars recipe is a keeper for how it blends tangy lemon, sweet berry, and creamy textures into one irresistible treat. It’s simple enough to make on a whim but special enough to impress guests or lift your own spirits on a quiet night. I love this recipe because it captures a fresh, summer feeling without being overly sweet or heavy—just the right kind of comfort food.
Feel free to tweak the berries, crust, or add herbs to make it your own. I hope these bars find a spot in your dessert rotation as they have in mine. If you try them out, I’d love to hear how you make them your own or what occasion you baked them for!
Frequently Asked Questions
Can I substitute blueberries for huckleberries in this recipe?
Absolutely! Blueberries are a great substitute and will provide a similar sweet-tart flavor and beautiful color swirl.
How do I prevent cracks from forming on top of cheesecake bars?
Make sure the cream cheese is fully softened before mixing, avoid over-beating after adding eggs, and don’t overbake. Also, chilling the bars thoroughly helps reduce cracks.
Can I make these bars ahead of time?
Yes, these bars keep well refrigerated for up to 4 days and actually taste better after the flavors meld overnight.
Is it possible to make this recipe gluten-free?
Yes! Use almond flour or gluten-free graham crackers for the crust instead of regular graham cracker crumbs.
What’s the best way to store leftover cheesecake bars?
Store them in an airtight container in the refrigerator for up to 4 days, or freeze wrapped tightly for up to 2 months. Thaw in the fridge before serving.
Pin This Recipe!
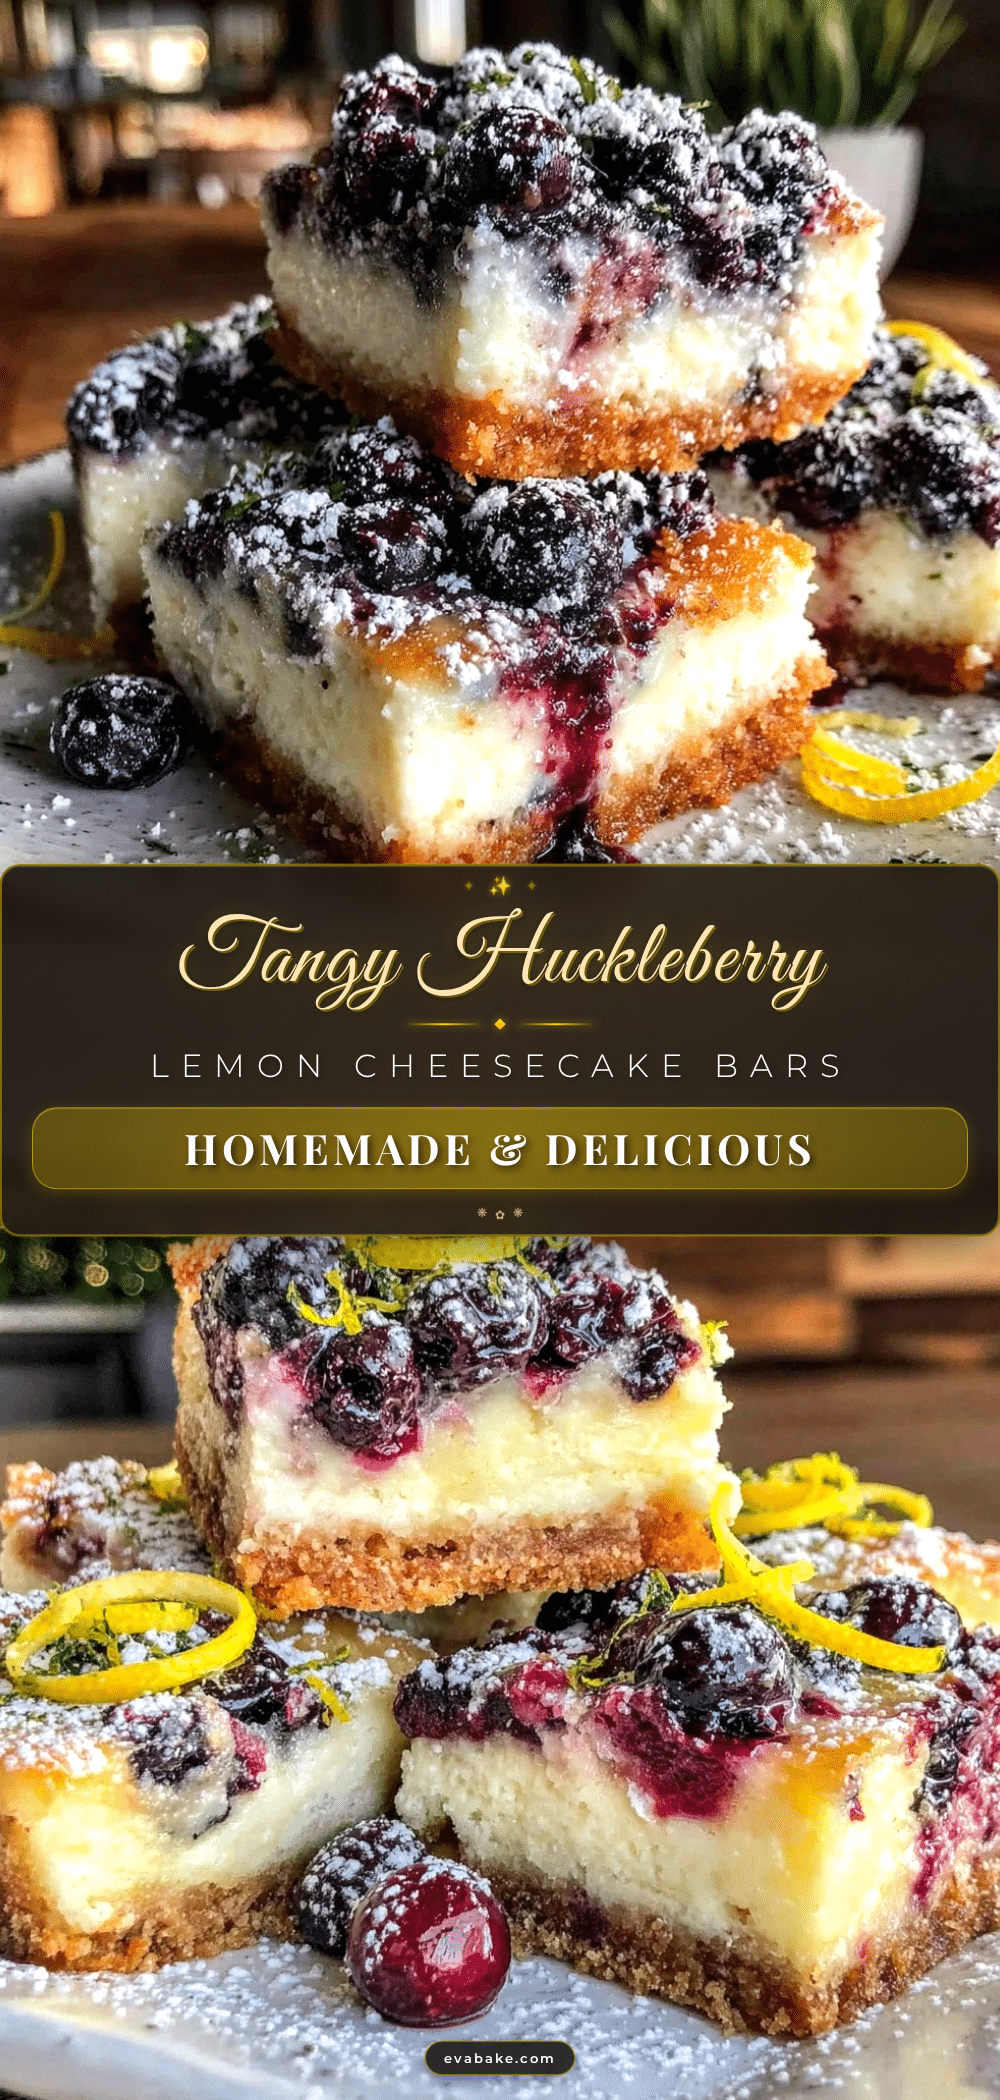
Flavorful Huckleberry Lemon Cheesecake Bars
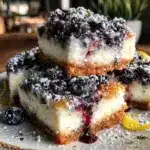
These cheesecake bars combine tangy lemon and sweet huckleberry flavors with a creamy, smooth texture. Easy to make and perfect for any occasion, they offer a delightful balance of tart and sweet in every bite.
- Prep Time: 15 minutes
- Cook Time: 45 minutes
- Total Time: 5 hours
- Yield: 16 bars 1x
- Category: Dessert
- Cuisine: American
Ingredients
- 1 ½ cups graham cracker crumbs (about 10 full sheets)
- ⅓ cup unsalted butter, melted
- 2 tablespoons granulated sugar
- 16 oz (450 g) cream cheese, softened to room temperature
- ¾ cup granulated sugar
- 2 large eggs, room temperature
- 2 teaspoons fresh lemon zest (about 1 lemon)
- 3 tablespoons fresh lemon juice (about 1 lemon)
- 1 teaspoon pure vanilla extract
- ½ cup sour cream
- ½ cup huckleberry jam or preserves
- Optional: ¼ cup fresh or frozen huckleberries
Instructions
- Preheat your oven to 325°F (163°C). Grease an 8×8 inch pan or line it with parchment paper with overhang for easy removal.
- Make the crust by combining graham cracker crumbs, melted butter, and sugar in a medium bowl. Stir until evenly moistened and press firmly into the bottom of the pan.
- Bake the crust for 8-10 minutes until lightly golden and toasty. Let cool slightly but keep the oven on.
- In a large bowl, beat the softened cream cheese with a mixer on medium speed until smooth and creamy (2-3 minutes). Scrape down sides to avoid lumps.
- Add sugar and beat until fully incorporated.
- Add eggs one at a time, beating just until combined after each addition to avoid overmixing.
- Mix in lemon zest, lemon juice, and vanilla extract.
- Fold in sour cream gently with a spatula until mixture is silky and uniform.
- Pour half of the cheesecake filling over the baked crust and smooth evenly.
- Drop spoonfuls of huckleberry jam over the filling and swirl gently with a butter knife or skewer to create marbled patterns.
- Pour remaining cheesecake filling on top and smooth the surface. Optionally add more jam dollops and swirl.
- Bake for 40-45 minutes until edges are set but center jiggles slightly when shaken.
- Cool completely on a wire rack for about an hour, then refrigerate for at least 4 hours or overnight.
- Slice into bars using a warm knife (run under hot water and dry before slicing) for clean edges.
Notes
Soften cream cheese fully before mixing to avoid lumps. Avoid over-beating after adding eggs to prevent cracks. Use fresh lemon zest for best flavor. Chill bars thoroughly before slicing for best texture. Use a warm knife for clean slices. Swirl jam gently to create pretty marbling without mixing it fully.
Nutrition
- Serving Size: 1 bar (assuming 16 b
- Calories: 320
- Fat: 18
- Carbohydrates: 30
- Protein: 5
Keywords: huckleberry cheesecake bars, lemon cheesecake bars, easy cheesecake bars, creamy cheesecake, huckleberry dessert, lemon dessert, homemade cheesecake bars