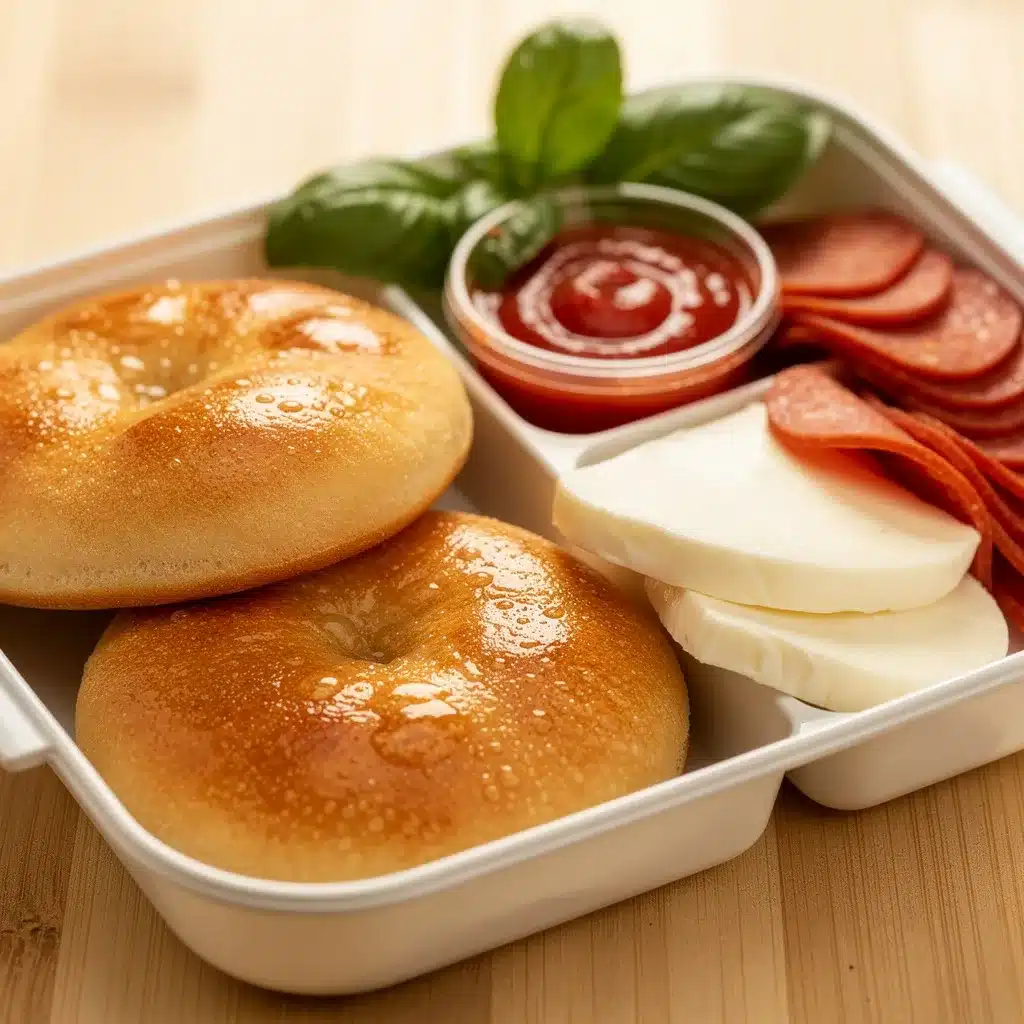
“Mom, can I have pizza for lunch again?” That question popped up more times than I could count last month, and honestly, I was running low on ideas. But then, one hectic afternoon after a long day juggling work and homeschooling, I found myself staring at some leftover pizza dough and a few random toppings in the fridge. Instead of the usual rushed sandwich, I grabbed those ingredients and tossed together a Homemade Pizza Lunchables Bento Box with Mini Dough for my kiddo’s lunch.
What surprised me was how much fun it turned out to be—not just for my little one but for me too. There was something comforting about shaping tiny pizza dough rounds, packing colorful toppings in neat little containers, and watching my kid’s eyes light up when they got to build their own mini pizzas at school. Honestly, it felt like a little slice of joy in the middle of a crazy week.
The best part? It wasn’t complicated or time-consuming. This recipe became a quiet little ritual, one I found myself making a couple of times a week because it’s just that easy and satisfying. Plus, it sneaks in fresh veggies, protein, and a bit of creativity, all in one lunchbox. It’s a twist on classic lunchables but way better, fresher, and homemade—no mystery ingredients or preservatives.
Looking back, that spontaneous lunchbox experiment stuck with me because it’s more than just food; it’s a simple way to share a little love, creativity, and balanced nutrition with my family each day. If you’re after a kid-friendly recipe that’s both playful and wholesome, this homemade pizza lunchables bento box might just become your secret weapon too.
Why You’ll Love This Recipe
After testing this recipe multiple times, here’s why the Homemade Pizza Lunchables Bento Box with Mini Dough has become a go-to for busy weekdays and casual weekend lunches:
- Quick & Easy: You can have it ready in under 30 minutes, perfect for last-minute lunch packing or spontaneous snack cravings.
- Simple Ingredients: Most of the ingredients are pantry staples or fridge regulars, so no extra grocery runs needed.
- Perfect for Kids’ Lunches: The mini dough rounds let kids build their own pizzas, keeping mealtime interactive and fun.
- Crowd-Pleaser: Whether it’s for a playdate, family picnic, or school lunch, it’s a hit with both kids and adults.
- Unbelievably Delicious: The homemade dough gives that fresh-baked softness, combined with vibrant toppings that burst with flavor.
What makes this recipe stand apart is the mini dough concept—this isn’t just pre-made crust slapped with sauce and cheese. You get to make the dough yourself, which means you control the texture and flavor from scratch. It’s a bit like the joy I found experimenting with flatbreads in my fluffy injera recipe, where homemade always tastes better.
Plus, this recipe is flexible—whether your kid prefers classic pepperoni, colorful veggies, or even a sprinkle of fresh herbs, this lunchbox adapts to their taste buds. Honestly, it’s a recipe that invites creativity while being reliably tasty and nutritious. That’s why it keeps popping up in my lunch rotation.
What Ingredients You Will Need
This recipe relies on simple, wholesome ingredients to create mini pizzas that are both delicious and fun to assemble. You probably already have most of these in your kitchen, making it a breeze to pull together.
- For the Mini Dough:
- All-purpose flour – 2 cups (240g), for a soft but sturdy base
- Instant yeast – 1 teaspoon (3g), helps the dough rise quickly
- Warm water – ¾ cup (180ml), to activate the yeast
- Olive oil – 2 tablespoons (30ml), adds stretch and flavor
- Salt – ½ teaspoon (3g), balances the dough’s flavor
- Sugar – 1 teaspoon (5g), feeds the yeast for a better rise
- For the Sauce:
- Tomato sauce – ½ cup (120ml), use your favorite brand or homemade
- Garlic powder – ¼ teaspoon (1g), adds subtle depth
- Dried oregano – ½ teaspoon (1g), classic pizza herb
- Salt and pepper – to taste
- Toppings: (customizable, but here’s what works beautifully)
- Shredded mozzarella cheese – 1 cup (100g), for that melty goodness
- Mini pepperoni slices – ¼ cup (30g), or omit for a veggie version
- Diced bell peppers – ¼ cup (40g), adds crunch and color
- Black olives, sliced – 2 tablespoons (30g), optional but tasty
- Fresh basil leaves – a handful, for fresh herbal notes
- Extras for Bento Box:
- Baby carrots or cucumber sticks
- Fresh fruit slices (apple, grapes, or berries)
- Small container of ranch or hummus for dipping
For best results, I recommend King Arthur flour for the dough due to its consistent texture. If you want a gluten-free option, you could swap the all-purpose flour for a blend like Bob’s Red Mill gluten-free flour, but keep in mind the dough texture will change a bit.
In summer, you might swap bell peppers for fresh cherry tomatoes or zucchini ribbons—whatever’s fresh and colorful. The sauce is flexible too; I’ve sometimes used a quick homemade version with canned tomatoes and Italian herbs, similar to the approach in my classic homemade Nonna’s Sunday Bolognese sauce.
Equipment Needed
- Mixing bowl – for combining and proofing the dough
- Measuring cups and spoons – to get precise ingredient amounts
- Rolling pin – to flatten the dough rounds (a clean bottle can work in a pinch)
- Baking sheet or pizza stone – for baking the mini pizzas
- Parchment paper – helps prevent sticking and easy cleanup
- Small containers or bento box compartments – for packing toppings and sides
If you don’t have a pizza stone, a regular baking sheet lined with parchment works just fine. I’ve used silicone baking mats before, which are great for sticking prevention and easy cleaning. For rolling out the dough, a small rolling pin is ideal, but sometimes I just pat the dough balls flat with my fingers—kids love helping with that part.
Keep your baking sheet well-maintained by wiping it clean after each use and avoid metal utensils that might scratch any nonstick surfaces. Budget-friendly options like a basic measuring set and sturdy mixing bowls can be found easily online or at local stores without breaking the bank.
Preparation Method
- Activate the yeast: In a mixing bowl, combine warm water (about 110°F/43°C), sugar, and instant yeast. Stir gently and let it sit for 5-7 minutes until it’s foamy and bubbly — that means the yeast is alive and kicking.
- Make the dough: Add the flour, salt, and olive oil to the yeast mixture. Stir with a wooden spoon or your hand until it starts coming together into a sticky dough.
- Knead the dough: Turn the dough onto a lightly floured surface and knead for about 6-8 minutes until it’s smooth and elastic. If it feels too sticky, sprinkle a bit more flour, but don’t go overboard—you want it soft, not dry.
- Let it rise: Shape the dough into a ball and place it in a lightly oiled bowl. Cover with a damp kitchen towel or plastic wrap and let it rise in a warm spot for about 45 minutes or until doubled in size.
- Prepare the sauce: While the dough rises, mix the tomato sauce with garlic powder, oregano, salt, and pepper in a small bowl. Adjust seasoning to your taste.
- Shape mini pizza bases: Once the dough has risen, punch it down gently and divide it into 8 equal portions. Roll or press each portion into rounds about 3-4 inches (7-10 cm) in diameter. Place them on a parchment-lined baking sheet.
- Add sauce and toppings: Spread a thin layer of sauce on each mini dough round, then sprinkle mozzarella cheese and arrange your chosen toppings on top. Keep it light to avoid sogginess.
- Bake: Bake the mini pizzas in a preheated oven at 425°F (220°C) for about 10-12 minutes, until the cheese is bubbly and the crust is golden brown.
- Cool and pack: Let the mini pizzas cool slightly before packing them into a bento box with your chosen fresh veggies and fruit sides.
Quick tip: If your mini pizzas puff up too much during baking, gently press them down with a spatula right after taking them out to keep the toppings spread evenly. Also, if you want crispier crusts, you can bake them a minute or two longer but watch closely to avoid burning.
Cooking Tips & Techniques
When working with pizza dough, patience is key. I learned the hard way that rushing the rise leads to dense, chewy results, so giving that dough time to double in size is worth it.
Another thing—don’t overload your mini pizzas with toppings. It’s tempting to pile on everything, but too much moisture can make the crust soggy. Light, balanced toppings melt and crisp up nicely.
Using instant yeast speeds things up without sacrificing flavor, but if you only have active dry yeast, just dissolve it in warm water a little longer before mixing it into the flour.
For multitasking during the dough rise, I usually prep the sauce and chop toppings so everything’s ready to go once the dough is set. This keeps the process smooth and stress-free.
Lastly, baking on parchment paper prevents sticking and cleanup headaches. But if you’re like me and sometimes skip it, a light brush of olive oil on the baking sheet helps as well.
Variations & Adaptations
- Gluten-Free Version: Use a gluten-free flour blend and add a tablespoon of xanthan gum for better elasticity. The dough will be a bit more delicate but still tasty.
- Vegetarian or Vegan: Skip the pepperoni and use dairy-free cheese alternatives. Add roasted veggies like zucchini, mushrooms, or spinach for extra flavor. I once made a batch using dairy-free cheese that kids barely noticed was different!
- Spicy Twist: Add red pepper flakes to the sauce or sprinkle sliced jalapeños on top for a kick. This is great for older kids or adults who want a little heat.
- Different Cooking Methods: You can pan-cook mini pizzas on a stovetop griddle if you don’t want to use the oven—just cover with a lid and cook on low until cheese melts.
- Seasonal Toppings: Swap bell peppers for fresh summer tomatoes or add a sprinkle of fresh herbs like rosemary or thyme in fall. I often mix it up based on what’s in my garden or fridge.
Serving & Storage Suggestions
Serve these mini pizzas warm or at room temperature, making them ideal for lunchboxes or picnic baskets. Packing the components separately in a bento box keeps everything fresh and lets kids build their own pizzas just before eating, which is part of the fun.
Complement your pizza bento box with crunchy veggies like baby carrots or cucumber sticks and a small dip—ranch or hummus pairs beautifully. For a sweet finish, fresh fruit slices like apple wedges or grapes make a nice balance.
Store any leftover mini dough in an airtight container in the fridge for up to 2 days or freeze it for up to a month. Cooked mini pizzas can be refrigerated and reheated gently in a toaster oven or skillet to keep the crust crisp.
Flavors often mellow and blend nicely after resting for a few hours, so these lunchables actually taste great made the night before—just pack toppings separately to keep things fresh.
Nutritional Information & Benefits
Each mini pizza contains approximately 150–180 calories, making for a balanced, portion-controlled lunch. The homemade dough provides complex carbohydrates and some protein, especially when paired with cheese and toppings.
Tomato sauce adds a dose of vitamin C and antioxidants like lycopene, while fresh veggies contribute fiber and vitamins. Using olive oil in the dough boosts healthy fats, supporting heart health.
This recipe can easily fit into gluten-free, vegetarian, or dairy-free diets with simple swaps. It’s a wholesome alternative to store-bought lunchables, free from preservatives and artificial ingredients.
From a wellness perspective, I appreciate how this recipe invites kids to engage with their food, which encourages healthier eating habits overall.
Conclusion
The Homemade Pizza Lunchables Bento Box with Mini Dough is more than just a recipe—it’s a little daily chance to bring fun, flavor, and freshness into your kid’s lunch. It’s easy enough to whip up on a busy morning, flexible enough to suit picky eaters, and tasty enough to keep everyone asking for more.
Feel free to make it your own with your favorite toppings and sides. For me, this recipe holds a quiet joy—seeing my kid’s face light up while assembling their pizza, knowing I packed something wholesome and homemade.
Give it a try and let me know how you customize it! Sharing meals like this always feels like a small but meaningful way to nurture family connections.
FAQs
Can I make the mini dough ahead of time?
Yes! You can prepare the dough a day ahead and store it in the fridge, just cover it tightly. Bring it to room temperature before shaping and baking.
What if my child doesn’t like tomato sauce?
Try substituting with pesto, cream cheese, or even a light olive oil and garlic spread. These alternatives work well on mini pizzas and add variety.
How can I keep the mini pizzas from getting soggy in the lunchbox?
Pack the toppings separately and let your child assemble the pizzas right before eating. Also, avoid too much sauce and use firmer toppings.
Can I freeze the mini dough or cooked mini pizzas?
Absolutely. Freeze dough balls wrapped in plastic wrap and place in a freezer bag for up to a month. Cooked mini pizzas freeze well too; reheat gently to keep crust crisp.
Is this recipe suitable for toddlers?
Yes, but cut toppings into very small pieces and avoid choking hazards like whole olives or large pepperoni slices. Always supervise young children while eating.
Pin This Recipe!
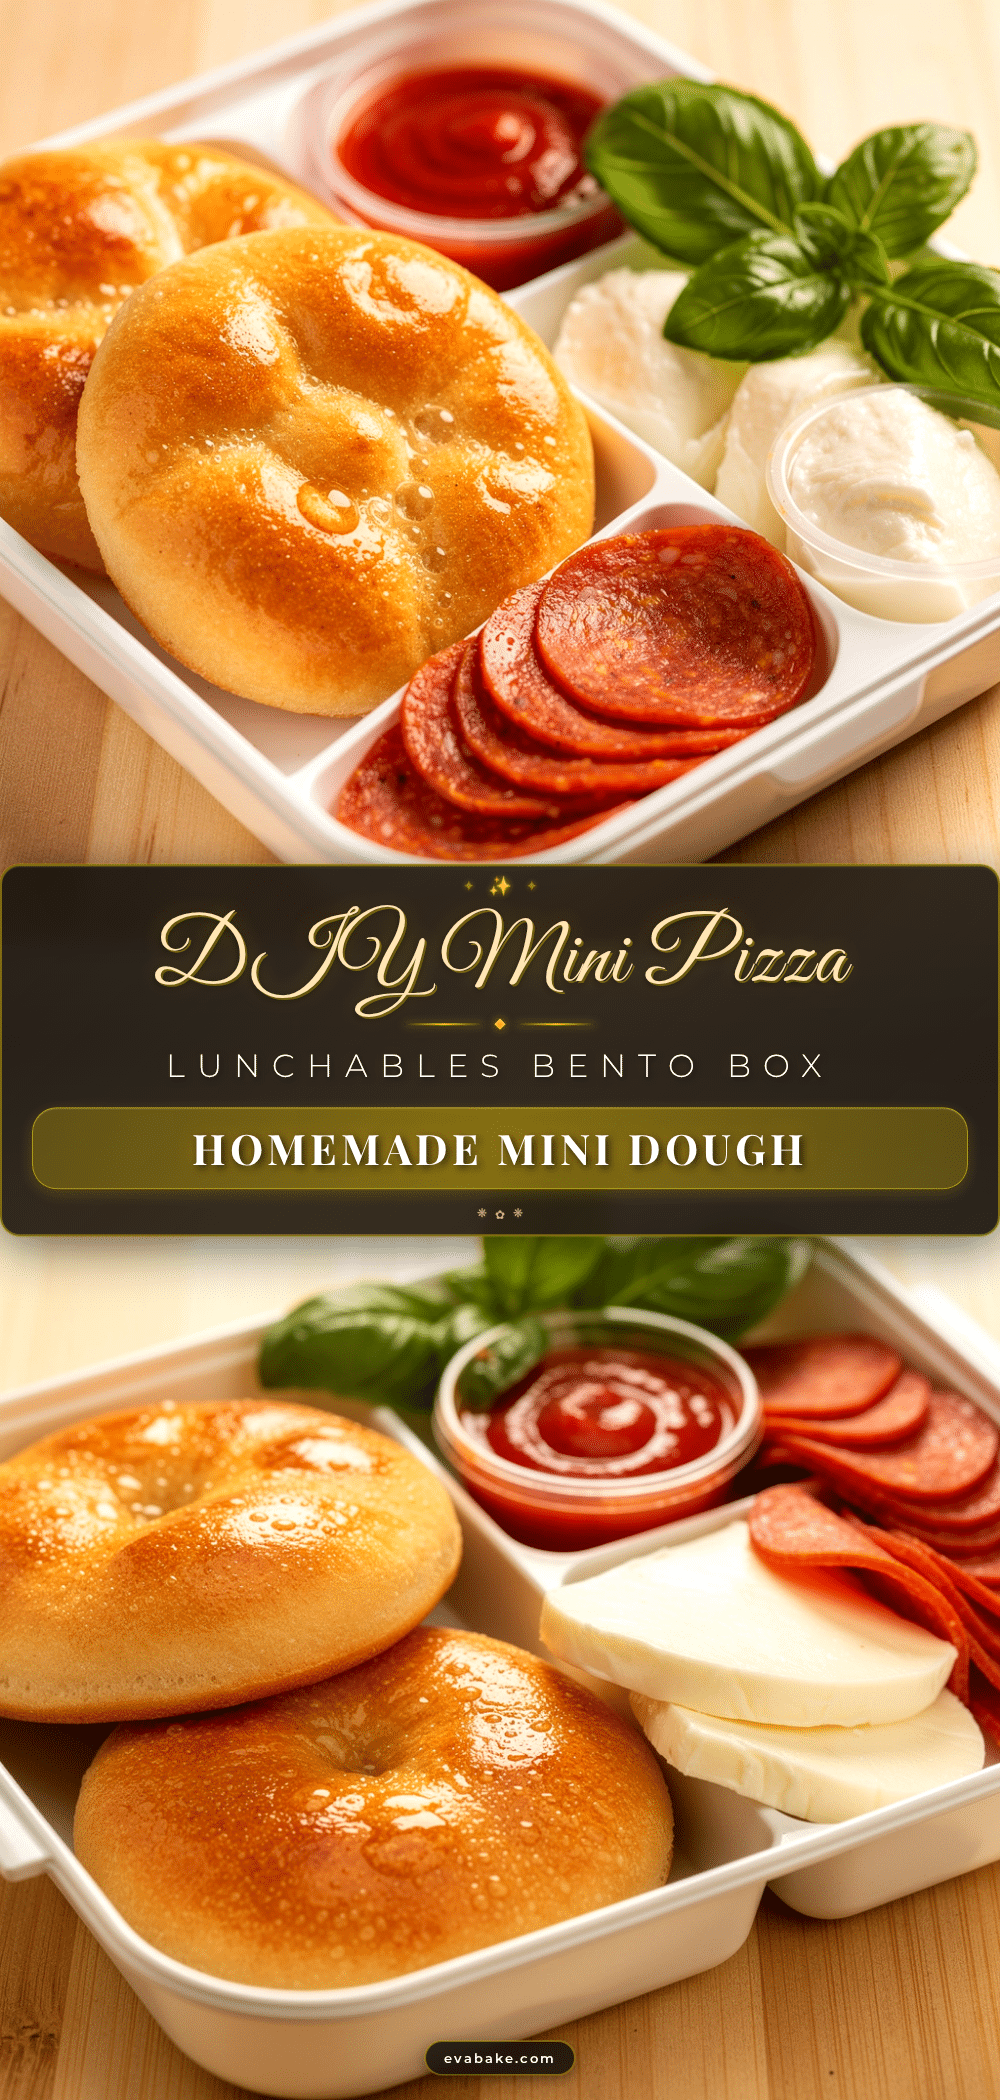
Homemade Pizza Lunchables Bento Box with Mini Dough Easy Recipe for Kids
A fun and easy homemade pizza lunchables bento box featuring mini dough rounds that kids can assemble themselves, perfect for quick, nutritious, and customizable lunches.
- Prep Time: 15 minutes
- Cook Time: 12 minutes
- Total Time: 1 hour
- Yield: 8 mini pizzas 1x
- Category: Main Course
- Cuisine: American
Ingredients
- 2 cups (240g) all-purpose flour
- 1 teaspoon (3g) instant yeast
- ¾ cup (180ml) warm water
- 2 tablespoons (30ml) olive oil
- ½ teaspoon (3g) salt
- 1 teaspoon (5g) sugar
- ½ cup (120ml) tomato sauce
- ¼ teaspoon (1g) garlic powder
- ½ teaspoon (1g) dried oregano
- Salt and pepper to taste
- 1 cup (100g) shredded mozzarella cheese
- ¼ cup (30g) mini pepperoni slices (optional)
- ¼ cup (40g) diced bell peppers
- 2 tablespoons (30g) sliced black olives (optional)
- Fresh basil leaves (a handful)
- Baby carrots or cucumber sticks (for bento box sides)
- Fresh fruit slices (apple, grapes, or berries)
- Small container of ranch or hummus for dipping
Instructions
- Activate the yeast: In a mixing bowl, combine warm water (about 110°F/43°C), sugar, and instant yeast. Stir gently and let it sit for 5-7 minutes until foamy.
- Make the dough: Add flour, salt, and olive oil to the yeast mixture. Stir until it forms a sticky dough.
- Knead the dough: Turn dough onto a floured surface and knead for 6-8 minutes until smooth and elastic. Add flour if too sticky, but keep dough soft.
- Let it rise: Shape dough into a ball, place in a lightly oiled bowl, cover, and let rise in a warm spot for about 45 minutes until doubled in size.
- Prepare the sauce: Mix tomato sauce with garlic powder, oregano, salt, and pepper in a small bowl. Adjust seasoning to taste.
- Shape mini pizza bases: Punch down dough and divide into 8 equal portions. Roll or press each into 3-4 inch rounds and place on parchment-lined baking sheet.
- Add sauce and toppings: Spread a thin layer of sauce on each dough round, sprinkle mozzarella cheese, and arrange chosen toppings lightly.
- Bake: Preheat oven to 425°F (220°C). Bake mini pizzas for 10-12 minutes until cheese is bubbly and crust is golden brown.
- Cool and pack: Let mini pizzas cool slightly before packing into a bento box with fresh veggies and fruit sides.
Notes
If mini pizzas puff up too much during baking, gently press them down with a spatula after baking to keep toppings spread evenly. For crispier crusts, bake 1-2 minutes longer but watch closely to avoid burning. Dough can be made ahead and refrigerated or frozen. Pack toppings separately to avoid sogginess. Use gluten-free flour and xanthan gum for gluten-free version. Vegan options include dairy-free cheese and roasted veggies.
Nutrition
- Serving Size: 1 mini pizza
- Calories: 165
- Sugar: 2
- Sodium: 300
- Fat: 7
- Saturated Fat: 3.5
- Carbohydrates: 20
- Fiber: 1
- Protein: 7
Keywords: homemade pizza, lunchables, bento box, mini pizzas, kids lunch, easy recipe, pizza dough, healthy lunch, customizable toppings